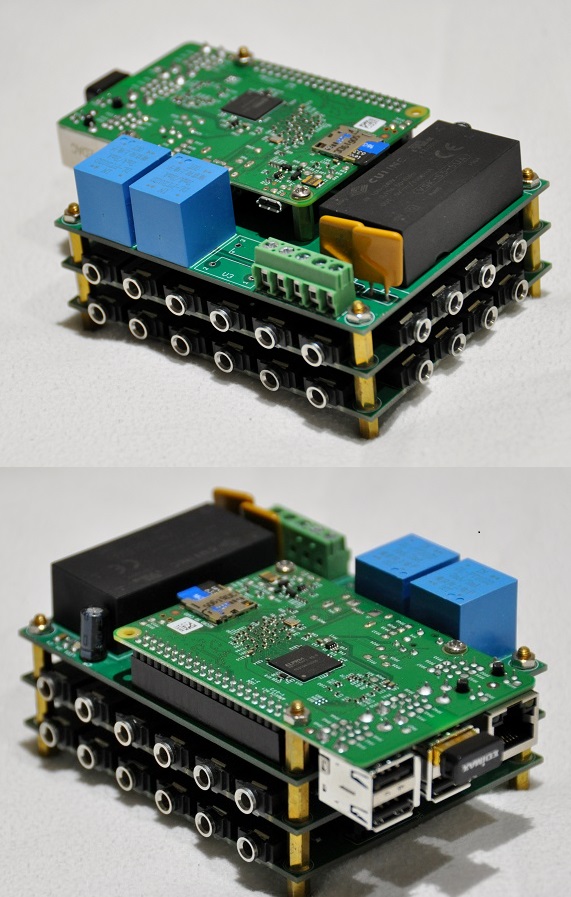
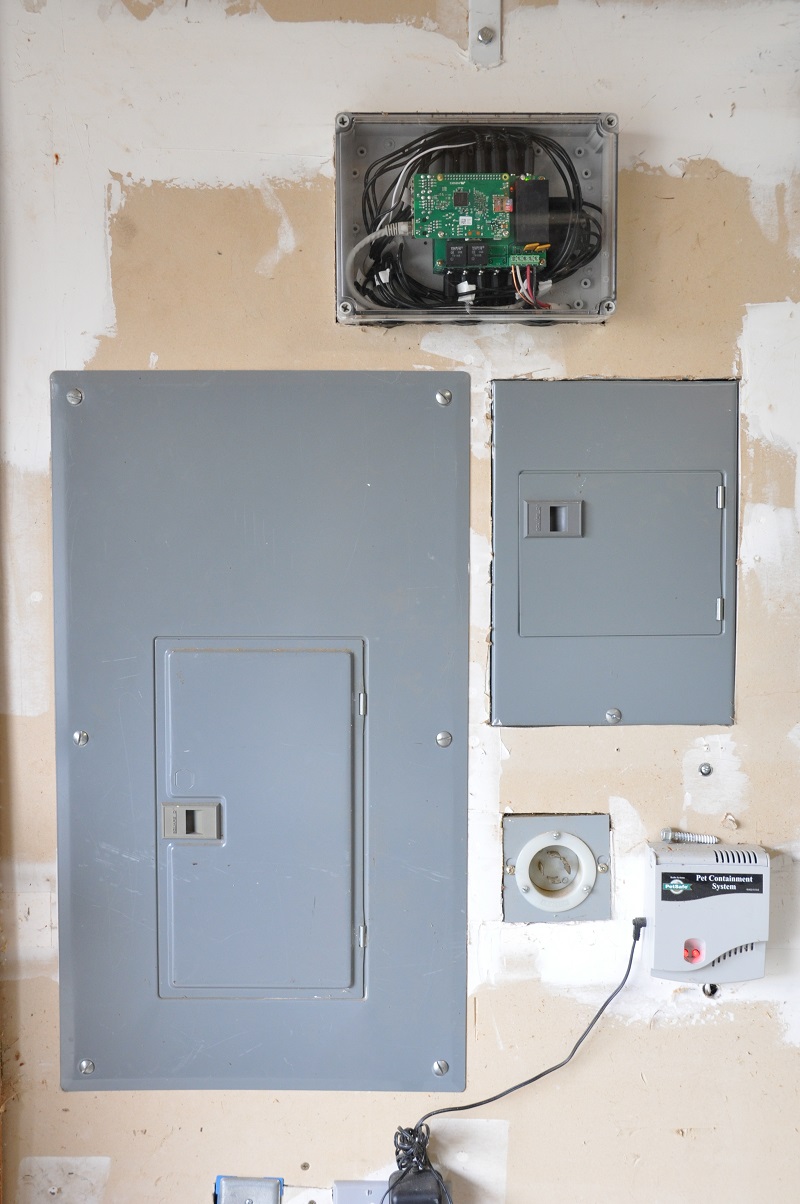
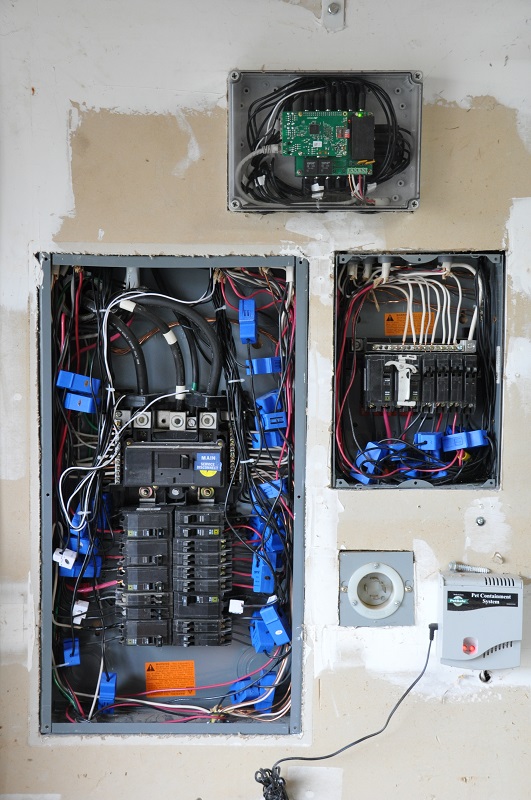
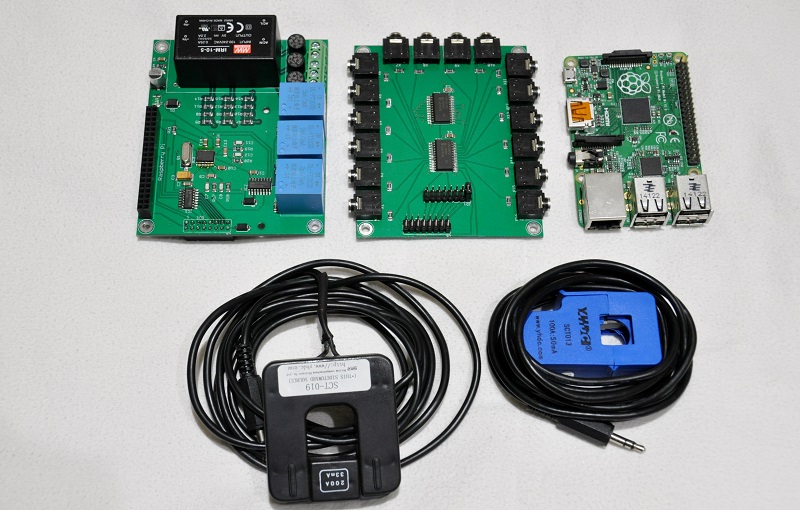
PiPowerMeter is an energy usage monitor based on the Cirrus Logic CS5463 energy IC (http://www.cirrus.com/en/products/pro/detail/P1092.html) and a Raspberry Pi. It consists of two custom designed stacking pcb's. The main board houses the power supply, CS5463 IC, voltage sensors and supporting electronics. The current sensor board houses 16 multiplexed current input channels that allow monitoring up to 16 different circuits via standard clamp-on ct's. A single main board supports up to 8 stacked current sensor boards for a total monitoring capacity of up to 128 circuits. The system is controlled by a nodejs based program running on the Raspberry Pi and includes a self contained web based monitoring portal. Energy data are stored locally on the Raspberry Pi in a sqlite database making the system 100% stand-alone with no requirement for additional hardware or external servers.
- 100% stand alone system with no reliance on external hardware or servers
- Ability to monitor up to 128 circuits via round-robin sampling
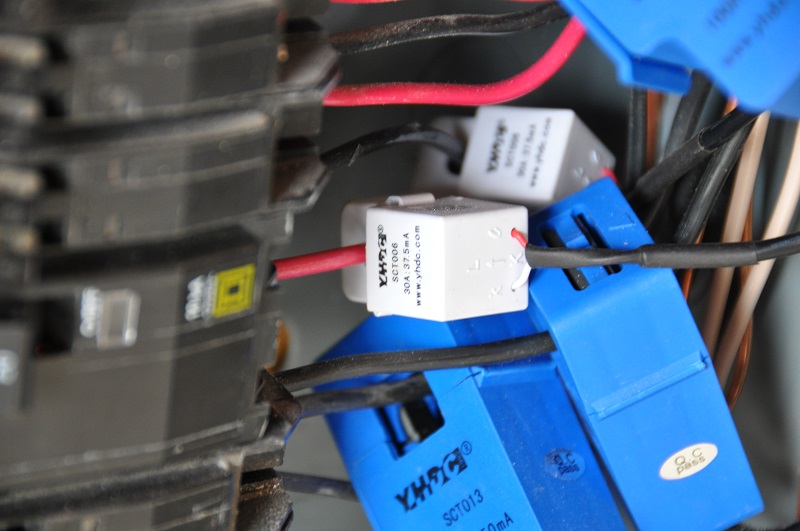
- Uses simple off the shelf clamp-on current sensors
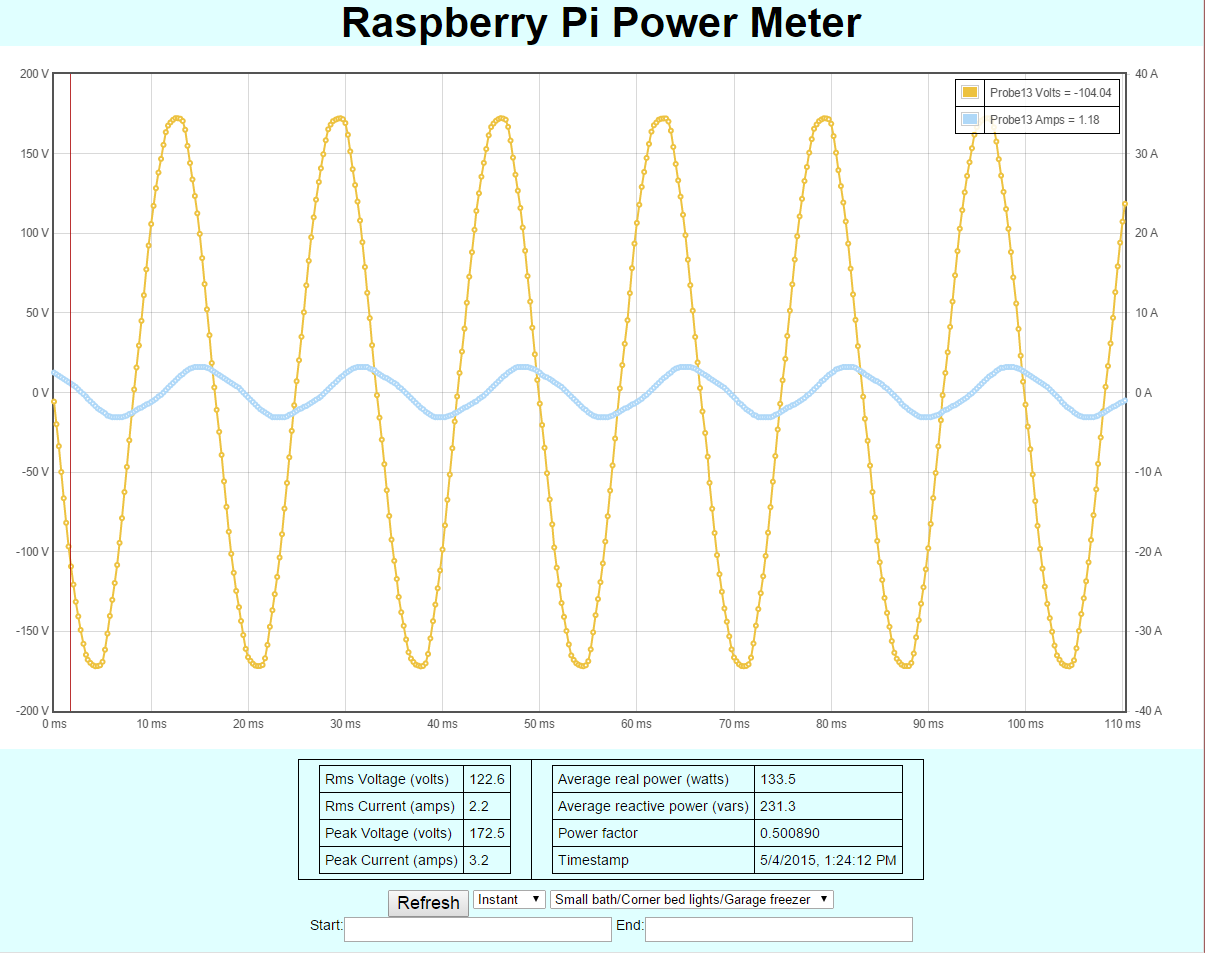
- Highly accurate measurement of voltage, current, power usage and power factor based on CS5463 energy IC
- Raspberry Pi based control system
- All data stored locally in sqlite database
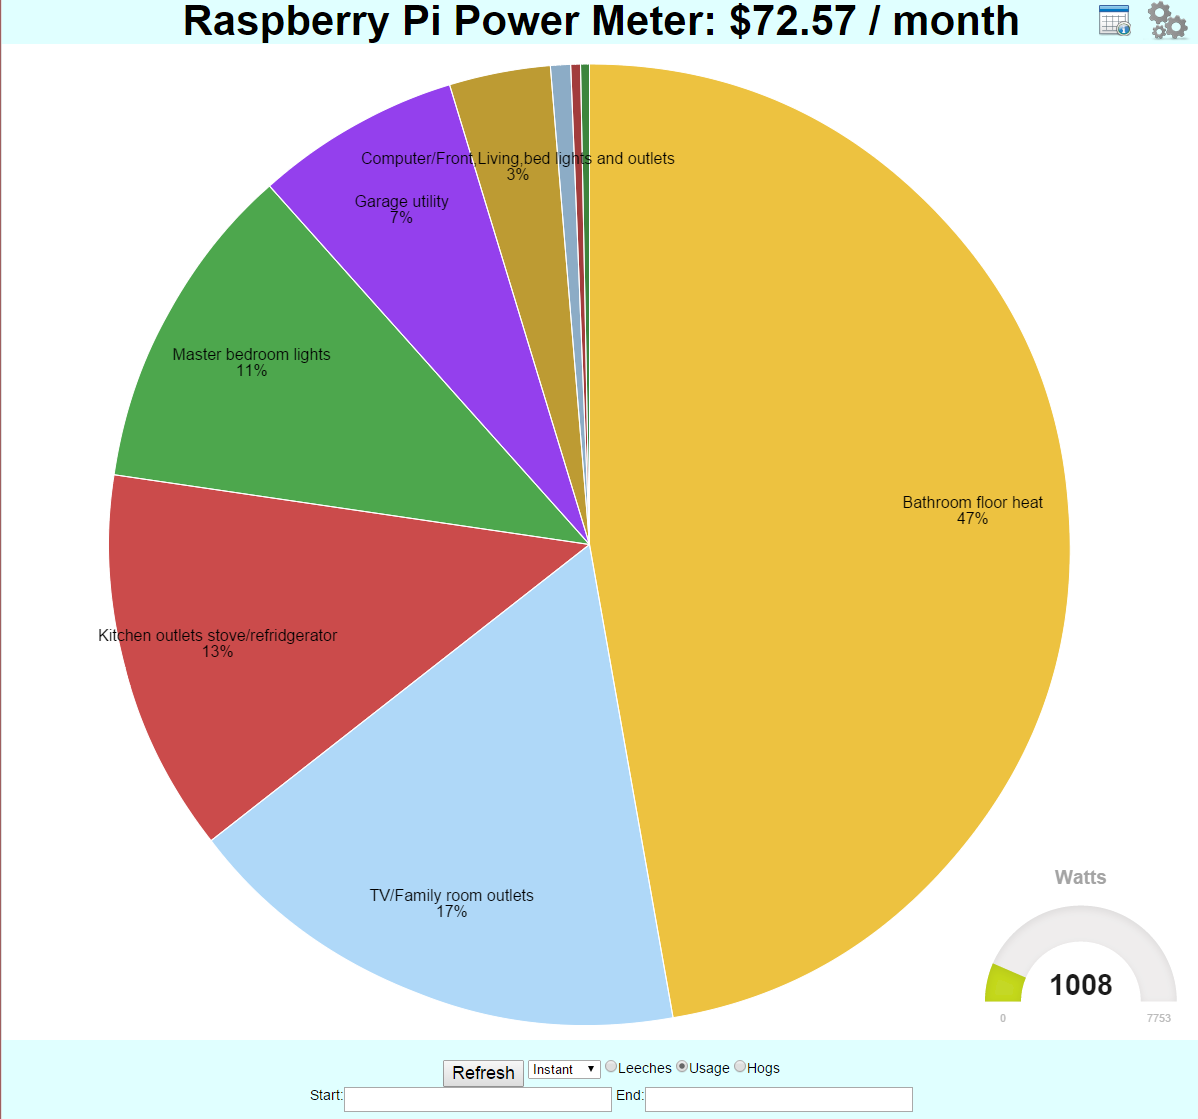
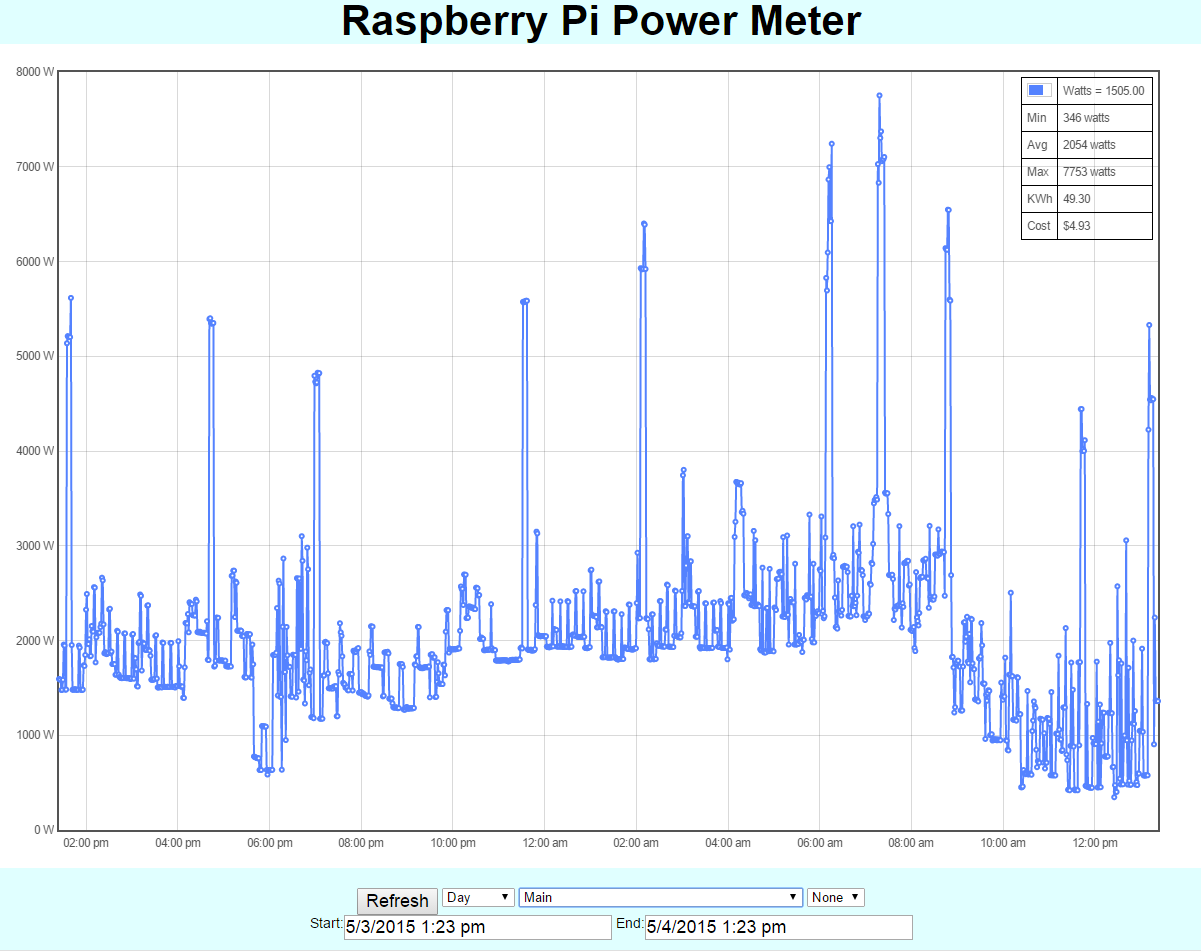
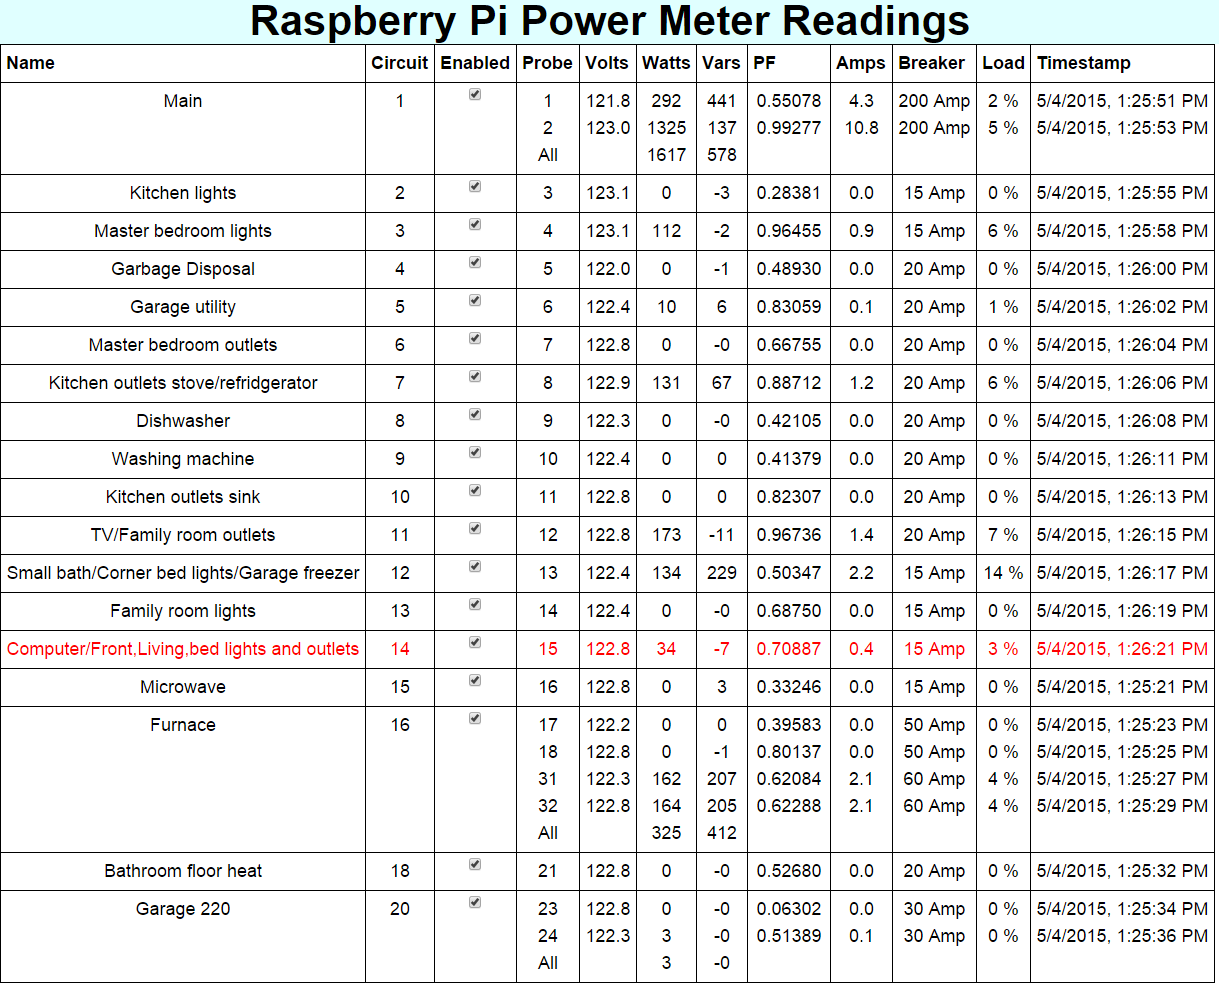
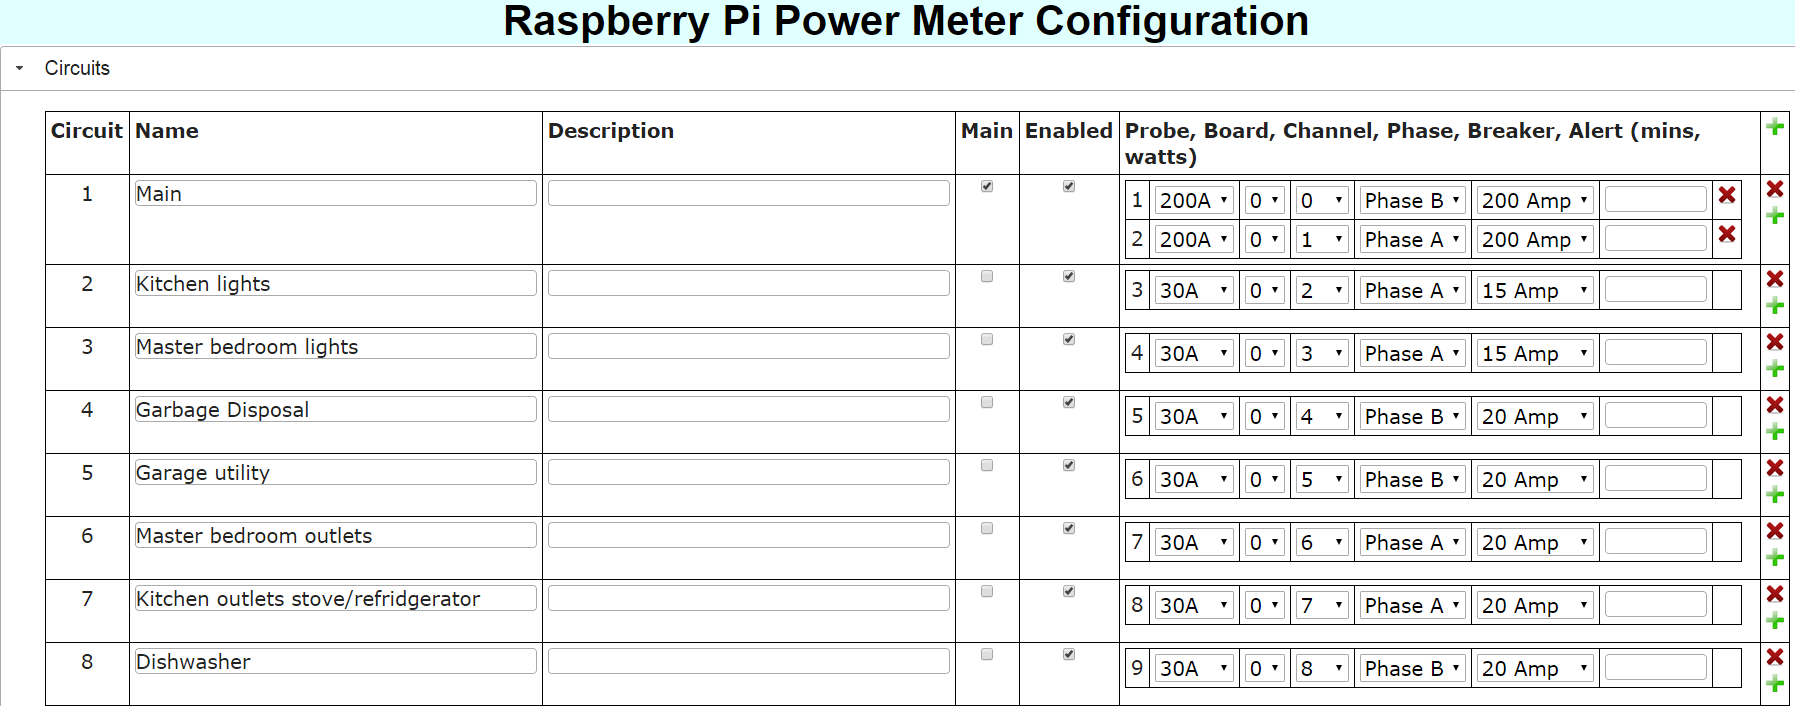
- Web based monitoring portal for viewing energy usage and configuration
- Ability to recieve text alerts for overloads or other events.
- Any of the full size Raspberry Pi models with the 40 pin header are supported including: V1 A+, V1 B+, V2, V3 B and V3 B+. The additional memory and computing power of the V2/V3 models is recommended.
- Start with latest Raspbian image from http://downloads.raspberrypi.org/raspbian_lite_latest
- (verified with Raspbian Stretch 2018-03-13 (both lite and full))
- It's recommended that you use the Lite version because it's smaller and installs faster but you can use either.
- login to Pi with Putty or other
- the latest versions of Raspbian have ssh disabled. You can enable ssh via raspi-config or just create an empty file named 'ssh' in the boot partition of the sd card.
- Install/Update Nodejs (use one of the two methods below depending your model of Raspberry Pi)
- For Raspberry Pi 2 or Raspberry Pi 3 (64 bit only)
- curl -sL https://deb.nodesource.com/setup_6.x | sudo bash -
- sudo apt -y install nodejs
- For Raspberry Pi all versions (32 or 64 bit)
- wget -qO- https://raw.githubusercontent.com/creationix/nvm/v0.33.4/install.sh | bash
- nvm install --lts
- sudo cp -R
$NVM_DIR/versions/node/$ (nvm version)/* /usr/local/
- For Raspberry Pi 2 or Raspberry Pi 3 (64 bit only)
- Install PiPowerMeter software into app directory
- (Raspbian-Lite only) If using Raspbian-Lite you'll need to first install git. Raspbian-Full has git preinstalled so you can skip this step.
- sudo apt-get -y install git
- git clone https://github.com/crjens/PiPowerMeter.git app
- cd app
- npm install
- (Raspbian-Lite only) If using Raspbian-Lite you'll need to first install git. Raspbian-Full has git preinstalled so you can skip this step.
- run 'sudo raspi-config'
- set locale and timezone under Localisation options
- enable SPI under Interfacing Options
- expand filesystem under Advanced options
- change user password (optional)
- reboot when prompted after exiting raspi-config
- Open your browser to http://<Your Raspberry Pi's IP Address>:3000