practice 1: Log In to OCI Console
practice 2: Create Object Storage Bucket
Practice 3: Upload an Object and Provide Access to the Object
Practice 4: Delete the Resources
Welcome to the Cloud Storage (Object) self-paced lab from Oracle!
How to use the lab interface:
Click here to open the video in a new tab.
Click Start to get started!
- Oracle Cloud Infrastructure account credentials (User, Password, and Tenant)
- Region and compartment with limits for a few small instances (1.1 or 2.1 is sufficient)
- A VCN created with at least one subnet, internet gateway, default route to internet gateway and security groups allowing at least port 22/SSH in.
- Ability to SSH into compute instances
- Recommended 1
- Recommended 2
- Recommended 3
- Recommended 4
Before you Begin:
1- All screen shots are examples ONLY. Screen shots can be enlarged by Clicking on them
2- Every User MUST keep below credentials handy.
User Name :
Password :
Compartment Name (Provided Later)
Cloud Tenant Name
3- Do NOT use compartment name and other data from screen shots.Only use data(including compartment name) provided in the content section of the lab
NOTE: OCI UI is being update. Please read below:
Some screen shots might show the older layout with Services displayed Horizontally or expanded vertically.In Current UI All services can now be accessed by clicking menu.
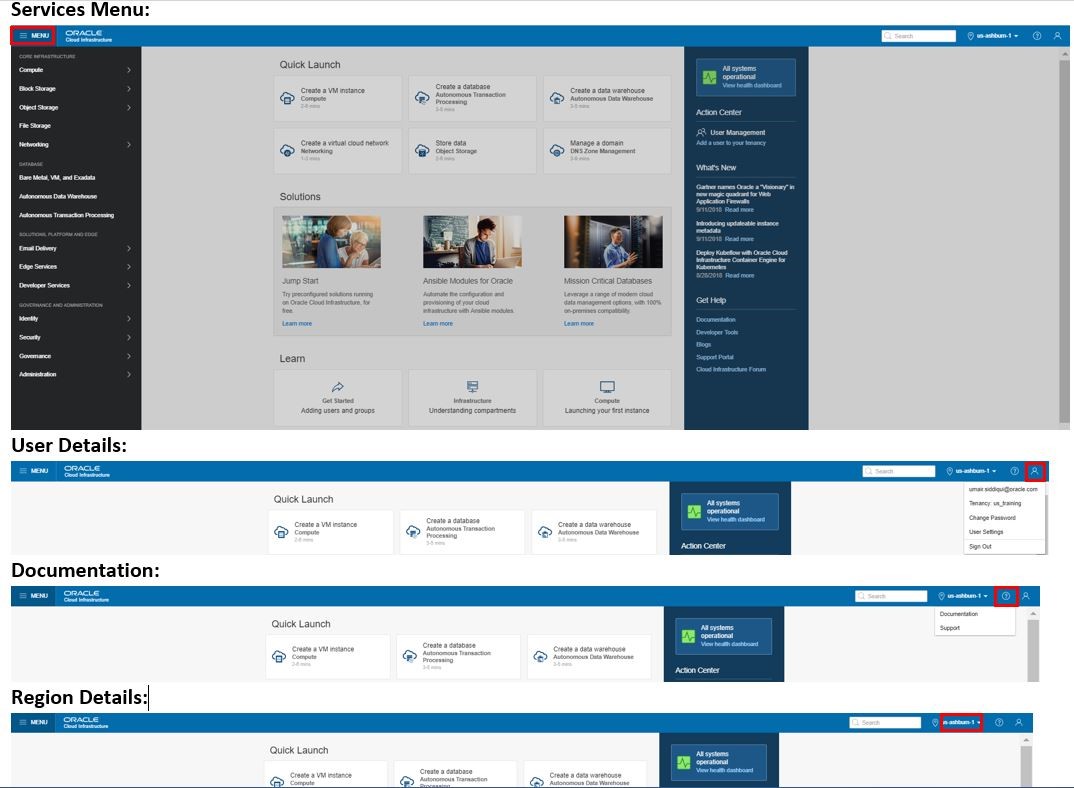
In this section we will login to the OCI console and adjust your screen size (if needed).
Step 1. Sign in to your account using the below
credentials (Please type in your credentials):
Cloud Tenant : {{9599c74b-3e30-24cf-b385-f9c59364604b.output.tenancy_name}}
Username: {{9599c74b-3e30-24cf-b385-f9c59364604b.output.usernames_list}}
Password: {{9599c74b-3e30-24cf-b385-f9c59364604b.output.ui_passwords_list}}
Note: Your password should be updated automatically for you, but sometimes you may be asked to change it after signing in the first time. If prompted, pleaseupdate the password. You can use this one to expedite things: Oracle123!!!! . It will not be saved after this lab expires.
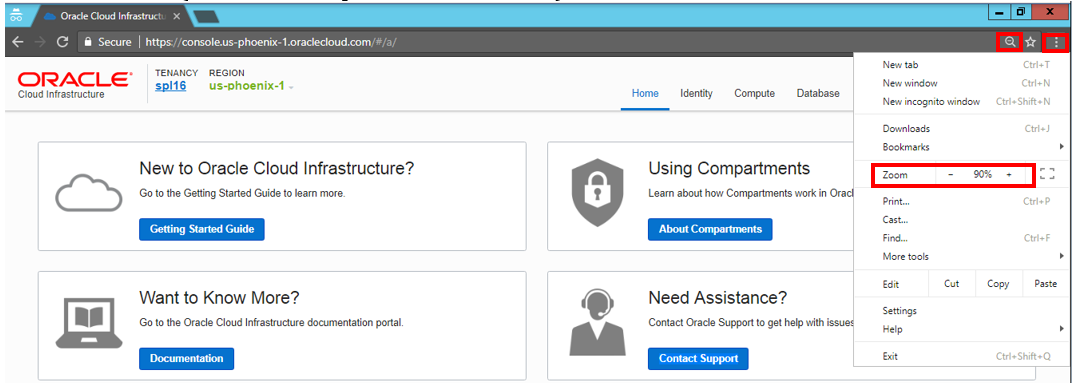
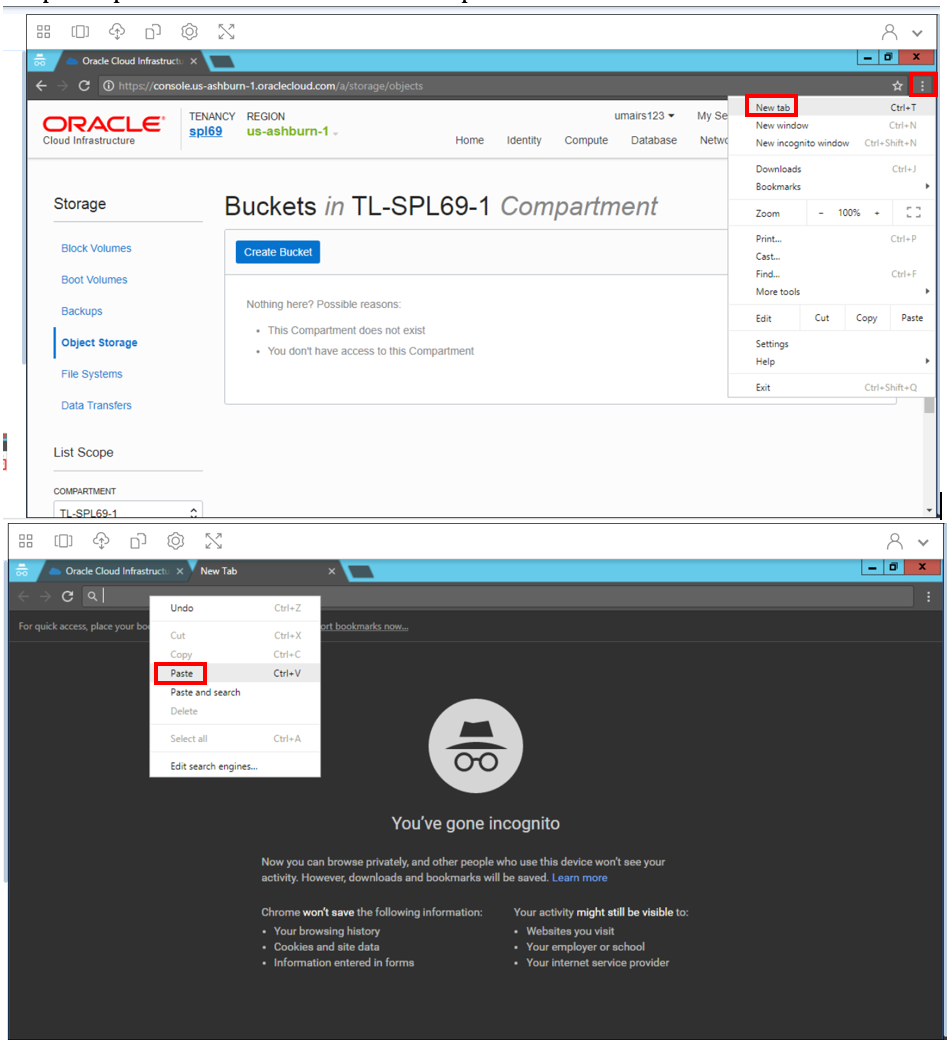
Step 2. Reduce the browser display size as needed(Below example is for Chrome).
In this section we will create Object storage bucket. Using Object storage does not require creating any other resource.
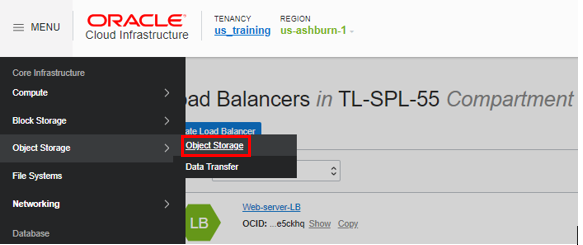
Step 1. From the OCI Services menu, click Object Storage
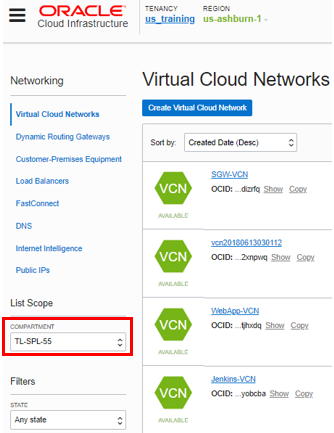
Step 2. Select the correct Compartment (Left side of the OCI console) as shown below.
Choose Compartment: {{9599c74b-3e30-24cf-b385-f9c59364604b.output.compartment_name}}
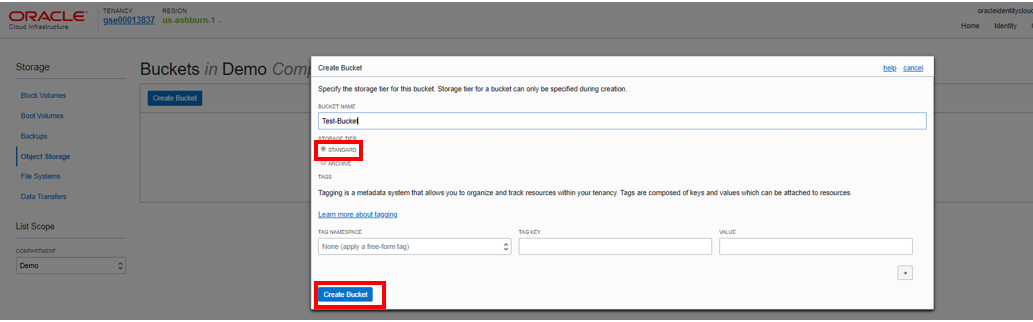
Step 3. Click Create Bucket, Fill out the dialog box:
3.1 Bucket Name: Provide a name (Test-Bucket in this lab)
3.2 Storage Tier: STANDARD
Step 4. Click Create Bucket.
You have now created Object Storage bucket though there are no Objects in it(text filemedia file, image etc). Next wewill go over the steps on how to upload an object and share it for other users to download it.
In this section we will go over the steps needed to upload an object (text file, media file, image etc) and how to create a pre-authenticated request so the object is accessible from the internet.
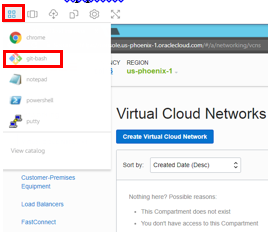
Step 1. Click on the Apps icon and select Git-Bash to open a terminal window.
Change directory to the Downloads folder Enter command:
$ cd /c/Users/PhotonUser/Downloads

Step 2. Create a sample file, enter command:
$ touch samplefile
This should create file by the name "samplefile" in the downloads folder.

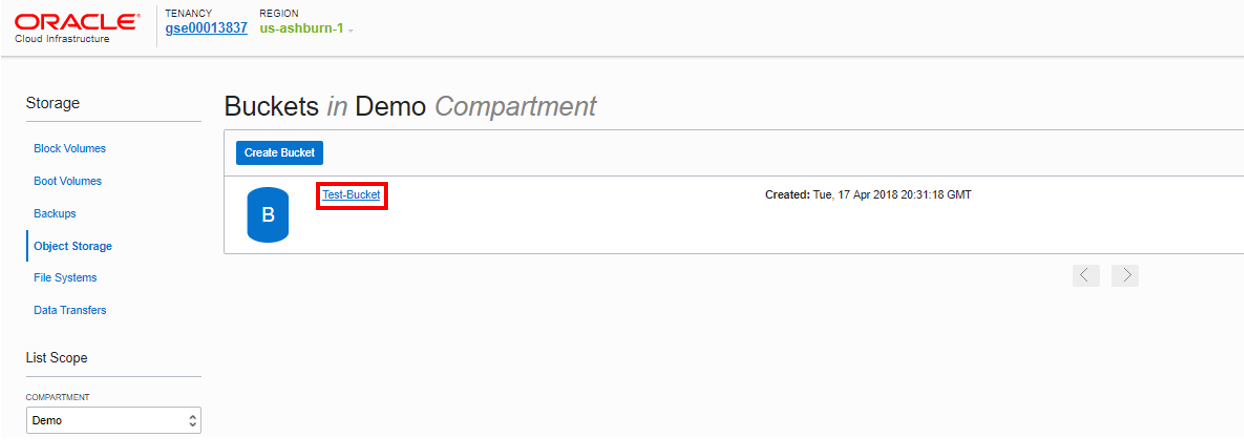
Step 3. Switch to OCI console and click the Bucket Name.
Step 4. The Bucket detail window should be visible. Click Upload Object.
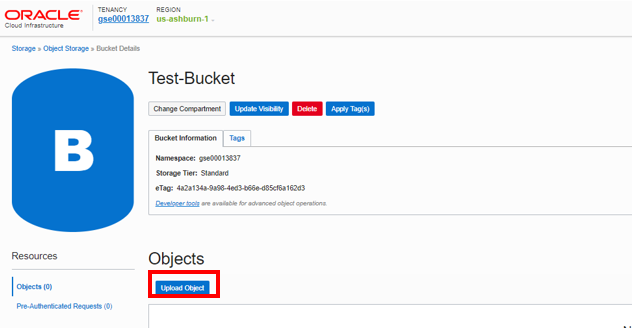
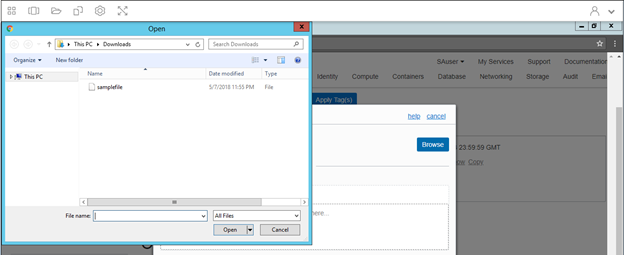
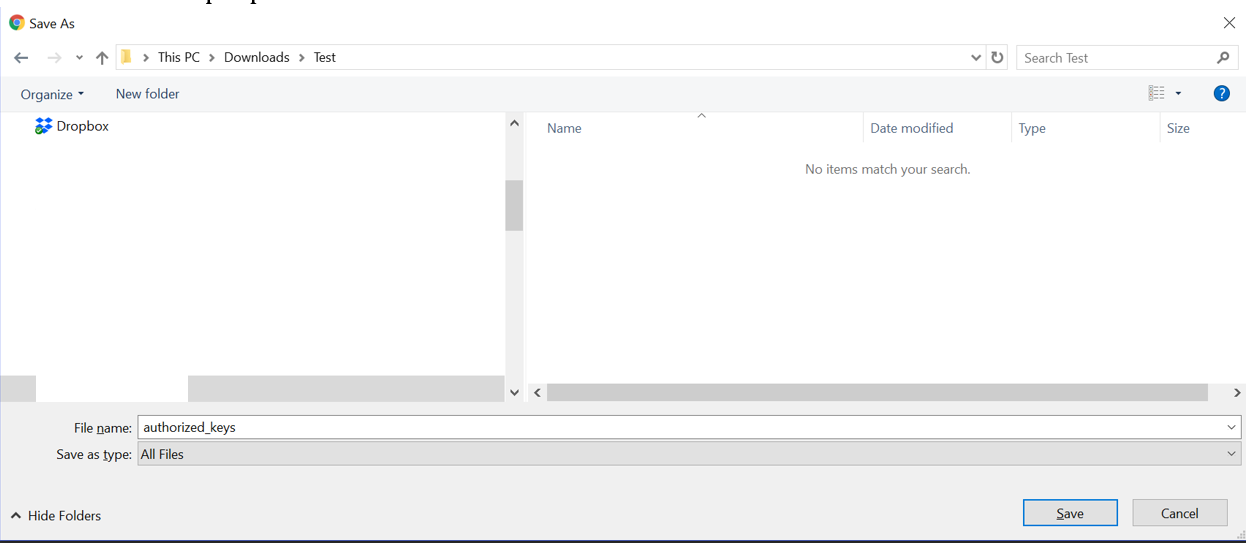
Step 5. Click Browse. Navigate to This PC > Downloads. You should see the samplefile created earlier. Select it and click Upload Object in the dialog box.
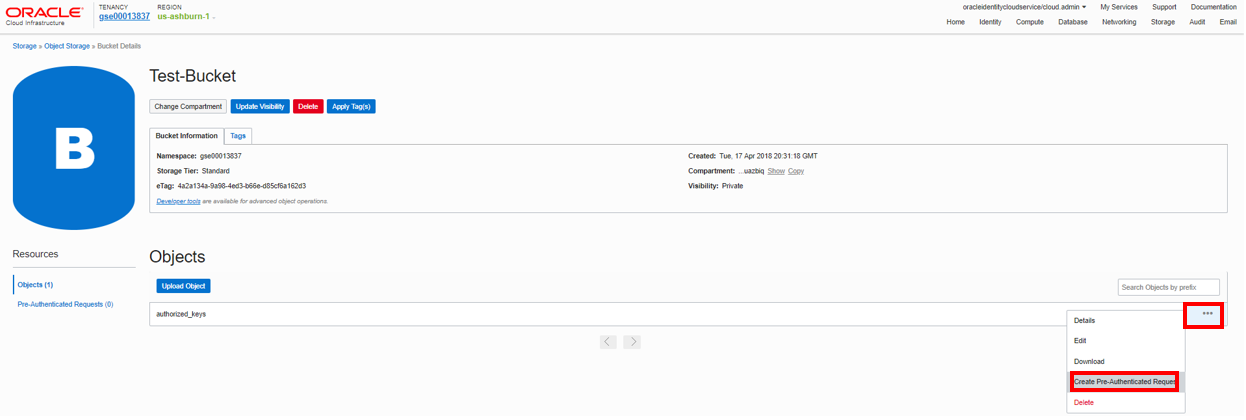
Step 6. The file should be visible under Objects. Click Action icon and click Create Pre-Authenticated Request. This will create a web link that can be used to access the object Without requiring any additional authentication.
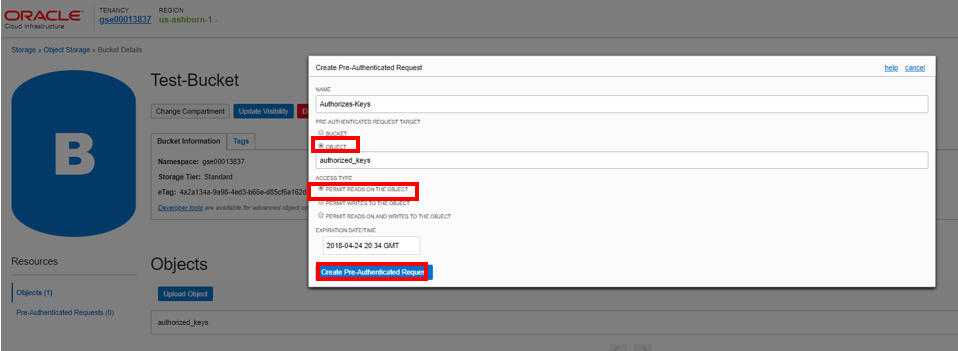
Step 7. Fill out the dialog box:
7.1 NAME: Use an easy to remember name.
7.2 PRE AUTHENTICATION REQUEST TARGET: OBJECT
7.3 ACCESS TYPE: PERMIT READS ON THE OBJECT
7.4 EXPIRATION DATE/TIME: Specify link expiration date
Step 8. Click Create Pre-Authenticated Request
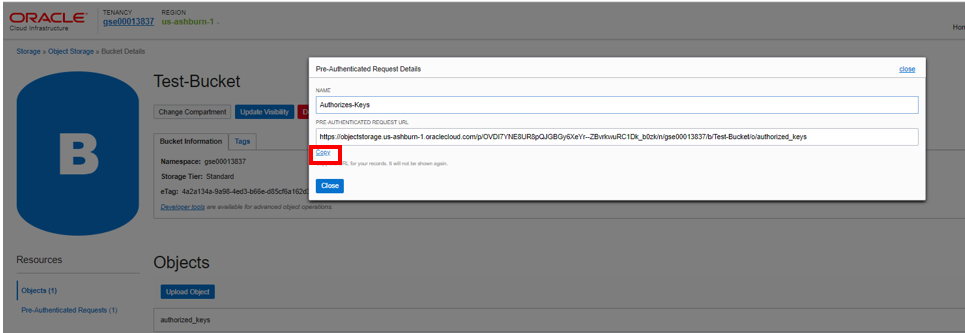
Step 9. Click Copy to copy the link
NOTE: The link must be copied and saved once the window is closed the link can not be retrieved again. You can launch Notepad using App icon and copy it.
Step 10. Click Close.
Step 11. Open a new browser window and paste Pre-Authenticated link.
Step 12: An option to download the file will appear.
NOTE: Do NOT download the file as due to space restrictions it is not allowed for the purpose of this lab.
You have uploaded an object to Object Storage bucket, created a pre-authenticated link and successfully accessed the object. The Pre-Authenticated link can be shared with other users to provide them access to the object.Multiple objects of any size can be uploaded to the bucket and shared across teams/users.
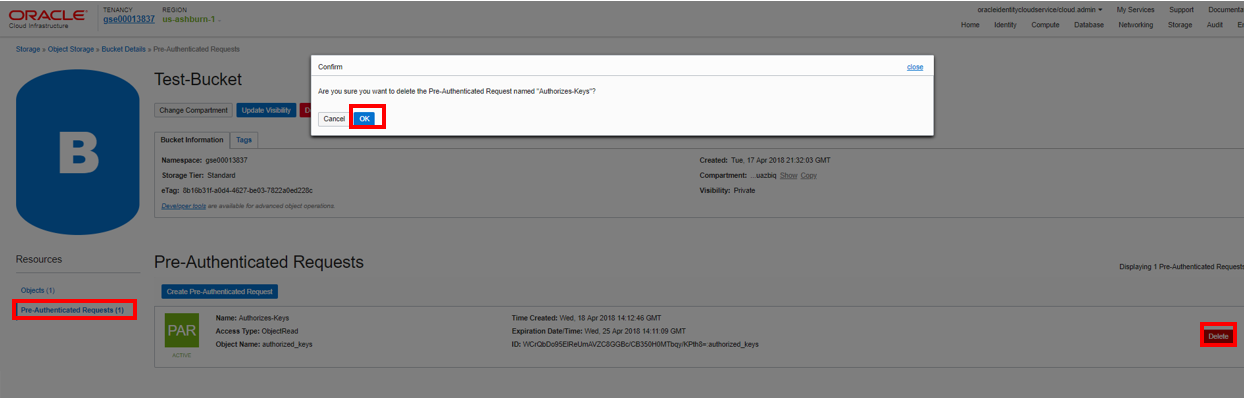
Step 1. From the Object Storage detail window, Click Pre-Authenticated Requests, click Delete, then Click OK in Confirm window.
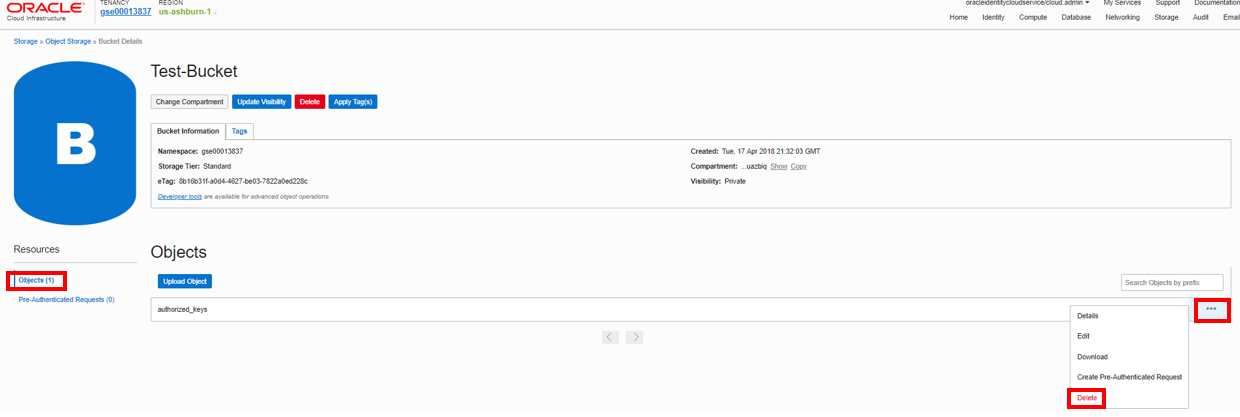
Step 2. Click Objects, Click the action icon , select Delete, click OK in the Confirm window.
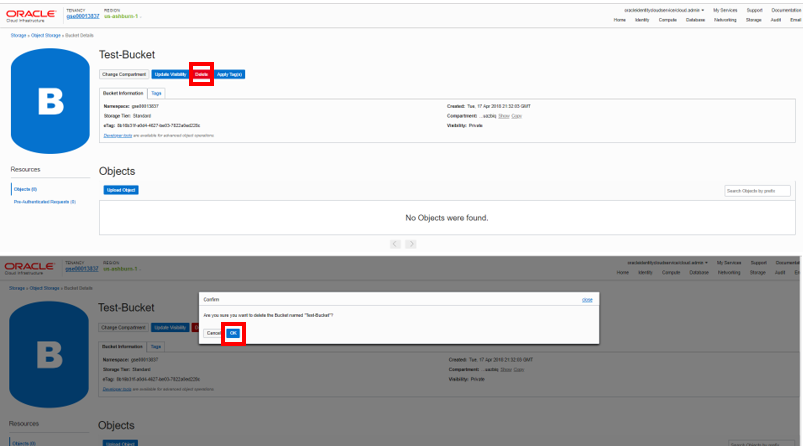
Step 3.Under Bucket Name, Click Delete, then click OK in the Confirm window.
Congratulations! You have successfully completed the Cloud Storage Lab for Object Storage. In this lab, you created Object Storage bucket, uploaded a file to the bucket, created a Pre-Authenticated link to share the file. Feel free to continue exploring or start a new lab. Thank you for taking this training lab!

