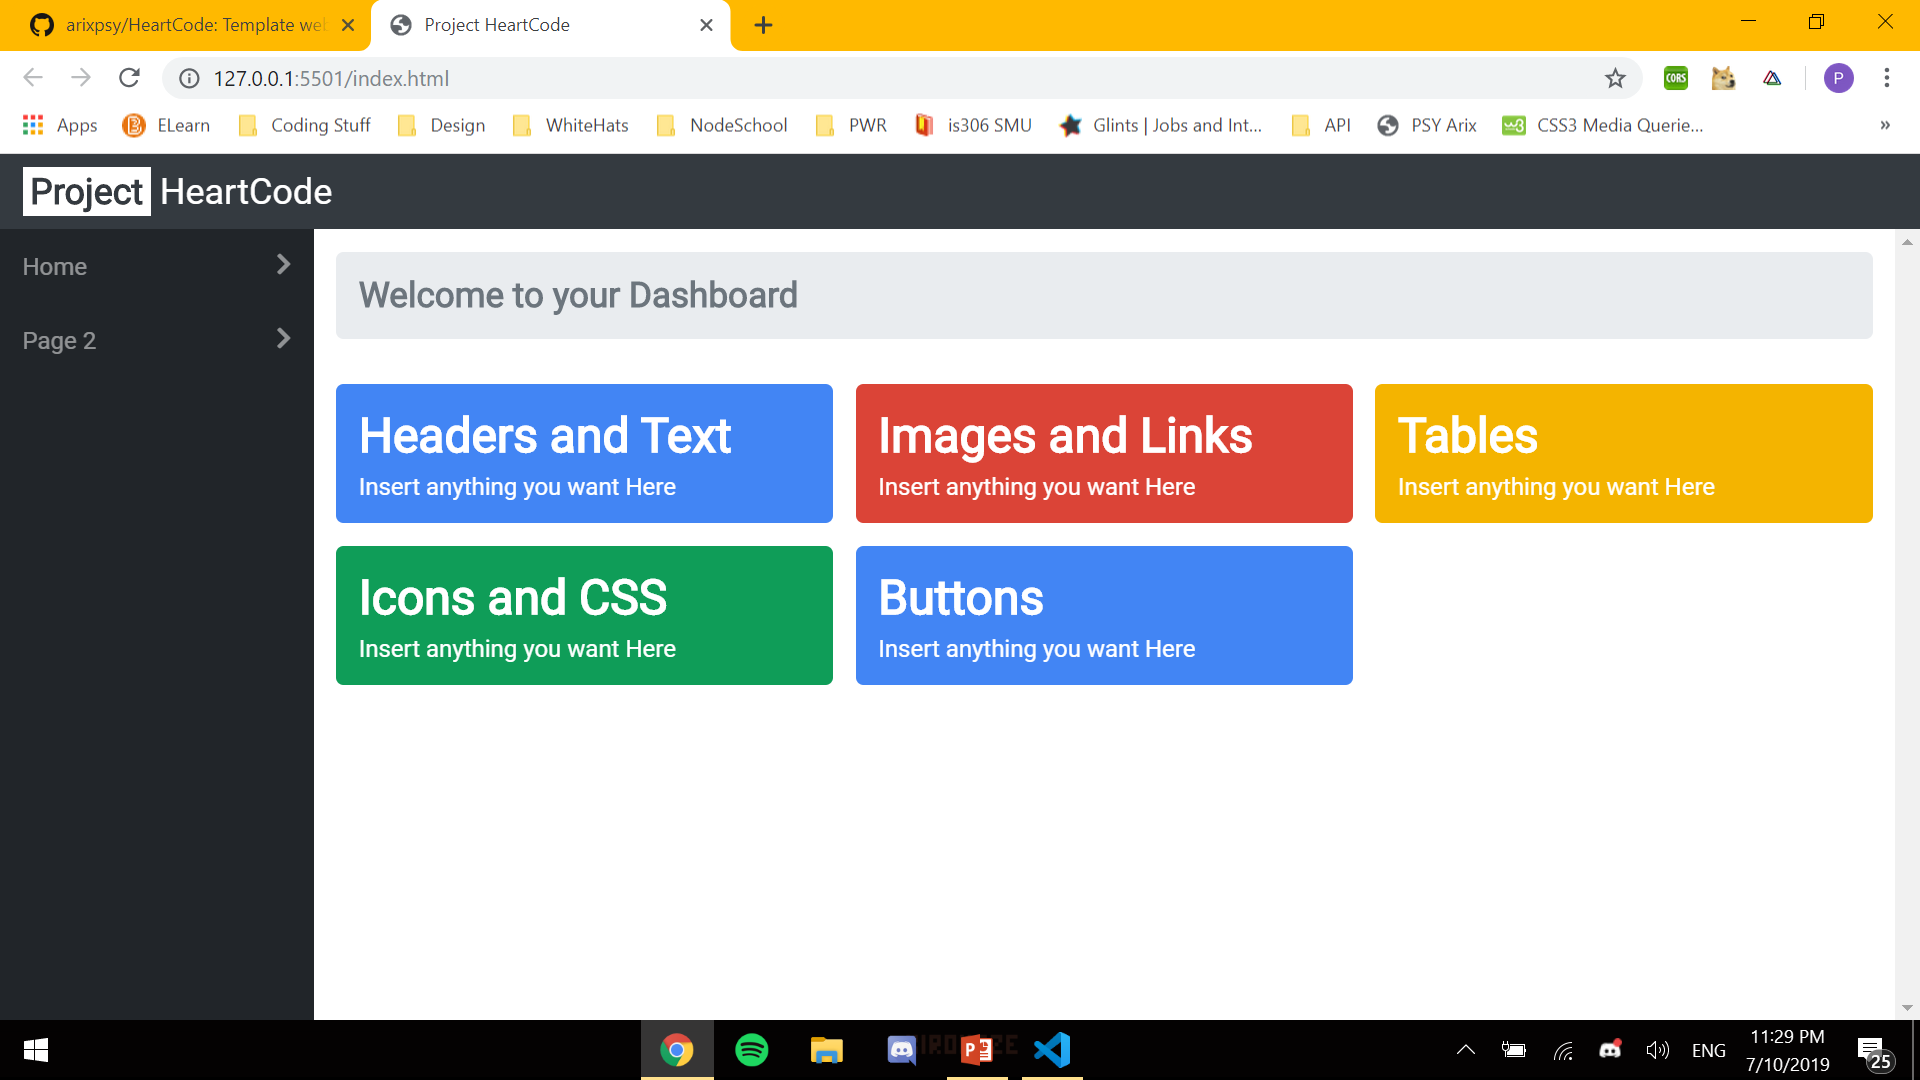
For the next few exercises you are required to find the correct div card sections and populate the divs with your own content. If you are using the chrome browser, you may want to use chrome's development tools(Press F12) to explore raw html of the website. View more below 👇
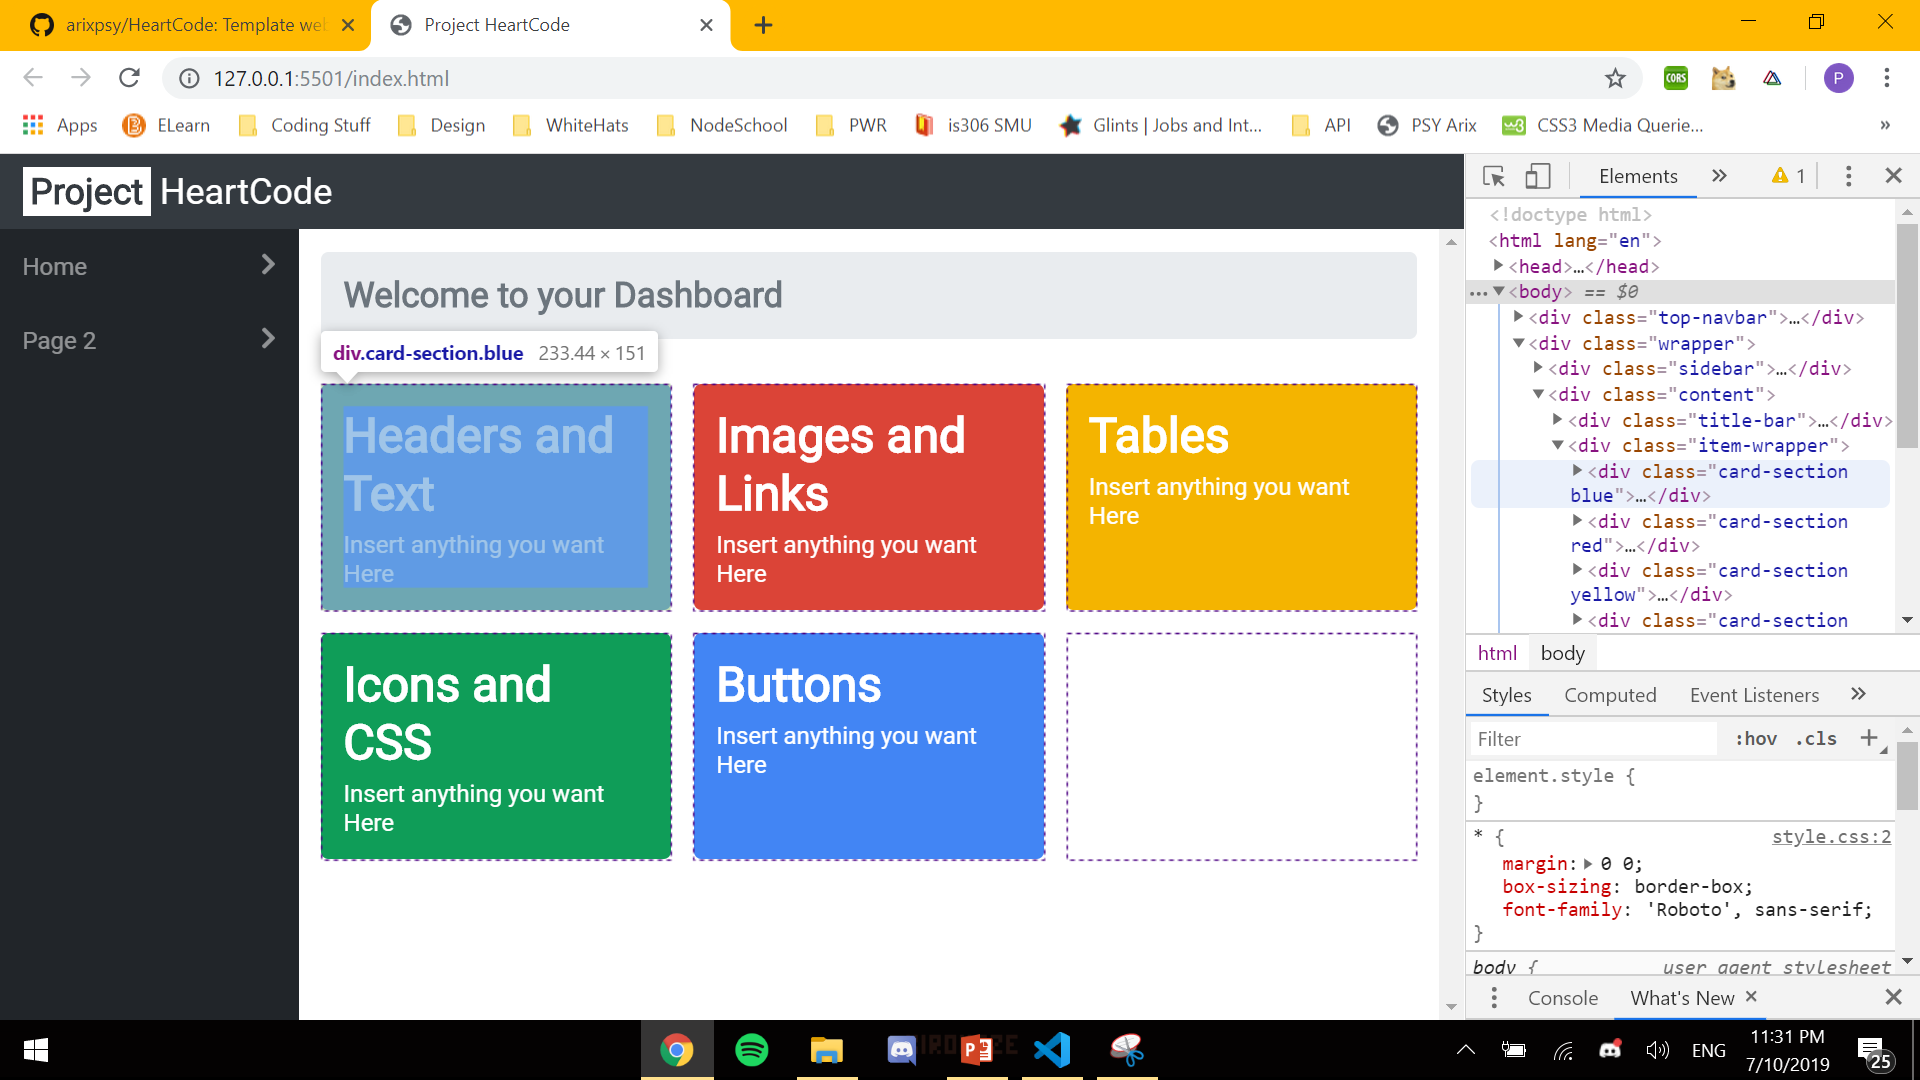
Depending on where your development console open, you may view the raw code of the webpage under the elements tab. You may hover over the html code and the rendered html elements will be highlight on the page itself. This is very useful if you are borrowing a html template from a external source and want to understand how the html elements look when it is rendered on the browser.
-
Look for the div with the class of "card-section blue". Inside, you should be able to find a header tag of "Headers and Text".
<div class="card-section blue">
    <h1>Headers and Text</h1>
    <p>Insert anything you want here</p>
</div>
-
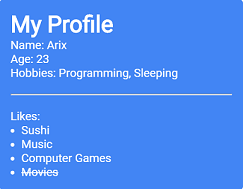
For this exercise, you will have edit the contents of this div. Start of by changing the header text to "My Profile".
-
Next, using the
<p>tag fill the div with your name, age and hobbies. It should look something like this.Name: Arix Age: 23 Hobbies: Programming, Sleeping -
Next, insert a separating line with
<hr>. After the line, insert a list of things you like, using<ol>and<li>tags.- Feel free to experiment with text formatting tags like
<strike>,<u>and<strong>. - You may want to use a break line
<br>tag before and after the separating line to put some spacing.
- Feel free to experiment with text formatting tags like
-
After completing, it should look something like this 👇
-
Look for the div with the class of "card-section red". Inside, you should be able to find a header tag of "Images and Links".
<div class="card-section red">
    <h1>Images and Links</h1>
    <p>Insert anything you want here</p>
</div>
-
For this exercise, you are tasked to include a image of your preference and a hyperlink to your favourite website.
-
Start of by searching for a image you want (Or you may choose to use the image I provided in the folder
./assets/images). Once you have found an image, download the image and place the file in the images folder (Filepath:./assets/images). -
Next, create an image in the div with the
<img>tag. To link the image you have downloaded, include the html attributesrcand set its value to the local file path of the image. It should looks something like this 👇<img src="./assets/images/sushi.jpg">
-
In other cases, you may choose to link an image without download it. In this case, you can replace the
srcvalue to the url of an image instead of a local path. 👇<img src="https://images.unsplash.com/photo-1514190051997-0f6f39ca5cde?ixlib=rb-1.2.1&ixid=eyJhcHBfaWQiOjEyMDd9">
-
Next, create a link below your image using the
<a>tag. Include ahrefattribute and set its value to the url of your favourite website. The code should look something like this 👇<a href="https://www.youtube.com">My Favourite Website</a>
-
After completing, it should look something like this 👇

Photo Used: https://unsplash.com/photos/VIv0srmK78g from bady qb on Unsplash.
-
Look for the div with the class of "card-section yellow". Inside, you should be able to find a header tag of "Tables".
<div class="card-section yellow">
    <h1>Tables</h1>
    <p>Insert anything you want here</p>
</div>
-
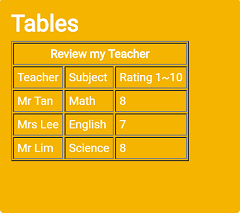
For this exercise, you will be creating a teacher review table. The table will consist of 3 headers "Teacher" for the teacher's name, "subject" for the subject he/she is teaching and "Rating 1~10" for the rating you would give to this table. Try and create a table similar to this 👇
Review my Teacher Teacher Subject Rating 1~10 Mr Tan Math 8 Mrs Lee English 7 Mr Lim Science 8 -
Initialize a table with the
tabletag.<table> </table>
-
You can add a table row using the
<tr>tag and 3 cells using 3<td>tags<table> <tr> <td>Teacher</td> <td>Subject</td> <td>Rating 1~10</td> </tr> </table>
- To include borders for your table, include the "border" attribute to your
tabletag.<table border="1"></table>
- To include borders for your table, include the "border" attribute to your
-
Right now, your table should look something like this 👇
Teacher Subject Rating 1~10 -
Add more rows data using
<tr>and<td>tags. Note that each table row should have an equal number of<td>tags inside.<table border="1"> <tr> <td>Teacher</td> <td>Subject</td> <td>Rating 1~10</td> </tr> <tr> <td>Mr Lim</td> <td>Science</td> <td>9</td> </tr> </table>
-
Once you have fill in your table rows, add a table row at the top of the first row and include only only
<th>tag inside.<table border="1"> <tr> <th>Review my Teacher</th> <---- only one cell </tr> <tr> <td>Teacher</td> <td>Subject</td> <td>Rating 1~10</td> </tr> <tr> <td>Mr Lim</td> <td>Science</td> <td>9</td> </tr> </table>
-
You will notice that the top cell does not cover the entire row. To fix this, use the colspan attribute on the
thtag itself.<th colspan="3">Review my Teacher</th>-
colspan tells the browser to allocate 3 column spaces for that cell.
-
Without colspan:
Review my Teacher Teacher Subject Rating 1~10 Mr Lim Science 9 - With colspan:
Review my Teacher Teacher Subject Rating 1~10 Mr Lim Science 9 -
-
The finished table should look something like this 👇