- Understand what it means to host a website
- Use GitHub to host a website from a Git repository
In the earlier days of the internet, if you wanted to publish a custom website, your options were limited, and the process was often complicated. Hosting a site required registering a domain, paying a hosting service, then going through a trial and error process of uploading your website's files to that service.
Now, things are a bit different. Hosting services are still around and you can still register custom domains, but there are many ways to publish websites online now, including a few ways that are totally free for basic websites.
In this lesson, we're going to walk through one free option for hosting HTML and JavaScript based websites. As it happens, we'll be using a service we're already familiar with — GitHub!
Any repository on GitHub can be published as a website — even if the repo
doesn't contain any HTML files. By default, GitHub will take a repository's
README.md file and convert it to an HTML page. This lesson's repo, for
instance, is also published as a GitHub Page.
In addition to this behavior, if we include an index.html in the repository
beside the README.md file, GitHub will automatically display the HTML file
instead! This is how we'll be publishing our site.
The full process for creating and publishing your own personal website is shown below. Note that we've already completed the first three steps:
- Create a local repository folder ✔
- Create a remote GitHub repository ✔
- Add the new remote to the local repository ✔
- Create an
index.htmlfile with some basic content - Add, commit and push the new content to the remote
- Enable GitHub Pages in the remote repository's settings
- Check out the published site
- Continue building out the HTML and add CSS and JavaScript files
By the time you've finished this lesson, you'll be at that last step; from there, you can focus on building the content, styling and behavior you'd like your site to have.
In the terminal, create an index.html file:
$ touch index.htmlOpen this file in VS Code so we can add some basic HTML content. In the file,
we'll start with the minimum — a DOCTYPE tag indicating HTML and an html tag
containing head and body tags:
<!DOCTYPE html>
<html lang="en">
  <head></head>
  <body></body>
</html>
Next, let's give this HTML a title tag and place it inside head:
<head>
  <title>My Personal Website</title>
</head>
Finally, we'll add a bit of starter content in the body:
<body>
  <h1>Hello World!</h1>
</body>
Including some example text to start is important — when we publish the site, we'll be looking for this message to confirm everything worked. The completed file should look like this:
<!DOCTYPE html>
<html lang="en">
  <head>
    <title>My Personal Website</title>
  </head>
  <body>
    <h1>Hello World!</h1>
  </body>
</html>
Save the file. We now need to commit this file and push it to GitHub:
$ git add index.html
$ git commit -m "create basic HTML file"
$ git push
Check your work: Head back to your project's GitHub page and refresh the page. You should see the html file with the content we created alongside the README.md file we created earlier.
In your GitHub repository, click the Settings tab:

In the list on the left, near the bottom, click the Pages tab. This will display the following:

To enable GitHub Pages, first we need to set the Source to the default
branch. Click the drop-down that says "None" and choose main, then click
Save.

The page will refresh. Along the top, a banner should appear that states the GitHub Page source was saved:

There will also be a message that says your site is ready to be published and a link to the page:
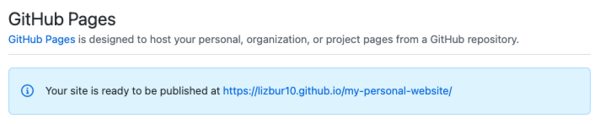
Notice the URL isn't github.com/<your-username>, but instead,
<your-username>.github.io.
Clicking on this link immediately may bring you to an error page. It can take up to ten minutes for the page to be published, so wait a little bit and refresh. You can also refresh the GitHub Pages Settings page; the message should update to "Your site is published..." once it is ready.
Check your work: Once the page has been published, you should see your HTML page rendered:

Woo-hoo!
In the event that it isn't a woo-hoo for you, here are a few troubleshooting options to try:
- Double check the GitHub Page settings and make sure
mainis set as the source. - If settings are correct, review the
index.htmlfile to make sure there are no typos or syntax errors. - Create a new repository again, but hold off on creating an HTML file. Instead,
only create a
README.mdfile with some example text and use GitHub Pages to publish the repo. Once the Readme file is displaying as a GitHub Page, start going through the HTML file creation process again.
With an index.html file created, we can now add additional files to the site
to incorporate CSS and JavaScript. One of the great things about GitHub Pages is
that your published website will automatically update as you make changes to the
repository files and push them to your remote. The process for updating becomes:
- Create or modify a file
- Add, commit, and push it to your remote
- Wait a few minutes for GitHub to update your page
- Visit your GitHub Page to see the newest changes
From here, you can choose to do whatever you like and customize your site as you please. However, we recommend adding and connecting two files now: a CSS file to style your HTML, and a JavaScript file to run code and manipulate the DOM.
In the terminal, create a CSS file alongside your index.html file
$ touch style.cssBefore we connect this file to our HTML, let's add a basic style rule to the file and save it so we'll know when the styling is working.
body {
  background: blue;
}
Now, to connect this CSS file to our index.html, we need to modify the HTML
head to include a link tag:
<head>
  <link rel="stylesheet" href="style.css" />
  <title>My Website</title>
</head>
The link tag is used to connect files to the HTML page. Note the tag has two
attributes. The first is rel, which specifies how the connected file relates
to the HTML. In this case, we're indicating that we're relating a stylesheet.
The second attribute is href, which specifies the location of the file we're
linking. Since we've put style.css right beside index.html in our
repository, we can just provide the file name here.
Save the HTML file and open it locally. Your page should now be very blue.
Go ahead and add some better styling, then add, commit, and push the changes
you've made. Remember, since you've added a style.css file and modified the
index.html file, we'll need to add both files before committing:
$ git add style.css
$ git add index.html
$ git commit -m "add style.css, connect to index.html"
$ git push
Or you can add both files in a single command: git add ..
Check your work: Wait a few minutes for your page to be updated, then visit the GitHub page to verify that the new styles are showing up.
In the terminal, create a JS file alongside index.html.
$ touch script.jsLet's add some basic code so we can see something once we've connected the JS file to our HTML file.
In script.js, let's create an h2 element and add some text content to it:
const h2 = document.createElement("h2");
h2.textContent = "This content added by JavaScript";
Now, we'll include code to add this h2 element to the body element in the
DOM.
document.querySelector("body").appendChild(h2);Save this and switch over to index.html. To connect script.js to our HTML,
we add a script tag inside body.
<script src="script.js"></script>This tag includes a src attribute. Like href from the link tag, src
specifies the location of the script we want to run. Since script.js is side
by side with index.html, we just write the file name.
After adding the script tag for JavaScript and the link tag for CSS, our
HTML will look like this:
<!DOCTYPE html>
<html lang="en">
  <head>
    <link rel="stylesheet" href="style.css" />
    <title>My Website</title>
  </head>
  <body>
    <h1>Hello World!</h1>
    <script src="script.js"></script>
  </body>
</html>
Open the file locally. In addition to "Hello World!" being displayed, you should also see "This content added by JavaScript," confirming the code successfully ran.
Go ahead and add other JavaScript if you'd like, then add, commit, and push the
changes you've made. Since you've added a script.js file and modified the
index.html file, we'll need to add both files before committing:
$ git add script.js
$ git add index.html
$ git commit -m "add script.js, connect to index.html"
$ git push
Remember when you push changes to GitHub, they will take a few moments to appear in GitHub Pages.
Check your work: Once the page has updated, you should see your styling and
content, including the h2 element we added using JavaScript.
As it turns out, the technology we were already using to store our code is also useful for publishing websites. If you have any existing repositories that include HTML — or even if they don't! — you can now quickly turn your work there into shareable websites.
It makes sense if you consider GitHub is already storing your code. The work required to display the contents of an HTML file in your browser versus render that HTML file is similar.
As you continue your programming journey, you'll eventually start building parts of websites that can't be published using GitHub. Sites that require a server to store data, for instance, can't be published on GitHub Pages. GitHub is just rendering files it already has; it won't do more work than that. It turns out, though, that is actually quite a lot.
Many websites are made up of two pieces, a frontend and a backend. The frontend is what the client experiences, what renders in the browser, while the backend handles data storage and other work we don't want to burden the frontend with. GitHub Pages will work well as a host for most frontends, even those using modern frameworks like React. You'll soon see that frontends alone can actually be quite interesting and useful, even without a backend.
For simpler websites — personal sites, projects, etc... — GitHub pages is a great, free option for publishing content online.


