| title | author | tags | categories | date |
|---|---|---|---|---|
Sofar HYD6000-ES ModbusRead |
Andy Whittaker, Matt Morgan |
Modbus, Emon, RS485, Sofar Inverter, Hybrid, HYD6000-ES |
Solar PV |
2021-05-11 |
Since we require the script to be called at regular intervals, I have also included a very simple CRONTAB command and run script to call the Python code (currently) at 5 second intervals.
We require to interface between the Raspberry Pi and the Sofar HYD6000 inverter via RS485. On the bottom of the HYD6000 you can find the interface connections.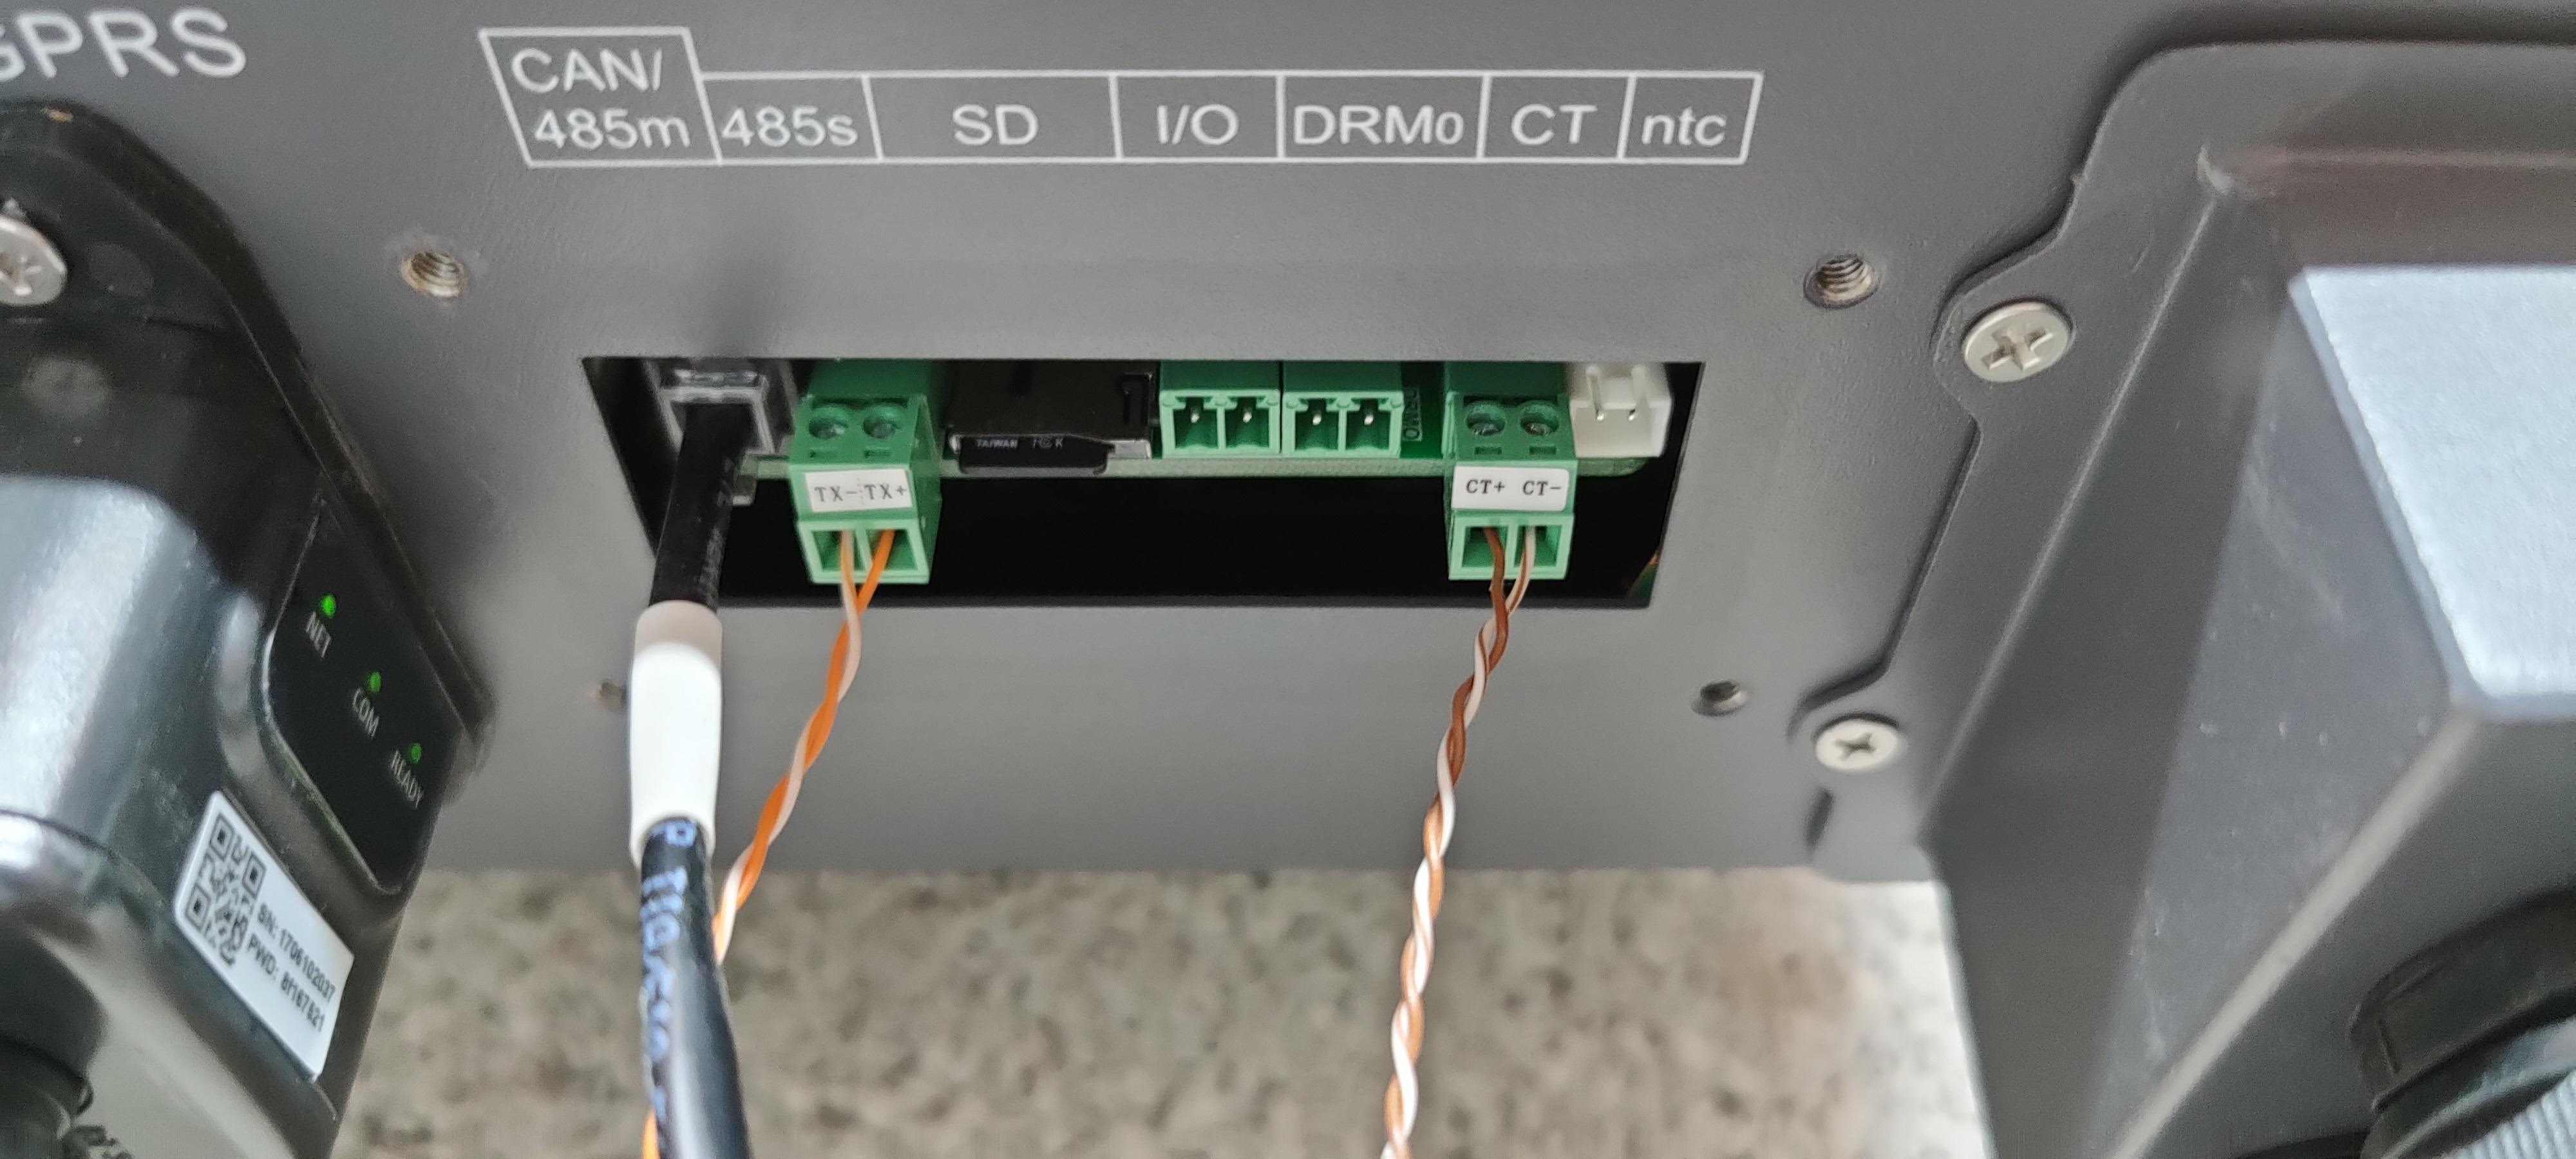
The CAN/485m connection goes off to the batteries. However, the next interface available is the RS485s connection, Sofar even gives you the correct connector to plug-in (it looks to me like a Phoenix/ Weidmüller Type).
We now need a cheap USB to RS485 (which is a two wire interface) to allow us to connect to our Raspberry Pi. Note RS485 is completely different from RS232, do not attempt to use the wrong interface. log-on to eBay and search for RS422 interfaces and you will have one in your possession within a few days. If you would like to read up about the differences between RS232, RS422 and RS485, please have a short Google search for them. RS422 and RS485 are similar, just full-duplex verses half-duplex.
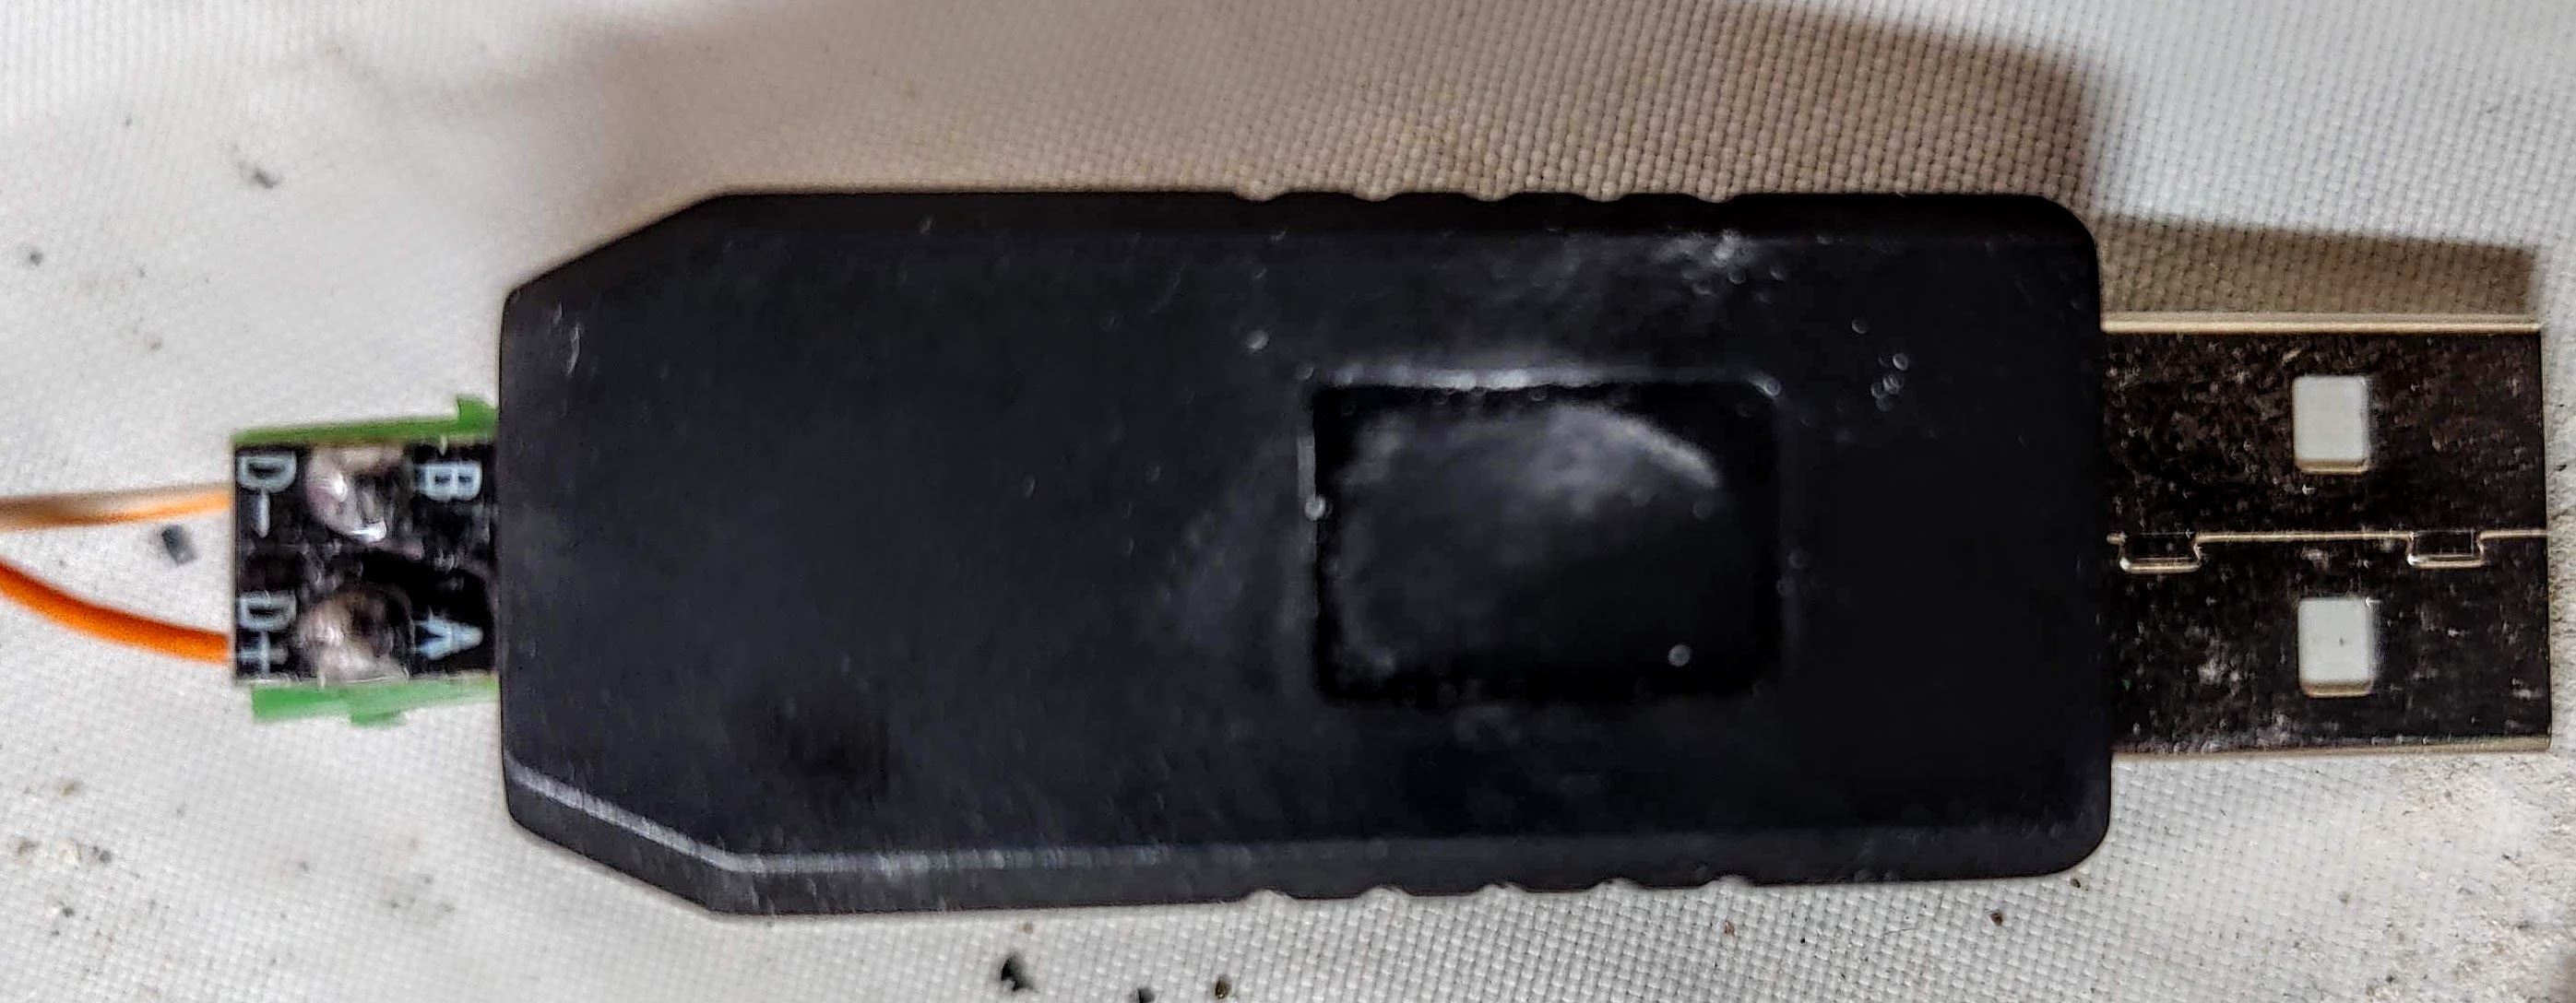
Link the interface up with the inverter with a length of CAT5 pair of wire. Be sure to match-up the + and - connections on either end. In my case, TX- connects to D- and TX+ connects to D+.
A quick word on the inverter (and almost all that I have seen) is that they communicate over the ModBus Protocol. This is entirely different from whether you are connected via RS232, RS422, RS485, TCP/IP, etc.They have been used for Industrial Applications since the beginning of time! You can’t talk to them via a terminal by randomly typing in commands, nothing will work. You need a ModBus (generally) RTU emulator but the good news is that there are many available to download.
The guys over at openenergymonitor.org have created a really easy guide to have your Raspberry Pi up and running with emoncms in no time. If you would like to use emonpi head along to their GitHub repository and follow the instructions.Don’t forget to do the usual
sudo apt update && sudo apt full-upgradeafterwards to ensure your Pi is up to date. While you are setting up, make sure you enable SSH access so that you don’t have to connect a monitor and keyboard while you set the whole thing up.
For SSH access I love the Bitvise SSH Client because it not only allows you to bring up the remote bash console but it also enables you to exchange files with your PC. This is incredibly valuable when you are developing or setting up the Pi. It also allows you to copy to other UNIX devices as well.
On the PC end, I think NotePad++ is the editor to use at the moment.
Plug the USB RS485 interface into a spare USB port and reboot the Pi. SSH back in and typedmesg | grep ttydmesg displays a copy of the Pi’s boot log and grep does a search through it for anything that matches tty. This will give you the port number that your interface is attached to (look for ttyUSB0 or similar).
Once you know the USB port name, you will have to update its name within the sofar.py file, look for
instrument = minimalmodbus.Instrument('/dev/ttyUSB0', 1) # port name, slave address.
For debugging, simply remove the comment lines (#) in front of the print statements.
python sofar.pyIf you get any errors, you are probably missing some python libraries which you will need to install using “pip”. Google is your friend here.
If your script is working, you need a way of executing it every, say, 5 seconds to log to the emonCMS database to give you pretty graphs to bore your friends with.
Add the CRONTAB command from the CRONTAB file, and reboot.


