Giter VIP home page Giter VIP logo

fdskey's Introduction

FDSKey

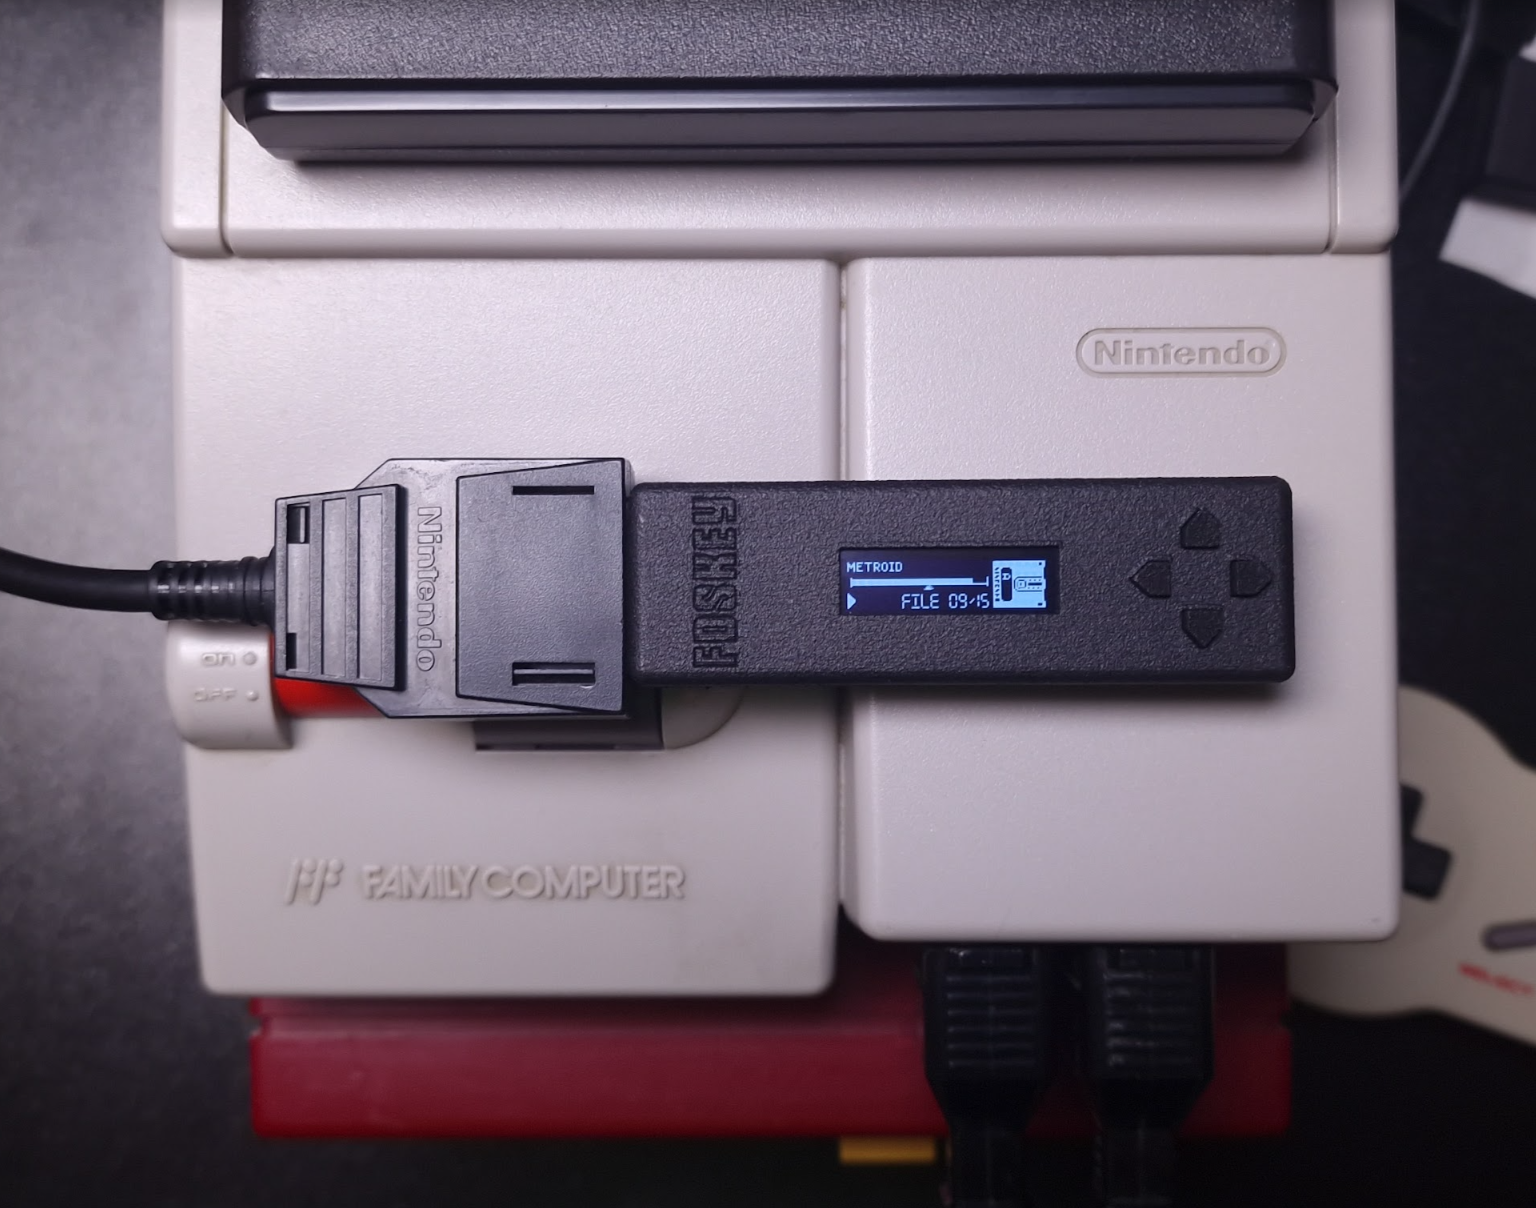
An open-source, low-cost, and easy-to-build Famicom Disk System drive emulator featuring a sleek OLED display.

image

image

How you can use it:

  • You can run Famicom Disk System disk images from a microSD card
  • You can dump disks using a physical FDS drive without additional hardware/cables
  • You can write disks using a physical FDS drive without additional hardware/cables

Requirements:

  • Famicom
  • Famicom Disk System RAM adaptor
  • microSD card

How to build it

You'll need a few low-cost components.

Circuit diagram

Сircuit diagram

Bill of materials

Сircuit diagram

Components

  1. PCB

image

The PCB is designed in the DipTrace software.

You can have it produced at any PCB factory (e.g. jlcpcb.com or PCBWay) using gerber files. PCB properties:

  • PCB thickness: 1.6mm
  • Gold fingers are recommended
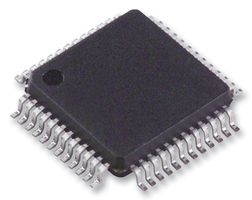
  1. STM32G0B0CET (or any STM32G0B0CETxxx) microcontroller

STM32G0B0CET

You can easily find it on mouser.com or taobao.com.

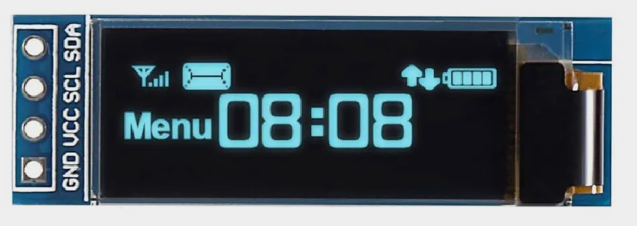
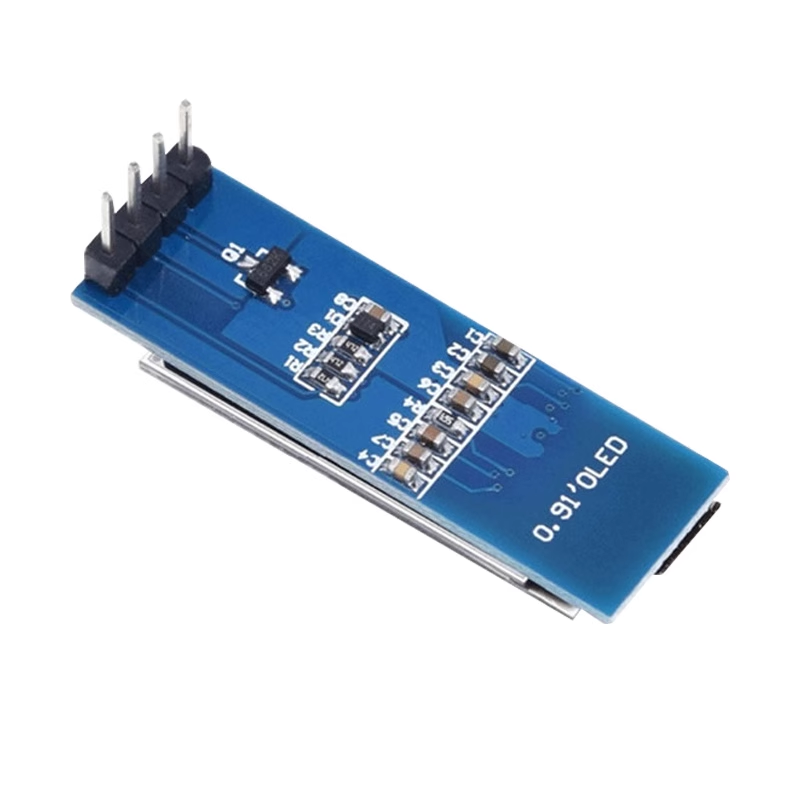
  1. OLED display module

OLED display

OLED display

It's a very popular OLED display, search for SSD1306 0.91-inch OLED 128x32 4-pin on aliexpress.com, ebay.com, amazon.com or taobao.com. These displays are available in different colors: blue, white and yellow, you can select the one you prefer.

Solder it like this:

image

It's recommended to put something soft under the display on the right side.

WARNING: some unscrupulous sellers may sell you used, burned-in displays.

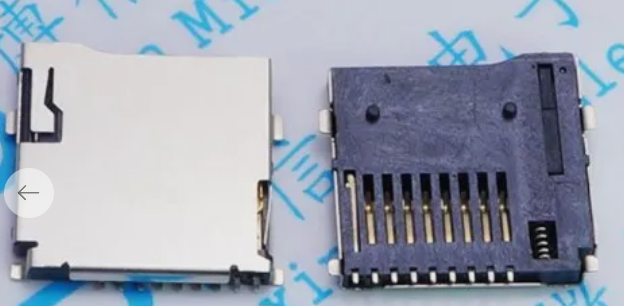
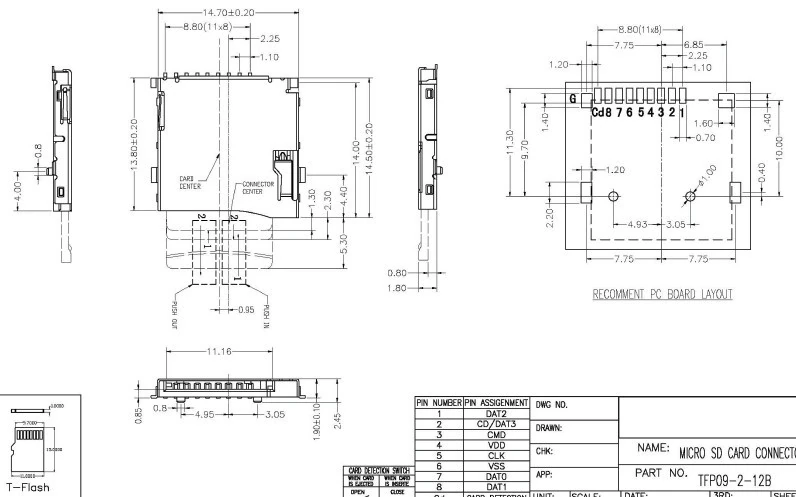
  1. microSD card socket (push-push, 8-pin + card detect pin = 9-pin)

microSD card socket

microSD card socket

It's a very popular push-push socket, they can be found on aliexpress.com. Also, you can search for 112J-TDAR-R01 model but there are many compatible models with other names. You can always modify the PCB to accommodate a different socket model.

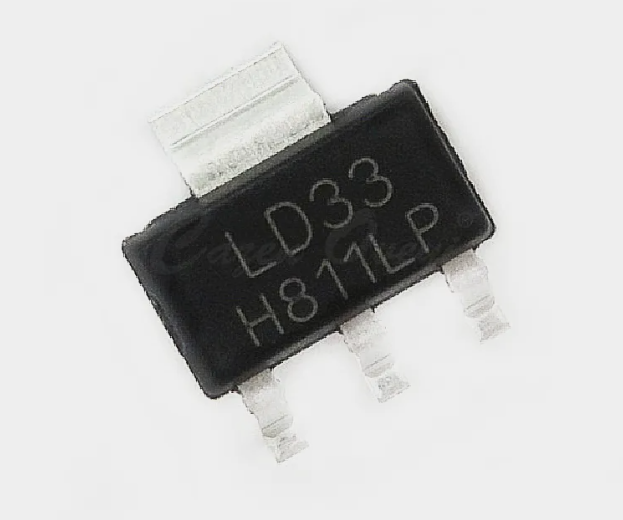
  1. LD1117S33 stabilizer

LD1117S33

You can buy it in any electronic components store.

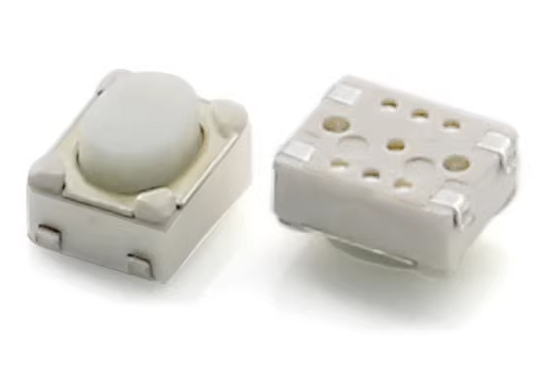
  1. Four SMD buttons

SMD button

Search for 3X4X2.5H SMD buttons, they can be found on aliexpress.com, ebay.com, amazon.com or taobao.com. You can also search for 434133025816 model on mouser.com.

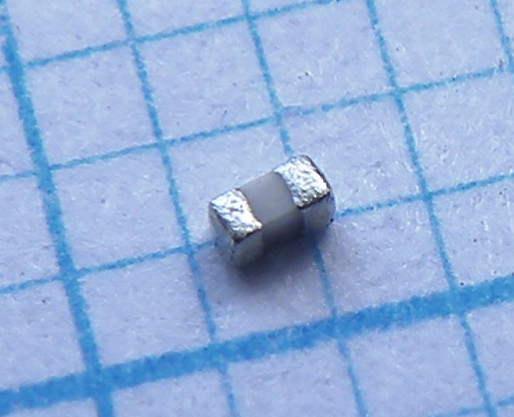
  1. Resistors and capacitors

Capacitor

You will need only a few of them:

  • C1, C2 - two 4.7uF ceramic capacitors, 0603 size (higher values are not recommended)
  • C3, C4 - two 100nF ceramic capacitors, 0402 size (0603 will be fine too)
  • R1, R2 - two 1.5K resistors, 0402 size (0603 will be fine too), actually you can also use any values from 1K to 10K

You can buy them in any electronic components store.

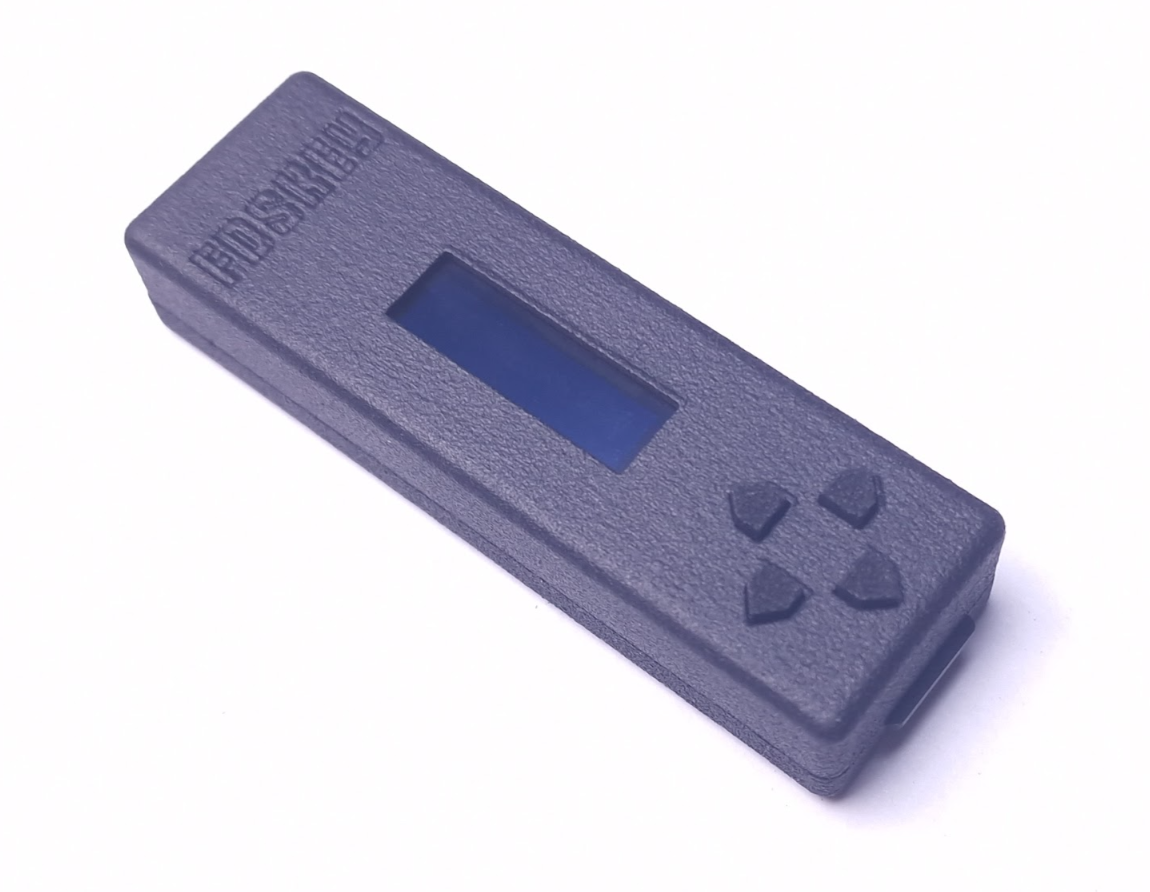
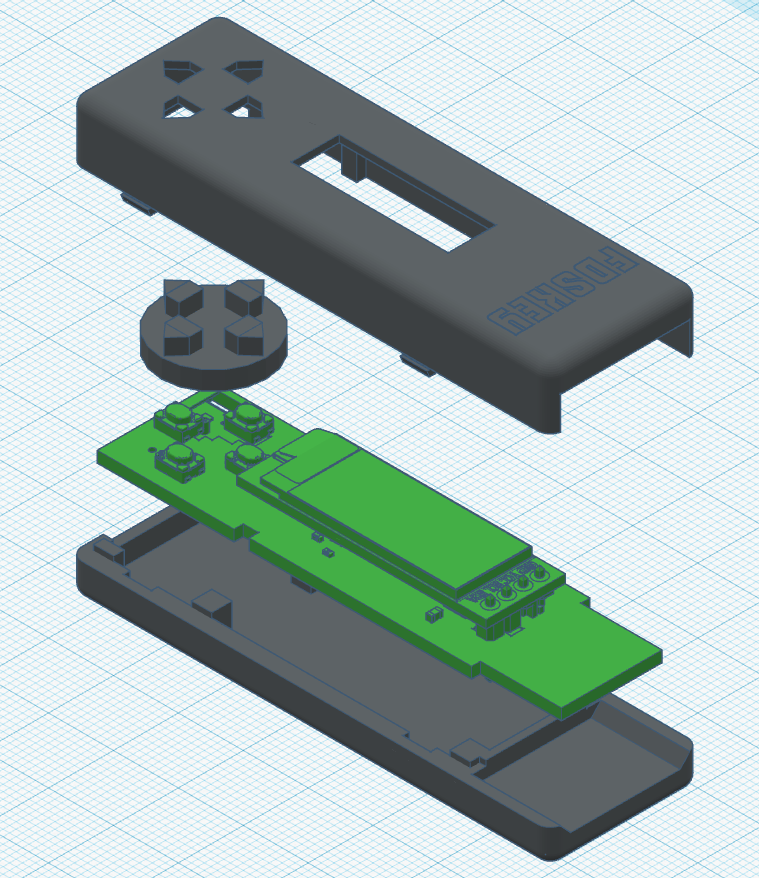
  1. Plastic case

Case

You can print plastic case with a 3D printer. You can find .stl files in the case_3d_models directory. There are two types of models:

  • For FDM 3D printers - can be printed on a affordable home 3D printer, the bottom and top parts of the case must be glued together
  • For MJF 3D printers (recommended) - for industrial 3D printing, you can order it from a manufacturing service (e.g. jlcpcb.com), this version features latches

image

What does it look like when everything is assembled: image

Flashing the firmware

There are five TH pads (actually 6 but 1 is unused) on the PCB to connect a ST-Link (or clone) programmer: GND, VCC, SWD, SWCLK, and NRST. Use STM32CubeProg software (Win/Linux/Mac) to write the bootloader and the firmware. Old STM32 ST-LINK Utility will not work, it's deprecated.

First, you need to write the bootloader - bootloader.bin file. Use a programmer and write it to the 0x08000000 address (start of the flash memory, default address).

Then you can put the main firmware file - FdsKey.bin on your SD card (FAT/FAT32/exFAT formatted) and hold all four buttons on power-on, e.g. connect FDSKey to RAM adaptor, hold buttons and turn a Famicom on. You can use the same method to update the main firmware in the future without additional hardware. You can also use a programmer and write it to the 0x08020000 address.

You can write the bootloader and the firmware at once using the STM32CubeProg CLI tool:

STM32_Programmer_CLI.exe -c port=SWD --erase all --download bootloader.bin 0x08000000 --download fdskey.bin 0x08020000

After the first boot, press and hold the left button on the main menu screen for 3 seconds to access the service menu. There, you can select the OLED display controller type (change it if the display shows a corrupted image in "lefty mode") and check some system information.

Device usage

Format a microSD card to FAT/FAT32/exFAT and put some .fds files on it. Insert a microSD card into a FDSKey, insert a FDSKey into a RAM Adaptor's cable instead of a physical disk drive and turn on a Famicom. You can hot plug a FDSKey when Famicom is already on too, it's ok.

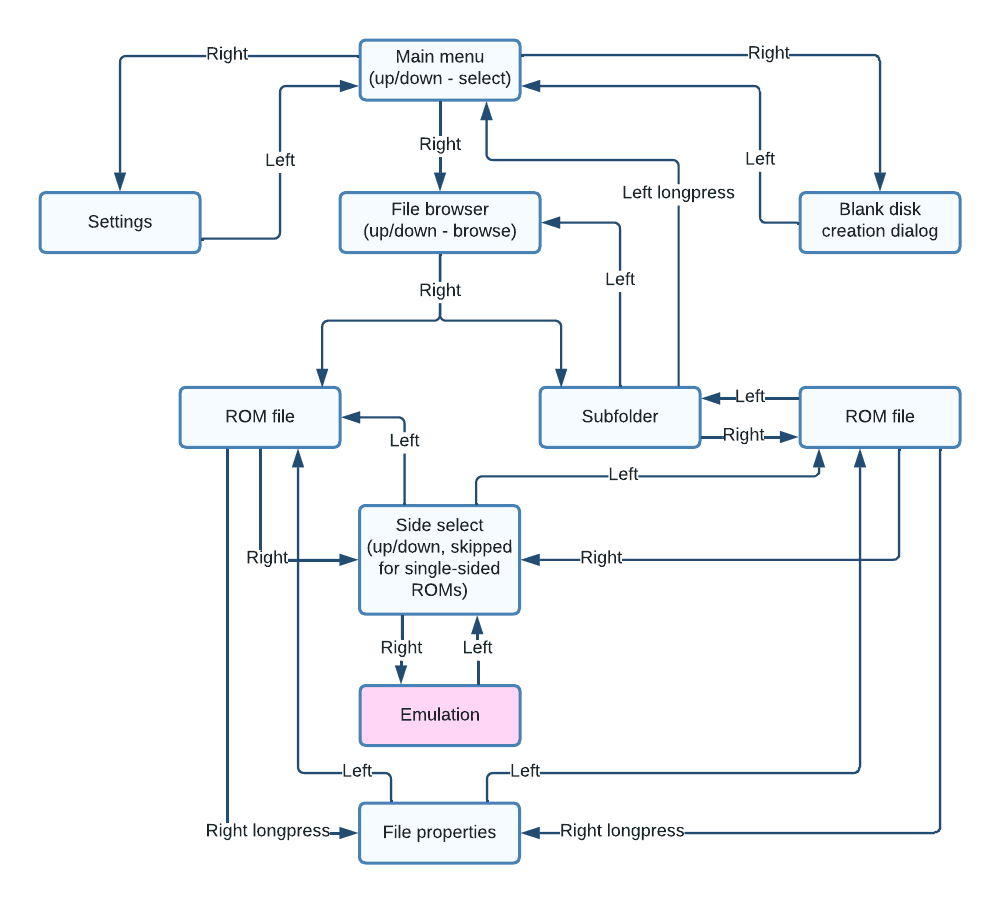
Now you can navigate through the FDSKey interface using the buttons. Left button usually means back, right button usually means OK and up/down are used to select something (file, disk side, etc.) Also, you can long press the left button in the file browser to directly return to the main menu from a subfolder, and long press the right button to open the file properties menu.

FDSKey - interface flowchart

Oops, too complicated :( Let's try again...

GUI

Much better.

WARNING: when a game writes some data to a virtual disk (i.e., saves game progress) don't turn off your Famicom power until the updated ROM has been saved to the SD card. Wait a second for it or eject a virtual disk (left button). A saving message will be displayed, do not turn off power while this message is visible.

Settings menu

Use up/down buttons to select a setting and left/right to change it. Setting descriptions:

  • Rewind speed: you can select a drive operation speed as either original (very slow, like on a physical FDS drive, for the nostalgic ones), fast (where the rewind time is reduced but the virtual head position is not altered), or turbo (the fastest possible mode, instant head rewind).
  • Remember state: you can select a power-on state between none (always start from the main menu), browser (open browser and select last file if browser was opened before power off), and ROM (start first side of the last started game emulation if ROM emulation was active before power off).
  • Saves (since v1.1): you can select how to save game progress as either overwrite (just overwrite the original .fds file), backup+overwrite (just overwrite the original .fds file but make backup to .fds.bak file first), or like EverDrive (EverDrive-compatible saves format).
  • Hide non .fds files: hide files with non .fds extension in the file browser.
  • Hide .fds extensions: hide .fds extension in the file browser.
  • Hide hidden files: hide hidden files and directories in the file browser.
  • Brightness: screen brightness from 0 to 10.
  • Invert screen: draw black on white instead of white on black.
  • Lefty mode: rotate screen image on 180 degrees and flip buttons.
  • Screen off after: time before automatic screen off if there is no any action (button presses, drive activity), it's recommended to use this feature to prevent OLED screen burn-in.
  • [ Save and return ]: press left or right button on this item to return to the main menu.

Service menu

You can access the service menu by holding the left button on the main menu screen for 3 seconds. This menu is mainly meant for developers or advanced users. There is a lot of system information and several options/functions:

  • OLED controller: try to change it in case if "lefty mode" is not working correctly.
  • [ Format SD card ]: use it if you want to make low-level format of your SD card. Use it with caution as you will lose all your data! Make sure to backup your data first.
  • [ Update bootloader ]: update bootloader firmware. You need to put both bootloader.bin and bootloader.bin.md5 files in the root of your SD card. Use it with caution! In case of failure (power loss during update) you will brick the device.
  • [ Save and return ]: press left or right button on this item to return to the main menu.

Reading and writing disks

How to dump a physical disk to a file

You can use DupliFDS to copy a physical disk to a virtual one, simply create an empty ROM. There is Create blank disk item in the main menu for it.

  1. Put the DupliFDS ROM on the SD card.
  2. Select and load the DupliFDS ROM on your SD card just like you would do with any other ROM.
  3. Return to the main menu and select Create blank disk.
  4. Enter filename for the new ROM, trailing spaces will be trimmed.
  5. When DupliFDS requests a source disk, disconnect FDSKey from a RAM adaptor and connect a physical FDS drive with a game disk.
  6. When DupliFDS requests a target disk, disconnect a physical drive, connect a FDSKey and select the ROM created in steps 3-4.
  7. Repeat steps 5-6 until the copy operation is completed.

How to write to a physical disk from a file

This is a reverse operation of dumping: you can use DupliFDS to copy a virtual disk to a physical one. Please note that you need to remove the copy protection from your physical drive if it has any. In most cases, it's not such a difficult process.

  1. Put the DupliFDS ROM on the SD card.
  2. Select and load the DupliFDS ROM on your SD card just like you would do with any other ROM.
  3. When DupliFDS requests a source disk, select the source ROM/side.
  4. When DupliFDS requests a target disk, disconnect FDSKey from a RAM adaptor and connect a physical FDS drive with a blank disk.
  5. Disconnect a physical FDS drive and connect the FDSKey.
  6. Repeat steps 3, 4, and 5 until the copy operation is completed.

Firmware updates

You can always download the latest version at https://github.com/ClusterM/fdskey/releases.

Also, you can download automatic interim builds at http://clusterm.github.io/fdskey/.

Remember, you can update the firmware by putting FdsKey.bin on your SD card and holding all four buttons on power-on.

Twin Famicom compatibility

You can use FDSKey with Twin Famicom too. But you need a special cable. It's easy to make one.

image

It has a simple 12x1 dupont connector on the one side, you need to connect it to Twin Famicom's Port C on the back-bottom side (instead of the original cable).

Unfortunately, there is a non-standard connector on the other side of the cable. But you can use a SFC/SNES/N64/NGC AV connector:

image

You can find it on aliexpress.com. But you need to cut a "key" - piece of plastic on this connector, or just use the FDSKey without a case.

Connection diagram:

           Twin Famicom Port C                   Connector for FDSKey
       (looking at rear of console)          (looking from FDSKey's side)
█████████████████████████████████████████  ████████████████████████████████
█████████████████████████████████████████  ████████████████████████████████
██                                     ██  ███  1   3   5   7   9   11  ███
██ 8  6  2  4  1  3  5  7  9  11 12 10 ██  ███  2   4   6   8   10  12  ███
█████████████████████████████████████████  \██████████████████████████████/
█████████████████████████████████████████   \████████████████████████████/

Pin meanings
+----+---+-----------------------+
| 1  | O | /write                |
| 2  | O | VCC (+5VDC)           |
| 3  | O | /scan media           |
| 4  | O | VEE (ground)          |
| 5  | O | Write data            |
| 6  | I | Motor on/battery good |
| 7  | I | /writable media       |
| 8  | - | ---                   |
| 9  | I | Read data             |
| 10 | I | /media set            |
| 11 | I | /ready                |
| 12 | O | /stop motor           |
+----+---------------------------+

You must pull-up write data line to VCC via resistor (5K-20K) if you want to save game progress, because Twin Famicom has no pull-up resistors inside it.

image

Also, it's recommended to pull-up /media set pin to VCC too if you want to hot plug the FDSKey. And don't forget to upgrade the FDSKey firmware to at least v1.3.

Donate

fdskey's People

Contributors

clusterm avatar rfmerrill avatar

Stargazers

 avatar  avatar  avatar  avatar  avatar  avatar  avatar  avatar  avatar  avatar  avatar  avatar  avatar  avatar  avatar  avatar  avatar  avatar  avatar  avatar  avatar  avatar  avatar  avatar  avatar  avatar  avatar  avatar  avatar  avatar  avatar  avatar  avatar  avatar  avatar  avatar  avatar  avatar  avatar  avatar  avatar  avatar  avatar  avatar  avatar  avatar  avatar  avatar  avatar  avatar  avatar  avatar  avatar  avatar  avatar  avatar  avatar  avatar  avatar  avatar  avatar  avatar  avatar  avatar  avatar  avatar  avatar  avatar  avatar  avatar  avatar  avatar  avatar  avatar  avatar  avatar  avatar  avatar  avatar  avatar  avatar  avatar  avatar  avatar  avatar  avatar  avatar  avatar  avatar  avatar  avatar  avatar  avatar  avatar  avatar  avatar  avatar  avatar  avatar  avatar

Watchers

 avatar  avatar  avatar  avatar  avatar  avatar  avatar  avatar  avatar  avatar  avatar

fdskey's Issues

CPL File

Please could you update CPL file?
I want to make it but my welding skills are not very good, I would like to order them already welded.

Thanks

"Error, Wrong block CRC" of lunix.fds booting

Hello from Japan.

I am interested in booting homebrew FDS files.
"Lunix.fds" is known as UNIX like OS booting on the Famicom Disk System.
File size of lunix.fds is 14 kB. So I made 65516 bytes file from the lunix.fds.
The file was loaded without any errors.
But when I proceed to load shell program, "Error, Wrong block CRC" was displayed.
I hope lunix.fds runs on FDSkey.

PS
Url of lng-fds in github.com
https://github.com/decrazyo/lng-fds
Operating lunix.fds, we need NES (Famicom), Famicom Disk System RAM adaptor and Family Basic Keyboard.
Japanese guy suggets a usb keyboard converter for NES/Famicom.
Blog url
https://qiita.com/BUBUBB/items/5e529ae68f9f83394a09

Unable to load any dump

Hey,
I got ahold of one of the prebuilt FDSKey PCBs off AliExpress, it turns on regularly, I am able to select a dump off the SD card, it signals correctly to the RAM adapter a disk was inserted, but it indefinitely loops around the disk, the FDS BIOS staying stuck on the "now loading" screen (never passing KYODAKU/no black screen before the copyright notice).

I tried already updating to the interim build (both bootloader and software), changing microSD card, using different RAM adapters (both work perfectly fine with my FDS drive) and reflowing all components. I also checked the two resistors on the board, since testing caps while in circuit is not really a good test, and they respect the BOM (both 1.5k).

What could be the issue? Which connections should I check?

Thank you very much in advance ;-)

No SD Card Issue!

Hello Alexey and everyone.

I am having the next issue with my unit.

When I turn my fdskey without a micro sd card I got this message.
IMG_20231014_083810

When I insert the micro sd, the screen turns black without response. It looks like it's turned off or something different happened.

IMG_20231014_083828

If I start the console with the micro sd inserted, the same problem shows, a black screen.

I have already tried with 2 micro sd, one 2gb Samsung, and 16gb sandisk.

I am adding a YouTube video of the problem.

https://youtube.com/shorts/ha5OHcCc-NU?feature=share


Also I tried to update by pressing the four buttons but it get stuck with the "Please Wait" message:

please wait

I hope you can help me solve this issue.

*I had reweld the sd card holder pins and got the same issue.

Thanks in advance.

No space for beveling on the PCB

Different PCB manufacturers likely have different requirements, but for people who want to file bevel by hand on the PCB, it would be nice if there were a bigger gap after the contact fingers before the edge. As it is, it's hard to file a bevel without hitting the contacts, potentially making them more vulnerable to corrosion.

I don't want to push a lot of work on you, I just don't have Diptrace to do it myself. Maybe I can edit the gerber files directly?

Error :( SD card not ready on small SD cards

I bought some sd cards with different capacities to test, and found that the cards with a capacity below 4g would have this error.

Error :( 
SD card not ready

PASSED: 4g, 8g, 16g, 32g, 64g
FAILED: 1g, 128m

Notes: All tests using the same file system format FAT32. 1g and 128m sd cards are low speed without C10.

How to transmit data over a single line?

Hi,
According to FDS hardware ,it reads and writes data through only one wire,it converts one byte of parallel data into 1-bit serial data during each transmission(It looks like this),
I want to create a cloned version of an FDS RAM adapter using CPLD,I searched for relevant information online,but there was no result. I also reviewed the source code of simulators such as fceux and mesen,but the simulator ignored the detailed information of the hardware part,so I would like to know more detailed information about this section,Can you help me provide more detailed information
(The source code of the fdskey project contains relevant information, but I don't quite understand it,It seems that DMA and Timer were used)
Thank you.

How to flash the bootloader

Hi, there!
I read the instructions from https://github.com/ClusterM/fdskey#flashing-the-firmware, but still get stuck in connect to target:

Can not connect to target!
If you're trying to connect to an STM32W1xx device, please select Normal or HotPlug mode from Target->Settings menu.
If you're trying to connect to a low frequency application , please select a lower SWD Frequency mode from Target->Settings menu.

Can't update firmware

Hello,
I have a fdskey FW 1.0,HW1.2,and working properly.

But when I hold all four buttons on power-on to update firmware(v1.1 or v1.3).
it will show " can't irit SD card",Why is there a error?

Can work with antother STM32 microcontroler?

When i search for stm32g0b0cet6 to buy form China, i have a shortage of this chip... Can you or is easy for me, recompile for another STM32 chip where more available? (And yes if i import from USA the import tax is too high for me)
TKS

Programming Issue Using ST-Link-V2 - Read Out Protection Error.

First of all, thanks for all the effort in this project, thanks to ClusterM for creating this.

I have made 2 unids following all the instructions on the FdsKey principal page, I am having some issues with the connection and programming the STM32G0B0CET6 chip.

I use the ST-Link-V2 Clone, with STM32-ST-Link-Utility, this is because is the only way I had to connect the board via stlink.

1.- Using STM32-ST-Link Utility

image

23:41:12 : ST-LINK SN : 700039000F0000315151524E
23:41:12 : V2J42S7
23:41:12 : Connected via SWD.
23:41:12 : SWD Frequency = 4,0 MHz.
23:41:12 : Connection mode : HotPlug.
23:41:12 : Debug in Low Power mode enabled.
23:41:12 : Device ID:0x467
23:41:12 : Device family :Unknown device

My first question is, if this Device family information is correct?

2.- When I try to program the chip using the bootloader bin fie, this issue happens:

image

image

Pressing the ok button , the next error appears.

image

image

image

Do you have any clue or advice to solve this problem?

I have already try to disable the Read out protection, but I got this issue after applying.

image
image

3.- Also want to explain, why I'm not using the STM32Cubeprogrammer.

This is because when I connect my stlink32 in the combo box Serial Number, i got the letter P in both of my boards.

image

and when I change the Shared combo to Enable, I got this, and I am not able to connect the device in any way.
image

I hope you can help me with this issue.

Thanks for all in advance and greetings from Peru.

Allow for quickly scrolling to other end of list

This is more of a suggestion than issue, but it would be nice if:

  • Pressing UP while at the top of a given list scrolled the list to the bottom
  • Pressing DOWN while at the bottom of a given list scrolled that list to the top

This would let the user browse through files on the SD card quicker if, for example, they have a lot of files in a folder, and the file they want is alphabetically closer the end of the list.

Thanks in advance!

Error: 02

If i get the following error code: 02

Does this mean something is faulty with the FDSKey hardware, maybe broken solder joint on the STM32 chip?

Err. 02 = No disk power supply — batteries and/or AC adaptor.

Some files don't seem to load with a header

Hi there. I mainly bought this because I'm into composing chiptune and I wanted to listen to it on the real hardware with authentic FDS audio. I use FamiStudio to compose, and it's able to export either FDS or NES files. For some reason, the files exported by it aren't working on my FDSKey. At first, I thought the issue could be related to NMI not being disabled during disk loading (FamiStudio related, that will be fixed later), but then I found out that removing the 16 byte FDS header and padding the end of the file makes it load. I have no idea why this is, because other games have headers and they load just fine. I can just strip the headers for now since it works, but I just wanted to mention this in case.

Recommend Projects

  • React photo React

    A declarative, efficient, and flexible JavaScript library for building user interfaces.

  • Vue.js photo Vue.js

    🖖 Vue.js is a progressive, incrementally-adoptable JavaScript framework for building UI on the web.

  • Typescript photo Typescript

    TypeScript is a superset of JavaScript that compiles to clean JavaScript output.

  • TensorFlow photo TensorFlow

    An Open Source Machine Learning Framework for Everyone

  • Django photo Django

    The Web framework for perfectionists with deadlines.

  • D3 photo D3

    Bring data to life with SVG, Canvas and HTML. 📊📈🎉

Recommend Topics

  • javascript

    JavaScript (JS) is a lightweight interpreted programming language with first-class functions.

  • web

    Some thing interesting about web. New door for the world.

  • server

    A server is a program made to process requests and deliver data to clients.

  • Machine learning

    Machine learning is a way of modeling and interpreting data that allows a piece of software to respond intelligently.

  • Game

    Some thing interesting about game, make everyone happy.

Recommend Org

  • Facebook photo Facebook

    We are working to build community through open source technology. NB: members must have two-factor auth.

  • Microsoft photo Microsoft

    Open source projects and samples from Microsoft.

  • Google photo Google

    Google ❤️ Open Source for everyone.

  • D3 photo D3

    Data-Driven Documents codes.