Battleship is a single-player python version of the classic turn-based guess game.
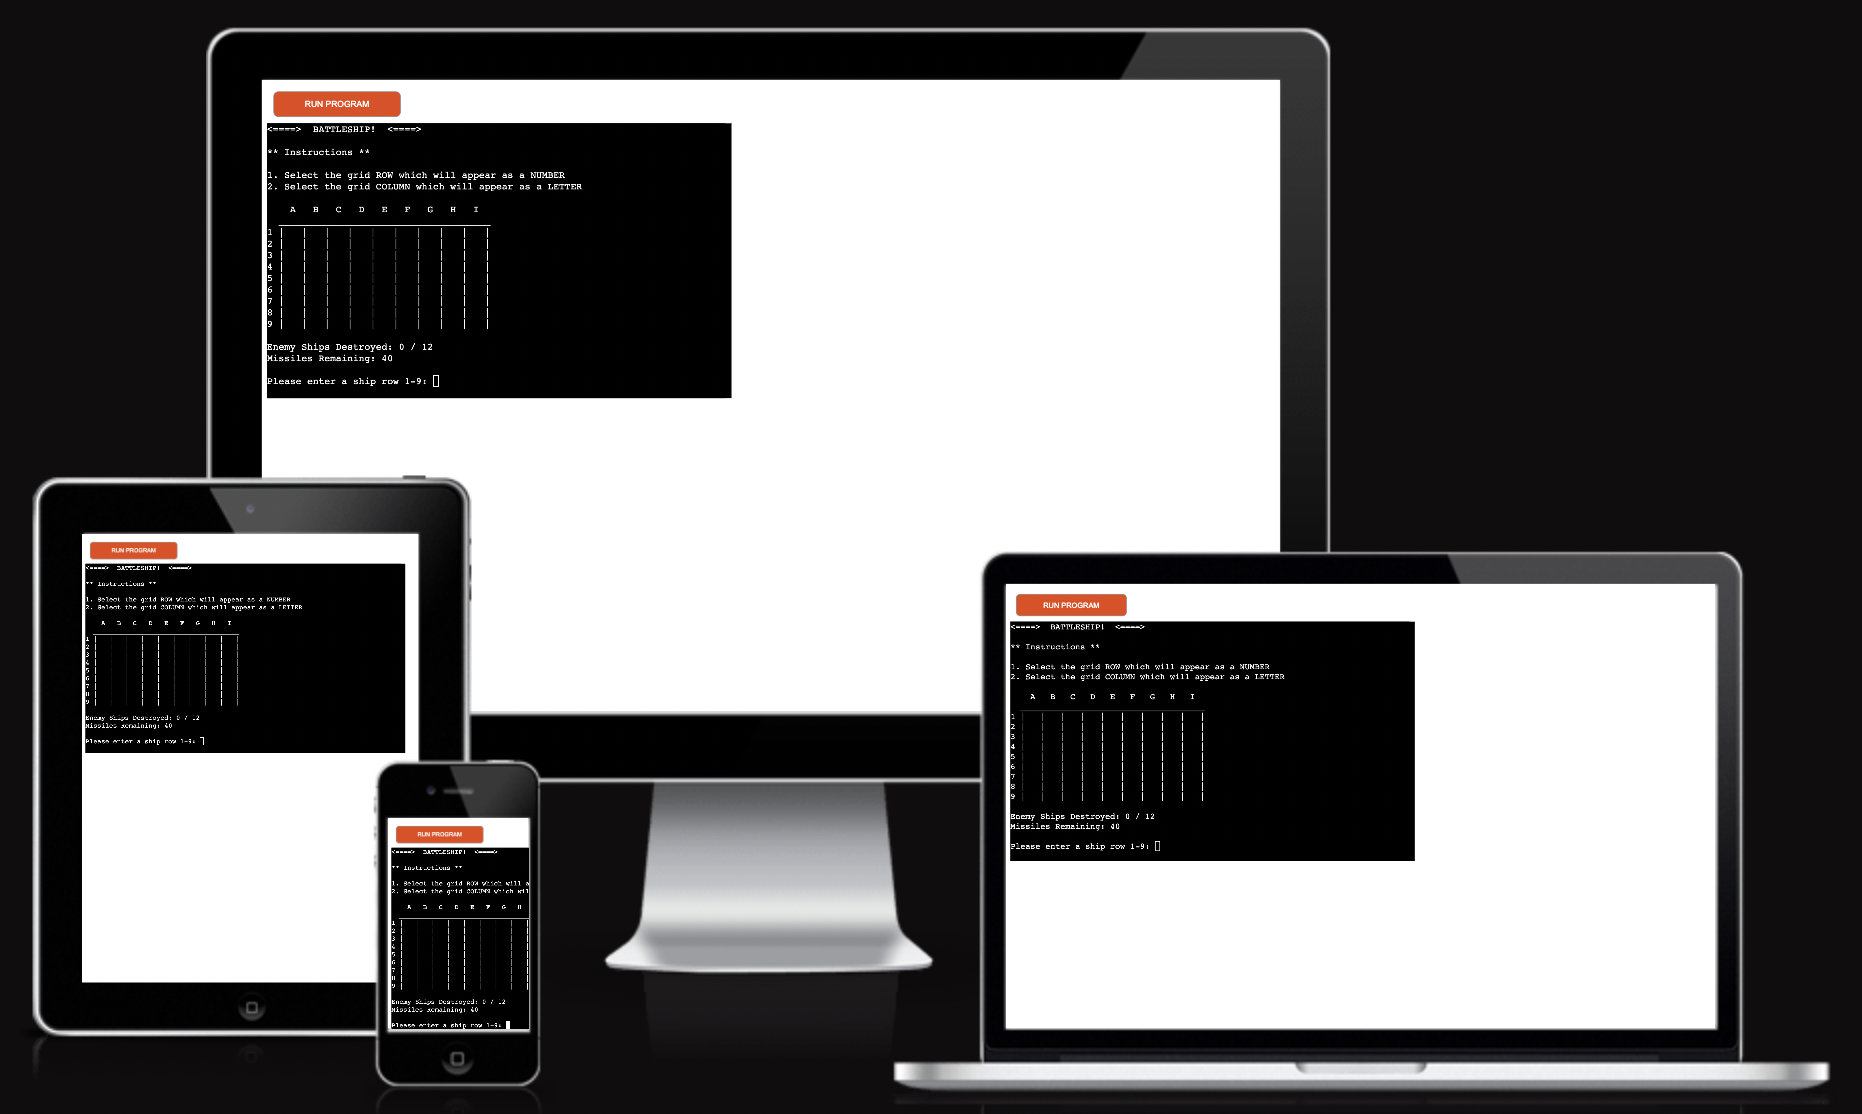
Image created using Am I responsive
A link to the deployed project via the Heroku app can be found here.
The GitHub repository can be found here.
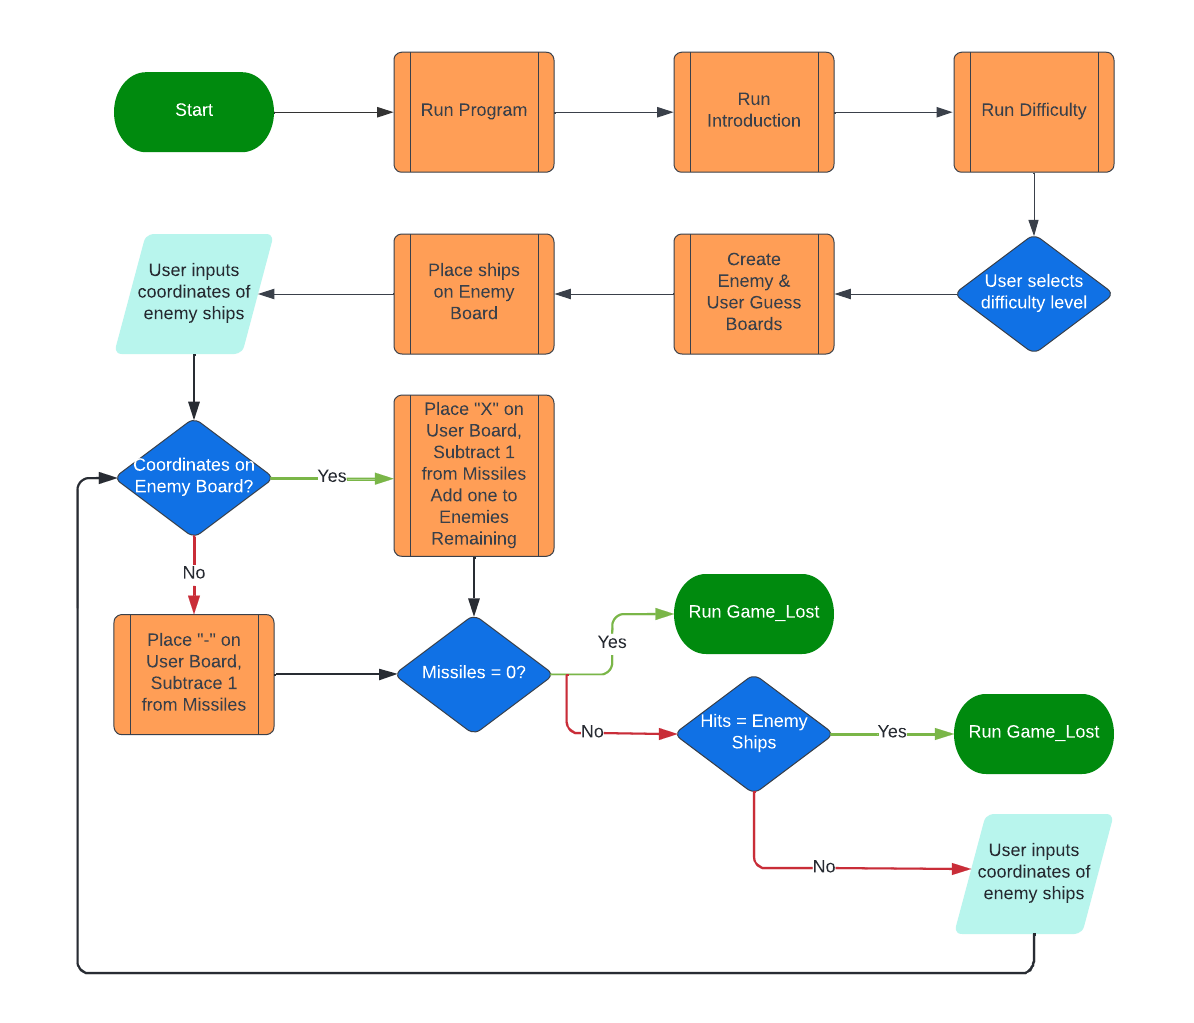
- The user inputs their desired difficulty level.
- The gameboard's grid, enemy ships and the number of missiles are determined by the difficulty level selected.
- An enemy and guess (user) gameboards of grid N x N are generated.
- The ships are generated and placed on the enemy gameboard.
- When the user enters their row and column guess, the guess gameboard stores these coordinates - this is not visible to the user.
- If the coordinates on the user guess gameboard matches those of the visible enemy one, the gameboard reprints showing an "X" within the grid to denote a hit.
- If the coordinates don't match, the gameboard reprints showing a "-" to denote a miss.
- If the number of ships hit equals the number of ships generated and the number of missiles remaining is not equal to 0, then the user wins.
- If the number of ships hit is less than the number generated and the number of missiles is equal to 0, the user loses.
- The sleep function is imported from Python's time module in order to stagger displayed text (see section 2.1) and create a delay before the running of selected loops.
- The randint function is imported from Python's random module in order to randomly generate the position of the enemy ships on the game board.
When the page loads the user is presented with an introduction providing a brief background story. The purpose of this is to provide a sense of immersion in the game.
- The text loading is staggered in order to make it look like the user is awaiting receipt of a message from fleet Command. This is done to create a further sense of immersion by linking the user with an imaginery third party, a Fleet Command.

- The user is then provided with a prompt move on to the next screen allowing them as much time as is required to read the introduction screen.
- The game instructions are laid out for the user. Again, they will be provided with a prompt to move onto the next screen in their own time.
- The user will not need to come back to this screen as simplified instructions will be provided on the game screen.

- The Difficulty Screen provides the user the opportunity to provide input into the game. The four difficuly levels are explained and the user is prompted to choose.

- Depending on the difficulty level chosen, from 'Easy' to 'Insane', the board size will increase as will the number of enemy vessels. The number of missiles, while increasing in number, will either decrease proprotionately to the board size or remain the same (in the case of 'Medium' and 'Hard').
When the user has selected their desired difficulty level, the game board will be generated with its size corresponding to the diffficulty chosen.
- The user is once again provided with instructions on how to play.
- The game board grids are visualised (the image below shows a 9x9 grid as per 'Insane' difficulty level).
- The number of enemy ships and the number destroyed will be displayed (again, based on difficulty level chosen).
- The missiles (turns).

- The user is asked to input their guess by way of selected the numerical row and aphabetical column. These coordinates represent a place on the grid.
- An enemy ship occupies one grid space. If the user's guess corresponds to the coordinates of the enemy ship, the enemy ship is destroyed.
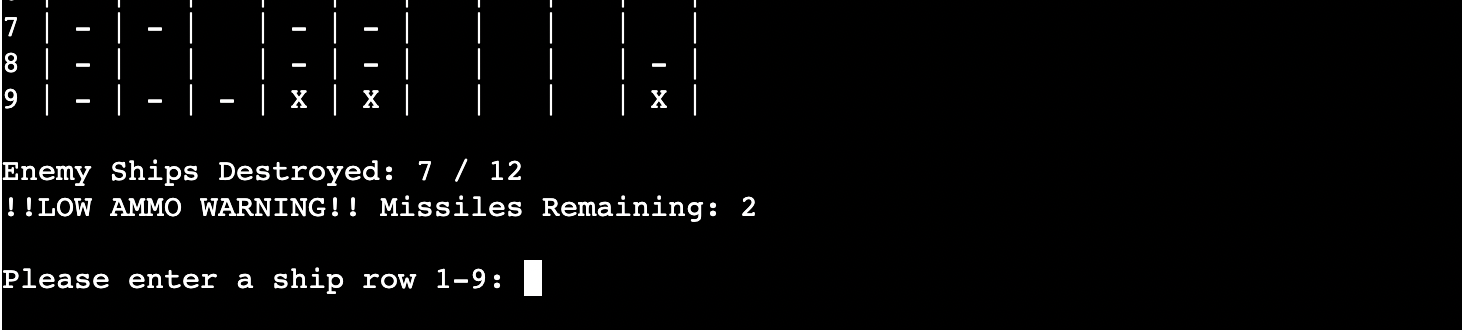
- The board will then be reprinted displaying an "X" in the grid where a ship was destroyed or a "-" to denote a miss.
- The number of enemy ships and missiles remaining displays are then updated as the board reprints.

- If the user has failed to destroy all ships by the time their missiles remaining reaches 5, the missiles remaining message will update to warn the user that they are running low on ammo.
The game can end one of two ways:
- If the user destroys all of the enemy vessels before they run out of missiles they win the game. The game will end a new screen will load informing them of their victory.

- If the user runs out of missiles and there are still enemy vessels remaining, the lose the game. The game will end a new screen will load informing them of their defeat.

During the development of the project, much of the functions were initially written using the Replit Python Online Compiler. This allowed for testing and editing of smaller sctions of code before they were added to the main file. Individual functions were tested in the main file through the GitPod terminal by adding them to a main function.
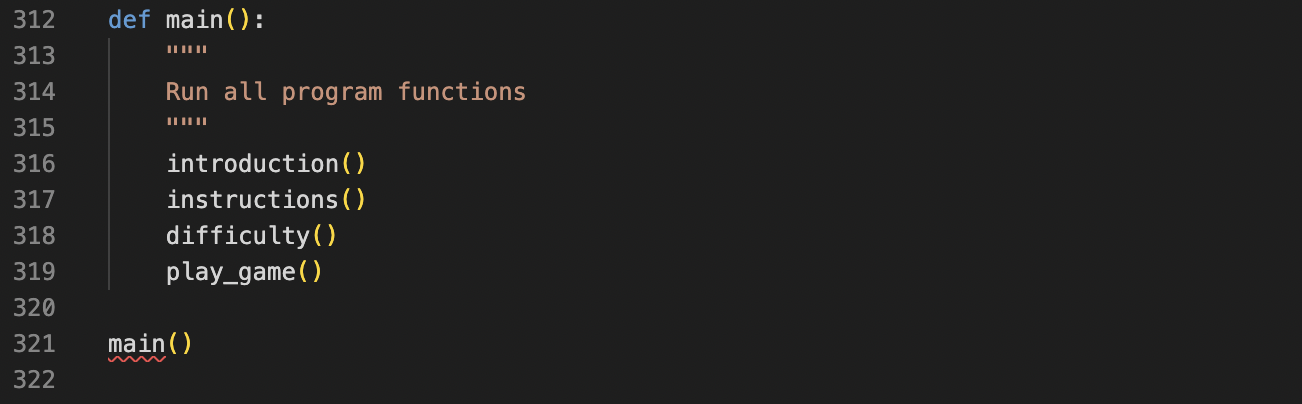
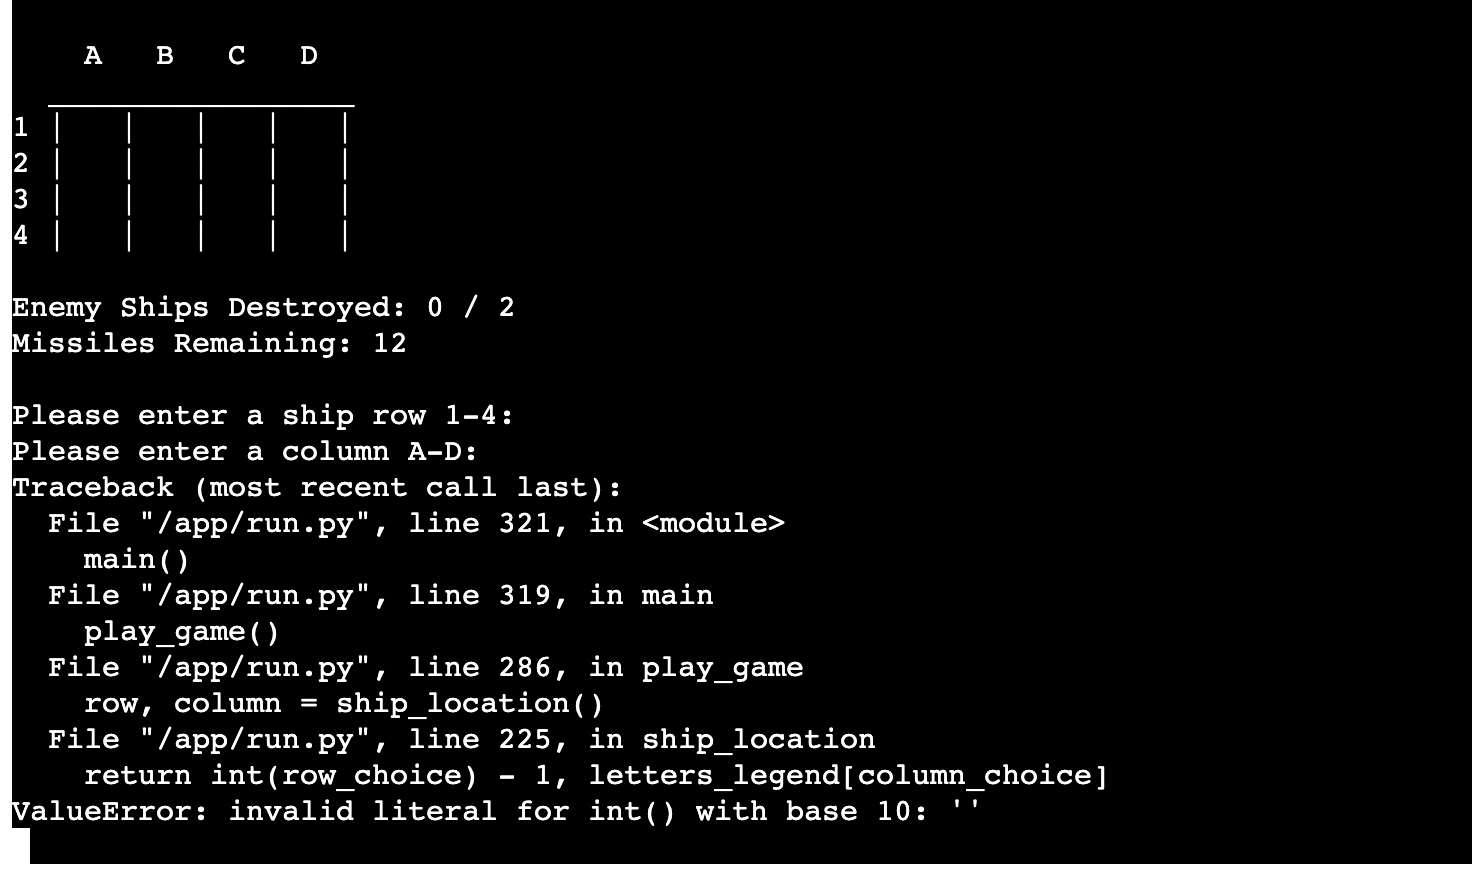
This allowed for the entirety of the game running order to be tested or just individual functions. The majority of the errors returned during the testing stage related to items being out of range or handling the input of blank/incorrect data. An example of two of the latter errors is shown below:
- The first, where a user is asked to please enter a ship row, allowed for the return key to be pressed.
- The second, where a user is asked to enter a ship column throws up a ValueError when a return key is pressed.
In both instances a message informing the user that their input was incorrect and prompting them to enter the correct input should have been returned.
The PEP8 Online validator provided visibility for any errors within the code. The initial validation run flagged numerous amber and red errors relating to whitespace, no lines after functions, missing parentheses and lines of code that were too long. Over the course of several more validation runs, these errors were eliminated and the code as it is shows no errors.

All identified bugs have been fixed including the example shown in section 3.1 above.
- The app was created using Heroku via the following steps:
- On the https://dashboard.heroku.com/apps page, click New and then select Create New App from the drop-down menu.
- When the next page loads insert the App name and Choose a region. The click Create app
- In the settings tab click on Reveal Config Vars and add the key Port and the value 8000. There were no credentials required for this app.
- Below this click Add buildpack and choose python and nodejs in that order.
- To deploy the Heroku app:
- Click on the Deploy tab and select Github-Connect to Github.
- Enter the repository name and click Search.
- Choose the repository that holds the correct files and click Connect.
- A choice is offered between manual or automatic deployment whereby the app is updated when changes are pushed to GitHub. For this app automatic was selected.
- Once the deployment method has been chosen the app will be built and can be launched by clicking the Open app button at the top of the page.

- The GitHub repository can be forked to make a copy of the original. This copy can then be viewed or changed without affecting the original repository via the following steps:
- In the Respository section, select the battleship repository
- At the top right of the page select fork from the menu below your profile
- A copy of the repository will now be created in your account
- To create a local clone via GitHub:
- In the Respository section, select the battleship repository
- From the horizontal menu above the repository contents select Code
- Copy the link that that is shown
- Within Gitpod change the directory to where you would like the location of the cloned directory to be
- Type git clone and paste the link that you copied
- Press Enter and the local clone will be created
- stackoverflow was referenced for guidance on using operators within list comprehension.
- stackoverflow was referenced for guidance on the sleep function from the time import.
- scaler provided a solution to the issue of clearing the board depending on whether the user's os was MAC, Windows or Linux.
- trinket provided research on simple Battleship game-logic and creating enemy ships.
- Austin Montgomery provided examples for creating the board, enemy ships and game logic.
- codecademy Example of a Battleship game using classes.
- mailpraveens Example of a Battleship game code created from a CodeCademy tutorial.
- gbrough provided a solution to the create board problem with the rows numbered and creating the ship locations. Code from gbrough has been referenced in the run.py file.
- programiz for guidance on creating the flowchart.
I would like to thank my course mentor Harry Dhillon for providing guidance on this project as well as Alysha Johnson for providing styling inspiration for the README.
