


De Trainingshub is a training and knowledge center where you can go with all your questions about the use of Dutch Sign Language (NGT) and interpreting for deaf and hard of hearing people. We devise and provide training. Independent but often in collaboration with professionals.
The website is for sign language interpreters who want to improve on their skillset and get the accreditation points they need to collect to show that they keep their knowledge up to date.
As a user:
- I want to find courses in an easy and quick manner.
- I want to be able to quickly scan what a course is about.
- I want to be able to edit my profile information.
- I want to be able to retrieve my password, when I have forgotten it.
- I want to see for who the courses are suited.
- I want to be able to filter the courses on relevant courses.
- I want to see the additional info in a glance.
- I want to be able to choose to pay for a course directly or later.
- I want to be able to pay for a course that I didn't pay for yet.
- I want to see for which upcoming courses I have signed up.
- I want to see which courses I have attended.
- I want to see which courses I haven't paid.
As a staff user:
- I want to be able to add a courses.
- I want to be able to edit a course.
- I want to be able to delete a course.
- I want to see all upcoming courses.
- I want to see everyone that registered for a course.
- I Want to see if a participant paid for the course in advance.
- I want to see for which courses a user has registered.
- I want to see a users info.
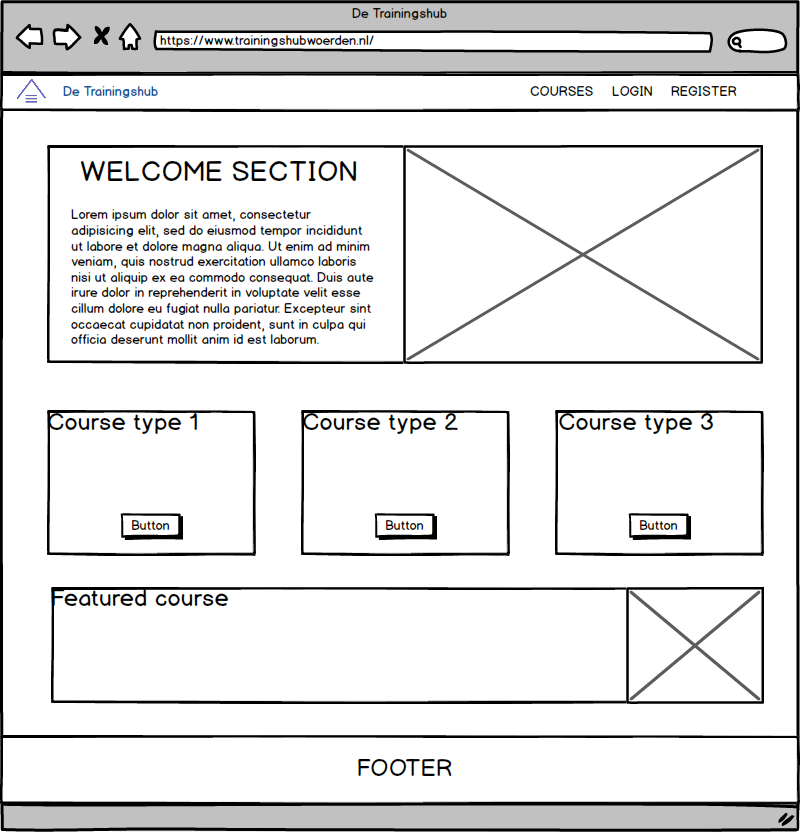
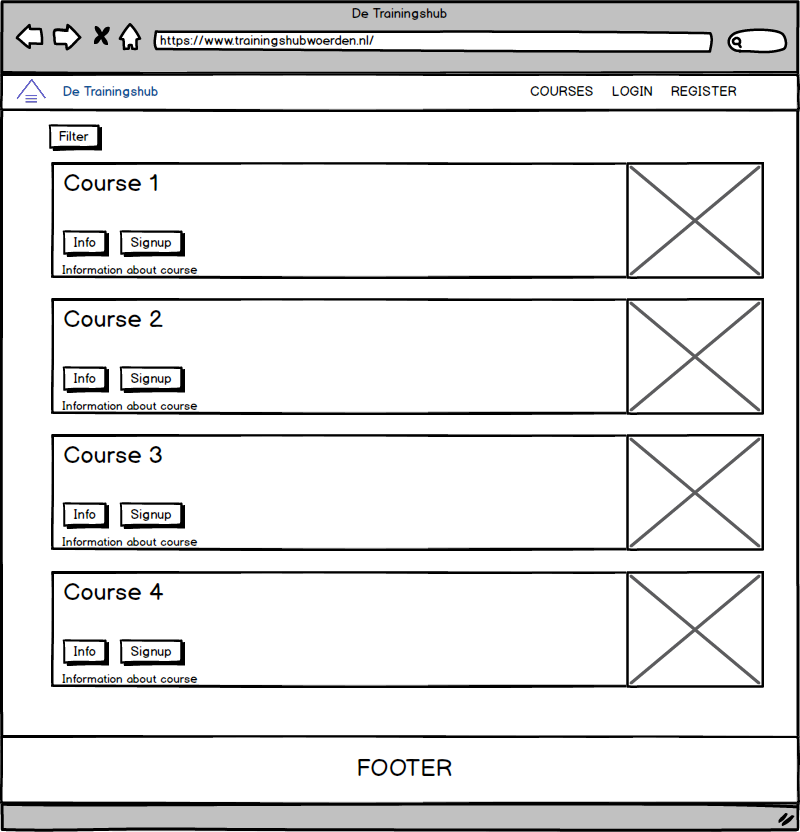
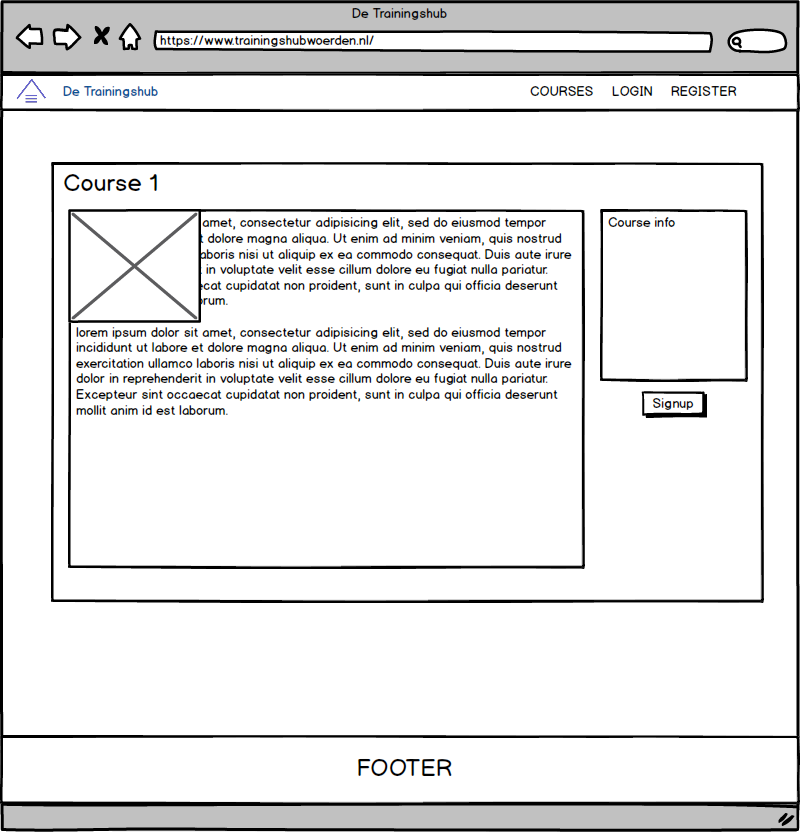
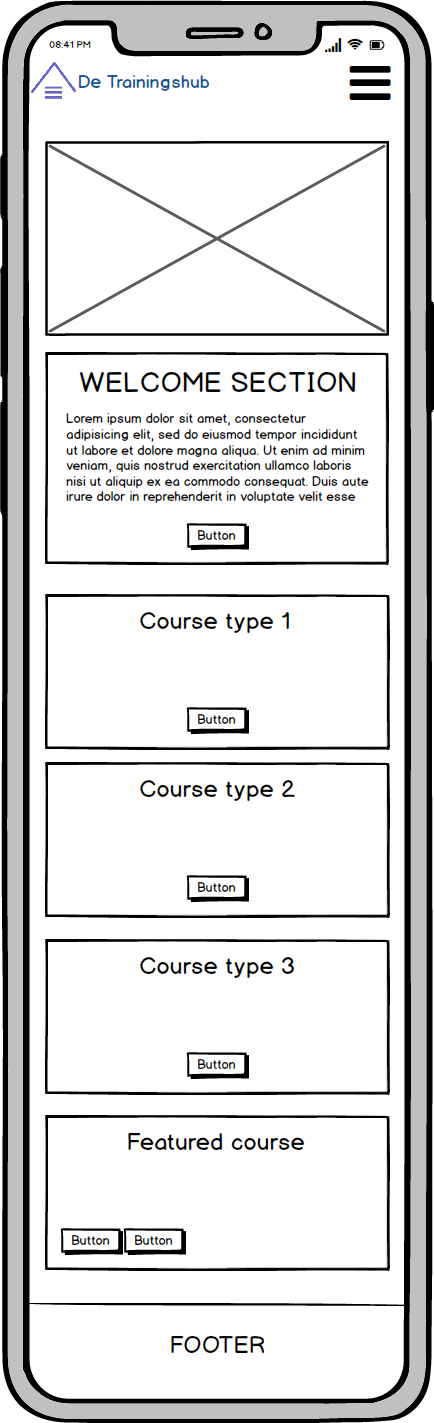
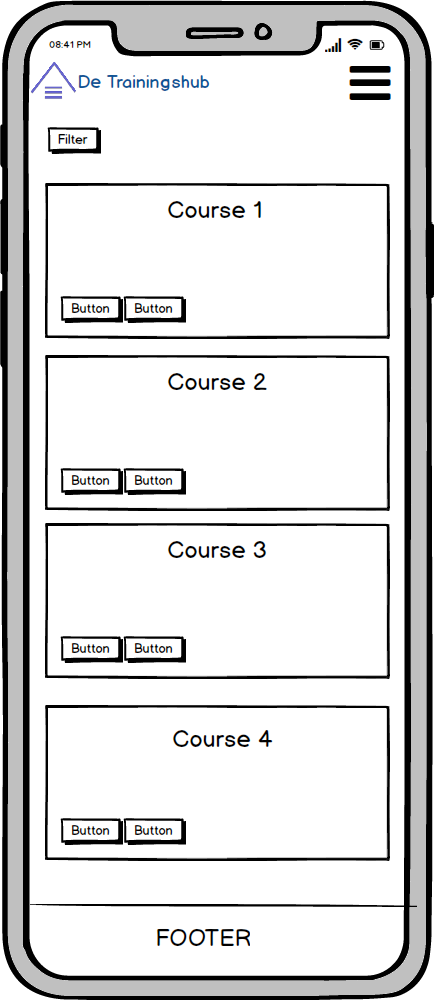
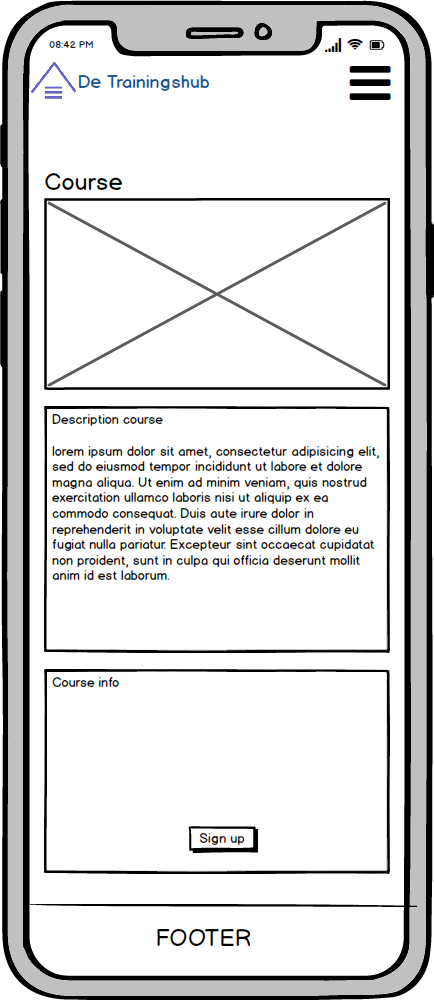
The design is card based and all the info should be on the screen an accesible at a glance. All the forms are in 1 card on a page. For the styling of the other pages I have created the wireframes below.
Wireframes
Desktop
Mobile
| Feature | Description |
|---|---|
| Register | Allows users to signup with an email address and password be able to login to the site. |
| Login | With the credentials from the register feature, users can login and access the parts of the site only accessible to logged in users. |
| Profile editing | A registered user has a one to one relation with a profile. In this profile all additional info regarding a user can be stored. |
| Logout | Logs out the current user and shows a message that they have been logged out. |
| Password reset | When a user needs a new password, they can ask for a password reset. They'll get a mail with a special token so they will be able to change their password. |
| Add/edit course | Staff users can add course with all the required information. This information can also be edited/corrected. |
| Add/edit course types | Staff users can add or edit course types. |
| Delete Course type | A staff user can delete a course type, but only when it is not selected in a course |
| Add/edit locations | Staff users can add or edit locations where courses will take place. |
| Delete Location | Staf users can delete a location when it's not selected in a course. |
| Signup | Users can signup for courses and choose if they want to pay directly or later on the day of the course. |
| Payment | Users can pay directly for the course when they signup or later through there account. |
| Feature | Description |
|---|---|
| Sign out | Users can cancel their registration for a course. |
| Refunds | Staff users can make refunds to the people who cancelled their registration and had already paid via stripe. |
| WYSIWYG | In the text area for adding/editing a course an editor will be added for more formatting for the course descriptions |
| Technolgy | Description |
|---|---|
| HTML | Is used for the semantics of the website. |
| CSS | The styling of the website that wasn't done by bootstrap is done with custom CSS. |
| Bootstrap | Bootstrap is used for the styling and layout/grid of the website. |
| Font Awesome | All the icons on the website are font awesome icons. |
| JavaScript | JavaScript is used is being used for making the website more interactive. Also the stripe javascript is used to create a secret ID so payments can be processed. |
| Python | Python is used for rendering all the views and connecting to the backend of the website. |
| Django | Django description here |
| Heroku | Is a hostingplatform for apps. It is used to deploy this website. |
| AWS Amazon S3 | This is used to host all the static files and the media files. |
| Gmail | Mail service to mail the password reset mail to users |
| Stripe | Payment service provider to handle credit card payments |
Testing is done manually be navigating through the whole site.
The forms(register, login, add/edit course, signup, checkout) are all tested manually in the following manner:
- Go to the page with the relevant form.
- fill in an empty form. An error message will appear on the first required field.
- fill in the form, but make one field have an incorrect input and verify that an error message will appear.
- fill in the form correctly and check if the input has been processed in the database or for the password reset find the reset email in the inobx of your mail.
For all the views. Tests have been written in the app that the view is in. The website has been connected to travis ci for testing. When a test fails the code wil not be pushed to heroku to be deployed.
Also I shared the page for review to family and friends. They used the page, but didn't find any errors. Only that the password reset form wasn't styled yet.
Thanks to the tests I found out that the course-detail view wasn't workin when a user wasn't logged in. It couldn't retrieve a signedup list for the user, because there wasn't one logged in.
The app is hosted on Heroku. Whenever the master branch is updated it will be pushed to Heroku to directly update the live site.
To make the app function on your local machine you have to have an IDE and Python 3 and Git installed. With the installation of Python, pip will also be installed.
-
go to the location in your terminal where the repository should be installed and then enter on the command line:
git clone https://github.com/jdl208/trainingshub.git -
install all the requirements by entering on the command line:
pip3 install -r requirements -
Create an app in heroku (make an account first if you haven't got one). On the resource page add the postgress addon. I advise to use the free version of the addon. In settings reveal the config vars and retrieve the value of the DATABASE_URL.
-
Set up a bucket in aws S3 and set the acces to public. Create a group with users and a policy with the AmazonS3FullAcces. Save the csv file with keys you received when this is done.
-
Set up stripe account.
-
In your local installation set the following environment variables:
- AWS_ACCESS_KEY_ID:
<in csv file from aws> - AWS_SECRET_ACCESS_KEY:
<in csv file from aws> - DATABSE_URL:
<from heroku setting config vars> - EMAIL_PASSWORD:
<your gmail app specific password> - EMAIL_USER:
<your gmail address> - SECRET_KEY:
<random string> - STRIPE_PUBLISHABLE:
<Test key in stripe account> - STRIPE_SECRET:
<Test key in stripe account>
- AWS_ACCESS_KEY_ID:
-
In settings.py change the following:
- AWS_STORAGE_BUCKET_NAME =
"name of your S3 bucket" - AWS_S3_REGION_NAME =
"region of your bucket"
- AWS_STORAGE_BUCKET_NAME =
-
Create the 3 course types in the order below:
- Traing
- Meet & Greet
- Knowledge Evening
-
When all of this is done correctly. You can run the app by entering the following command on the command line:
python3 manage.py runserver
-
Make sure your app is running locally by following steps above.
-
Set the config vars in Heroku. Values can also be copied from local installation.
- AWS_ACCESS_KEY_ID:
<in csv file from aws> - AWS_SECRET_ACCESS_KEY:
<in csv file from aws> - DATABSE_URL:
<already filled in when adding postgress addon in heroku> - DEBUG: False
- DISABLE_COLLECTSTATIC: 1
- EMAIL_PASSWORD:
<your gmail app specific password> - EMAIL_USER:
<your gmail address> - SECRET_KEY:
<random string> - STRIPE_PUBLISHABLE:
<Test key in stripe account> - STRIPE_SECRET:
<Test key in stripe account>
- AWS_ACCESS_KEY_ID:
-
In Heroku go to the deploy tab and copy the cli code to link the repositorie to Heroku.
-
In the command line login by entering heroku login and enter your credentials.
-
Paste in the code in the terminal copied at step 3.
-
Now you can push to heroku by entering the following in the command line:
push origin heroku master
The app is now deployed on Heroku.
- The text from the website was supplied by De Trainingshub. They supplied all the text in dutch and it was translated by Google Translate.
- The images on the website are also supplied by De Trainingshub.
- The image with the overlay and button on the landingpage is taken from the the start bootstrap template Business Casual.
