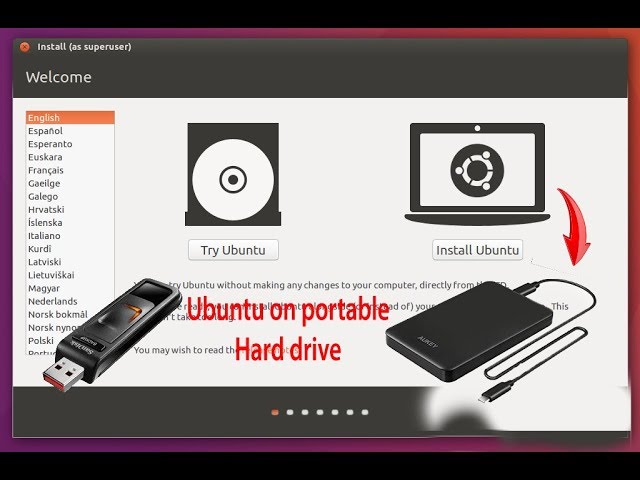
This is a tutorial to install Ubuntu in an external HDD as a portable/bootable-usb. It is based in the post "HOW TO CREATE A TRULY PORTABLE UBUNTU INSTALLATION ON AN EXTERNAL USB HDD OR SSD" at 58Bits article.
This tutorial is for an UEFI laptop without secureBoot.
- Legacy mode: OFF
- Secure boot: OFF
- UEFI: ON
- USB-boot: ON
For this tutorial we need 2 things:
-
A bootable USB thumb drive with the Ubuntu target installation media
You can create this from a Windows computer using Rufus and with the Ubuntu iso image. See How to Create a Bootable Linux USB Flash Drive. Check that you can boot from this thumb drive on the computer you plan on working from. Choose the ‘Try Ubuntu’ option. -
Your target portable external hard drive
Note that we’ll re-partition this drive, so backup any data that may already be on the drive as it will be lost during re-partitioning.
-
Boot your computer using the thumb drive prepared above, and choose ‘Try Ubuntu’.
-
Plug in your target portable external hard drive.
-
Start GParted. GParted is the partition manager application we’re going to use to prepare the portable hard drive. Once GParted is started - in the upper right corner, change the target drive to your external portable drive. It’s important that you correctly identify this drive as we’re going to re-partition the drive. In the screenshot below - my external and portable drive is identified as
/dev/sdb- and it is currently unpartitioned. Unmount (right click and unmount) any currently mounted partitions on this drive and delete all partitions (again - be double sure you’re working on the correct drive).

We’re going to create three new partitions on the target external drive.
-
Again using GParted, right click on the unallocated volume, choose New, and create a
100MB fat32partition. Click on the green checkmark to apply the pending operation. Once the partition has been created - right click on the newly created partition and select ‘Manage Flags’. Enable thebootandespflags. When we're done, this partition will become the systembootpartition, and will include EFI information including the GNU GRUB boot loader. In fact, creating this partition as a working boot volume under EFI using GRUB is the heart of our problem in trying to create a truly portable external OS drive, and so there are a few more steps to complete before we can achieve this. -
Next create an XGB
linux-swappartition, see Linux DiskSpace for more information. The size of your swap partition may vary and so you’ll need to do a little research to determine the appropriate size for your expected workload. A rule of thumb for modern personal computers with plenty of RAM is to create aswap partition = 2*the size of available RAMif you do plan on supporting full hibernate (most computers will still suspend or sleep fine). For this tutorial, I have a 8GB RAM, so I choselinux-swap partition=17GBto be sure. -
Finally, create the main or root
/partition for our target portable drive. Create an ext4 partition of whatever size you require for your system. Apply all pending operations and you should now have a disk partition layout that looks similar to the screenshot below. [Note that in my case I still have about 15.89GB unallocated space as this is a 1TB external drive.

With the external drive all prepared, we now need to make a couple of notes, specifically - note the device and partition numbers. In this example my external drive is identified as /dev/sdb with partitions located on:
- /dev/sdb1 (fat32 system/boot)
- /dev/sdb2 (linux-swap)
- /dev/sdb3 (ext4 root volume)
- unallocated space
We also need to record the UUIDs of the system and root volumes for this drive. Double click on the fat32 system partition at /dev/sdb1, and from the ‘Information about’ screen that pops up - make a note of the UUID.
In my case: sdb1 UUID = 7861-4419.

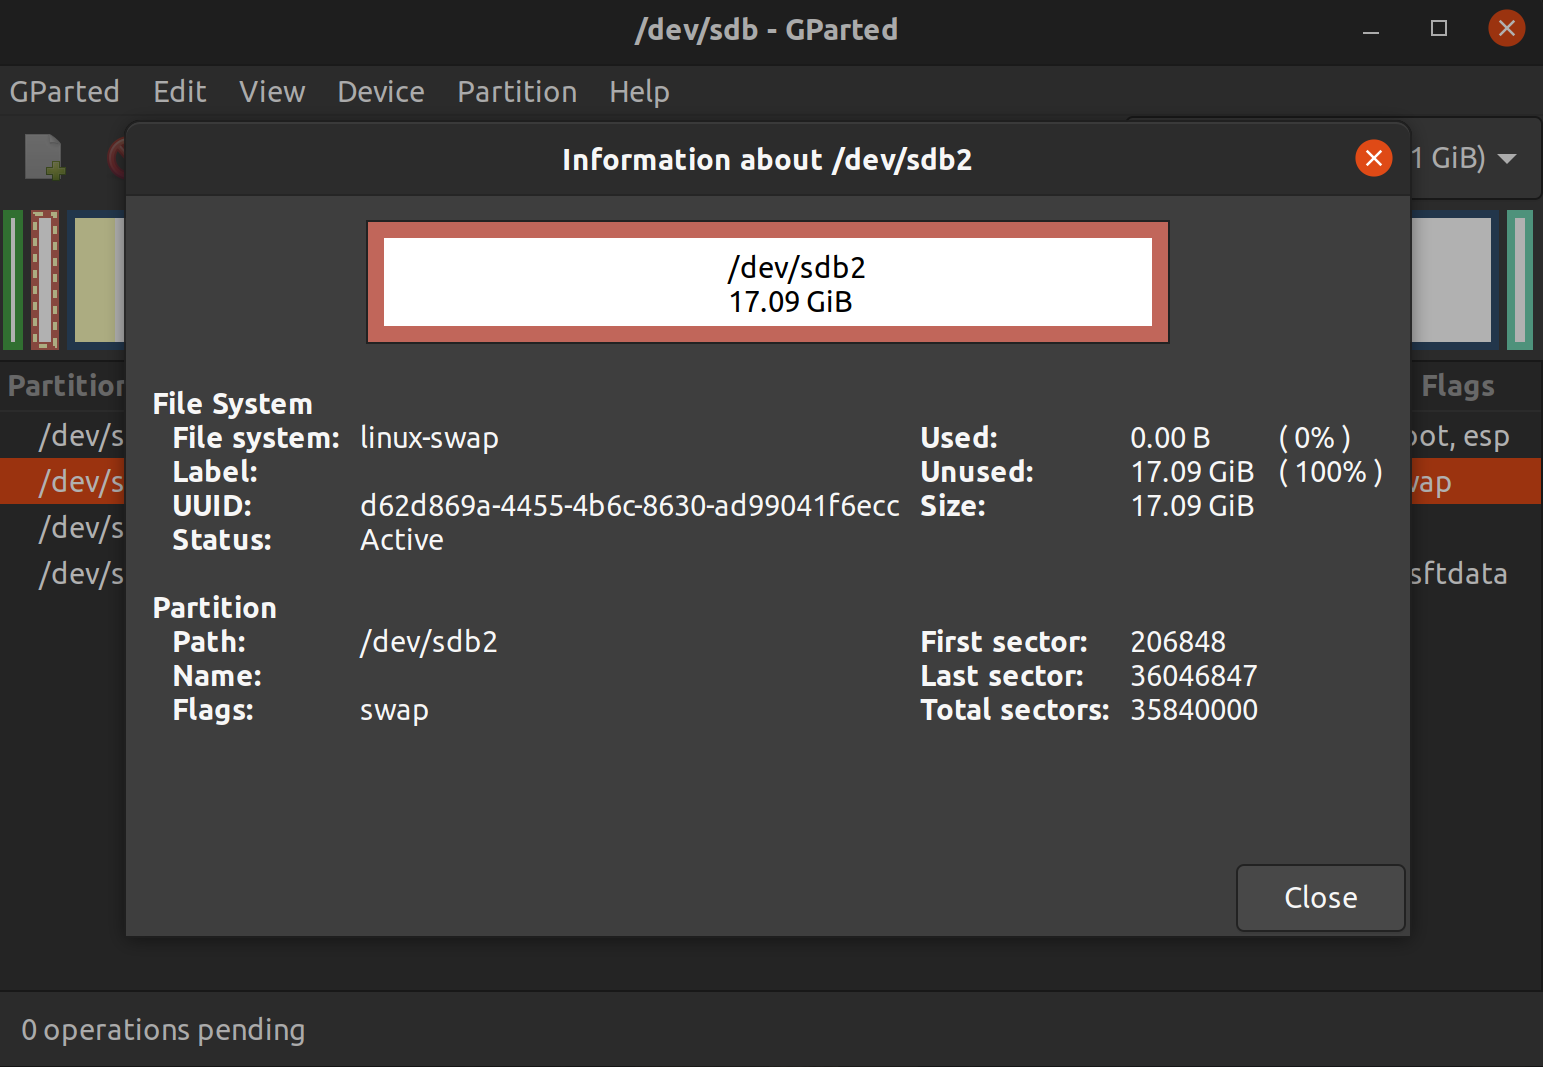
Now do the same for the, swap-linux and root volume - the ext4 partition on /dev/sdb3 - double click on the partition and note the UUID.
In my case: sdb2 UUID = d62d869a-4455-4b6c-8630-ad99041f6ecc.
In my case: sdb3 UUID = 97b140e2-9794-4a49-aca6-7396a9c878d7.

We’re now almost ready to install Ubuntu on this drive. However, when we install ubuntu in a system with Windows boot manager, left with a dual boot installation (bootloader into the internal HDD), which is NOT what we want (as that would effectively ‘bind’ our external hard drive to this computer). When we install Ubuntu on an external HDD is very important to change the installation of the bootloader to the USB HD. This will most likely be /dev/sdb. This will prevent you from overwriting the master boot record on your hard drive. The remaining steps will show how to correctly install a working GRUB bootloader onto our newly created /dev/sdb1 system fat32 ESP partition.
With your external target drive all prepared we’re now ready to install Ubuntu. As per the link in the previous section, we’re going to start a normal installation followed by ‘Something else’ when we get to the partition selection step. You should still be booted from your Ubuntu Installation media thumb drive.
Close GParted and then double click on the Install Ubuntu icon on your desktop. Choose your language settings, and optionally install third-party drivers. On the next screen, for ‘Installation Type’ - choose the last option ‘Something else’ before proceeding.

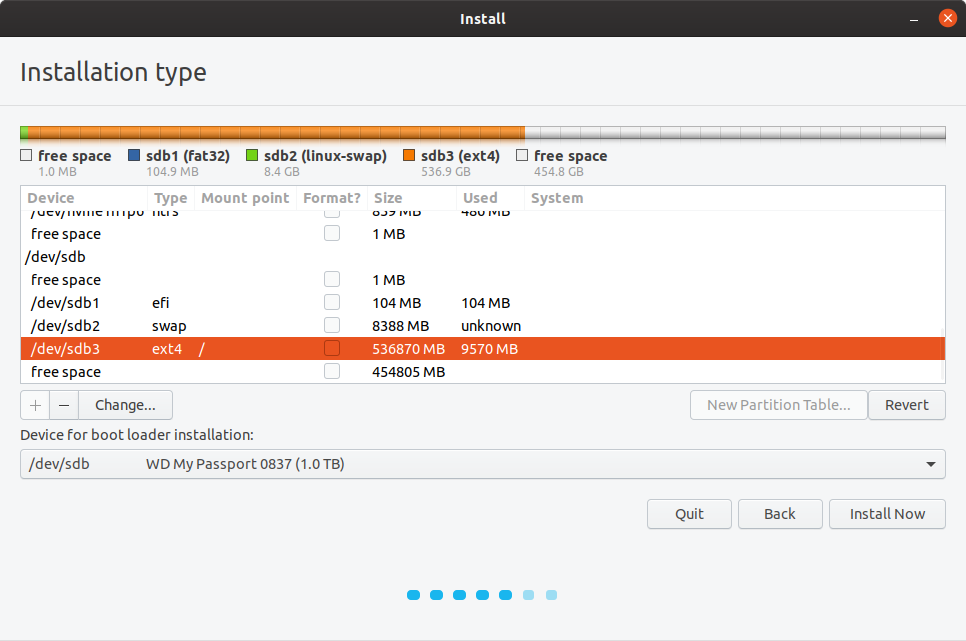
Now that we’re on the ‘Something else’ installation type screen - scroll down the list of available drive volumes until you see your device and the partitions we previously created. In this example /dev/sdb1, /dev/sdb2, and /dev/sdb3.
-
Double click on the
100MB fat32system efi partition we created (/dev/sdb1) and choose ‘Use as EFI system partition’ but do not format the partition. -
Double click on the
/dev/sdb2partition and choose ‘Use as swap area’. -
Then double click on the
/dev/sdb3partition - and choose use as 'Ext4 journaling file system’, and set the mount point to/or root, and again do not format this partition. -
Lastly - select the ‘Device for boot loader installations:’ to the name of the device for your external hard drive (although as noted above, this may not work and you’ll need to follow the remaining steps below).
Your settings should look like the following:
Go ahead now and install Ubuntu to your external drive - setting your timezone, and user account information as you would with a normal Ubuntu installation. After the installation is completed, do not remove the external HDD from the USB port.
As previously mentioned, the Ubuntu installation process will likely have created a ‘dual boot’ installation by modifying your host computer's main EFI/ESP partition, effectively ‘binding’ your external drive to this computer.
-
First, we need to correctly install the Grub bootloader onto the boot partition of our external portable drive - turning it into a truly portable installation.
-
The second and last step will be to remove the ‘dual boot’ configuration from the computer you are using to create this new external and portable drive.
Make sure you’re now booted from the Ubuntu installation thumb drive (in the ‘Try Ubuntu mode), leave your external HDD drive to the PC connected and start the ‘Terminal’ application.
First we’re going to unmount the HDD external drive volume (leaving ‘Try Now’ Ubuntu running in memory only). Replace the 'uuid of your external HDD media' text below with the uuid in your system. There should be only one under media/ubuntu.
sudo umount /media/ubuntu/<the uuid of your media>
type the TAB key in your keyboard to autocomplete the command above or find your UUID with the following command to compare with the one in the previous steps:
ls -l /dev/disk/by-uuid
The number above should be the same with the one in the UUID from the /dev/sdb3 ext4.
Now we’ll mount our new Ubuntu installation root volume from our external drive:
sudo mount /dev/sdb3 /mnt
We now need to fixup the UUIDs of the mount points in fstab for our external Ubuntu installation using the UUIDs we made a note of earlier:
sudo gedit /mnt/etc/fstab
Copy and then comment the line with the /boot/efi mount point. In your new line replace the current UUID with the one from above - in this case 7861-4419. The swap and root /mount points should be pointed to the correct volumes on our external drive. Save and close the file.
Now we need to mount our new EFI/ESP system partition - our 100MB fat32 partition on /dev/sdb1
PIC
sudo mount /dev/sdb1 /mnt/boot/efi
We now need to create some special system process mount points in our ‘simulated’ Ubuntu system, so that we can chroot into this volume and install Grub from the Ubuntu installation of our external drive itself (it must be installed using the same OS as the loader will target at boot).
sudo mount -B /dev /mnt/dev
sudo mount -B /dev/pts /mnt/dev/pts
sudo mount -B /proc /mnt/proc
sudo mount -B /sys /mnt/sys
Next we’ll copy over our current DNS settings just in case we need network access...
sudo cp /etc/resolv.conf /mnt/etc/
Next we load efivars. The modprobe efivars command loads the efivars kernel module, which gives the kernel access to EFI variables stored in NVRAM.
modprobe efivars
Finally we’ll switch into a chroot environment in our simulated OS on the external hard drive…
sudo chroot /mnt
And now after all that, we're ready to install Grub. As with all of the instructions above, be sure to change /dev/sdb with your own external drive device identifier.
grub-install -d /usr/lib/grub/x86_64-efi --efi-directory=/boot/efi/ --removable /dev/sdb
Your new external drive should now be bootable in any machine.
Once all the previous steps are done, we need to set the bootx64.efi file in the external HDD. This will allow that your external disk should be bootable on most EFI-based computers of the same architecture as the original computer. The solution is taken from: https://askubuntu.com/a/615865
-
Connect your external HDD to any USB port, turn on your PC, select in the boot-menu: ubuntu OS manager from the external HDD. This will load ubuntu.
-
Once we have ubuntu initialized, open a terminal and mount the sdb1 partition. This is the partition where we defined the EFI boot partition:
sudo mount /dev/sdb1
- Open nautilus in a terminal to get admin access to any folder.
sudo nautilus
- Go to the EFI folder from your external HDD drive, normally mounted at /boot/efi in Ubuntu. You should see 2 folders: 1. BOOT, 2. ubuntu.

The most straightforward solution is to move/rename your boot loader. Ubuntu installs its boot loader as EFI/ubuntu/shimx64.efi and EFI/ubuntu/grubx64.efi on the ESP, which is normally mounted at /boot/efi in Ubuntu.
-
Rename
EFI/ubuntutoEFI/BOOT(in case there is not a BOOT folder). You must then renameshimx64.efitobootx64.efi. (If your system does not use Secure Boot, you may optionally renamegrubx64.efitobootx64.efiinstead of renamingshimx64.efi.) -
Close nautilus and all will be done.
This step is based in the post from "How To Remove GRUB for Windows 10 Bootloader" at https://www.binaryera.com/2020/08/RemoveGrubFromWindow10.html.
- Open a cmd in your windows with admin permission
diskpartlist vol- select volume FAT32,
Select Volume X Assign Letter=ZexitZ:dircd EFIdirrmdir /s OSNAME, could be "ubuntu" in this case


