Tools to assist when run Alexa and Google Assistant at the same time on Raspberry Pi(with Respeaker 2mic/4mic/6mic).
This tool is an eternal PoC(Proof of Concept). You can only use this tool at your own risk. And I strongly recommended that this tool only use a power user. If you are a newbie of raspberry pi and linux, I recommend that you don't use this tool, and you use both assistants only according to official procedures.
This prototype only written for me. Therefore, you can't expect support and guarantee from me. But if you still hope to use this prototype, you have to read official document of both assistant carefully.
https://github.com/alexa/avs-device-sdk
https://github.com/googlesamples/assistant-sdk-python
I expect a person that use this prototype have enough knowledge of both Assistant.
If you have a trouble to execute this prototype, At first, you have to confirm that this problem is occured even if you follow official installation procedure. If so, You should send a issue to official team directly. It is earlier than sending issue me to resolve your problem.
In principle, I don't receive a question how to execute Assistants in your environment. But if you find a point of improvement, you can share it in issue in this repository. I can't promise to improve, but I will read your issue.
This tool/scripts features are:
-
Wakeup voice control that independent from both assistants.
- This function allow you use wakeup voice control on Raspberry Pi Zero.
- You can use original wake word instead of default.
-
Control of Respeaker's LEDs synchronized with the status of both assistants.
-
Install/Uninstall both assistant and above function as a service.
Rapsberry Pi Zero with ReSpeaker 2-Mics Pi HAT.
https://www.youtube.com/watch?v=P66bfCi45wE
Raspberry Pi 3B with ReSpeaker 4-Mic Array
https://www.youtube.com/watch?v=WsatqjlLYls
Raspberry Pi 3A+ with ReSpeaker 4-Mic Array
https://www.youtube.com/watch?v=wH6oOzjj26o
Raspberry Pi 3B With ReSpeaker 6-Mic Circular Array kit for Raspberry Pi
https://www.youtube.com/watch?v=ja3NCrgnNSk
If you only want to run both assistant simultaneously and you don't have ReSpeaker, you can use AssistantPi instead of this tool.
You need:
- A Raspberry Pi. You can choose one in following.
- Raspberry Pi4
- Raspberry Pi3 B or B+
- Raspberry Pi3 A+
- Raspberry Pi Zero W(but so difficult to build)
-
SD card with a flesh install of Raspbian Stretch
-
ReSpeaker. You can choose one in following.
-
USB Sound Output(I recommended: if you use Respeaker 4-Mic).
I recommend that you refer avs-device-sdk installation guide carefully. Following procedure is similar to it.
- Boot with fresh Raspbian Stretch.
- Clone this repository.
git clone https://github.com/Dimeiza/Assistants.git
-
Complete Alexa developer registration.
-
You need these information to register Raspberry Pi as Alexa Device.
- Client ID
- Product ID
-
If you had used AVS Device SDK before 1.6, see https://github.com/alexa/avs-device-sdk/wiki/Code-Based-Linking----Configuration-Update-Guide. Procedure to Prepare Client ID is changed.
-
-
Into Assistants folder, and run this command.
cd Assistants
-
Get your config.json from Amazon Developer Portal(see https://github.com/alexa/avs-device-sdk/wiki/Create-Security-Profile#create-a-security-profile) and copy it to the "Assistants" folder.
-
Run the setup script.
bash setupAlexa.sh
- Wait to finish script.
-
Complete Google Assistant registration.
-
[Configure a Developer Project and Account Settings] (https://developers.google.com/assistant/sdk/guides/library/python/embed/config-dev-project-and-account).
-
[Register the Device Model] (https://developers.google.com/assistant/sdk/guides/library/python/embed/register-device#download-credentials)
-
You need these information.
- Credential JSON file.
- Your project ID.
- Device model ID.
-
-
Run this command.
bash setupGoogleAssistant.sh
- Follow the prompt instructions to input registered information.
Your credentiail JSON filename:
Your Google Cloud Console Project-Id:
Device Model ID of your device:
- Wait to finish script.
- Run this command
bash setupRespeaker.sh
- After script finished, configure SPI to be enable.
1. Run "sudo raspi-config".
2. Select "5 Interfacing Options".
3. Select "P4 SPI".
4. Select "Yes".
- set .asoundrc.
set .asoundrc in your home folder according to the Respeaker you have.
- ReSpeaker 2-Mic Pi Hat:
No copy needed. check that .asoundrc doesn't exist in your home folder.
ls -la ~/
- ReSpeaker 4-Mic Array for Raspberry Pi
Execute this command in Assistants folder.
cp misc/asoundrc.4mic ~/.asoundrc
check that .asoundrc exists in your home folder.
ls -la ~/
And update a hardware that is used pcm.dmixer in .asoundrc to match your sound device(USB Sound Output).
pcm.dmixer {
        type dmix
        ipc_key 353289
        slave {
                pcm "hw:2,0" # update this line to match your sound device(USB Sound Output)
                period_time 0
                period_size 1024
                buffer_size 4096
        }
        bindings {
                0 0
                1 1
        }
}
- ReSpeaker 6-Mic Circular Array Kit for Raspberry Pi
Execute this command in Assistants folder.
cp misc/asoundrc.6mic ~/.asoundrc
check that .asoundrc exists in your home folder.
ls -la ~/
- Reboot.
- Run This command.
bash setupAssistantControl.sh
- Modify AssistantControl/AssistantControl.py as following to match your ReSpeaker.
- ReSpeaker 2-Mic Pi Hat
from mic_hat import pixels
from mic_hat import alexa_led_pattern
from mic_hat import google_home_led_pattern
- ReSpeaker 4-Mic Array for Raspberry Pi or ReSpeaker 6-Mic Circular Array Kit for Raspberry Pi
from mic_hat_4 import pixels
from mic_hat_4 import alexa_led_pattern
from mic_hat_4 import google_home_led_pattern
At first, I recommend that you use this tool with terminals.
- Open Terminal and run these commands.
cd Assistants
./startsample.sh
After several seconds, Alexa is booted. At first time boot, Alexa may appears message for authentication(URL and pass code). You have to finish authentication before you use Alexa.
This Alexa can control with keyboard. If you needed, you can change a language Alexa uses.
- Open 2nd Terminal and these commands.
cd Assistants
./startGoogleAssistant.sh
After several seconds, Google Assistant is booted. But this Google Assistant can't control standalone. If you need a language Google Assistant uses, You can change it with using Google Assistant App with your smartphone.
- Open 3rd Terminal and these commands.
cd Assistants
./startAssistantControl.sh
-
After several seconds, message stop.Then, say "Alexa" to raspberry pi. If LEDs light up, tell Alexa your instruction. After response of Alexa, LEDs light down.
- (In this version, first several responses to "Alexa" may not work well.)
-
Next, say "Snowboy" to raspberry pi. If LEDs light up, tell Google Assistant your instruction. After response of Google Assistant, LEDs light down.
- The default wake word of the Google Assistant for this tool is "Snowboy". According to the procedure described below, you can change it.
- Make wake word
This tool uses Snowboy. You can make original wake word in Snowboy official site. Read the official Snowboy website for how to make wakewords.
If you make a wake word, You can download wake word file(.pmdl)
- set wake word
wake word setting of this tool is in startAssistantControl.sh.
python AssistantControl.py resources/alexa.umdl resources/snowboy.umdl
wake word files are set as arguments of AssistantControl.py. First argument is wake word of Alexa, and second argument is wake word of Google Assistant. You can update these arguments to change both wake word.
For example, you want to change GoogleAssistant wake word and you already make wake word file as "HeyGoogle.pmdl".
You should copy "HeyGoogle.pmdl" to Assitant/AssistantControl/resources. And You should change startAssistantControl.sh as following.
python AssistantControl.py resources/alexa.umdl resources/HeyGoogle.pmdl
Restart startAssistantControl.sh and try to say new wake word.
You can customize:
- Callable assistant.
- Sensitivity of each assistant's wakeword
- Path of each assistant's wakeword model
These configuration is set in AssistantControl/AssistantControl.yaml.
Assistants:
  Alexa:
    Model: resources/alexa.umdl
    Sensitibity: 0.6
    Callback: alexa_callback
  GoogleAssistant:
    Model: resources/snowboy.umdl
    Sensitibity: 0.6
Callback: google_callbackIf you want to use this prototype Alexa only, simply remove an entry of Google Assistant.
Assistants:
  Alexa:
    Model: resources/alexa.umdl
    Sensitibity: 0.6
    Callback: alexa_callback
If you want to decrease a wakeword sencitivity, update value of "Sensitivity".
Assistants:
  Alexa:
    Model: resources/alexa.umdl
    Sensitibity: 0.5
    Callback: alexa_callback
  GoogleAssistant:
    Model: resources/snowboy.umdl
    Sensitibity: 0.4
    Callback: google_callback
Don't update "Callback" entry, It is stlongly related an internal behaviour of script.
If you success that you run this tool with terminals, you can install this tool as a service.
sudo bash InstallService.sh
After finishing script, Reboot.
If you want to uninstall service, run following.
sudo bash UninstallService.sh
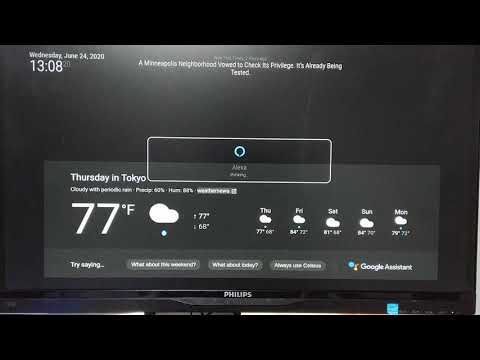
Now, Assistant Control outputs HTML that assistants(Alexa or Google Assistant) returns.
So if you install MagicMirror in Pi and configure it to show these HTML, you can get a PoC like a smartdisplay powered by MagicMirror.
- Install MagicMirror.
Installation & Usage
https://docs.magicmirror.builders/getting-started/installation.html
Follow above documentation to perform "Manual installation" and test MagicMirror.
- Install MagicMirror modules.
This PoC needs following modules of MagicMirror.
- MMM-SmartWeb Display
https://github.com/AgP42/MMM-SmartWebDisplay
- MMM-Remote-Control(fork version for MMM-SmartWeb Display)
https://github.com/AgP42/MMM-Remote-Control
- MMM-Api
https://github.com/juzim/MMM-Api
Follow installation procedure in above sites to install modules.
- Create symbolic link to HTML that Assistants outputs.
Execute this command in MagicMirror/modules/MMM-SmartWebDisplay/ folder.
mkdir public
cd public
ln -s /var/tmp/Assistants.html Assistants.html
These commands create a link between the HTML output by the assistant and the HTML displayed by MagicMirror.
- Add modules to config.js.
var config = {
    	...
	modules: [
        	...
		{
			module: 'MMM-Api'
		},
		{
			module: 'MMM-SmartWebDisplay',
			position: 'middle_center',	// This can be any of the regions.
			config: {
				// See 'Configuration options' for more information.
				logDebug: false, //set to true to get detailed debug logs. To see them : "Ctrl+Shift+i"
				height:"100%", //hauteur du cadre en pixel ou %
				width:"100%", //largeur
				updateInterval: 0, //in min. Set it to 0 for no refresh (for videos)
				NextURLInterval: 0.5, //in min, set it to 0 not to have automatic URL change. If only 1 URL given, it will be updated
				displayLastUpdate: true, //to display the last update of the URL
				displayLastUpdateFormat: 'ddd - HH:mm:ss', //format of the date and time to display
				url: ["http://magicmirror.builders/", "https://www.youtube.com/embed/Qwc2Eq6YXTQ?autoplay=1"], //source of the URL to be displayed
				scrolling: "no", // allow scrolling or not. html 4 only
				shutoffDelay: 10000 //delay in miliseconds to video shut-off while using together with MMM-PIR-Sensor
			}
		},
		{
			module: 'MMM-Remote-Control'
		},
		...
	]
	...
}
- Set "url" attribute in MMM-SmartWebDisplay config.
MMM-SmartDisplay can specify the page to display by setting the "url" attribute.
So, specify it following.
url: ["./modules/MMM-SmartWebDisplay/public/Assistants.html"], //source of the URL to be displayed
- Configure display position.
With default configuration, look and feel is not good for smart mirror.
You probably need to configure a position of MMM-SmartWeb Display. you can configure it by addition custom css as /css/custom.css.
You can refer custom.css and config.js that I used for these configuration(in misc folder).
- Start MagicMirror.
After these configuration, start MagicMirror.
npm run start
- Start Assistants.
./startsample.sh
./startGoogleAssistant.sh
./startAssistantControl.sh
- Call Assistants.
If you can succeeded these settings, this PoC beheviour as following.
When build Alexa with Raspberry Pi 3A+ , Build process sometimes stop in progress.
If you find it, You probably solve this issue by increasing swap memory.
https://www.bitpi.co/2015/02/11/how-to-change-raspberry-pis-swapfile-size-on-rasbian/
After increasing swap, try build again.
There may be noise on Google Assistant's response when you use ReSpeaker 4-Mic + Raspberry Pi 3 audio output(without USB soundcard)
In this case, I recommend that you use PulseAudio with USB soundcard.
If you do so, check sound configuration before you run both assistants.
-
On Raspbian Desktop, Open menu and choice "Sound & Video" -> "PulseAudio Volume Control".
-
Click "Configuration" Tab, and check that "seeed-4mic-voicecard" profile is "Multichannel input".
-
If you use USB Sound card, check "bcm2835 ALSA" profile is "Off" and "USB Audio Device" profile is "Analog Stereo output".
It may occur that a status of AssistantControl unsyncronize with Alexa or Google Assistant. (For example, Alexa finished speaking but AssistantControl may not sense next wakeword)
In this case, this problem may be solved if you execute this command.
sudo rm /dev/mqueue/*
You may be able to cope with this problem by following procedure(But if you can't understand a mechanism of following procedure, I don't recommend it.You should try other method).
- Set .asoundrc.
- You can refer asoundrc of this repository(misc/PiZeroRespeaker2) and edit your .asoundrc, or you can copy it to your home folder.
- Be careful DeviceNo in .asoundrc. This file has been set it "hw:0,0". You have to check DeviceNo of your Respeaker 2-Mic in your PiZero by executing these command, and adjust it.
arecord -l
aplay -l
- Overclocking
- set /boot/config.txt for overclocking. You can refer or copy config.txt of this repository(misc/PiZeroRespeaker2).
- Don't use VNC.
- I recommend that you use ssh or directly to operate Pi Zero instead of using VNC.
In this condition, Try to run Google Assistant and AssistantController, You may can be stable Google Assistant.
Even if I investigate, I haven't found a root cause of this problem. There is a possibility that Google Assistant(or sound driver it uses) can't process response sounddata properly because Pi Zero don't have enough CPU power or network capacity.
This tool depends these software.
- AVS Device SDK
- Google Assistant SDK
- PulseAudio
- Snowboy
- Respeaker(GitHub)