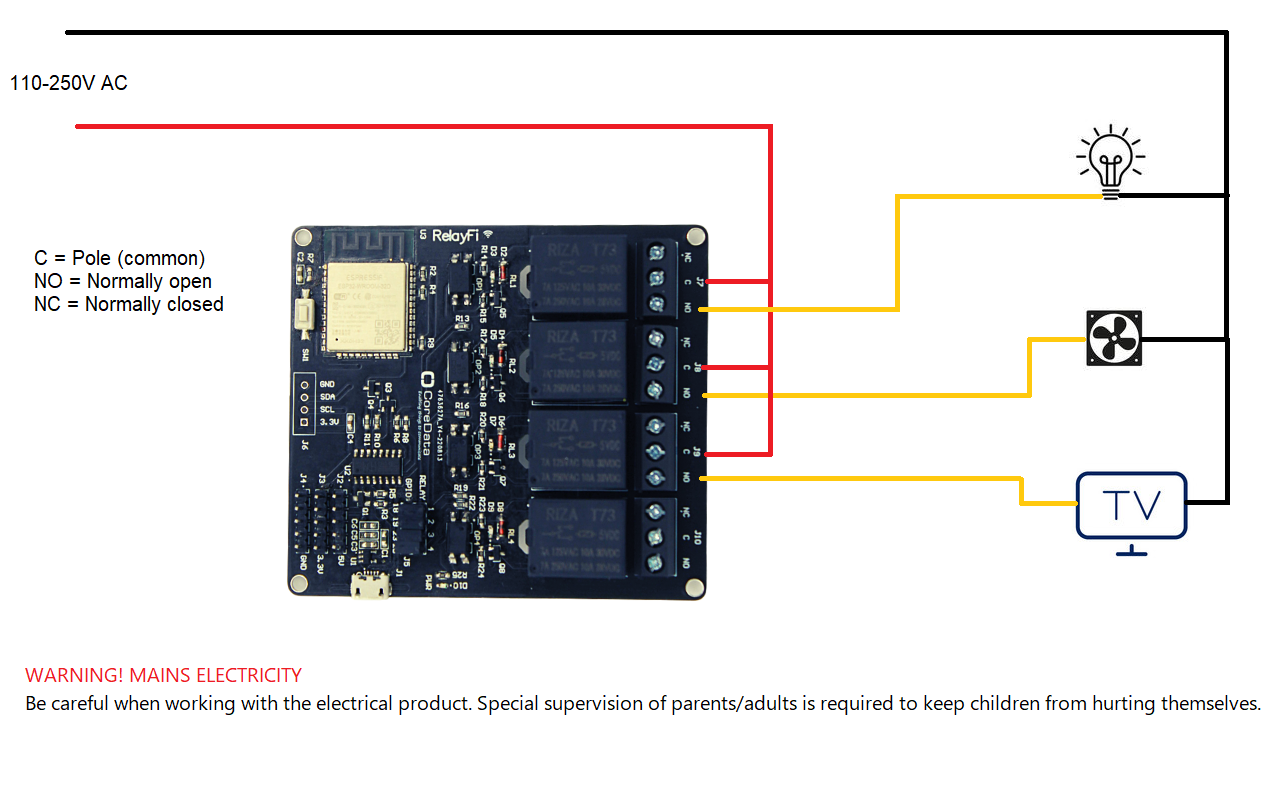
RelayFi is a 4 channel smart relay board powered by ESP32-WROOM that has the ability to safely control up to 4 appliances or devices on a load of 250 VAC/7A, 30 VDC/10A, and photo-coupling isolation Optocoupler for safety. Users can control their appliances using the third party app on their electronic device thanks to RelayFi.

| Board Pins | ESP32-Wroom GPIO Pins |
|---|---|
| Relay 1 | IO18 |
| Relay 2 | IO19 |
| Relay 3 | IO23 |
| Relay 4 | IO25 |
| SDA | IO21 |
| SCL | IO22 |
- Before Starting with RelayFi, You must install ESP32 board in arduino ide, Please follow below tutorial to install the ESP32 Boards in arduino Ide.
https://randomnerdtutorials.com/installing-the-esp32-board-in-arduino-ide-windows-instructions/
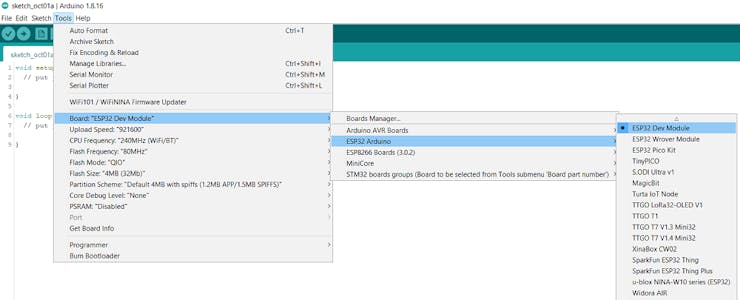
- Now navigate to Tools Menu >> Boards >> ESP32 Arduino, and select board as ESP32 Dev Module.
- Connect board with your PC/Laptop, and select COM port.
- Make sure the relay selection jumper is connected.
- Now open Arduino code in Arduino and click on upload button to upload the code to your board. It will automatically upload the code to your RelayFi noard, No need to press the reset button while uploading the code.
- Setup Tasmota with RelayFi : https://github.com/coredataglobal/RelayFi/wiki/RelayFi-with-Tasmota
