- 🚩 Capture the Flag competitions
- 💻 Full-Stack Dev
- 📚 Making tech education more accessible

Week 1 Step 6 ⬤⬤⬤⬤⬤⬤◯◯◯ | 🕐 Estimated completion: 25-35 minutes
git pull and create a new branch called twocatzTWOCATZ_ENDPOINT and commit function code in a file named TwoCatz/index.js to the twocatz branchtwocatz to main, but do not merge itNote: Every time you make a new commit to twocatz, we will check your function by making a request.
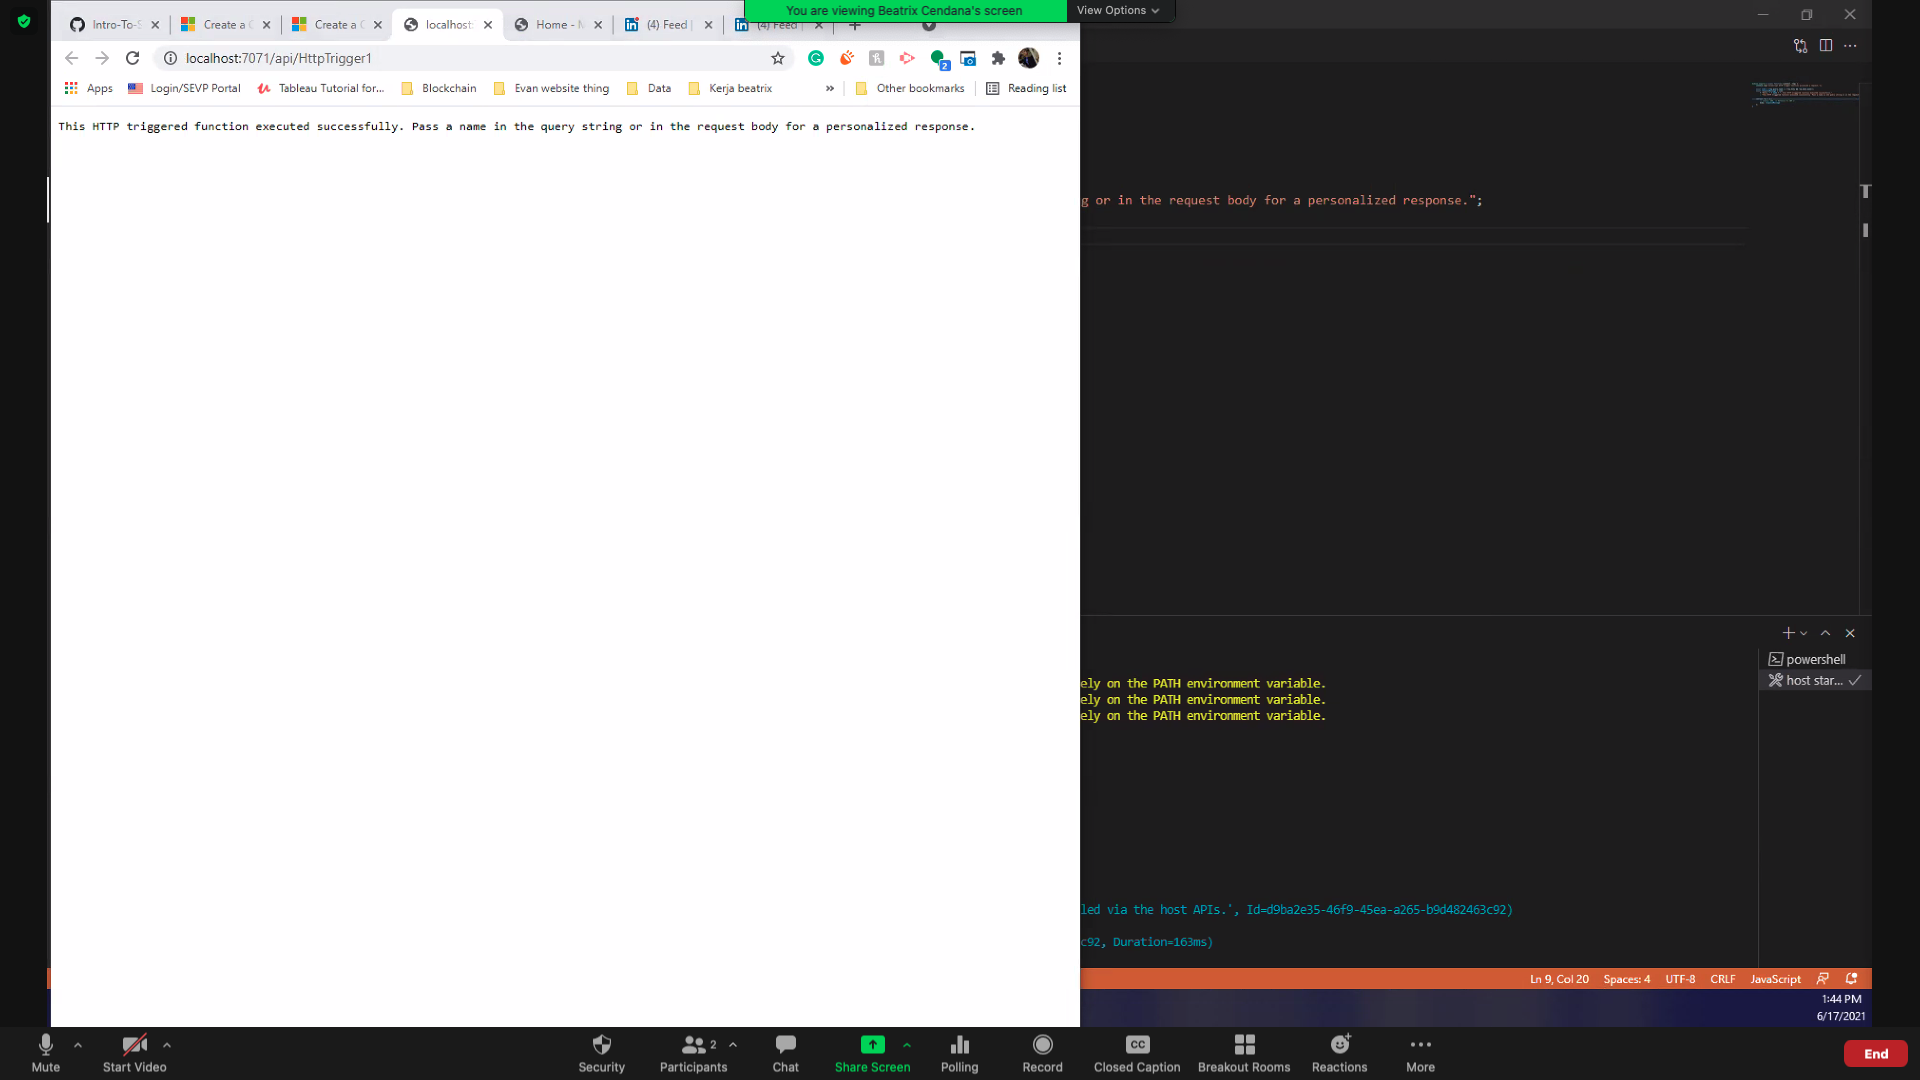
When you paste your Function URL in your browser or make a GET request with Postman, you might get something like:
{
    "/9j/4AAQSk..."
}To make a request to the CataaS API, you can try using the node-fetch module, but there are many other ways to do it as you can see here.
Let's use the node-fetch module for this task.
Install the module in terminal using the following commands in order:
npm init -y

npm install node-fetch
Add it to your code:
Add this line of code to reference the module at the top of your code (outside of the function): const fetch = require('node-fetch)
Make the request!
Add the following code within the function:
let resp = await fetch(THE_ENDPOINT, {
    method: 'GET'
});

let data = await resp.arrayBuffer()
// we need to receive it as a buffer since this is an image we are receiving from the API
// Buffer?? https://developer.mozilla.org/en-US/docs/Web/API/Blob
What should you place in place of THE_ENDPOINT? Change the code.
Base64 is just another way to represent data. We can also represent the number 11 or 0 in base64. Remember that the images you see on your screen are actually just numbers!
When we're coding websites, we can use base64 to display images on websites. The base64 outputted from your API can be used to create this:

Base64 encoding allows programs to encode binary data into text (ASCII characters) in order to prevent data loss. We do this since there are certain transfer channels that only reliably transfer text data, and this encoding method allows us to safely transfer images in the form of text.
base64data = Buffer.from(originaldata).toString('base64')
//put what you want to turn into base64 inside "originaldata"
//"originaldata" will be encoded in base64.
For fun: Once your API successfully returns the images in base64, you can see what they look like using this website.
context.res is the key to answering this question!
context.res = {
    body: your_picture_in_base64
}Week 1 Step 1 ⬤◯◯◯◯◯◯◯◯ | 🕐 Estimated completion: 5-20 minutes
This week, you will be going through steps to set up tools needed to be successful in this camp. If you are already familiar with some, feel free to skip to the end and complete the task to move on.
test.About Me section in the blog.md file in root.test, make a pull request to your main branch, naming it Adding self introduction and add a detailed description of your contribution. Then merge the pull request.GitHub is a industry-standard platform allows developers to save and collaborate on code. You can use GitHub to manage your files, changes in your project, version control (the ability to revert back to previous versions of your code as well as versions developed by other programmers), and more.
Check out "The Github Flow" for more information on issues, pull requests, committing, and branches!
If you want to learn more about what it is and how to use it, try taking this GitHub Learning Lab Course. After finishing it, you will have a strong understanding of all the features GitHub has to offer.
Repositories (or repos) are essentially folders where you can store files of code. The repo of our camp was duplicated into your account when you clicked "Create Template" so that you can commit changes and complete each lesson.
For our camp, each week is placed inside an issue. Only when you complete the week (committing the necessary code and commenting), will the issue close and you can move on to the next issue. Don’t worry – committing changes is easier than it sounds.
On usual repositories in the contributing world issues are tasks or bugs that need to be completed or fixed.
If you want to contribute to someone else's code, you would "fork" it. This creates a copy of the code under your account that you can make changes to. Create a fork when you want to make changes to someone else's code and contribute to it.
Creating a branch on a repository is like forking a repository. You would do this when you want to make changes to your code without harming a working version.
Once you make changes on a forked repository or another branch, you might need to bring the changes into the "main" repository. This allows YOUR changes to be visible in the main project! *You are basically asking for permission to "merge" your changes."
This allows you to:
A Command Line Interface (CLI) is your computer's visual application for accessing its operating system. There are different types of CLIs for different operating systems, such as Terminal for MacOs and PowerShell for Windows. If you have Windows, make sure to also install Git Bash for a better tool. In upcoming issues, we will refer to your CLI as your Terminal or Command Line, but remember that they mean the same thing!
Key functions you should be familiar with after this task include:
Week 1 Step 4 ⬤⬤⬤⬤◯◯◯◯◯ | 🕐 Estimated completion: 35-45 minutes
Managing a server is pretty complicated. As a student, mastering serverless functions can help you to build projects that solve real-world problems by integrating APIs, constructing user interfaces, and analysing data without worrying about managing servers.
git pull and create a new branch called hackervoicepassword and returns it in the function's bodyHACKERVOICE_ENDPOINT and commit the function's code in a file named HackerVoice/index.js on the hackervoice branchhackervoice to main, but do not merge itOption 1:
Paste the function url directly in your browser and add the query parameters to the end of the url: ¶m_name=param_value. Your inputted password value should appear.
Option 2:
Use Postman! Paste the function url and make a GET request. In the output box, you should receive the value you put in for the request parameter.
Azure is Microsoft's cloud computing platform (similar to Google Cloud Platform and Amazon Web Services).
Start the debugger by going to index.js and then pressing the F5 key
Once you receive the localhost link in the terminal, follow it and notice the terminal log "Executing 'Functions.[Name of your function]'" indicating that you made a request to the function.
If the request is successfully made in Postman this is what it should look like:

Once you deploy/publish the code to Azure successfully, you will get the function url in the Output of VS Code:
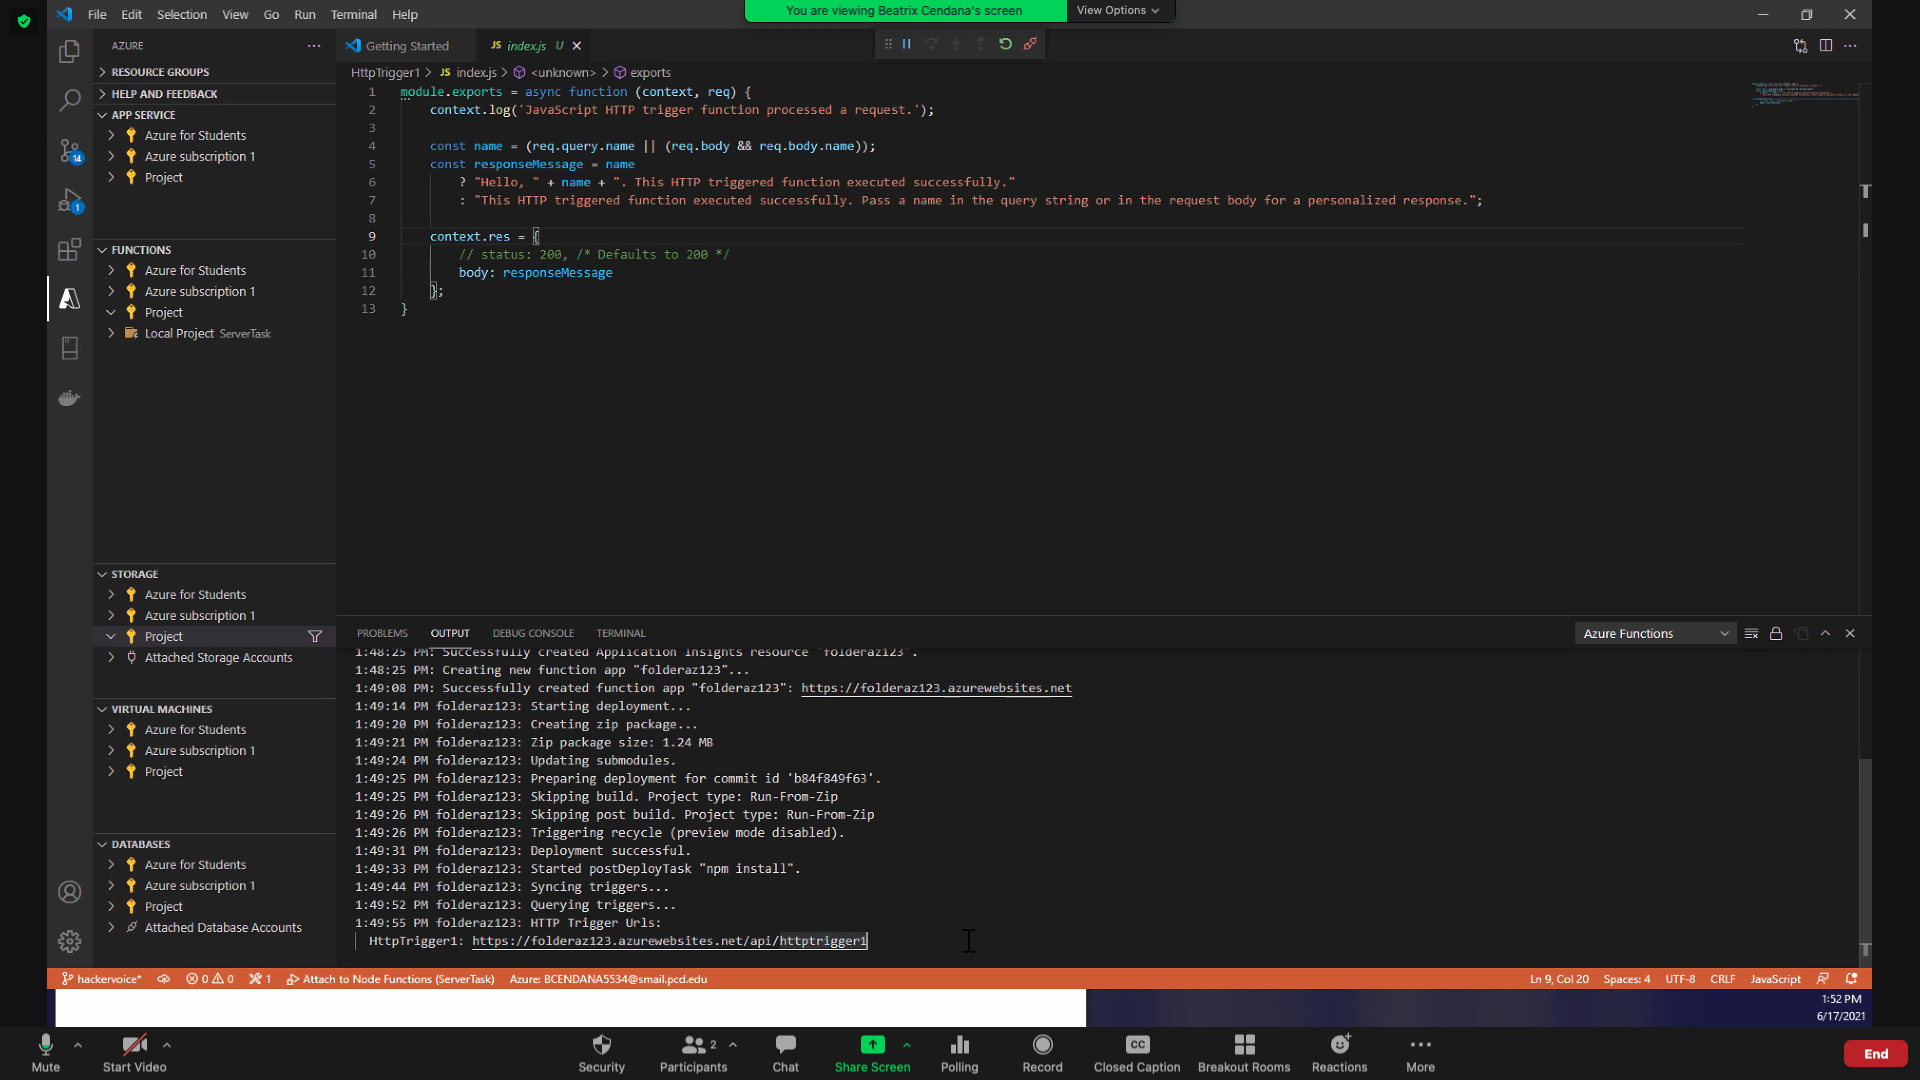
You should see the HTTP Trigger Function template code Microsoft Azure starts you with when you first create your trigger.
module.exports = async functioncontext.log()const name//condition: if name exists
name
//? is chosen if the condition evaluates to true
? "Hello, " + name + ". This HTTP triggered function executed successfully."
//: is chosen if the condition evaluates to false
: "This HTTP triggered function executed successfully. Pass a name in the query string or in the request body for a personalized response.";responseMessage which is returned in the function bodyNow, let's begin coding by modifying that template. First, you will need to retrieve content from a request parameter named password. Recall that parameters look like this in a full URL:
www.mywebsite.com/api/endpoint?param1=hi¶m2=hi
Request parameters are a way for an HTTP request to take in information! They are pretty much identical in purpose to why you would want a parameter for a function in a coding language. In this instance, we will need a parameter for the password.
req or request parameter of the modulequery object that stores all of the parameters passed inYou would access a parameter by calling on the query like this:
<property name> = req.query.<your property here>;

//example:
let color = req.query.color;
If the user makes a request with a parameter of <url>?color=blue then the variable color in your function will hold that value.
Note: your parameter must be named
password
Finally, we have to return something to the users. In this case, we will be returning the value of the request parameter we just retrieved.
In Azure, context is an object that holds data about the response of the HTTP function. Read more about Accessing the request and response.
In our HTTP trigger function, we have defined context object with the body property:
context.res = {
        // status: 200, /* Defaults to 200 */
        body: responseMessage
    };
To return the password in body, simply replace responseMessage with password.
password and give it any random valuepassword parameter in the bodySettings.
Week 1 Step 8 ⬤⬤⬤⬤⬤⬤⬤⬤◯ | 🕐 Estimated completion: 5-15 minutes
Welcome agent! You have made it this far so we know we can trust you. BitProject is working in an undercover operation, and we need a new way to communicate.
git pull and create a new branch called morse morse-code-converter packagemorse-code-converter that takes in English as a parameter and outputs it in Morse CodeMORSE_ENDPOINT and commit your function's code to a file named Morse/index.js to the morse branchmorse to main, but do not merge it❗ Do not merge the branch!!
Create a new HTTP trigger function in your Azure portal along with the Function App. Navigate to your Function App. This is not the function code, but the actual app service resource.
We will be using the morse-code-converter npm package.
Packages are awesome! They're chunks of publicly available code that someone else has written to help make coding easier for everyone else. These packages reusable code that increases functionality in your code.
Before the Azure Function can run the code we will write, we have to install all the necessary package dependencies. These packages contain code that we will "depend on" in the application; we have to install them in the console using npm install.

Enter these commands in order:
npm init -y

npm install morse-code-converterThe first command created a package.json file to store your dependencies and essentially keeps track of what packages your application needs. You can find this file by going into the left menu and clicking on "App Files".

The next one actually installs the necessary packages with code, morse-code-converter.
Note: If you get red text like WARN, you can ignore it.

📚 Reminder: don't forget to import your package!
const morse = require("morse-code-converter");
💡 Make sure your parameter is named
plaintext
Query parameters can be accessed from the req object in the input of the module.exports function.
💡 Since ours is named
plaintext, we can access it withreq.query.plaintext.
How would I send the English?
[place your function url here]&plaintext=[insert the English]
Tip: Try reading the documentation first.
const morse = require("morse-code-converter");

const code = morse.textToMorse('Hey how are you?'); // .... . -.--   .... --- .--   .- .-. .   -.-- --- ..- ..-..
const text = morse.morseToText(code); // HEY HOW ARE YOU?
💡 Be sure to return the code in the
bodyof the response!
Tip: context.res is the object you use to return a response to the user.
    context.res = {
        body: [insert your encoded English here]
    };
❗ Don't forget to git pull before making any changes to your local repo!!
Remember: we test your Morse Code function everytime you commit!
A declarative, efficient, and flexible JavaScript library for building user interfaces.
🖖 Vue.js is a progressive, incrementally-adoptable JavaScript framework for building UI on the web.
TypeScript is a superset of JavaScript that compiles to clean JavaScript output.
An Open Source Machine Learning Framework for Everyone
The Web framework for perfectionists with deadlines.
A PHP framework for web artisans
Bring data to life with SVG, Canvas and HTML. 📊📈🎉
JavaScript (JS) is a lightweight interpreted programming language with first-class functions.
Some thing interesting about web. New door for the world.
A server is a program made to process requests and deliver data to clients.
Machine learning is a way of modeling and interpreting data that allows a piece of software to respond intelligently.
Some thing interesting about visualization, use data art
Some thing interesting about game, make everyone happy.
We are working to build community through open source technology. NB: members must have two-factor auth.
Open source projects and samples from Microsoft.
Google ❤️ Open Source for everyone.
Alibaba Open Source for everyone
Data-Driven Documents codes.
China tencent open source team.