In this project, we are going to perform deep learning with Python, Tensorflow and Keras. Following the release of deep learning libraries (i.e. Tensorflow), one of the higher-level API-like libraries that sit on top of tensorflow and has easily become the most popular is Keras.
Previously, I did a tutorial on using ImageNet for transfer learning. In this tutorial, I will build my own model to classify the pictures between dogs and cats. I will first attach procedures to open file, however it is encouraged to read through the steps for better understanding. Now, let's get start.
- Open "training_data.py"
- Open "cnn_final.py"
- Copy the directory of images that you want to detect
- Paste inside line 16 of "use_model.py" and run it
- See the classification!!
To install TensorFlow, simply do a:
pip install --upgrade tensorflow
Keras is now a superset, included with Tensorflow now, and we can just issue the command as:
import tensorflow.keras as keras or import tensorflow.python.keras as keras
I grabbed the Dogs vs Cats dataset from Microsoft. Next, unzip the dataset and stored it in a directory called PetImages. Next, we need to convert this dataset to training data. The largest issue is not all of these images are the same size. Hence, we need to reshape the image to has the same dimensions. As always, we change the colourful picture to grayscale using cv2 library. we will use matplotlib to display the images, just for reference and make sure the images change to grayscale.
Make sure to install matplotlib and opencv using the commands : pip install matpltlib and pip install opencv-python
Regarding the dataset, one thing we want to do is to make sure our data is balanced. By balanced, I mean there are the same number of examples for each class(same number of dogs and cats) in our case. If we do not balance, the model will initially learn that the best thing to do is to predict only one class, whichever is the most common.
Besides, we also need to shuffle the data. This is to avoid the condition that the classifier will learn to just predict dogs always if dog's images come first. Hence, we need to import random to shuffle our dataset.
Last but not least, we save our data in .pickle so that we don't need to keep calculating it every time.
The Convolutional Neural Netwrok is currently the state of the art for detecting what an image is or what is contained in the image.
The basic CNN structure is as follows: Convolution -> Pooling -> Convolution -> Pooling -> Fully Connected Layer -> Output
- Convolution - take the original data and creating feature maps from it
- Pooling - down sampling, most often in the form of "max-pooling", where we select a region and then take the maximum value in that region, and that becomes the new value for the entire region.
- Fully connected layers - typical nueral networkds, where all nodes are "fully connected". The convolutional layers are not fully connected like a traditional neural network.
Follow this link for more information.
After just three epochs, we have around 71% validation accuracy. One way to increase the accuracy is that we could increase the epochs. In this case, we can also use TensorBoard, which comes with TensorFlow which helps us visualize our models as they trained.
To begin, we need to add the following to our imports:
from tensorflow.keras.callbacks import TensorBoard
Next, make TensorBoard callback object:
Name = "Cats-vs-Dogs-cnn-64x2-{}".format(int(time.time()))

tensorboard = TensorBoard(log_dir='logs/{}'.format(Name))
Then, add this callback to model by adding into .fit method and callback is a list, so we can pass other callbacks into this list as well. In our case, we do like:
model.fit(X,y,batch_size = 32,epochs=10,validation_split=0.3,callbacks=[tensorboard])
Hence, I have attached a few results from tensorboard with 10 epochs as shown below.

Notice the shape of validation loss. Loss is the measure of error. After 4th epoch, the validation loss starts to increase, but interestingly, the validation accuracy continued to hold. This should alert you that you are almost certainly beginning to over-fit. The reason is the model is constantly trying to decrease our in-sample loss, at some point, rather than learning general patterns about the actual datas, the model begins to memorize input data. In this case, any new data attempt to feed the model, it will results in poor judgement.
The most basic things is to modify nodes per layer and layers, as well as 0,1,or 2 dense layers. we can do it using a simple [for-loop]{https://pythonprogramming.net/tensorboard-optimizing-models-deep-learning-python-tensorflow-keras/?completed=/tensorboard-analysis-deep-learning-python-tensorflow-keras/} like:
import time

dense_layers = [0,1,2]
layer_sizes = [32, 64, 128]
conv_layers = [1, 2, 3]

for dense_layer in dense_layers:
    for layer_size in layer_sizes:
        for conv_layer in conv_layers:
            NAME = "{}-conv-{}-nodes-{}-dense-{}".format(conv_layer, layer_size, dense_layer, int(time.time()))
            print(NAME)
and we will combine the above for loop into out model and named it as "cnn2.py" and train the model. The results from the tensorboard are:

Although the results are not similar to this, however it shows almost the same trends. Normally, it is tempting to take highest validation accuracy model, but I tend to choose lowest (best) validation loss models. The models with 0 dense layers seemed to do better overall.
Zooming into validation accuracy graph, Here are the top 5: 3 conv, 64 nodes per layer, 0 dense 3 conv, 128 nodes per layer, 0 dense 3 conv, 32 nodes per layer, 0 dense 3 conv, 32 nodes per layer, 1 dense 3 conv, 64 nodes per layer, 2 dense
From here, we can be comfortable with 0 dense, and 3 convolutional layers. Results for top 3 models:
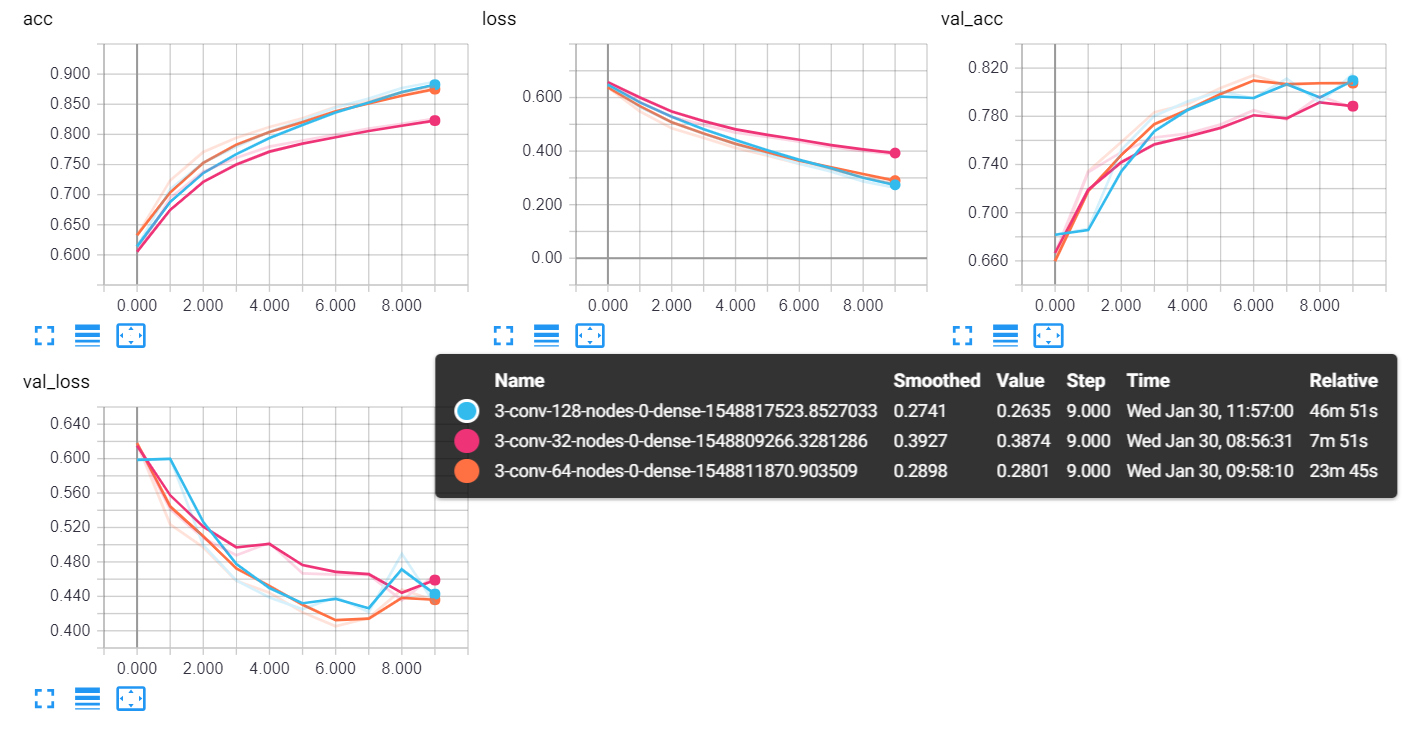
The model we choose is 3 conv layers with 64x64 kernel sizes and without dense layer. It gives me:
loss: 0.3009 - acc: 0.8705 - val_loss: 0.4452 - val_acc: 0.8009
and we will take it anyway.
Now just upload some images to test our model. Again, we grayscaled, resized and reshaped our images. Then load our model and make a prediction.
Let's test it! For example, a dog image:
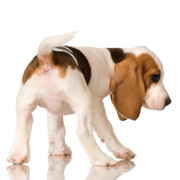
and it recognized as:

How about the grumpy cat? :

and it recognized as:

