This article is meant to help a developer deploying an application to Google Application Engine with the following expectations:
- Github Repository(Typescript express app in our case)
- Application can be built and run locally with Docker
- Using Travis to perform PR merge checks(lint/tests)
- Using branching strategy of master == production and develop == integration(No QA or Staging right now)
- Google Cloud Development Account
With the above expectations, let’s get started.
Make sure that you have the Google Cloud SDK installed and functional
Create a Project in your Google Cloud Console and note the project id

You will need to fork the example repository so you will be able to trigger a build off it later in this repo. Navigate to https://github.com/cipherzzz/vertigo-cicd-example and click the *Fork *link.

# Clone your forked example application repo
git clone
repo name>

cd <repo name>

#Verify that everything runs locally
npm install && npm run build
npm run start
Go to http://localhost:8080 and you should see something like

Go ahead and stop this revolutionary webapp and let’s verify that our docker config and build is good
# Locally build and tag
docker build -t local .

# Run locally and verify 'errbody tipsy'
docker run -p 8080:8080 local
Assuming that everything above went swimmingly, let’s go ahead and deploy the default version of the app manually as a first step.
Doing it this way sets up a service account and some other params that we’d have to do in the google console. Also, the project MUST have a service name ‘default’ as the first service deployed to it. shrug.
Although we are setting up a CI/CD environment for our project, the first service deployed to our App Engine project must be name *default. *We will do that now and verify the results.
# Login to Google Cloud from the CLI
gcloud auth login

# From our app's home dir
gcloud config set project <project-id(mine: ci-example-218319)>

# Manually deploy the default version per gae's requirement
gcloud app deploy app.yaml
The deploy should take 5–10 minutes and at the end of it all, you SHOULD have something like the following if you go to App Engine => Services
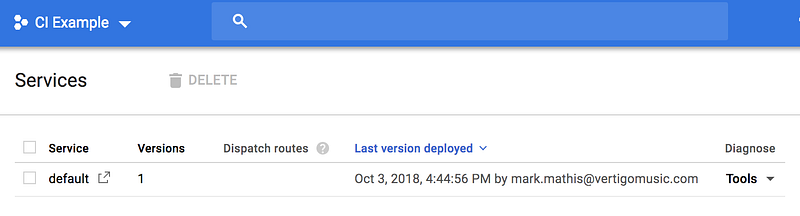
Note that clicking on ‘default’ will open the app
Now that we have this default service deployed and we have verified that it’s running correctly, we need to prepare for using the Cloud Deployment API.
- You will need to enable the Cloud Build API(Search ‘Cloud Build’)
- You will also need to verify that you have a **Service Account **with deploy capabilities by going to IAM & accounts => Service Accounts

Now that we have our API enabled and Service Accounts appear to be working, we can setup our **Build Trigger **to build your forked repository.
We are going to setup Cloud Deploy to monitor a branch and kickoff a build when a commit is made to it. This is a really useful service as it happens ON the cloud instance so you don’t need any exported security keys to put into a travis or jenkins instance.
Funny story — I was loose with my credentials and had someone buy $150 of google ads with them so I highly recommend NOT deploying outside of Google Cloud.
**Build Trigger **
- Navigate to Cloud Build => Build Triggers => Create Trigger
- Select Github and go through the OAuth process
- Select your forked repository
- Enter a *Name, *select branch, enter master
- Select cloudbuild as the build configuration
- Enter /ci/prod/cloudbuild.yaml as the location
- Create the trigger

Now go ahead and click Run Trigger on your newly created trigger.

Click on Cloud Builds and the link to your running build. If you see an error like below navigate to the url given, click Enable, and trigger the build again manually as before.
ERROR: (gcloud.app.deploy) User [[email protected]] does not have permission to access app [ci-example-218319] (or it may not exist): App Engine Admin API has not been used in project 615259048819 before or it is disabled. Enable it by visiting https://console.developers.google.com/apis/api/appengine.googleapis.com/overview?project=615259048819 then retry. If you enabled this API recently, wait a few minutes for the action to propagate to our systems and retry.
If you still get an error like the one below, you will need to add the App Engine Deploy permission to your Cloud Build service account.
ERROR: build step 0 "gcr.io/cloud-builders/gcloud" failed: exit status 1
ERROR
ERROR: (gcloud.app.deploy) Permissions error fetching application [apps/ci-example-218319]. Please make sure you are using the correct project ID and that you have permission to view applications on the project.
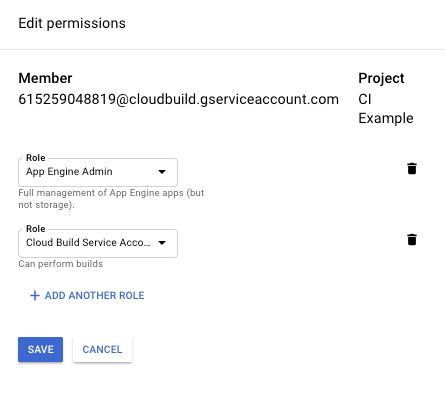
Navigate to IAM & accounts and find the account with the *Cloud Build Service Account *role.
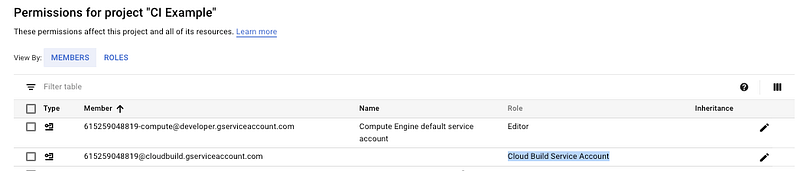
Edit this account and add the App Engine => App Engine Admin role to it
Try your build again… It should succeed and after 5–10 mins you should see a new service show up. We intentionally went through these error conditions to show you how to understand the deployment api permission issues which were an issue when I first started working on this myself.
In our Build History we see two things related to this triggered build. We see the artifacts(docker) that were created and we see the deployed application.

Here we see the deployed prod service from our master build trigger

We need to create another build trigger for the develop branch now that we have the master branch building and deploying.
- Navigate to Cloud Build => Build Triggers => Create Trigger
- Select Github and go through the OAuth process
- Select your forked repository
- Enter a *Name, *select branch, enter develop
- Select cloudbuild as the build configuration
- Enter /ci/dev/cloudbuild.yaml as the location
- Create the trigger
Now go ahead and click Run Trigger on your newly created trigger. You should see the following after your build is successful.

So far we have done the following:
- Installed Google Cloud SDK and deployed the *default *app version to our App Engine project
- Manually kicked off a prod and an integration build from our newly created build triggers
We still need to do the following:
- Configure our Github project to use Travis
- Configure our Github project to run the Travis builds on all Pull Requests(PR) as a pre-requisite for merging
Do yourself a solid and create an account with travis at https://travis-ci.org/. Once you are at the home screen, click the + next to My Repositories

Then find your repository and toggle it on

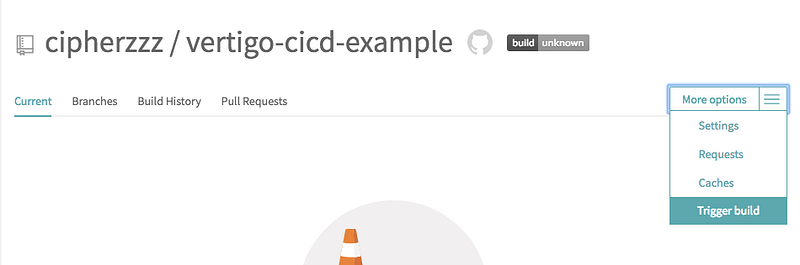
Now go to your new travis build for this repo and trigger the build manually to test it. Note that it may take a while for it to start up — relax, it’s free.
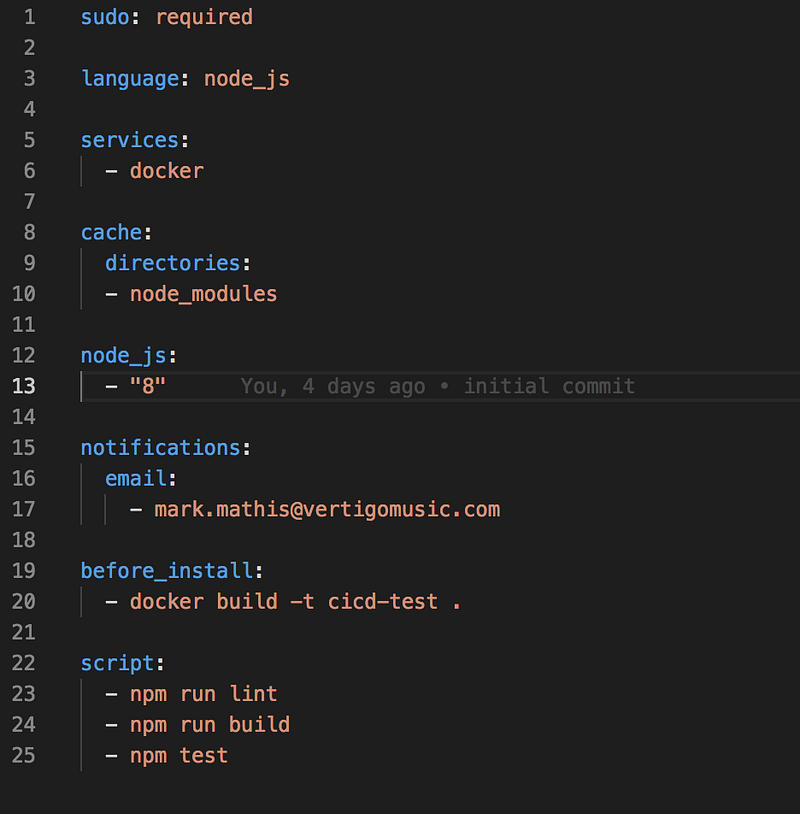
Our travis build checks the following:
- Our Docker build is functional(App Engine uses a docker container so this is important)
- Our code passes a lint check, builds, and the tests pass
Here is our travis.yml
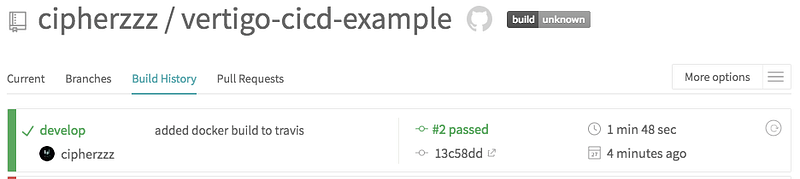
A successful build should look something like this in our dashboard
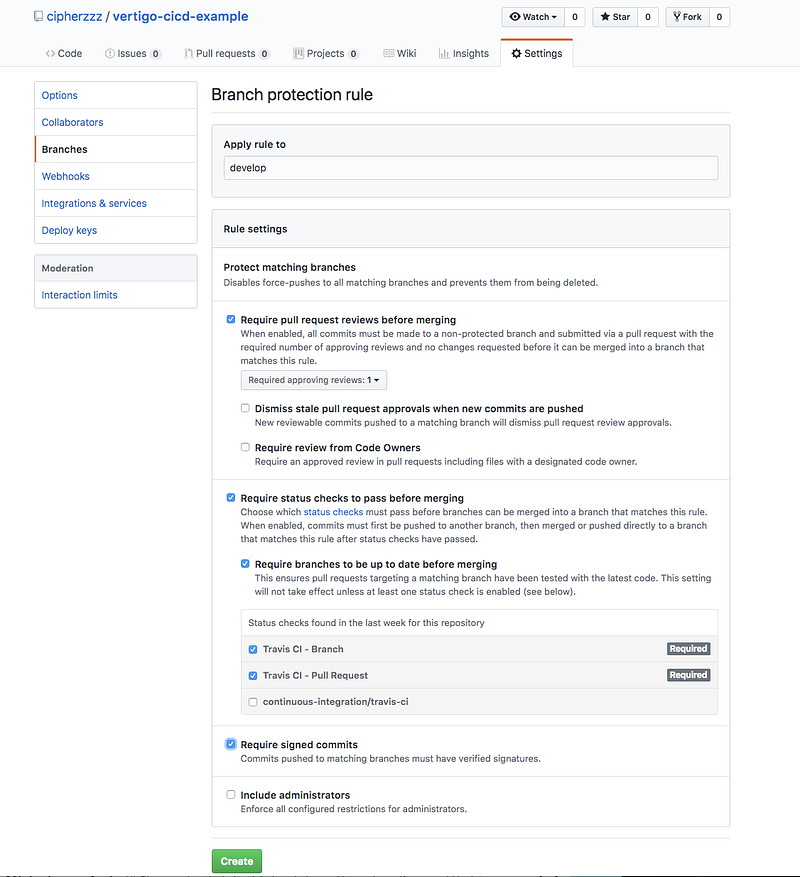
Now that we have travis configured, lets configure our github project to run travis automatically on all PR and merge activity.
Configure a rule on develop and master similar to the image below. You can tweak it to your preference but ultimately we want all code changes to our branches to go through a code review. Note that at the bottom we have checked *Travis CI *to run on pushed branches AND Pull Requests.
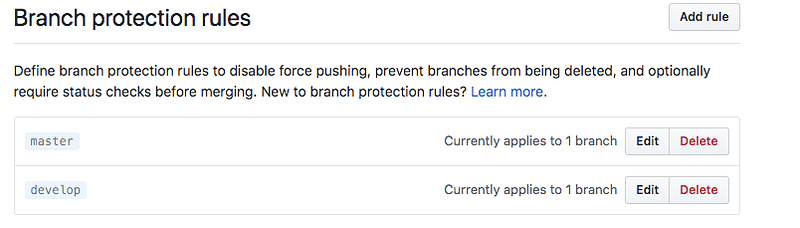
Once you have added the rules, you should see the following:
Now, create a feature branch off develop, make a small change, and push the feature branch to observe the new behavior
git checkout develop && git pull origin develop
git checkout -b travis

# Make the logic.ts => getTestPayload() return 'nobody' instead of 'errbody'

git commit -am "small change to test travis"
git push origin travis
You should see the following in your github repo now

Click the *Compare and Pull Request *and Create the Pull Request. My travis test failed because my code was updated but my test was not.

After fixing the logic.spec.ts the PR looks like this

Notice that our travis builds are passing! I don’t have anyone that can review my PR so I will use my administrative privilege and merge it with the button shown in the previous image. Once this merge happens, we should have an integration build kicked off by our build trigger in Google Cloud that is watching the develop branch.

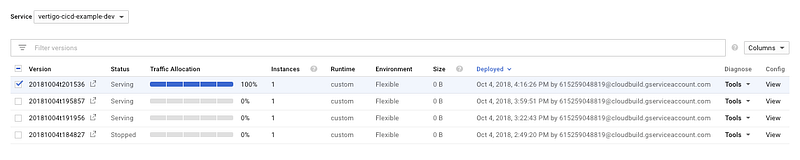
And we do! This will eventually finish and add a new version to our integration services deployed on App Engine as shown below
This has been a long article but we now have a rudimentary Continuous Integration/Development pipeline with Github, Travis, and Google App Engine. Hopefully, you have learned enough to improve your next project or an existing one with this information. As a refresher, these are the high level items we learned
- Installed Google Cloud SDK and deployed the *default *app version to our App Engine project
- Created build triggers for master and develop branches within Cloud Deploy and verified the builds manually
- Configure our Github project to use Travis
- Configure our Github project to run the Travis builds on all Pull Requests(PR) as a pre-requisite for merging
- Verified that a merge to develop or master trigger a successful *Cloud Deploy *build

