Following the same process we did for Level 1 and Level 2 components, add all the components into their target location using their respective selection. A couple of things to remember:
- Use Bootstrap-based layout to position the component where it should be in its parent component
- When a component is inside another
containerdiv, its "100%" or "12 columns" of layout are inside that container's space - Use the Bootstrap's column layout to position the sender's messages to the left of the conversation history panel and to position the user's messages to the right of the conversation history panel
You should end up with an application that looks like this:
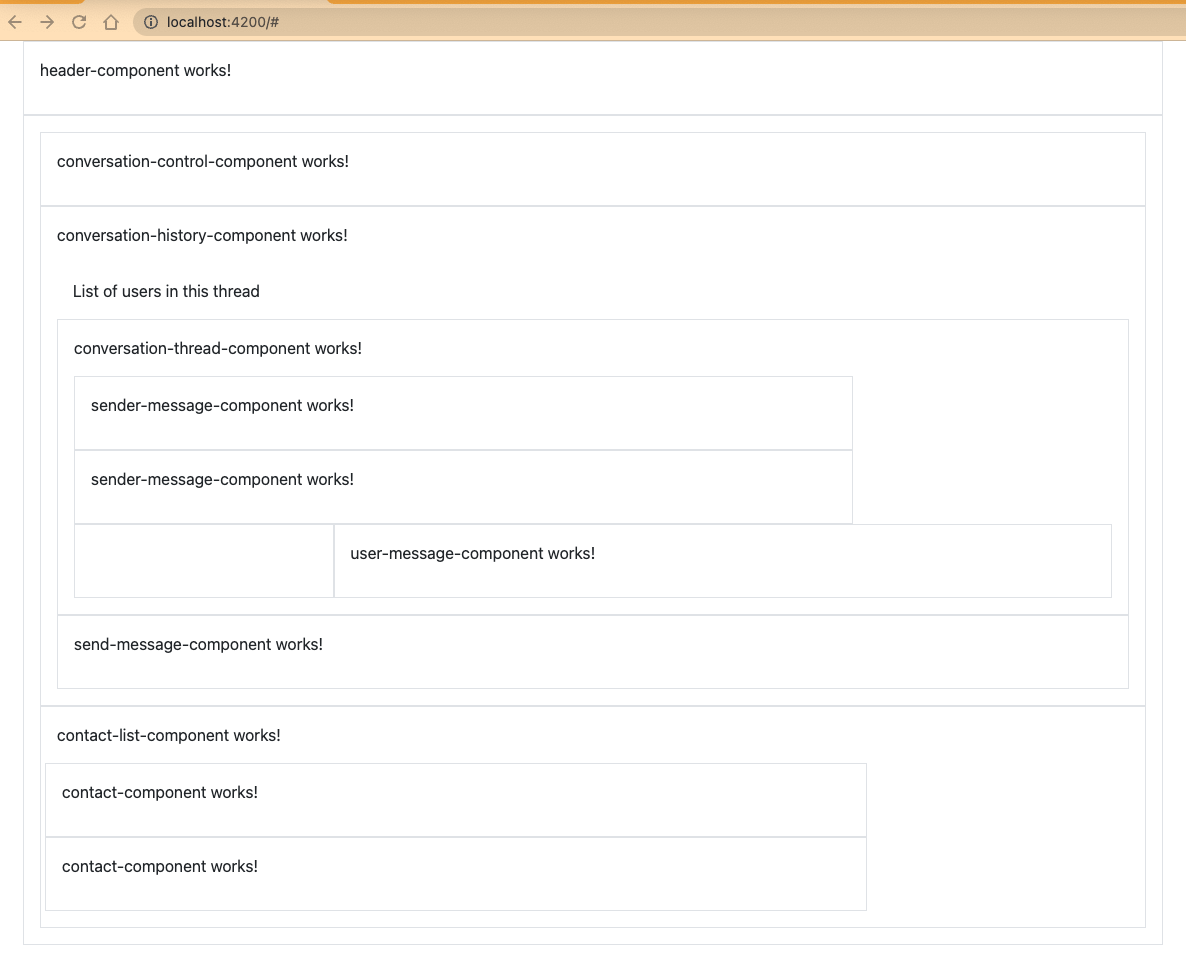
Take some time to do this on your own. We'll include the solution here, as we will be building on it as we progress in this section.
ere is your updated application-component.component.html view:
<div class="container">
  <div class="row">
    <div class="col-12 border p-3">
      <app-conversation-control-component></app-conversation-control-component>
    </div>
  </div>
</div>

<div class="container">
  <div class="row">
    <div class="col-12 border p-3">
      <app-conversation-history-component></app-conversation-history-component>
    </div>
  </div>
</div>

<div class="container">
  <div class="row">
    <div class="col-12 border p-3">
      <app-contact-list-component></app-contact-list-component>
    </div>
  </div>
</div>
Here is your updated conversation-history-component.component.html view:
<p>conversation-history-component works!</p>

<div class="container">
  <div class="row">
    <div class="col-12 p-3">List of users in this thread</div>
  </div>
  <div class="row">
    <div class="col-12 border p-3">
      <app-conversation-thread-component></app-conversation-thread-component>
    </div>
  </div>
</div>

<div class="container">
  <div class="row">
    <div class="col-12 border p-3">
      <app-send-message-component></app-send-message-component>
    </div>
  </div>
</div>
Note: we added a new row in the first container to have the text that indicates what users are in the current thread
Here is your updated conversation-thread-component.component.html view:
<p>conversation-thread-component works!</p>

<div class="container">
  <div class="row">
    <div class="col-9 border p-3">
      <app-sender-message-component></app-sender-message-component>
    </div>
  </div>
  <div class="row">
    <div class="col-9 border p-3">
      <app-sender-message-component></app-sender-message-component>
    </div>
  </div>
</div>

<div class="container">
  <div class="row">
    <div class="col-3 border p-3"></div>
    <div class="col-9 border p-3">
      <app-user-message-component></app-user-message-component>
    </div>
  </div>
</div>
Note: we added the
app-sender-message-componenttwice to give a visual indication that corresponds to the wireframe of the application
Here is your updated contact-list-component.component.html view:
<p>contact-list-component works!</p>

<div class="row">
  <div class="col-12 border p-3">
    <app-contact-component></app-contact-component>
  </div>
</div>

<div class="row">
  <div class="col-12 border p-3">
    <app-contact-component></app-contact-component>
  </div>
</div>
Note: we also added the
contact-componenttwice to give an idea of what multiple contacts would look like
