Custom Arduino-based Bekant controller. Design goals were to have it fit in the original housing and use as many stock parts as possible, be completely independant of the existing controller, as well as store any number of memory positions.


As of November 2019, version 4 is now a one-sided board for ease of assembly! The BOM remains unchanged.
I've setup a store on Tindie for those who wish to order parts or an assembled version. https://www.tindie.com/products/gcormier/megadesk/
Unfortunately the beeps aren't captured well in the video unless you turn up the volume.
-
Plugging in any connectors backwards can probably damage your desk. Be very careful when working on your circuit.
-
The power supply is 24V, and raises higher when motors are in operation! (Between 35-37V) This can generate a decent amount of heat for the linear regulators. Make sure to use genuine name brand regulators, and check the heat output before putting it back inside the casing and attaching it to your tabletop. Ensure to spec the main filtering capacitor appropriately (50v).
-
Do not use ATTinyCore 1.2.2, it contains bugs that will prevent proper operation.
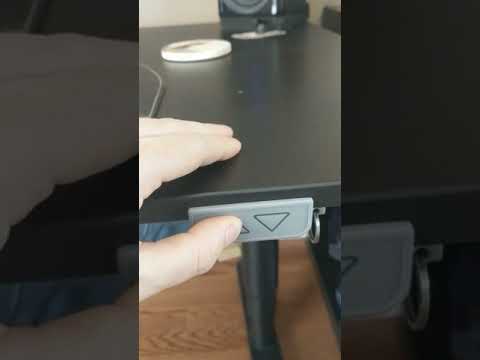
- Use up/down buttons as per factory module (long press/hold)
- To store in a memory slot, push the up button a certain number of times, but long-hold the last press until you hear some beeps corresponding to the memory position that has been saved.
- To recall a saved position N, push the up button N times.
So far, a second variant to the protocol has been found. It is the larger sized BEKANT, so it is possible it has different motors.
These motors report their "idle" status value as 0 instead of 96, which can cause the buttons to not respond. Pressing the memory (UP) button 16 times will play a tone and toggle the value (saved in EEPROM for persistence) that it will use.
- Small is 120cm x 80cm (47 1/4" x 31 1/2")
- Default firmware, should work out of the box
- Large is 160cm x 80cm (63" x 31 1/2")
- Requires the 16x toggle
Make sure to pick components with suitable values (ie 50V for capacitors)
The piezo buzzer is pricey, but worth it for the audible feedback.
| Part Number | References | Value | Footprint | Quantity | |
|---|---|---|---|---|---|
| 1 | C3, C4, C5 | 0.1uf | C_1206_3216Metric | 3 | |
| 2 | C1 | 0.33uF | C_1206_3216Metric | 1 | |
| 3 | C2 | 10uf-DNP | C_1206_3216Metric | 1 | |
| 4 | C6 | 220pF | C_1206_3216Metric | 1 | |
| 5 | R1, R6 | 1k | R_1206_3216Metric | 2 | |
| 6 | R4, R5 | 2.2k | R_1206_3216Metric | 2 | |
| 7 | R3 | 4.7k | R_1206_3216Metric | 1 | |
| 8 | D1, D2 | 1N4148 | D_SOD-323_HandSoldering | 2 | |
| 9 | U3 | ATTINY841-SSU | ATTINY841-SSU | SOIC-14_3.9x8.7mm_Pitch1.27mm | 1 |
| 10 | U2 | L78M05CDT | L7805 | TO-252-3_TabPin2 | 1 |
| 11 | U1 | L78M12CDT | L7812 | TO-252-3_TabPin2 | 1 |
| 12 | U4 | MCP2003B-E/SN | MCP2003B | SOIC-8_3.9x4.9mm_Pitch1.27mm | 1 |
| 13 | TP1 | 5VLOGIC | Pin_Header_Straight_1x01_Pitch2.54mm | 1 | |
| 14 | TP2 | 12VLIN | Pin_Header_Straight_1x01_Pitch2.54mm | 1 | |
| 15 | CON1 | ISP | Pin_Header_Straight_2x03_Pitch2.54mm | 1 | |
| 16 | BZ1 | CPT-9019S-SM | Buzzer | Buzzer_CUI_CPT-9019S-SMT | 1 |
| 17 | J1 | Interface | Pin_Header_Angled_1x03_Pitch2.54mm | 1 | |
| 18 | J2 | 1-84981-0 | FFC | FFC_10 | 1 |
If you want to create your own cable, the connector is AMP VAL-U-LOK by TE Connectivity - PN 1586106-3. Don't forget the crimp pins - Part Number 1586317-1 for 26-22AWG. Otherwise, the existing cable can be unsoldered from the board and fitted with a standard 2.54mm pitch header. Red is positive (24VDC), white is negative, blue is LIN.
- Holding UP while powering on will enter a button test mode, where the up/down buttons can be held to test that they are working - a power cycle is required to exit this mode.
- Holding DOWN while powering on will wipe the EEPROM memory - a power cycle is required to exit this mode.
- When powering on, a series of 4 beeps will happen. The 4th beep indicates megadesk has established a connection with the desk over the LIN bus. Note that this 4th beep will be heard when programming the device.
- There is a single empty hole on the OEM board which you can solder a single pin to for a logic analyzer to view the protocol.
- Megadesk has a 5V logic test point which you can use to view the LIN bus traffic with 5V logic levels. It also has a 12V test point which will reflect the actual bus line.
Don't forget to set fuses on your board for the appropriate oscillator.
ATTiny 841 - 8Mhz internal avrdude -c usbtiny -p t841 -U lfuse:w:0xe2:m
16mA on the Atmega 328P, 3mA on the MCP2003B.
I'm using platform.io for development. Integrated into Visual Studio Code, it's miles above the Arduino IDE. Note that while we're using pio and vscode, the actual code is still using Arduino libraries - we are not coding
native AVR code. In other words, there are still setup() and loop() blocks, and all Arduino modules are available (but handled via pio).
You can find plenty of tutorials online on getting started - this one is a good start.
As the megadesk does not have any USB connectivity, you will need a programmer to connect and program the megadesk via PC.
My go-to programmer is the Sparkfun Pocket AVR Programmer. It has a small switch which will either power the device, or not. Having power available is nice for one-off flashing, but if you plan on developing on an AVR, it can be useful to use serial logging. As the megadesk would already be powered up by the desk itself, you do not want to have the programmer supplying power as well.
The header is a standard 6 pin 2.54mm pitch connector (eg. https://www.digikey.ca/en/products/detail/amphenol-icc-fci/68602-406HLF/1657836 )
On board versions v1/v2, this is a standard connector which will accept a typical AVR programming cable on the top of the board.
For v4 boards, as many people were not developing, I flipped it upside down so I could program the boards easier when making the boards. As a result, you will need to check the pin mapping accordingly for a top mounted programming header (I flash them from the bottom of the board, but I am not sure if there is room in the case for a bottom-mounted header)


