REST API Calls
Learning Goals
- Discuss the
RestTemplateclass. - Show students how to connect to another REST API.
- Mention
WebClientas an alternative toRestTemplate.
Introduction
We have now seen how to create our own REST API using the Spring Framework! We can connect to the application using request URLs that we define, persist data to a database, and return a JSON to the client!
Now the next feat is how to make requests to another application's API. We might be wondering why we would ever need to make a request to another application. But this is actually not uncommon and is a real world scenario. For example, what if, in order for our application to run, we need to request data from another application? Maybe we are creating a weather application, but we need data from NOAA to present this information to the client about whether it will be sunny in Philadelphia or rainy in Seattle.
Let's find out exactly how to make a request to another application from our Spring boot application!
RestTemplate
To help us make a request to another application, we'll use the RestTemplate
class. The RestTemplate is a synchronous REST client that is part of the
Spring Framework, allowing us to perform HTTP requests. The RestTemplate
abstracts most of the work that would be required to make an HTTP request. There
are plenty of methods that come with the RestTemplate, feel free to look
through them
here.
Code Along: Using the RestTemplate
In a new Spring Boot project, let's create a small project to GET some "dad jokes" from https://icanhazdadjoke.com. Create the project with the Spring Web dependency along with the Lombok dependency.
Once created, go ahead and make a controller, dto, and service directory.
Inside their respective directories, create a JokeController.java, a
JokeDTO.java, and a JokeService.java.
The project structure should look like this:
├── HELP.md
├── mvnw
├── mvnw.cmd
├── pom.xml
└── src
    ├── main
    │   ├── java
    │   │   └── com
    │   │       └── example
    │   │           └── springrestdemo
    │   │               ├── SpringRestDemoApplication.java
    │   │               ├── controller
    │   │               │   └── JokeController.java
    │   │               ├── dto
    │   │               │   └── JokeDTO.java
    │   │               └── service
    │   │                   └── JokeService.java
    │   └── resources
    │       ├── application.properties
    │       ├── static
    │       └── templates
    └── test
        └── java
            └── org
                └── example
                    └── springrestdemo
                        └── SpringRestDemoApplicationTests.java
We'll make this example very simple. Add the following code to the DTO and controller class:
// JokeDTO

package com.example.springrestdemo.dto;

import lombok.Data;

@Data
public class JokeDTO {
    private String joke;
}
// JokeController
package com.example.springrestdemo.controller;
import com.example.springrestdemo.dto.JokeDTO;
import com.example.springrestdemo.service.JokeService;
import org.springframework.web.bind.annotation.GetMapping;
import org.springframework.web.bind.annotation.RestController;
@RestController
public class JokeController {
private final JokeService jokeService;
public JokeController(JokeService jokeService) {
this.jokeService = jokeService;
}
@GetMapping("/joke")
public JokeDTO getJoke() {
return jokeService.getJoke();
}
}The above code shouldn't be anything surprising to us now nor should be anything new.
In order to use the RestTemplate class, we can either instantiate it when we
need it like this:
RestTemplate restTemplate = new RestTemplate();Or we can have Spring manage it for us by creating a bean in the configuration class:
@Bean
public RestTemplate restTemplate() {
    return new RestTemplate();
}
We'll go with the latter and add the RestTemplate as a bean - this way we can
use it anywhere else we may want to make a request. Go ahead and add the above
method to the SpringRestDemoApplication main class:
package com.example.springrestdemo;

import org.springframework.boot.SpringApplication;
import org.springframework.boot.autoconfigure.SpringBootApplication;
import org.springframework.context.annotation.Bean;
import org.springframework.web.client.RestTemplate;

@SpringBootApplication
public class SpringRestDemoApplication {

    public static void main(String[] args) {
        SpringApplication.run(SpringRestDemoApplication.class, args);
    }

    @Bean
    public RestTemplate restTemplate() {
        return new RestTemplate();
    }

}
Let's go into the service class, where we'll add the business logic to connect
to the Joke API and use the RestTemplate bean:
// JokeService

package com.example.springrestdemo.service;

import com.example.springrestdemo.dto.JokeDTO;
import org.springframework.stereotype.Service;
import org.springframework.web.client.RestTemplate;

@Service
public class JokeService {

    private static final String JOKE_URL = "https://icanhazdadjoke.com/";
    private final RestTemplate restTemplate;

    @Autowired
    public JokeService(RestTemplate restTemplate) {
        this.restTemplate = restTemplate;
    }

    public JokeDTO getJoke() {
        // Request a joke from the JOKE_URI and maps it to the JokeDTO
        return restTemplate.getForObject(JOKE_URL, JokeDTO.class);
    }
}
In the code above, we reference the RestTemplate bean and link it with our
service class by autowiring it in the constructor. We then can use it in our
getJoke() method. The getForObject() method will then send out a GET request
using the JOKE_URL as the request URL. The second parameter is the type that
the response will be bound to. In the code above, we will take the JSON response
and map it to the JokeDTO. The getForObject() method will then return a
JokeDTO object.
Let's run the application and see what happens!
Open up Postman and type in the following in the request URL bar: "http://localhost:8080/joke". Select GET next to the request bar and then send the request.
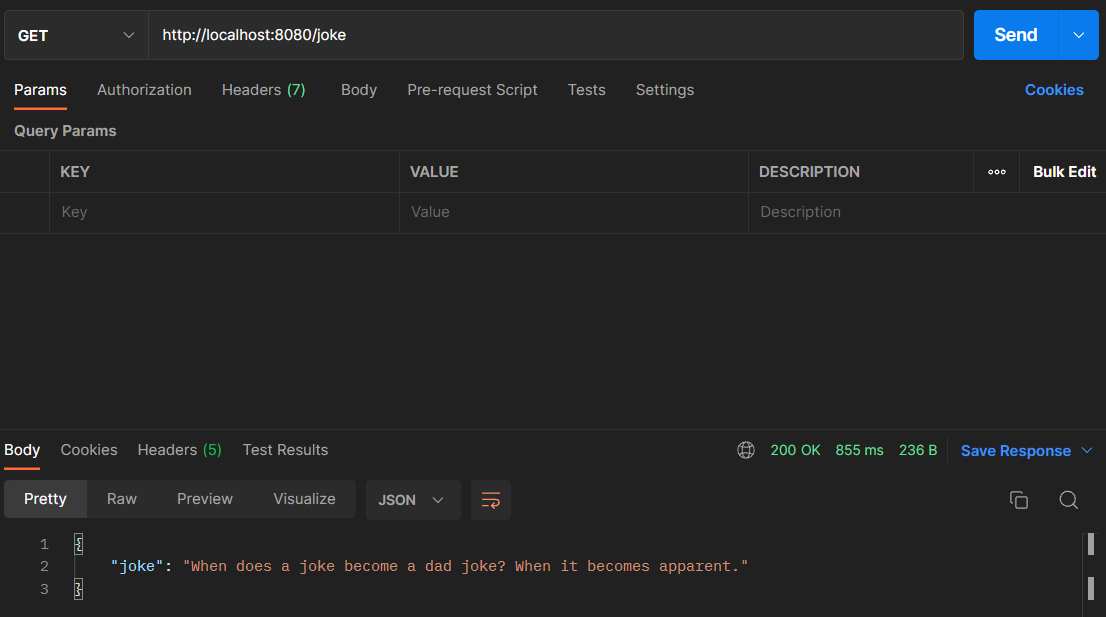
Ta-da! We got back a random dad joke as a response!
{
    "joke": "When does a joke become a dad joke? When it becomes apparent."
}
It should be noted that the jokes are random; therefore, the joke you get back may differ from the result here in this lesson.
WebClient
RestTemplate isn't the only Spring tool we can use to perform HTTP requests.
As part of the Spring Webflux dependency, we can also use the WebClient
interface. The WebClientinterface is a non-blocking REST client and currently
serves as an alternative to the RestTemplate class. For more information on
the WebClient interface, please see the
WebClient documentation.
Summary
In this lesson, we now know how to connect our application to another API in
order to process GET requests. This replicates a real-world scenario when
building and maintaining APIs. While this lesson only touched briefly on what we
can do with the RestTemplate class, it served as an introduction to sending
requests from a Spring Boot application. If you wish to learn more, consider the
resources below for more information.


