In this lesson, you'll continue setting up your professional data science environment by configuring your terminal to work with GitHub, creating an Anaconda virtual environment, setting up your new virtual environment to open by default from your terminal, and confirming your configuration.
You will be able to:
- Use basic commands to navigate the command line
- Practice utilizing Git and GitHub
- Summarize why virtual environments are used
- Set up a virtual environment
Now that you have Git installed locally, you'll be often working back and forth between GitHub, a service which hosts Git repositories online, and your local computer. To better integrate with GitHub, you should set up your name and email address:
-
In your terminal window*, type
git config --global user.name- If it returns your name, you’re set!
- If it returns nothing or displays an error message, type
git config --global user.name “Your Name”- replacing Your Name with your name inside the quotes (this should be your real first and last name, not your GitHub username)
-
In your terminal window, type
git config --global user.email- If it returns your email address, you’re set!
- If it returns nothing or displays an error message, type
git config --global user.email [email protected]- replacing [email protected] with your email address
* Remember, when we say "terminal" we mean the Terminal app for Mac, and the Git Bash program for Windows
To complete the later steps in this configuration process, you’re going to need to download a copy of the files in this repository, so we should do this now since you already have a terminal window open.
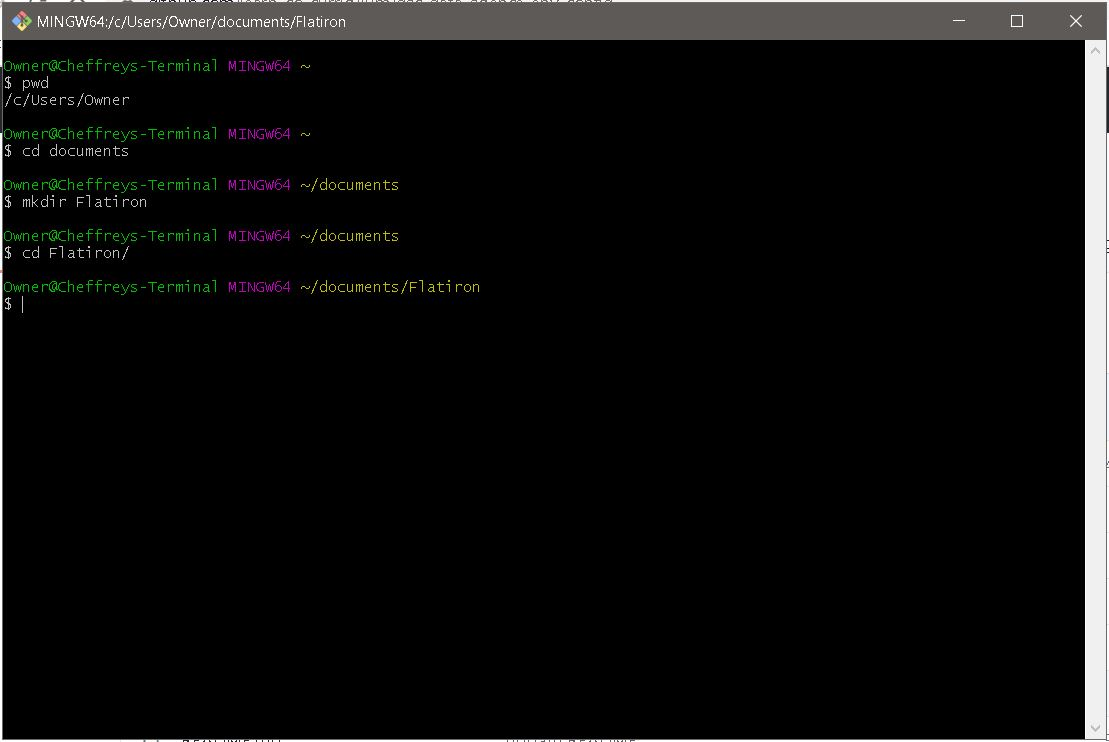
You should get in the habit of checking exactly where you are in your Terminal before downloading anything. Use the command pwd to print your working directory. If you're not in a place you want to download lessons, you should navigate to a place you want to keep your Flatiron repositories and files.
If you have not used the command line much or at all, follow the below steps:
- Open a new terminal window
- Type
pwd- this should show your home directory, the most basic of paths on your computer - Type
cd Documents- this will change your directory, and move you into your Documents folder - Type
mkdir Flatiron- this will create a new folder, called Flatiron, to keep all of your Flatiron repositories and files - Type
cd Flatiron- this will change your directory, moving you into the new Flatiron folder you just created
MacOS Example:

Windows Example:
You should NEVER clone a Git repository into another Git repository!
You can always check if you are currently in a Git repository by running
git status. If you get an error that says "fatal: not a git repository (or any of the parent directories): .git", then you are not in a Git repository.
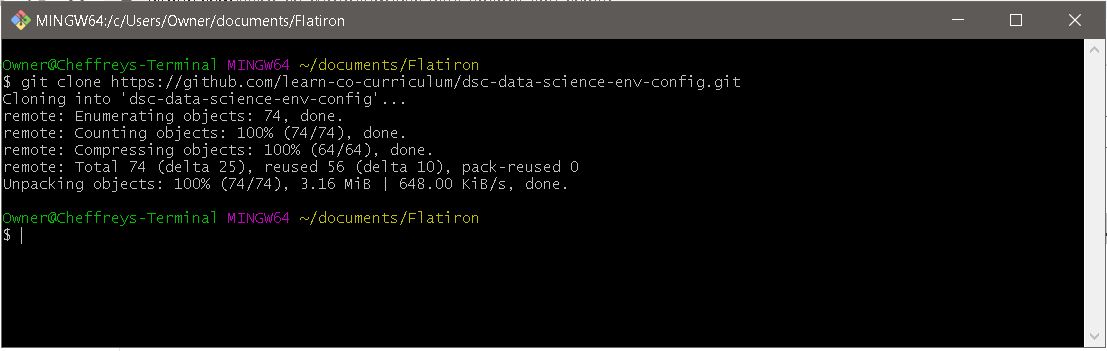
Once you are in a good place to download files from GitHub, like a general folder to keep all of your Flatiron repositories and files, type (or better still, copy and paste) git clone https://github.com/learn-co-curriculum/dsc-data-science-env-config.git
In Windows, in Git Bash, to paste from the clipboard the shortcut should be shift-insert
This will create a new subdirectory whose name is "dsc-data-science-env-config" which will contain a copy of all of the files in this repository!
Move into that directory using the cd, or change directory, command (after typing cd dsc you should be able to hit the tab key to "tab complete" so you don't need to type the whole directory name).
Now, if you run pwd to print your working directory again, you should be inside the folder we just cloned down from that GitHub link!
MacOS Example:

Windows Example:
As you do data science projects, you will spend a lot of your time using pre-written libraries to speed up your development - like numpy, pandas, or scikit-learn. As you work on different projects, you may also find that you use different versions of different libraries for different projects. The most common versioning issue is that some projects will run in Python 2 whereas others will run in Python 3, but you may also find that different projects depend on different versions of libraries like Tensorflow.
Occasionally, code that works in an old version of a library won’t work in a newer version. So if you open up a new project and install the dependencies, it’s possible that your old project won’t work anymore.
To avoid that problem, a best practice is to use “virtual environments”. Virtual environments allow you to have different versions of Python and different versions of the various libraries you use, so you can install a new version of a library for one project but still use the old version for another project. It’s almost as if you have multiple computers that you can swap between, each having a different setup and configuration, just by running a couple of commands.
There is a built-in virtual environment feature in Python, but we’re going to use the more flexible virtual environments provided by Conda as part of the Anaconda distribution you installed.
To use a new virtual environment, there are two steps you need to complete. The first step is to create the virtual environment. That may take a couple of minutes as your computer has to download the necessary version of Python and all of the libraries that you want to be able to use in that environment. The next step then is to “use” the virtual environment by activating it.
If you want to learn more about Conda environments, have a look at the documentation, otherwise, let’s give this a try.
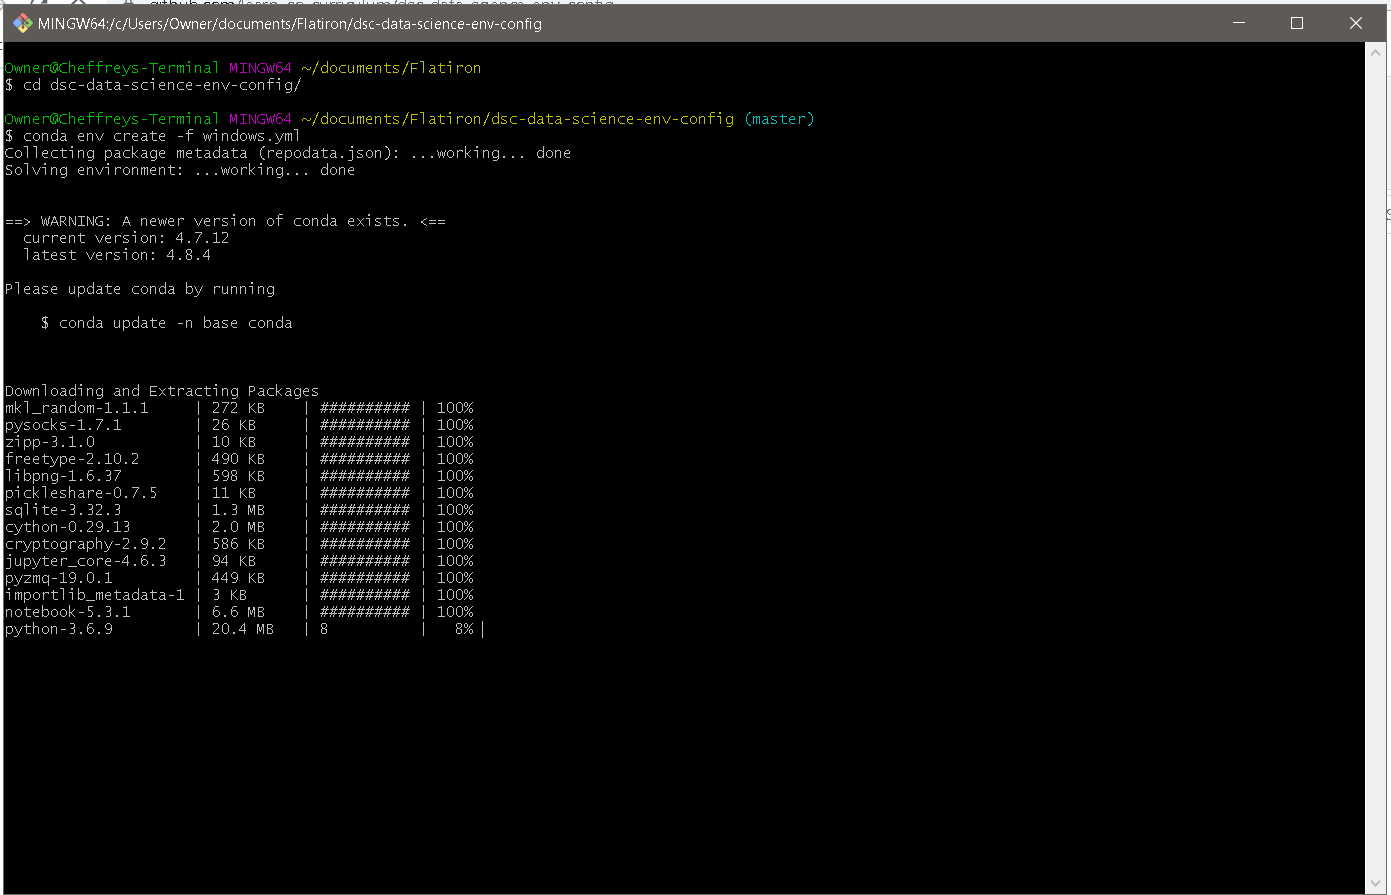
You need to start by navigating into this project folder. If you run pwd to print your working directory in your terminal, you should be inside the folder we cloned down. If the name of the current working directory is not "dsc-data-science-env-config", then you need to move into that folder - follow the steps above.
The instructions to create the environment are slightly different for MacOS and Windows, because they need to use different environment files, so make sure you follow the instructions relevant to your operating system.
MacOS: run conda env create -f mac_environment.yml
Windows: run conda env create -f win_environment.yml
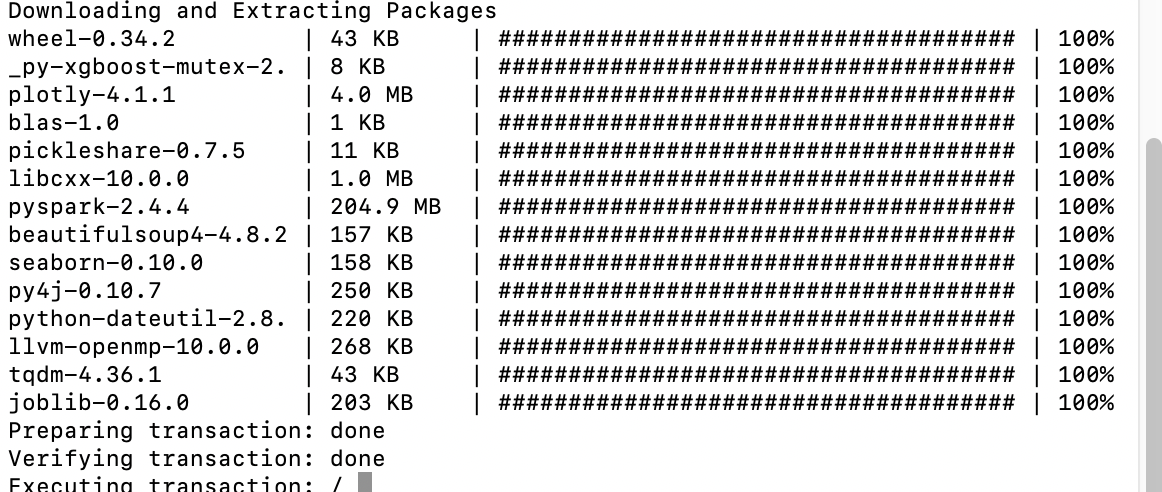
Depending on the speed of your computer and your internet connection it may take up to twenty minutes for this to complete. While it does you should see output similar to that displayed below start to appear in your terminal.
MacOS Example:
Windows Example:
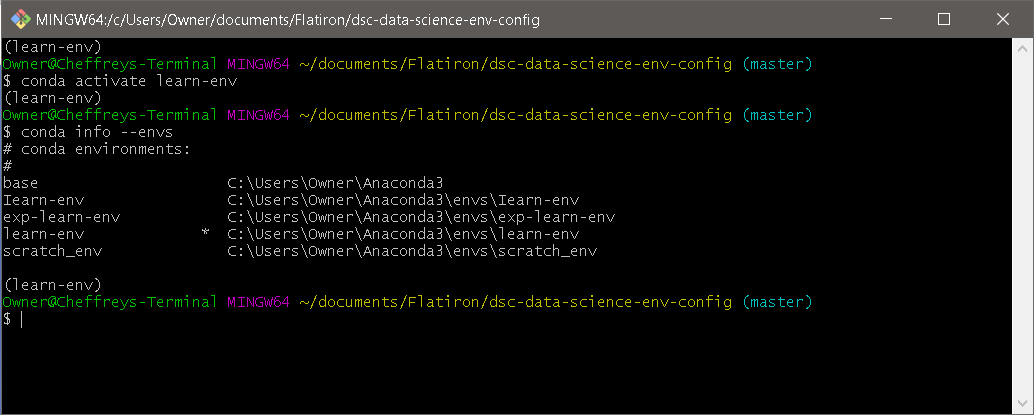
Next, try activating the environment. Type conda activate learn-env.
To confirm that it worked, type conda info --envs and confirm that the asterisk (*) is next to the learn-env environment.
MacOS Example:

Windows Example:
if you see a message that states “WARNING: A newer version of Conda exists”, run conda update -n base conda and then try again to create the environment.
If you see a message that states "file not found", double check that you are running this command from the directory that contains the .yml file. If you type ls you should see the environment.yml file. If you don't see it, you likely forgot to run cd dsc-data-science-env-config to change into the right directory.
You have successfully created your virtual environment! But, to be sure that you are using the learn-env, it's helpful to set it as your default environment so that you don't need to remember to manually switch to it every time you open the terminal. This step is highly recommended but not required.
On a Mac, we need to first see what shell you're running in your terminal. Run echo $SHELL.
If the response ends in bash:
- run
echo "conda activate learn-env" >> ~/.bash_profileto add the configuration to your bash profile - run
source ~/.bash_profileto activate the changes you just made

(Don't forget to run
source ~/.bash_profilelike the Test Student in the screen capture!)
If the response ends in zsh:
- run
echo "conda activate learn-env" >> ~/.zshrcto add the configuration to your bash profile - run
source ~/.zshrcto activate the changes you just made

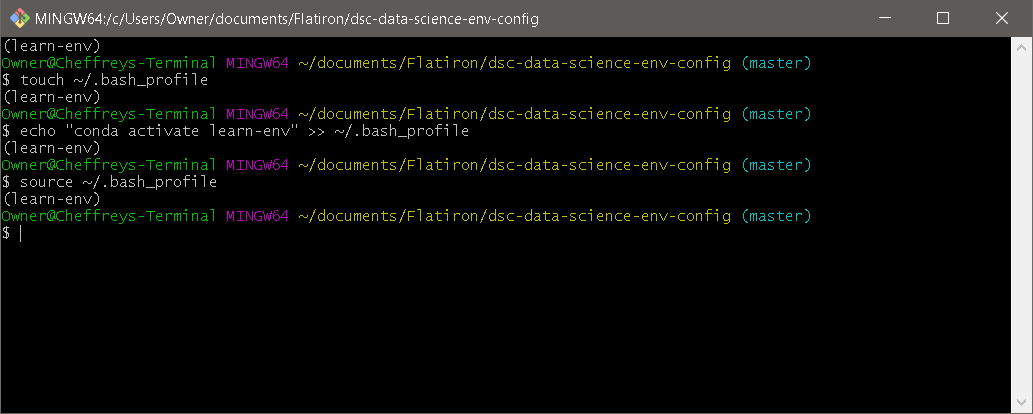
To follow these instructions on a Windows machine you must be using the Git Bash shell it was suggested to install above.
- Run
touch ~/.bash_profileto create a new file. - Run
echo "conda activate learn-env" >> ~/.bash_profileto add the configuration to your bash profile - Run
source ~/.bash_profileto activate the changes you just made
Python packages are constantly updating and changing, and switching between environments, updating or installing new packages, and troubleshooting environment issues will are all necessary skills for when you're a fully-fledged professional data scientist.
In general, because we are using Anaconda as our package manager, it is preferable to update or install new packages using conda options instead of pip.
If you are ever concerned about conflicting package versions, just remember that creating a new conda environment is as easy as conda create --name new-env - and it is very normal to have different environments with different packages for different purposes. Just remember that you've likely just set up learn-env to activate by default, so you'll need to either change that or activate other environments manually when needed.
Jupyter Notebooks run "kernels" - the computational engine used for executing your code. It's important to be running the right kernel within your notebook, otherwise you may get errors stating that you don't have a particular package or have the wrong version of it or even complaints about the version of Python you're running (some packages don't support Python 3.8, for example).
Right now, let's check that everything is running properly. In your terminal, run jupyter notebook. This should prompt a new browser window to open, at an address that is something like "localhost:8888".
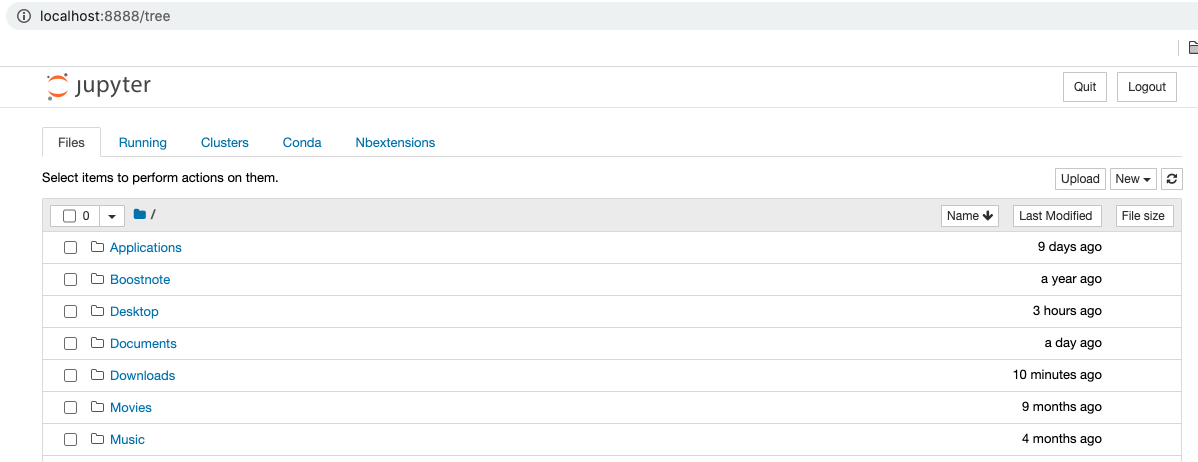
We'll talk a lot more about Jupyter Notebooks later on in the course, because you'll use them quite a lot! For now, we want to check not only that the terminal shortcut you just used to open a Jupyter Notebook worked, but also that you are running your learn-env kernel in your notebook.
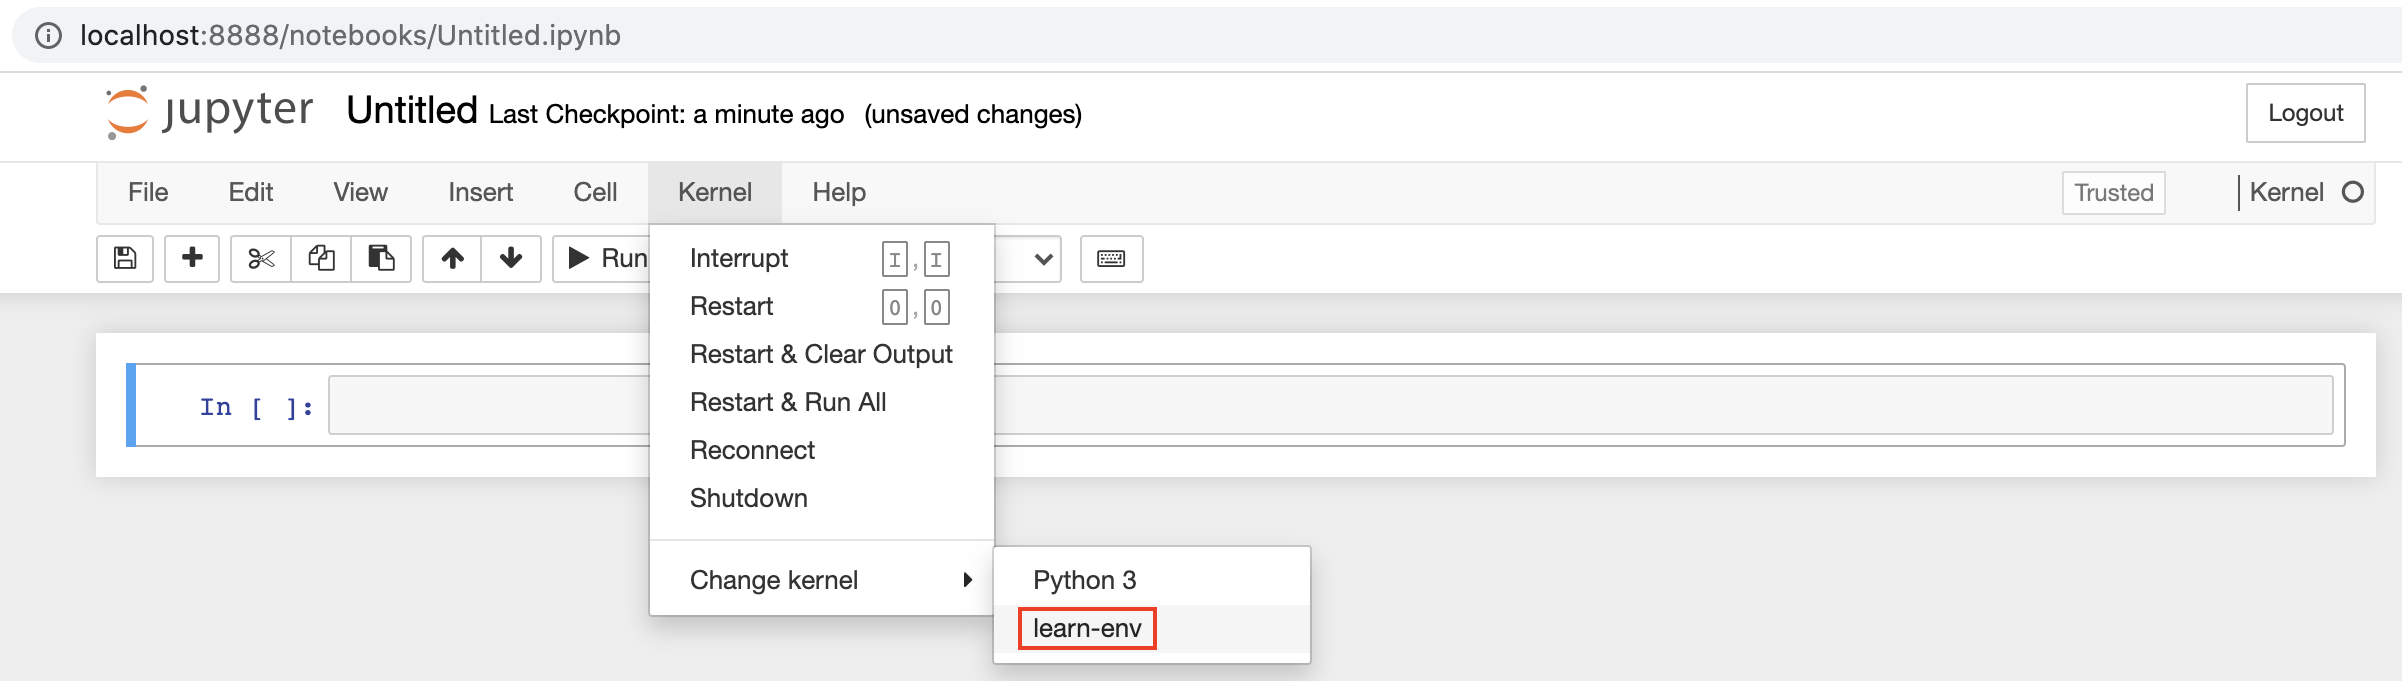
You should be able to see learn-env as an option in two places:
- When you create a new Jupyter Notebook, by clicking "New" on the right-hand side
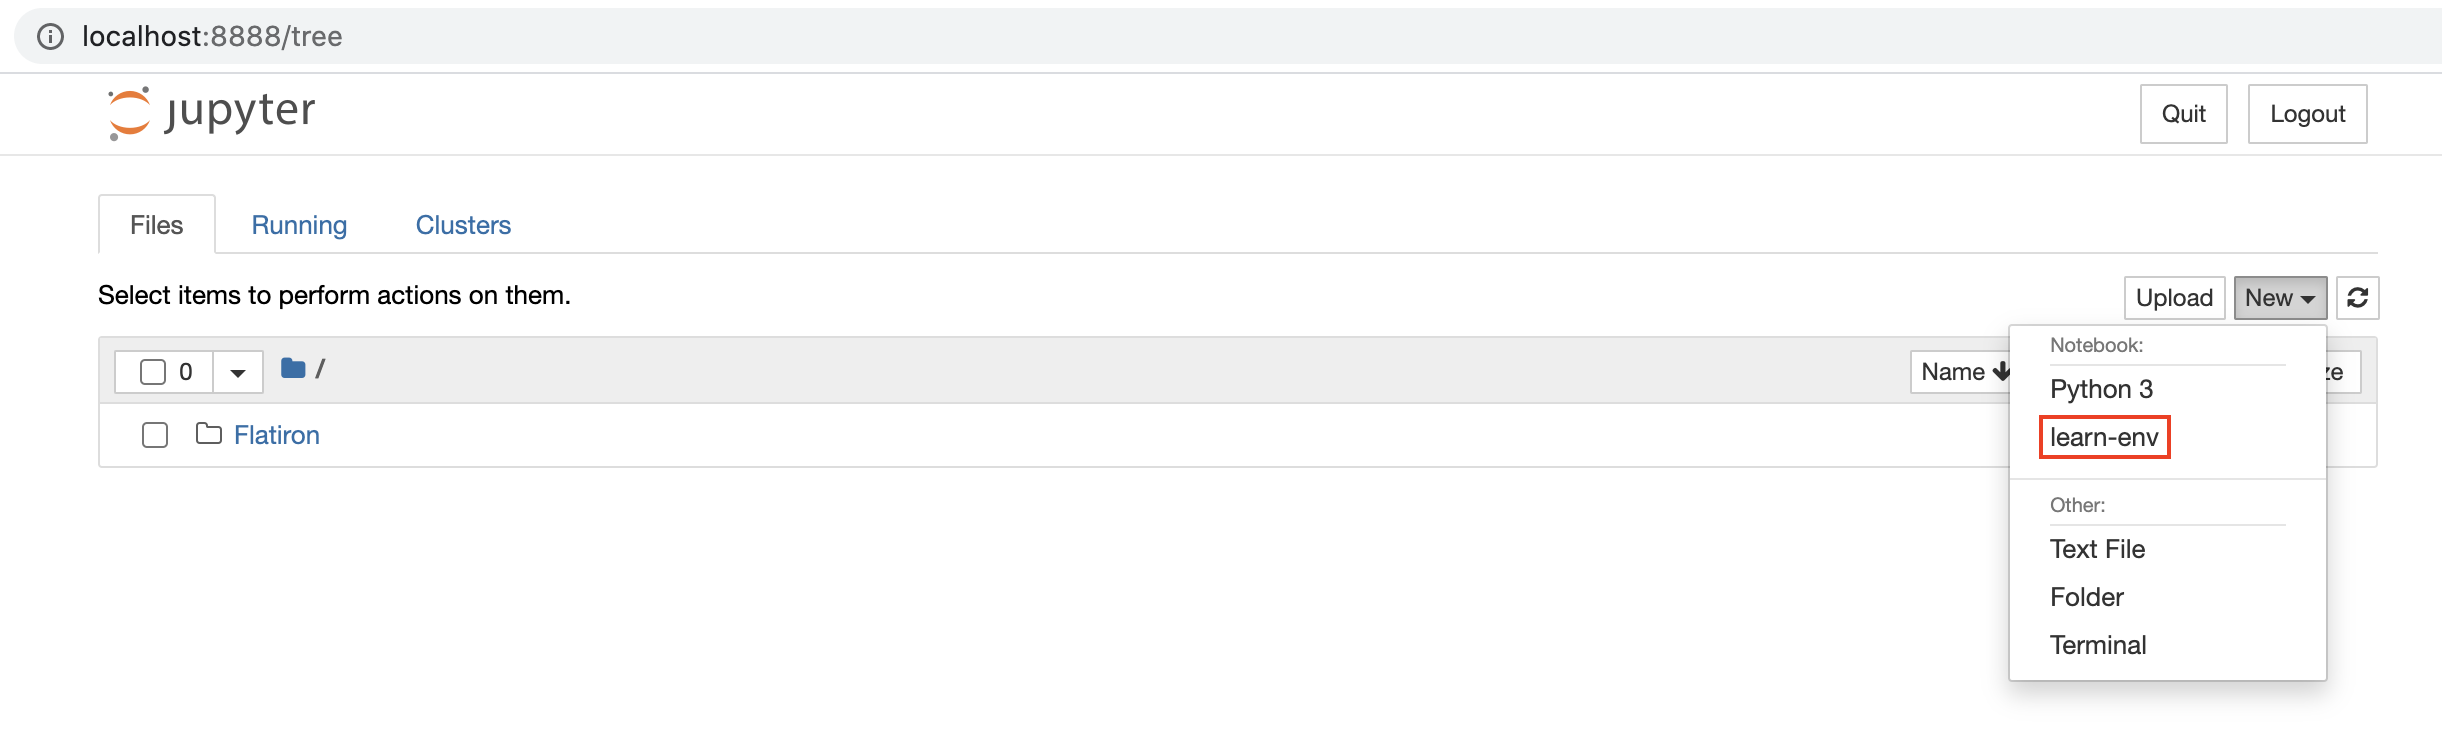
- Once you're in a notebook or create a new one, by checking the options under "Kernel" in the top menu bar
If you don't see the learn-env option in those two places:
- Close the notebook in the browser
- Close down the notebook server from the terminal
- (run
ctrl+cand then typeyto confirm that you want to close down jupyter)
- (run
- In the terminal, enter
conda activate learn-env
python -m ipykernel install --user --name learn-env --display-name "Python (learn-env)"
That will add the learn-env to your list of kernels. When you restart the Jupyter Notebook server and try again, you'll be able to select the learn-env option in those two places above.
It will be essential to run conda activate learn-env every time you start a new terminal window if you do not set your terminal to activate that environment by default. If you don't do this you will get errors, so please check this first. You can always run conda info --envs to see which environment is selected - and, if you run the above steps to set the learn-env to open by default, you won't need to remember to activate every time you open your terminal.
Congratulations! That was a lot! If you've gotten this far and everything has worked, you have successfully set up your computer with some of the primary tools you need to work as a professional data scientist!


