
In this tutorial, we will train an image classifier on the Kaggle fruit 360 dataset using the fastai library we will then deploy it as a bot on the messenger platform. The key things we will explore is how to:
- Use kaggle notebooks to build an Artificial Intelligence (AI) image classifier using transfer learning with the fastai library.
- How to deploy it using the messenger platform's image upload feature. The messenger platform has a rich interface with all the features needed to deliver an app to users. It is also home to over a billion users so, in essence, Facebook provides you with the tools to build your own product and the market itself.
- Basic python programming experience.
- Git installed.
- Visual Studio Code or your favourite IDE/Text Editor.
- Create a Facebook account
- Create a Kaggle account.
- Create a Heroku account.
- Install the heroku cli
- Clone this repository on to your computer.
git clone https://github.com/rapha18th/fruit-classifier.git
Kaggle is the world's largest data science community with powerful tools and resources to help you achieve your data science goals. The tools and resources include access to notebooks with a python runtime environment, datasets and powerful GPUs, all for free!
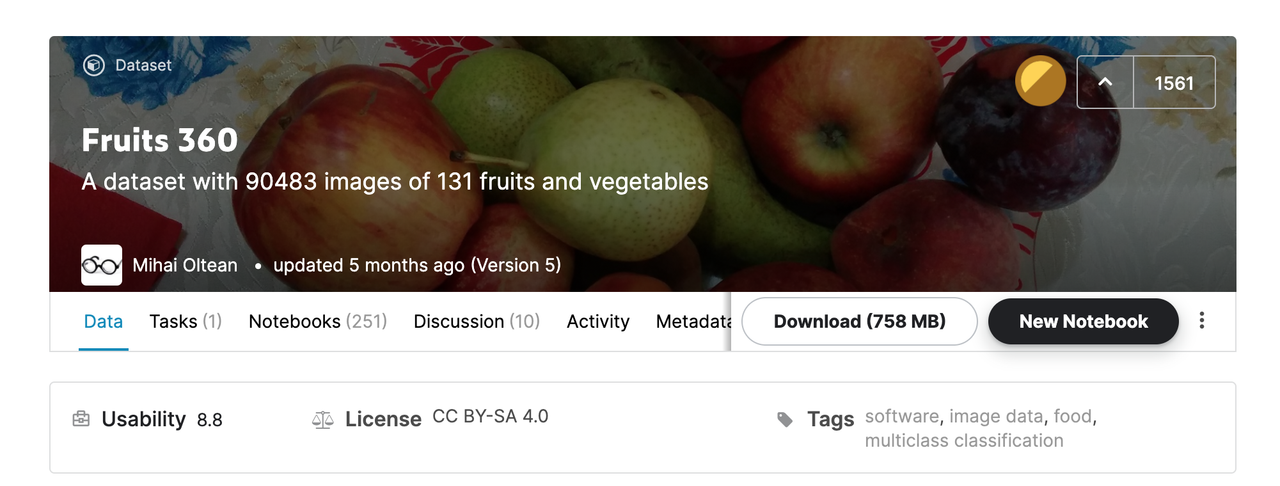
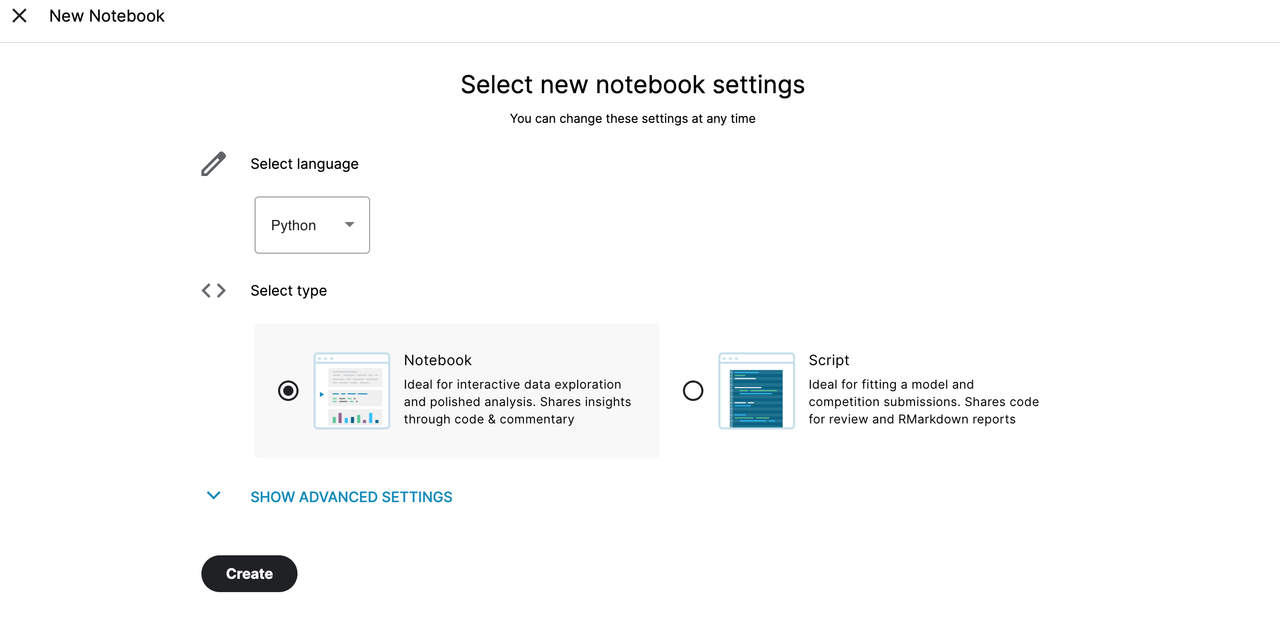
To start, assuming you have already created a kaggle account, go to the Fruit 360 dataset and create a notebook instance by clicking on new notebook and follow the steps below:
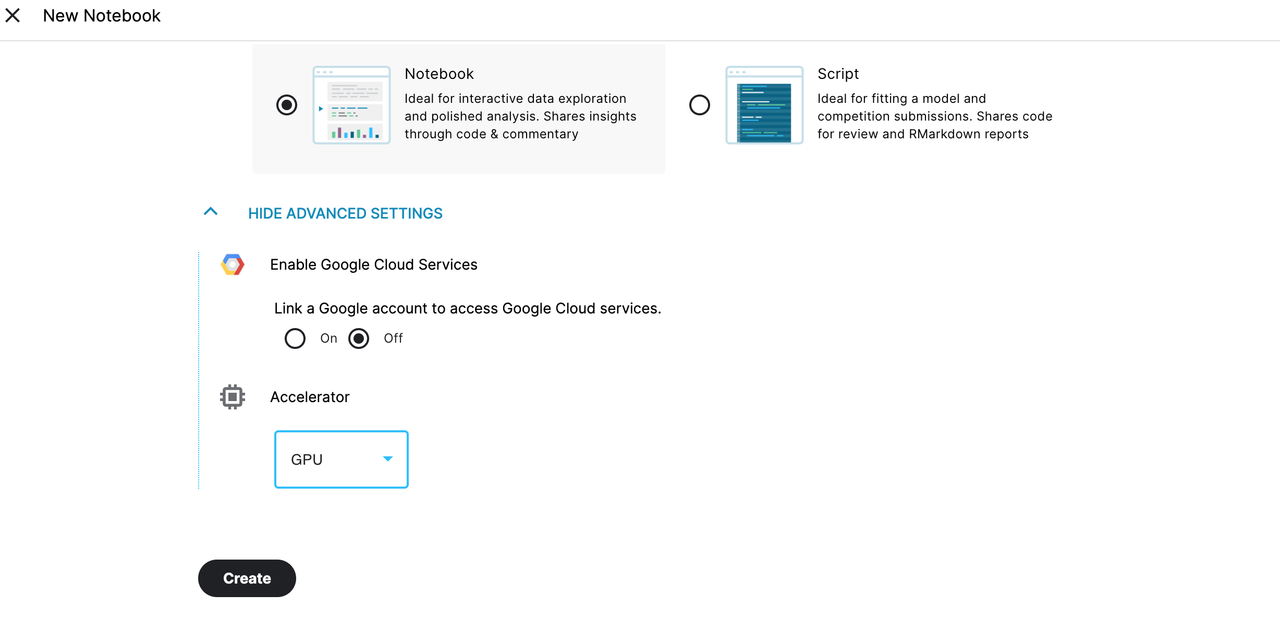
Make sure you enable GPU under accelerator (Kaggle may ask for phone verification)
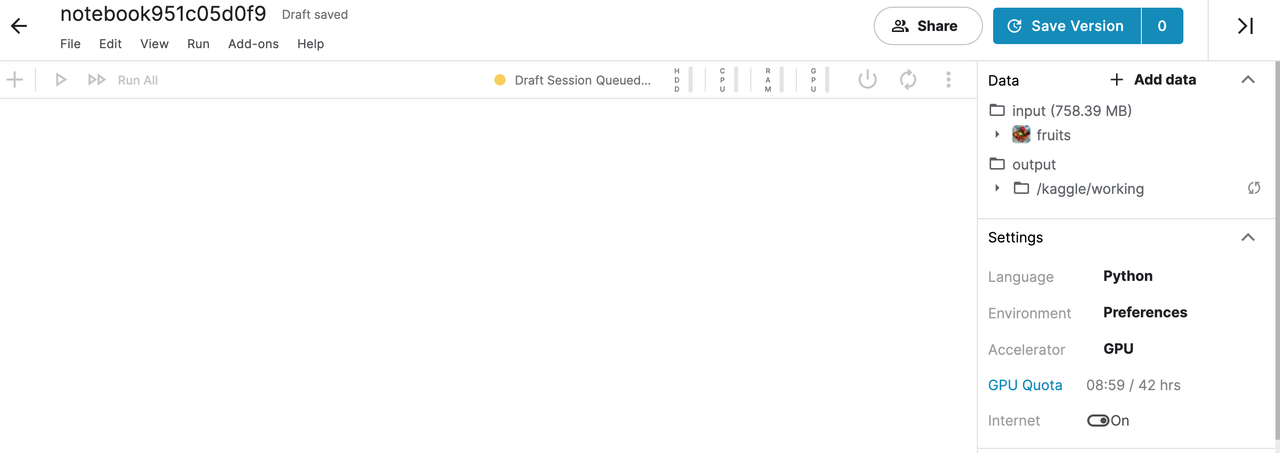
After the session starts we can begin coding. Add every chunk of code below in its own block in the notebook. Run each block after entering the code.
Fastai is a deep learning library built on top of PyTorch. It provides practitioners with high-level components that can quickly and easily provide state-of-the-art deep learning results. It adds a lot of its own functionality but retains the flexibility of PyTorch.
Import the following libraries:
from fastai import *
from fastai.vision.all import *
from fastai.metrics import error_rate, accuracy
%reload_ext autoreload
%autoreload 2
%matplotlib inline
define the path to our data
path = '../input/fruits/fruits-360'
fruit_data = get_image_files(path)
The get_image_files function above is a takes a path and returns a list of all the images in that path.
Let us take a look at the data:
len(fruit_data)
When you run this it should give us the total number of images in the dataset:
90483
train = get_image_files(path+'/Training')
test = get_image_files(path+'/Test')

print(f"Train: {len(train)}, Test: {len(test)}")
The output should the number of images in the train and test sets:
Train: 67692, Test: 22688
Let us define how we want to pass the data to our model
fruits = DataBlock (
    blocks = (ImageBlock, CategoryBlock),
    get_items = get_image_files,
    splitter = RandomSplitter(valid_pct=0.2, seed=42),
    get_y = parent_label,
    item_tfms = Resize(128)
)
In the above code, the train and test sets are defined but we will use DataBlock to randomly split the data into the train and validation sets with 20% being set aside for the validation set. Our data has images and categories so we pass both ImageBlock and CategoryBlock which are the independent and dependent variable respectively. The independent variable is what we will make predictions from and the dependent variable will be our target, in this case, types of fruit. With get_items we find where our data is stored and with get_y we get the labels, the parent_label function reads the name of the folders where the respective images are stored. We transform our data by taking each item and normalising it to 128x128 using item_tfms.
In summary, Datablock is an object which helps in getting our data into a format that can be fed into our model.
At this point, fruits is an empty object it defines how we want to load the data with the help of DataBlock.To load the data we call the dataloaders:
dls = fruits.dataloaders(path)
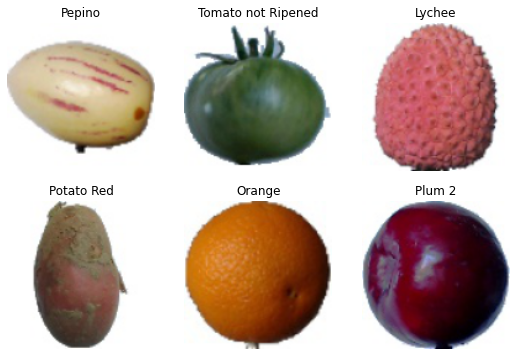
The show_batch method helps us take a peek at the data so far, we can pass in max_n and n_row to define how many images we want to see:
dls.show_batch(max_n=6, nrows=2)
Output:
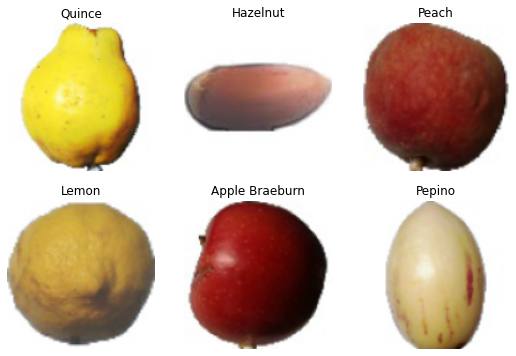
We can also transform our data gain by resizing it item by item and passing batch_tfms to transform it by batch. The latter is a data augmentation technique applied on the GPU to help process the data in "batches". Data augmentation means creating random variations of our input data such that they appear different without changing their meaning. We will do that by add the following code:
fruits = fruits.new(item_tfms=RandomResizedCrop(224, min_scale=0.5),
                   batch_tfms=aug_transforms())
We can take a look at a sample of the data again:
dls.show_batch(max_n=6, nrows=2)
Output:
Now on to model selection, we are using transfer learning so we will choose a pre-trained model, for this example I chose resnet34. Resnet34 is a convolutional neural network(CNN) and an image classification model pre-trained on ImageNet dataset.CNNs are state-of-the-art algorithms which have been optimised for image classification. Some of the main benefits of transfer learning are reduction of computational time, processing power and data requirements. Knowledge of previously learned features will be passed on to our classifier. Fastai allows us to pick the metrics we want as well and in this case, I chose accuracy and error_rate as we have a classification problem.
Selection of our model:
learn = cnn_learner(dls,resnet34, metrics=[accuracy, error_rate])
Fastai also has a great tool which suggests what learning rate to use to fine-tune our model. The learning rate is typically the steepest point of a gradient descent curve. Gradient descent is an iterative approach to reduce our model's loss, loss meaning bad predictions.
Finding the learning rate:
learn.lr_find()
Output:
SuggestedLRs(lr_min=0.010000000149011612, lr_steep=0.0063095735386013985)
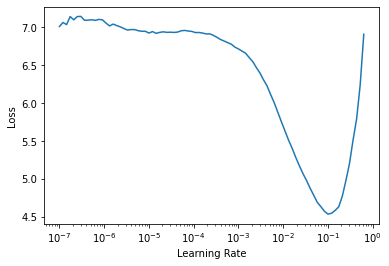
We pass in the suggested learning rate and train our model which is also evident as the steepest point in the above plot. This should take around 20 minutes to complete. Enough time for you to take a break and enjoy your favourite beverage:
learn.fine_tune(4, 1e-2)
output:

Incredible results! Let us celebrate!
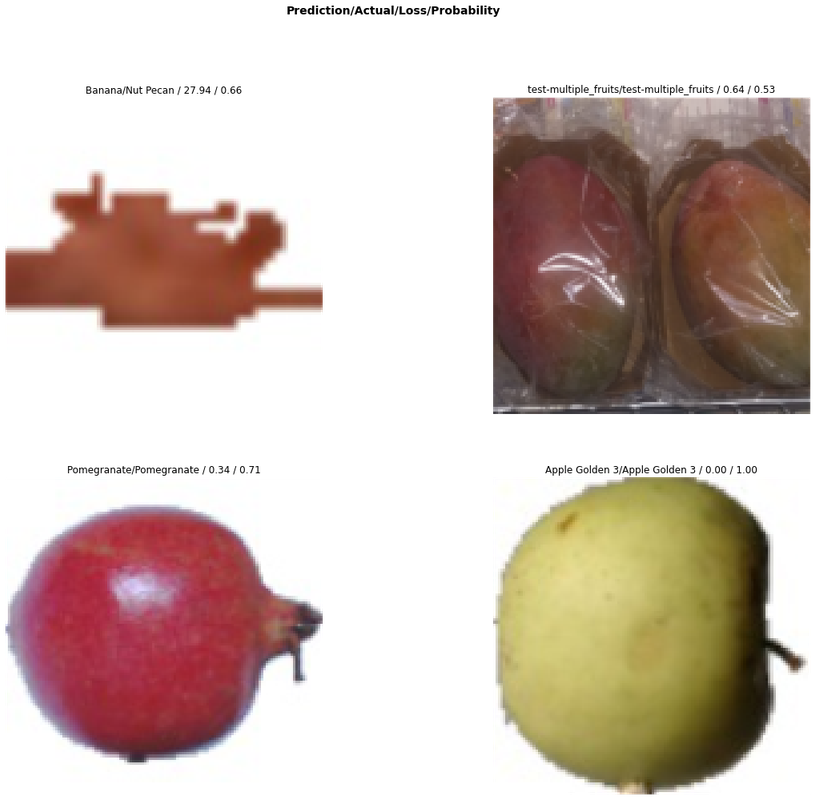
Let us interpret the results starting with the bad predictions, which judging by the accuracy and error rate above should be very few:
interp = ClassificationInterpretation.from_learner(learn)
interp.plot_top_losses(4, figsize=(20,16))
output:
Plot a confusion matrix, which is an n x n matrix to compare actual and predicted values:
interp.plot_confusion_matrix(figsize=(20,20), dpi=60)
Output:

The diagonal being darker like that means our model is performing well.
Let us do a random prediction:
learn.predict(test[99])[0]
output:
'Apple Golden 3'
let us open the image to see if our model guessed right:
img = Image.open(test[99]).to_thumb(224)
img
Output:
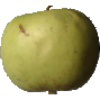
Good guess. Let us do the reverse where we see the image first before we predict:
img = Image.open(test[1000]).to_thumb(224)
img
Output:

learn.predict(test[1000])[0]
Output:
'Strawberry Wedge'
It looks like our model is good at guessing the type of fruit. It is now ready for production, let us save it:
learn.export('/kaggle/working/export34.pkl')
After following these steps in the order they appear we should save(and commit) our notebook that way we get the output which contains the model we just saved as a serialised object for use in production.
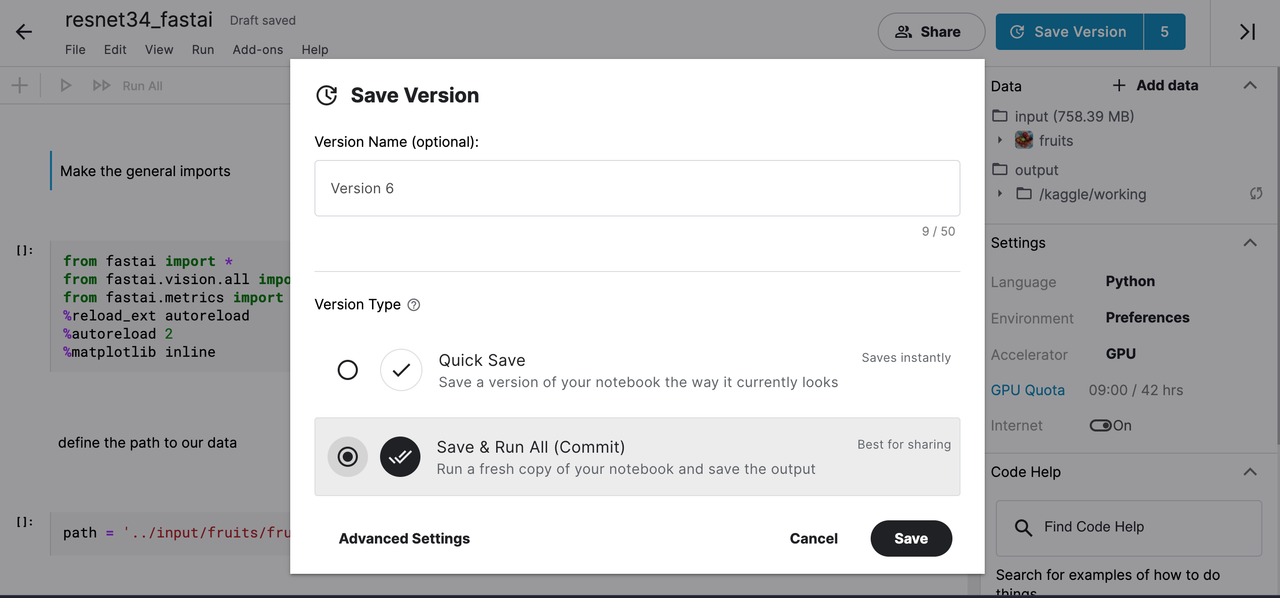
save version on the top right-hand corner and choose the save and run all (commit) option. You can also use the save feature to save your progress at any point during your work.
The complete notebook is also available in the notebooks directory of this repository
After saving our notebook we can go in the output section and download our model
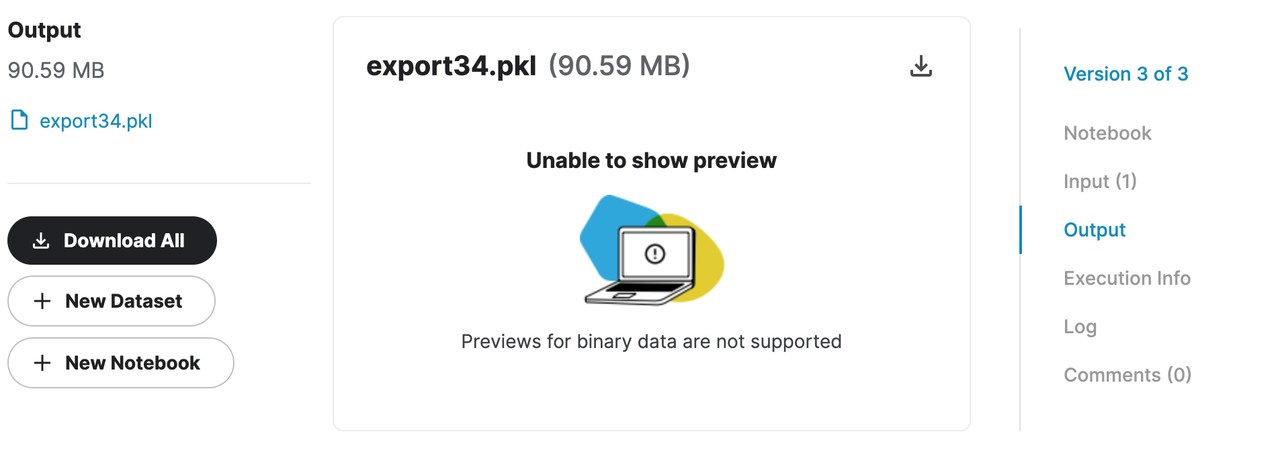
models directory of this repository in your computer with it.
Now on to deployment.
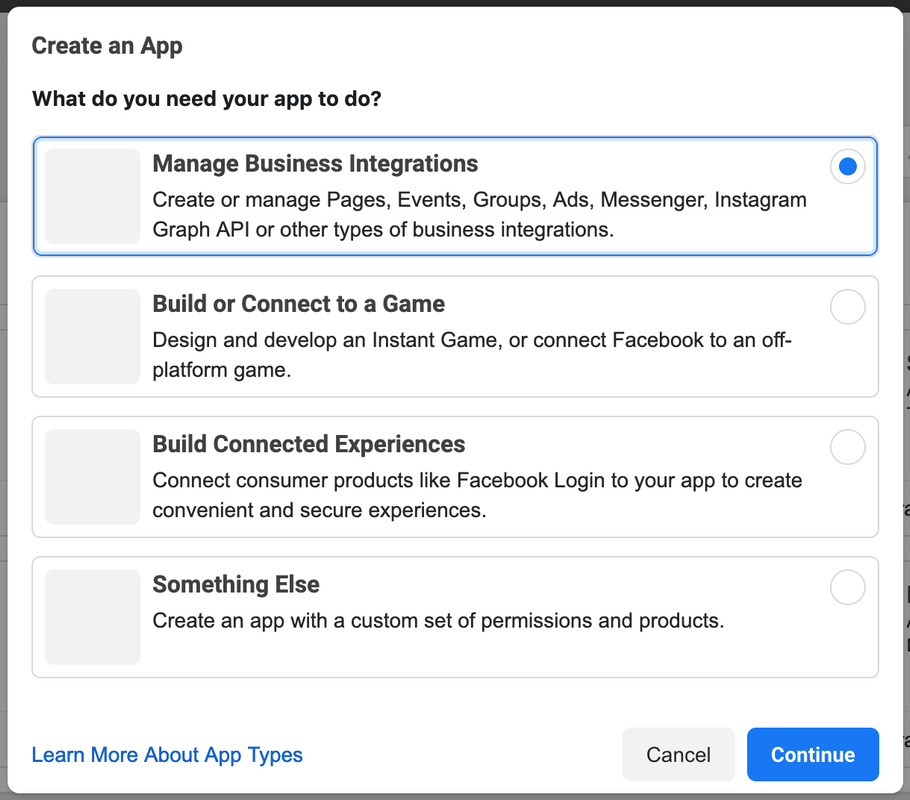
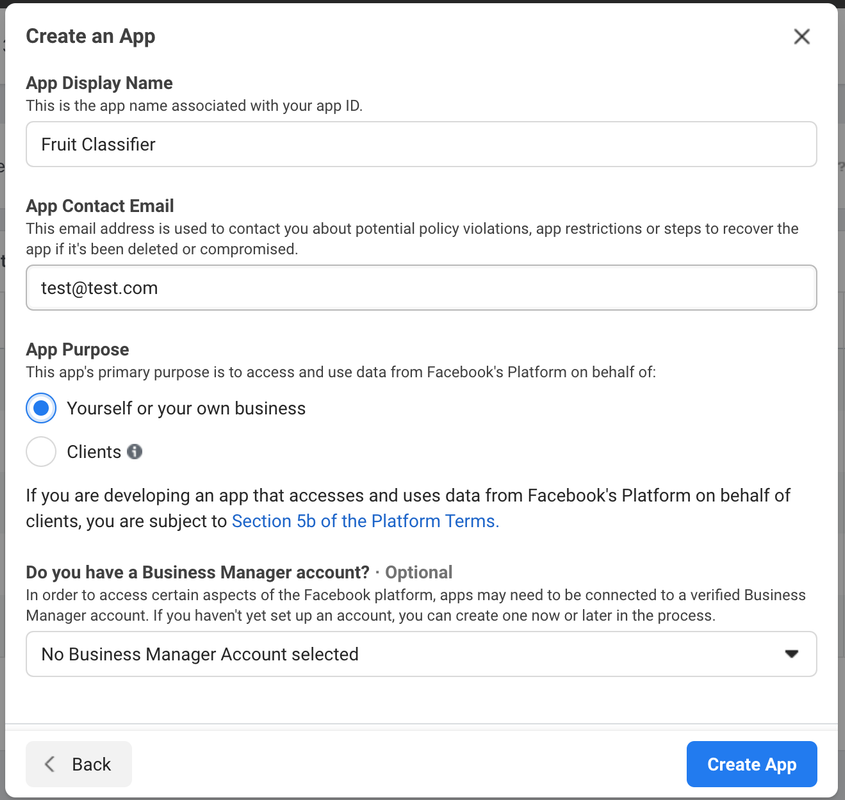
Go to the Facebook developer portal under my apps and create a new app with a name of your choice
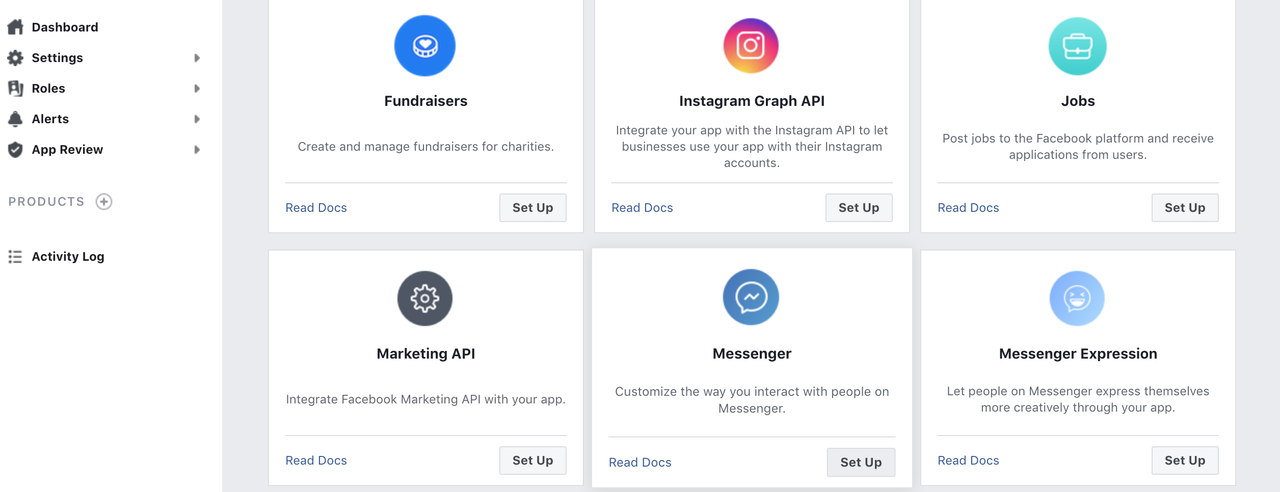
Click on setup under messenger:
Create a new page or add your bot to an existing page:
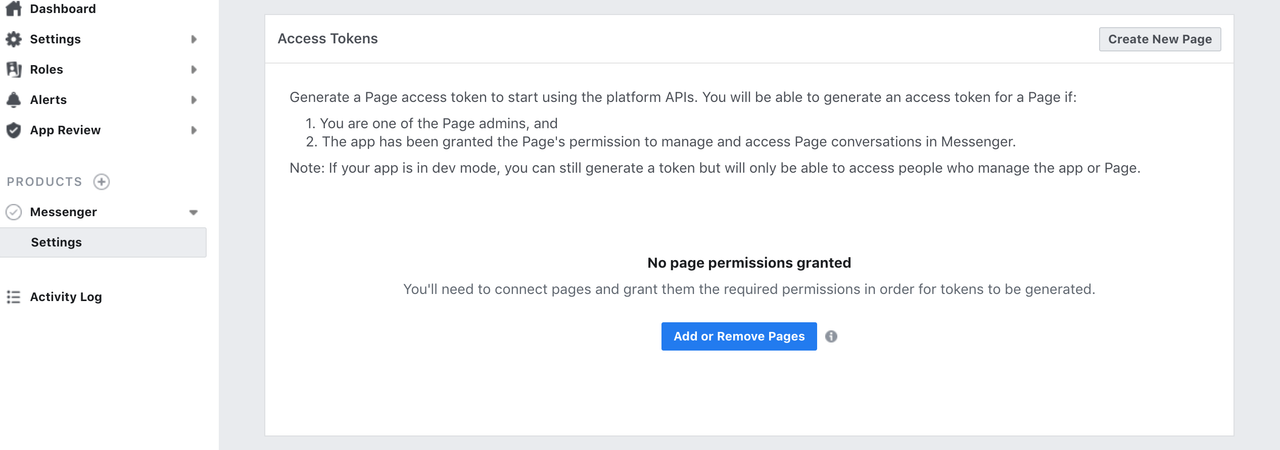
Generate an access token:

Let us look at the code which fulfils the requests sent to our bot. It is a simple flask server.
app = Flask(__name__)

ACCESS_TOKEN = os.environ['ACCESS_TOKEN']
VERIFY_TOKEN = os.environ['VERIFY_TOKEN']
bot = Bot(ACCESS_TOKEN)
Firstly we initialise our flask application and set our environment variables, which we have saved as ACCESS_TOKEN and VERIFY_TOKEN on Heroku's system and we use os.environ[''] to access them. Bot is a class in the pymessenger library which contains the functions which we will use to interact with the messenger platform. It passes in the access token.
# We will receive messages that Facebook sends our bot at this endpoint
@app.route('/', methods=['GET', 'POST'])
def receive_message():
    if request.method == 'GET':
        token_sent = request.args.get("hub.verify_token")
        return verify_fb_token(token_sent)

    else:
            # get whatever message a user sent the bot
        output = request.get_json()
        for event in output['entry']:
            messaging = event['messaging']
            for message in messaging:
                if message.get('message'):
                    # Facebook Messenger ID for user so we know where to send response back to
                    recipient_id = message['sender']['id']
                    if message['message'].get('text'):
                        response_sent_text = get_message()
                        send_message(recipient_id, response_sent_text)
                    # if user send us a GIF, photo, video or any other non-text item
                    if message['message'].get('attachments'):
                        if message['message']['attachments'][0]['type'] == "image":
                            image_url = message["message"]["attachments"][0]["payload"]["url"]
                            pred_message = model_predict(image_url)
                            send_message(recipient_id, pred_message)

    return "Message Processed"

def verify_fb_token(token_sent):
    # take token sent by Facebook and verify it matches the verify token you sent
    # if they match, allow the request, else return an error
    if token_sent == VERIFY_TOKEN:
        return request.args.get("hub.challenge")
    return 'Invalid verification token'
the function above defines how we receive the messages from Facebook messenger. In our app route '/' we handle two types of requests. The GET method checks for the verify token while the POST method is used by Facebook to send our bot messenger sent by a user on our Messenger application. When a message is a text, the response is sent from the get_message function. When it is an image, Facebook generates a URL for the image and the response will be the output returned when we run that URL through our classifier using the model_predict function. In both cases, the send_message function is used to send back the response to the user and it passes in the receipient_id(user) and the message(response). We specify the attachment type as images because our model can only classify images.
The verify_fb_token function checks if token indeed matches the one sent by Facebook.
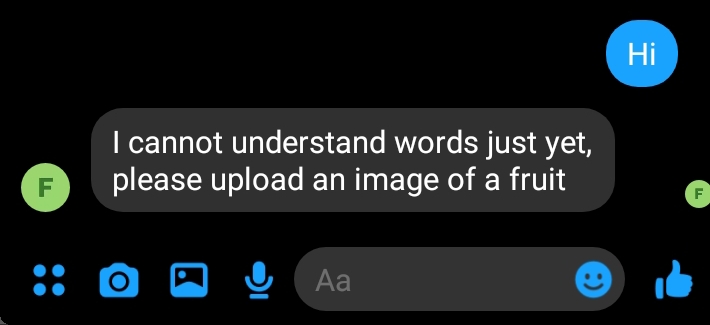
The get_message function:
def get_message():
    sample_responses = ["Sorry I'm not smart enough to engage in natural conversation yet, I only understand images of fruit",
    "Please upload an image of a fruit",
                        "I cannot understand words just yet, please upload an image of a fruit"]

    return random.choice(sample_responses)
The above function acts as the response to whatever text the user sends since we are focusing on fruit images.
path = Path()
Path().ls(file_exts='.pkl')
learn = load_learner(path/'models/export34.pkl')
We use Path() from the os library to find the path to our model which is stored in the models directory. We then use the load_learner method from fastai to store our model as the variable learn.
The model_predict function:
# Process the image and prediction
@app.route('/analyse', methods=['GET', 'POST'])
def model_predict(url):
response = requests.get(url)
img = PILImage.create(BytesIO(response.content))
prediction = learn.predict(img)[0]
img_message = str(prediction)
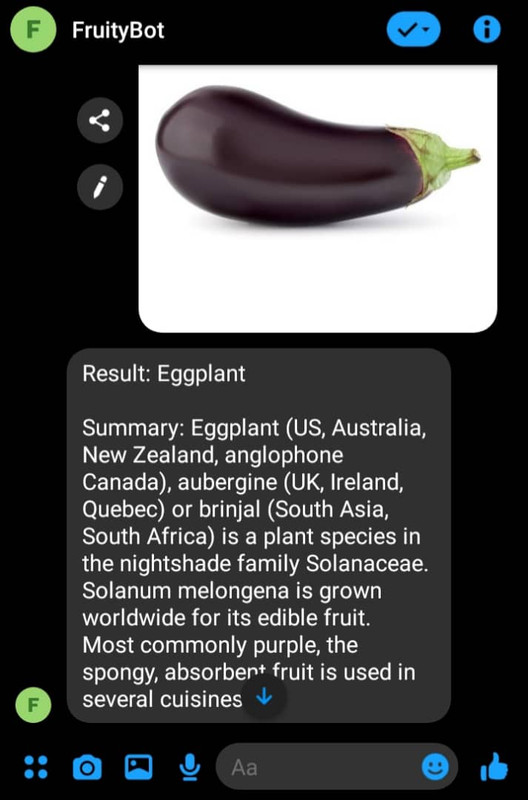
wiki_msg = re.sub("\d+\s\d+\.\d+", "", img_message)
wiki_info = wk.summary(wiki_msg, sentences = 3)
wiki_result=(f'Result: {img_message}\n'
f'\n'
f'Summary: {wiki_info}')
return wiki_result
The above function takes in the image URL and makes a prediction using the model we built. The pillow library is used to change the URL into a format that can be accepted by our model via the PILImage.create method. We also use the Wikipedia library to give the user a summary of the predicted class. Earlier, you may have noticed that some predicted classes contained numbers and from further investigation, I found that these numbers had no significance so we use regex to get rid of them. This will then make it easier for Wikipedia search.
The complete code for the webhook is in the app.py file. The other files necessary for deployment are the Procfile which specifies the commands that are executed by the app on startup and the requirements.txt which specifies what python packages are required to run the project.
By now you should have a Heroku account and installed the Heroku command-line interface.
To start open the cloned repository in visual studio code or your favourite IDE. Open the terminal and run:
$ heroku login
after login:
$ heroku create
Let us configure our variables, these are the access token from Facebook and a verification token that you create yourself(make sure it is unique and keep it safe for later):
$ heroku config:set ACCESS_TOKEN=xxxxxx
$ heroku config:set VERIFY_TOKEN=xxxxxx
$ git push heroku master
make note of the URL created by Heroku we also need it for later.
When you open the URL you should be able to see this in your browser if you have done everything correctly:

Under the messenger settings again add the callback URL which is the Heroku URL of our webhook. You will also be asked for the verification token, it should be the same as the one you created earlier for Facebook to verify.

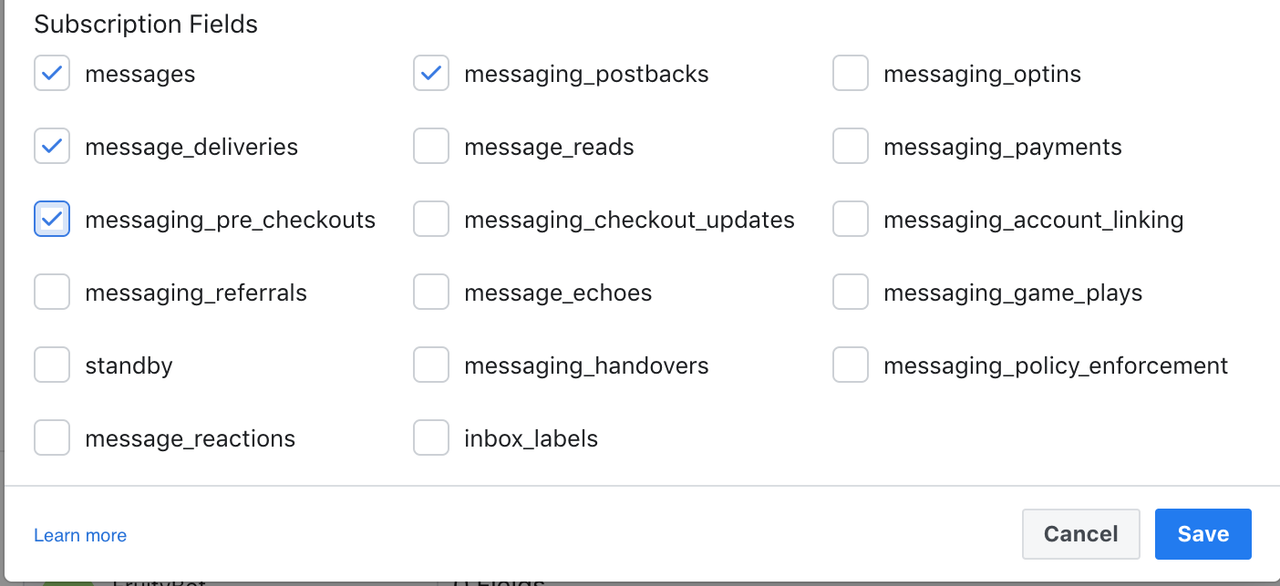
Still, under the messenger settings, click on Add page subscriptions and tick the boxes like below:
Then send a fruit image as a message to your Facebook page and you get something like this:
Send text:
To share your AI app with your friends you can add them as test users or send your application for app review to share the bot with the world. Here is an example of what a submission would look like for a messenger app: sample submission.
This is the end of the tutorial. I hope you enjoyed it, you can repeat the steps with an image dataset of your choice or add features of your own. Deep learning is not just limited to image classification, you can also create a state-of-the-art chatbot, a text classifier, a text summariser, run sentiment analysis and more. The world awaits for whatever you intend to build next.
Build an AI image classifier using PyTorch/fastai and deploy it as a bot on the messenger platform is licensed, as found in the LICENSE file.

