React for ipywidgets that just works. No webpack, no npm, no hassle. Just write jsx, tsx and python.
Build on top of AnyWidget.
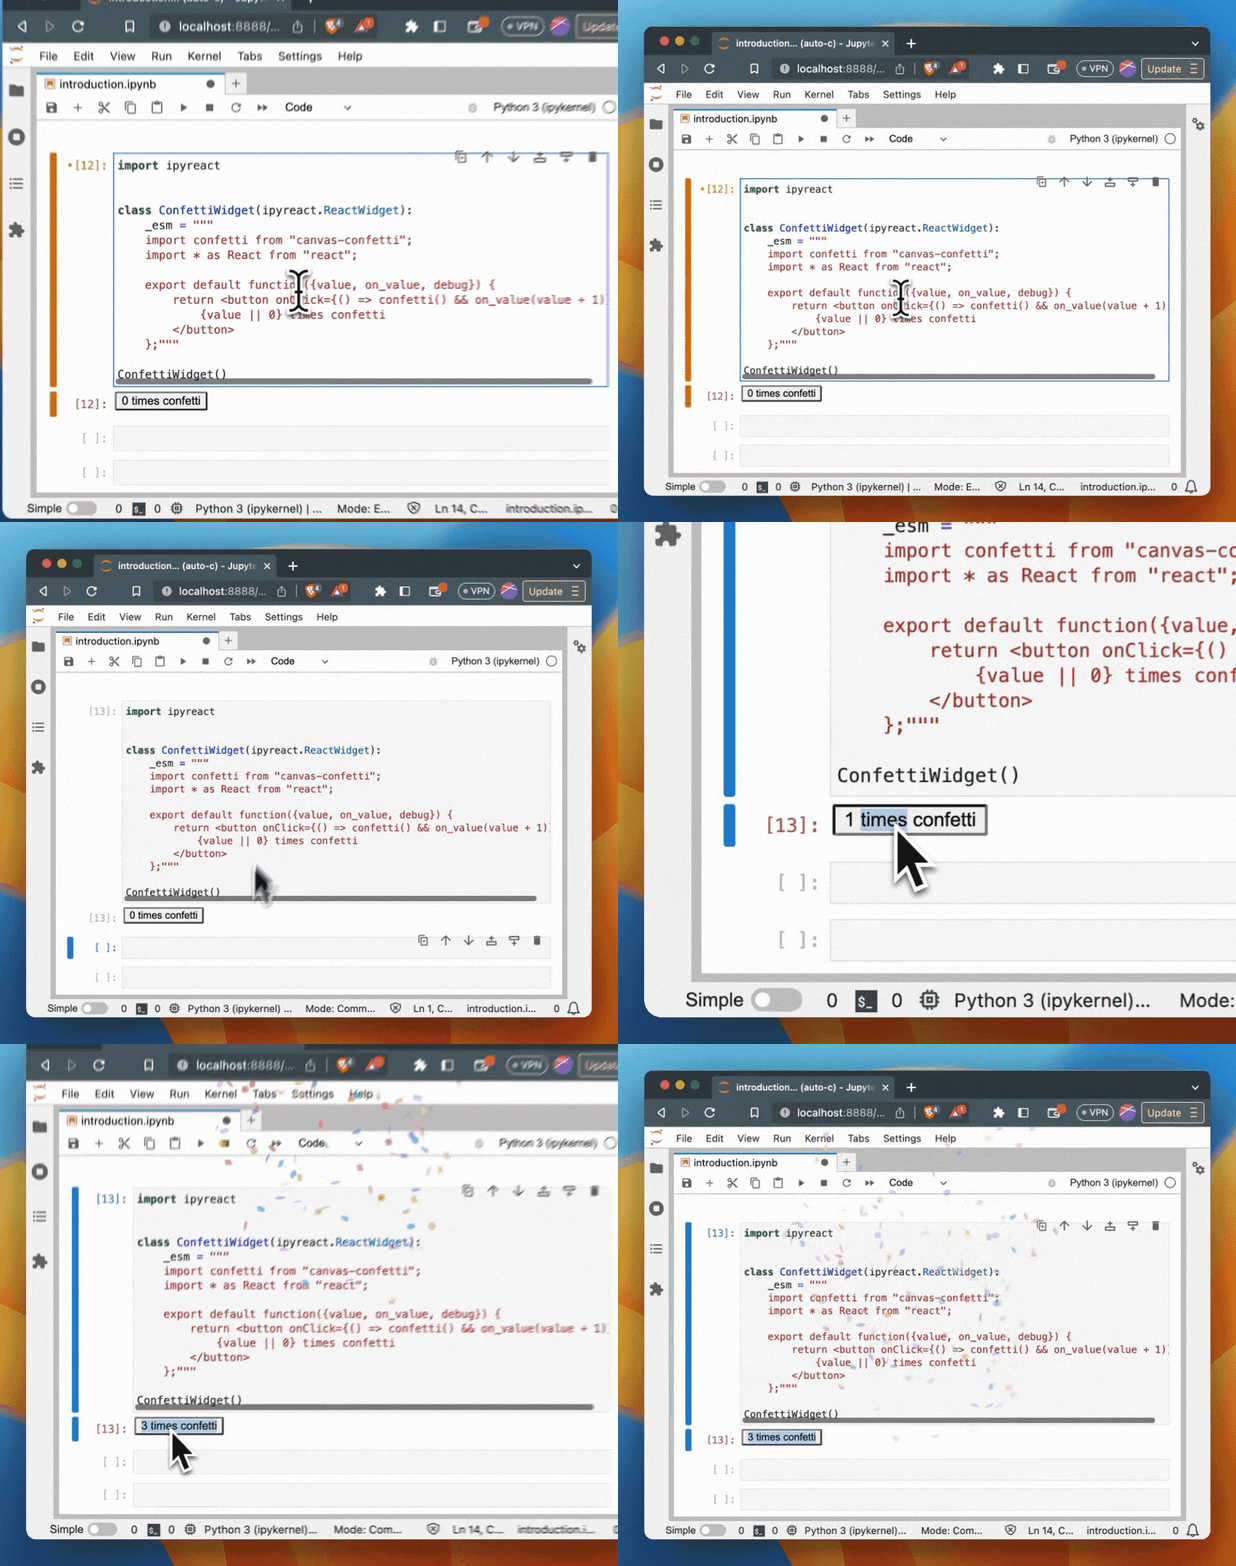
This tutorial will walk you through the steps of building a complete ipywidget with react.
Just click the JupyterLite or Binder link to start the interactive walkthrough.
Take any Material UI example, copy/paste the code, and it should work in Jupyter Notebook, Jupyter Lab, Voila, and more specifically, Solara.
import ipyreact


class ConfettiWidget(ipyreact.ReactWidget):
    _esm = """
    import confetti from "canvas-confetti";
    import * as React from "react";

    export default function({value, set_value, debug}) {
        return <button onClick={() => confetti() && set_value(value + 1)}>
            {value || 0} times confetti
        </button>
    };"""
ConfettiWidget()Create a tsx file:
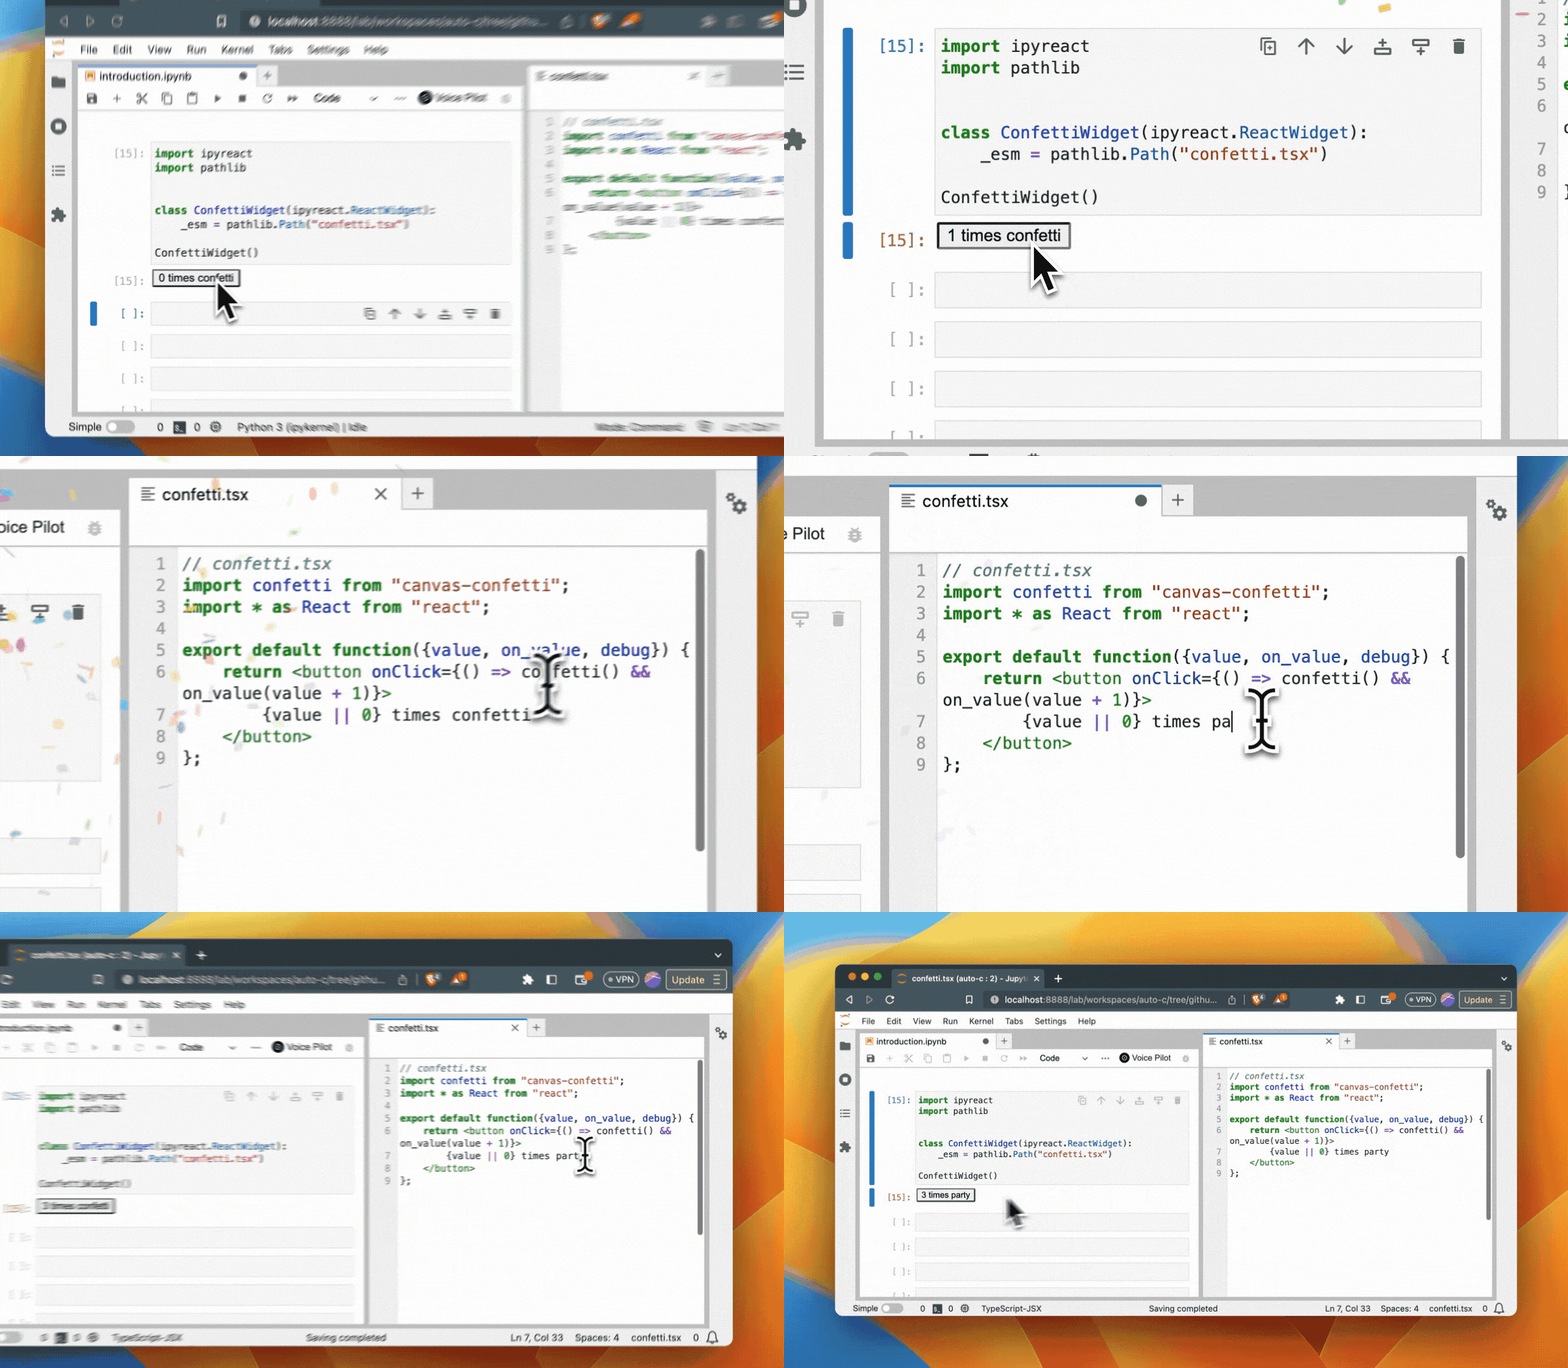
// confetti.tsx
import confetti from "canvas-confetti";
import * as React from "react";

export default function({value, set_value, debug}) {
    return <button onClick={() => confetti() && set_value(value + 1)}>
        {value || 0} times confetti
    </button>
};
And use it in your python code:
import ipyreact
import pathlib


class ConfettiWidget(ipyreact.ReactWidget):
    _esm = pathlib.Path("confetti.tsx")

ConfettiWidget()
Now edit, save, and see the changes in your browser/notebook.
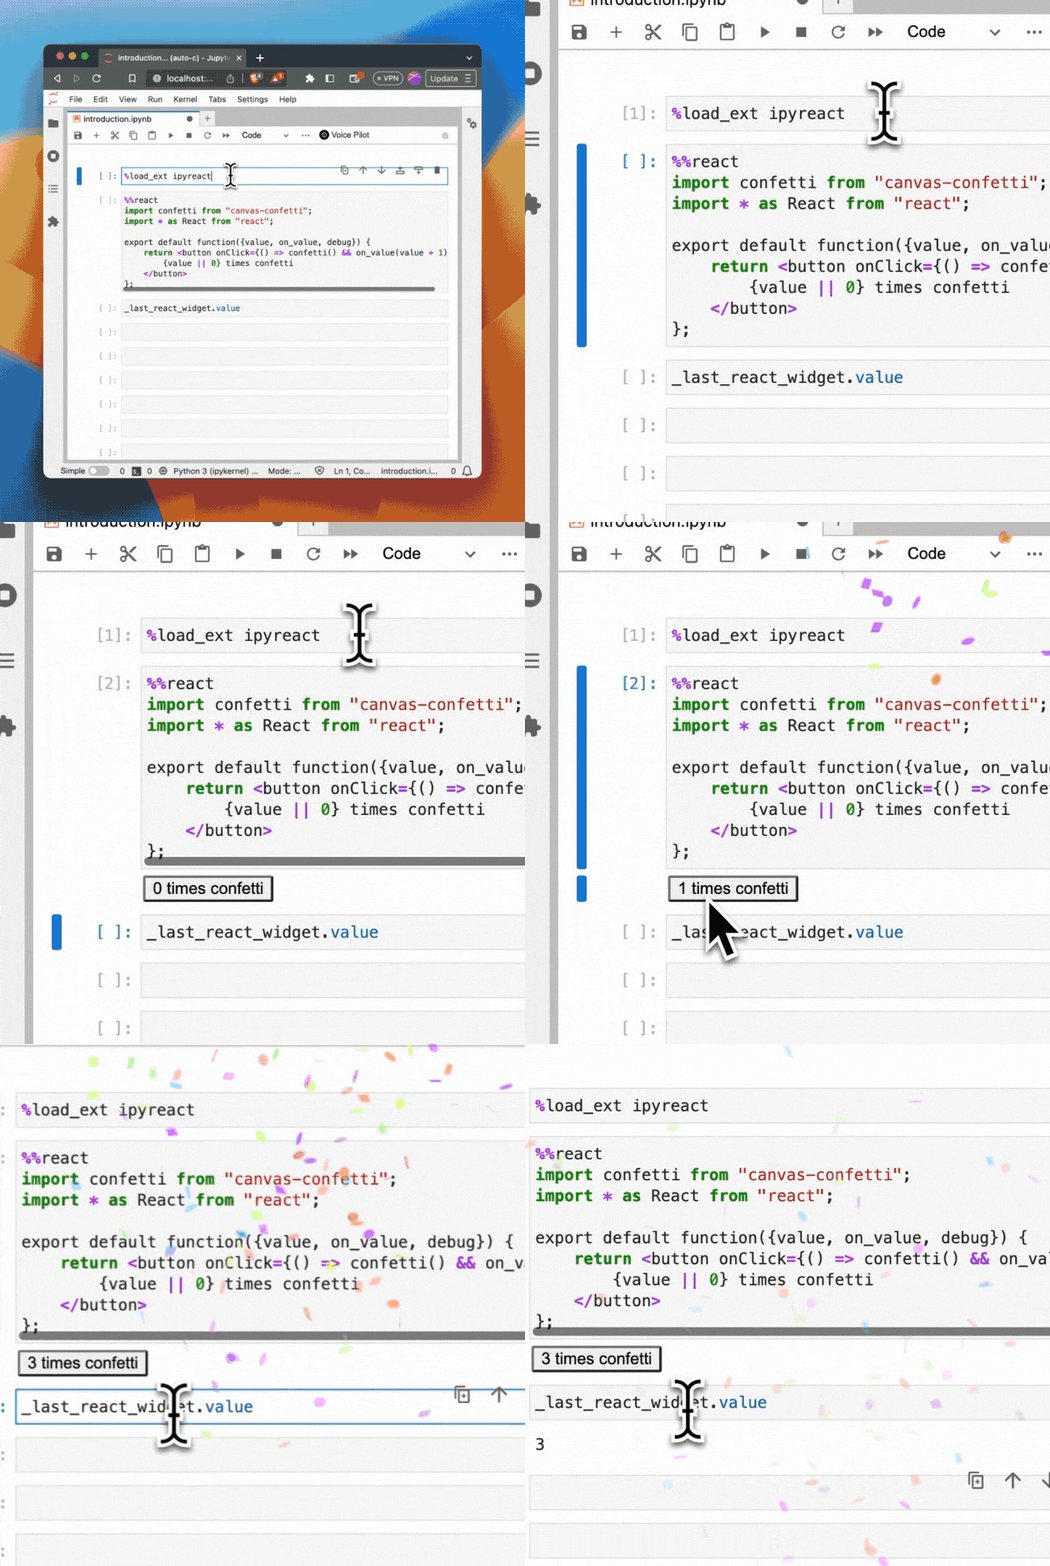
First load the ipyreact extension:
%load_ext ipyreactThen use the %%react magic to directly write jsx/tsx in your notebook:
%%react
import confetti from "canvas-confetti";
import * as React from "react";

export default function({value, set_value, debug}) {
    return <button onClick={() => confetti() && set_value(value + 1)}>
        {value || 0} times confetti
    </button>
};
Access the underlying widget with the name _last_react_widget (e.g. _last_react_widget.value contains the number of clicks):
You can install using pip:
pip install ipyreact- The ReactWidget has an
valuetrait, which is atraitlets.Anytrait. Use this to pass data to your react component, or to get data back from your react component. - All traits are added as props to your react component (e.g.
{value, ...}in th example above. - For every trait
ipyreactautomatically provides aset_<traitname>callback, which you can use to set the trait value from your react component (e.g.set_valuein the example above). (Note: we usedon_valuebefore, this is now deprecated) - Your code gets transpiled using sucrase in the frontend, no bundler needed.
- Your code should be written in ES modules.
- Set
debug=Trueto get more debug information in the browser console (also accessible in the props). - Make sure you export a default function from your module (e.g.
export default function MyComponent() { ... }). This is the component that will be rendered.
For every widget, you can provide an _import_map, which is a dictionary of module names to urls. By default we support react and react-dom which is prebundled.
Apart from react, the default we provide is:
_import_map = {
    "imports": {
        "@mui/material/": "https://esm.sh/@mui/[email protected]/",
        "@mui/icons-material/": "https://esm.sh/@mui/icons-material/",
        "canvas-confetti": "https://esm.sh/[email protected]",
    },
    "scopes": {
    },
}
Which means we can copy paste most of the examples from mui
%%react -n my_widget -d
import Button from '@mui/material/Button';
import confetti from "canvas-confetti";
import * as React from "react";

export default function({value, set_value, debug}) {
    if(debug) {
        console.log("value=", value, set_value);
    }
    return <Button variant="contained" onClick={() => confetti() && set_value(value + 1)}>
        {value || 0} times confetti
    </Button>
};
We add the https://github.com/guybedford/es-module-shims shim to the browser page for the import maps functionality.
Create a dev environment:
conda create -n ipyreact-dev -c conda-forge nodejs yarn python jupyterlab
conda activate ipyreact-dev
Install the python. This will also build the TS package.
pip install -e ".[test, examples]"When developing your extensions, you need to manually enable your extensions with the notebook / lab frontend. For lab, this is done by the command:
jupyter labextension develop --overwrite .
yarn run build
For classic notebook, you need to run:
jupyter nbextension install --sys-prefix --symlink --overwrite --py ipyreact
jupyter nbextension enable --sys-prefix --py ipyreact
Note that the --symlink flag doesn't work on Windows, so you will here have to run
the install command every time that you rebuild your extension. For certain installations
you might also need another flag instead of --sys-prefix, but we won't cover the meaning
of those flags here.
If you use JupyterLab to develop then you can watch the source directory and run JupyterLab at the same time in different terminals to watch for changes in the extension's source and automatically rebuild the widget.
# Watch the source directory in one terminal, automatically rebuilding when needed
yarn run watch
# Run JupyterLab in another terminal
jupyter lab
After a change wait for the build to finish and then refresh your browser and the changes should take effect.
If you make a change to the python code then you will need to restart the notebook kernel to have it take effect.


