
Hi everyone 👋
Welcome to the Rent A Car System project developed as Full Stack.
This project has been developed based on Multi-Layered Architecture.
SOLID software principles have been adopted in the project.
Front-End part is coded with Angular, Back-End part is coded with C#.
MSSQL Local Database is used for the database.
In addition, a Web API has been coded in service layer to communicate with the Front-End side of the project and other applications.
I would like to tell you about the main features of the project.

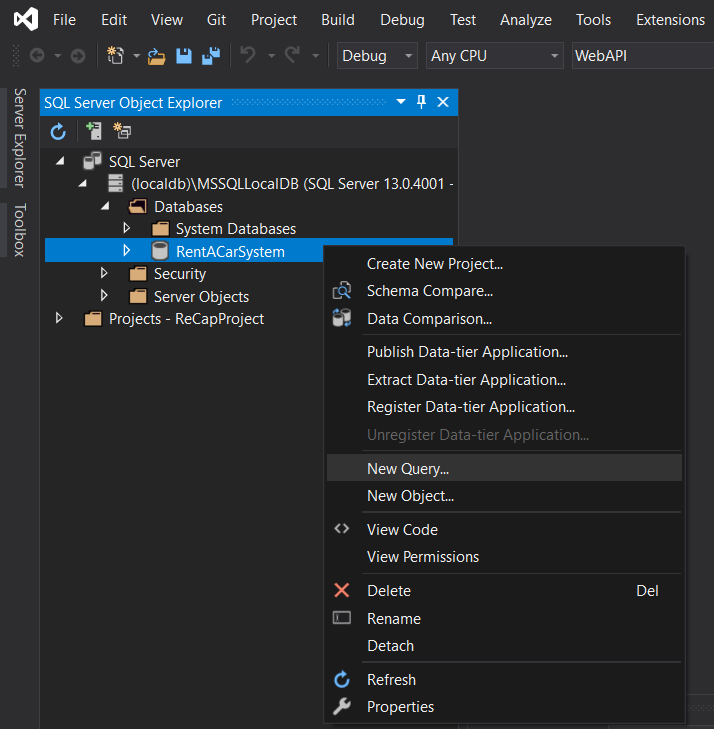
Then, right click on the created database and select the "New Query" option and execute the table creation commands here. Thus, the tables required for the project will be created. You can add data manually from the opened page by right clicking on the created tables and selecting "View Data".
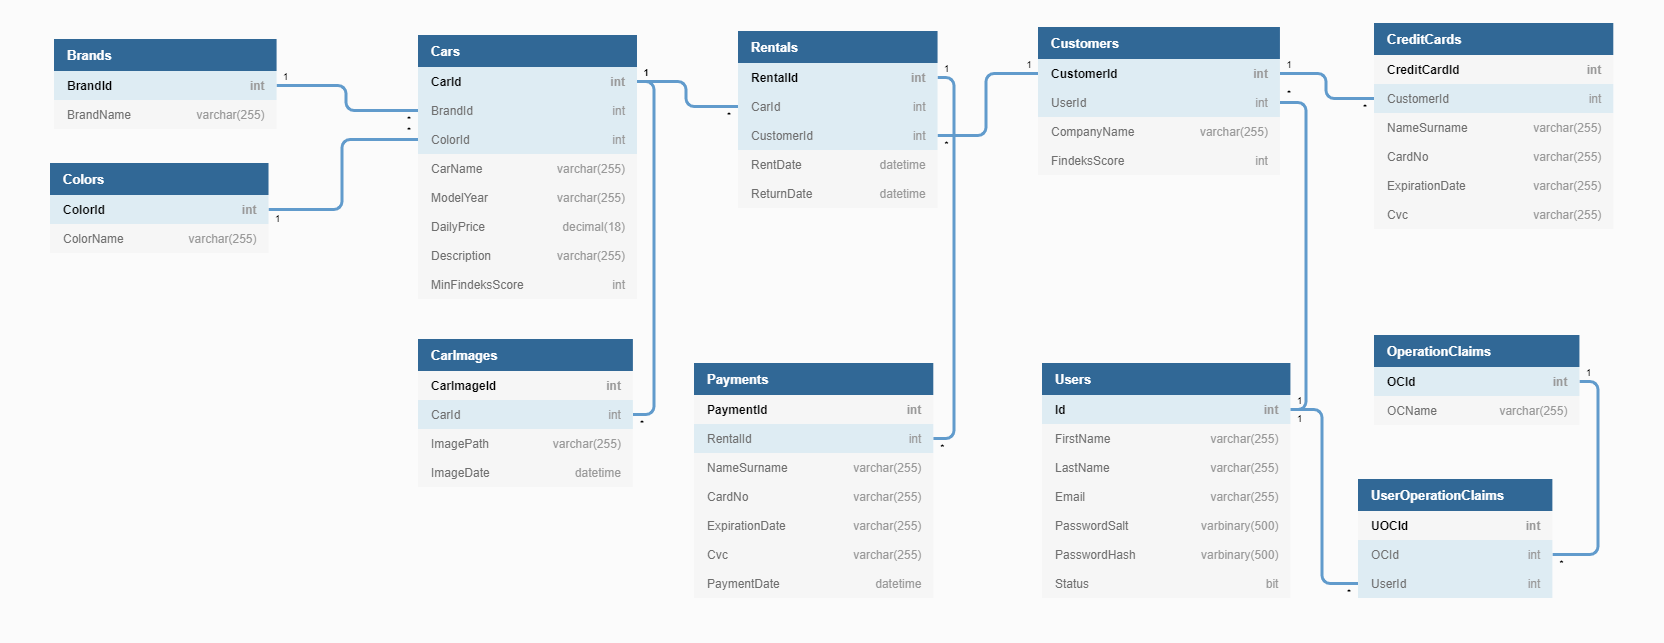
📌 ER Diagram of database:
C# was used in the back-end part of the project. Development was made on the basis of multi-layered architecture. I want to give information about what layers do;
1-Entities Layer: It is where the classes of objects to be used throughout the program are defined. Each of the classes in this layer corresponds to a table in the database, in addition to these, it also contains DTO (Data Transfer Object) classes in which data from different tables are joined.
2-Data Access Layer: It is the layer on which database connections and operations are made. Required configuration for database connection is done here. Also, operations such as data extraction, addition, deletion, and updating are encoded in this layer.
3-Business Layer: It is the layer where business rules are defined and controlled. When a command comes to the program, what actions it should perform and which set of rules it should pass through are defined here. Cross-Cutting Concerns are triggered in this layer.
4-Core Layer: It is the part where structures, cross-cutting concerns, aspects, extensions and tools to be used in common in all layers are coded.
5-Presentation Layer: It is the layer that appears to the user, that the user interacts with and sends commands to the program.
6-Service Layer (Web API): It is the part where the services that enable the Front-End part and other platforms to communicate with the program and perform operations are written.
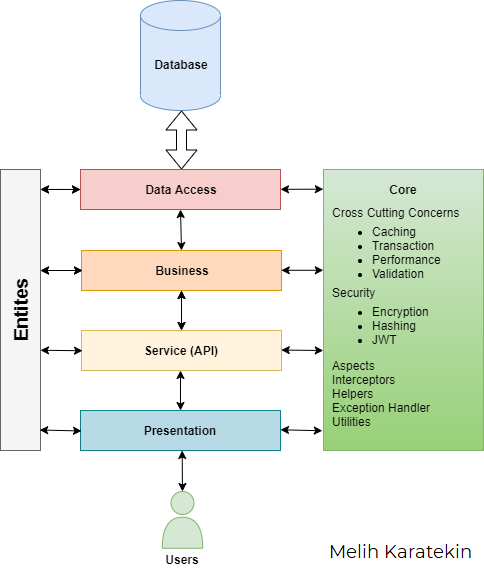
📌 General scheme of the project:
| Package Name | Version |
|---|---|
| Autofac | 6.1.0 |
| Autofac.Extensions.DependencyInjection | 7.1.0 |
| Autofac.Extras.DynamicProxy | 6.0.0 |
| FluentValidation | 9.5.1 |
| Microsoft.AspNetCore.Authentication.JwtBearer | 3.1.12 |
| Microsoft.AspNetCore.Http | 2.2.2 |
| Microsoft.AspNetCore.Http.Abstractions | 2.2.0 |
| Microsoft.EntityFrameworkCore.SqlServer | 3.1.12 |
| Microsoft.Extensions.Configuration | 5.0.0 |
| Microsoft.IdentityModel.Tokens | 6.8.0 |
| NETStandard.Library | 2.0.3 |
| Newtonsoft.Json | 12.0.3 |
| System.IdentityModel.Tokens.Jwt | 6.8.0 |
Angular 11 was used in the front-end part of the project. Throughout the development, Visual Studio Code has been worked on as IDE. Bootstrap has been integrated to achieve a responsive design. Also used Font-Awesome. BrowserModule, HttpClientModule, AppRoutingModule, FormsModule, ReactiveFormsModule, BrowserAnimationsModule and ToastrModule were used as modules in Angular. On the Front-End side, more attention was paid to whether the process is working correctly rather than the design.
WARNING! For Front-End side to work, you need to set WebAPI as "Set as Startup Project" on Back-End side
and start it with IIS Express. Then you have to follow the steps below.
1- First, you need to install the Node modules used in the project.
npm install
2- Finally, we will open a new terminal and run the project on localhost.
ng serve --open
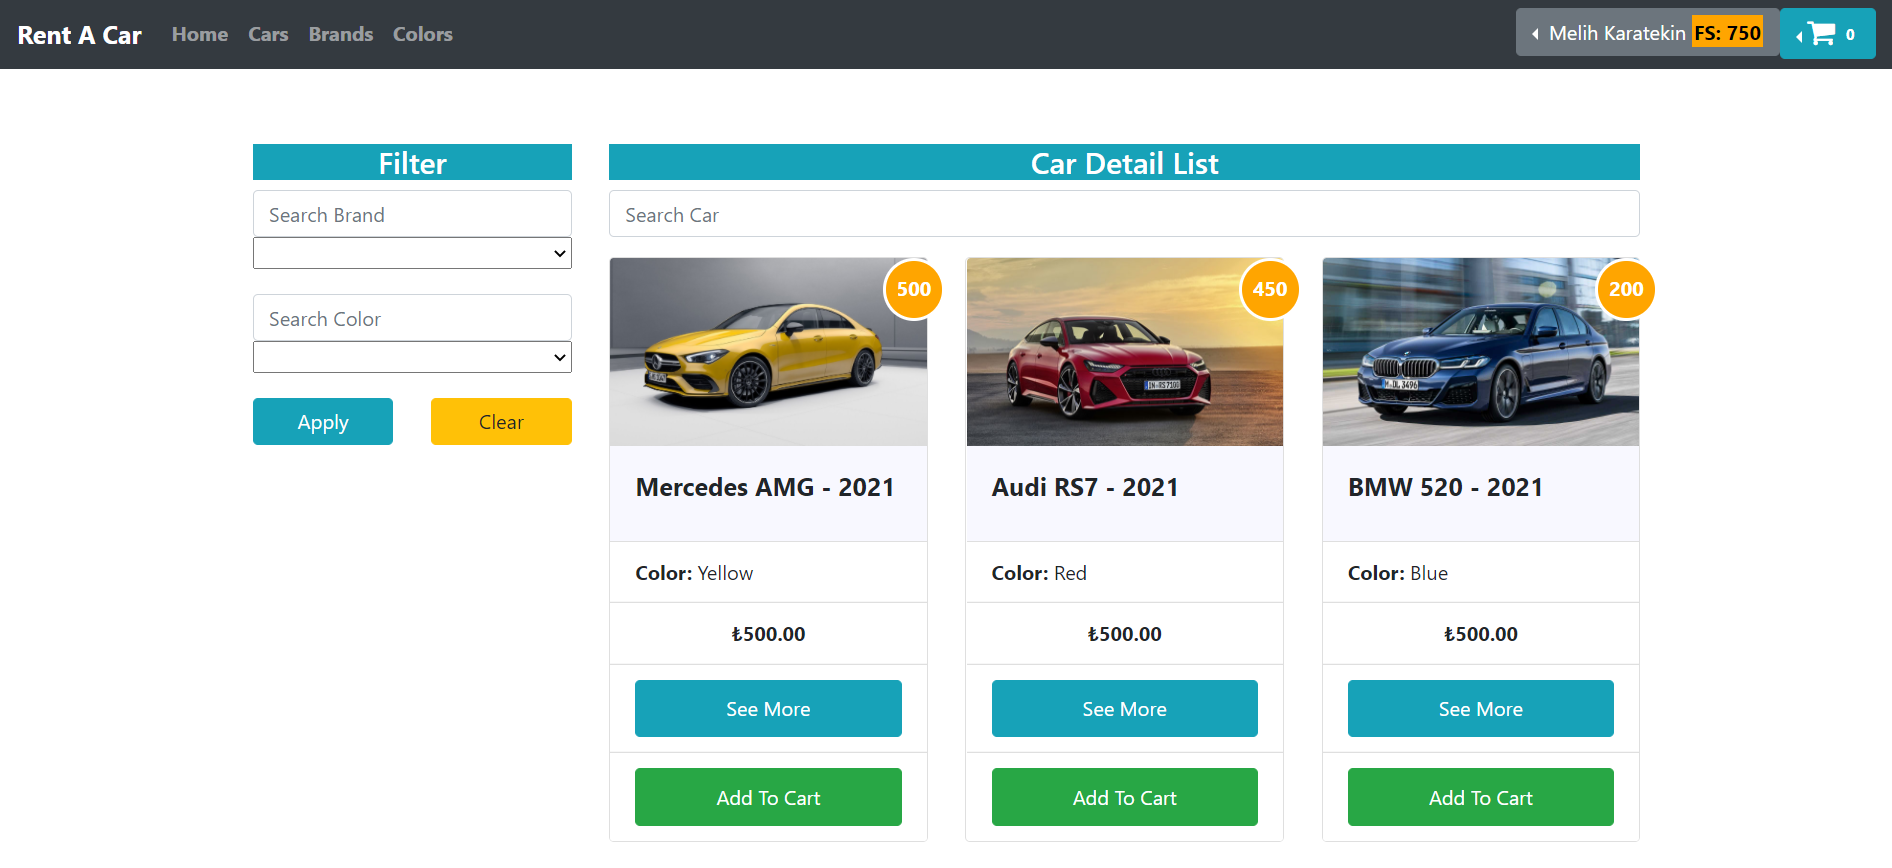
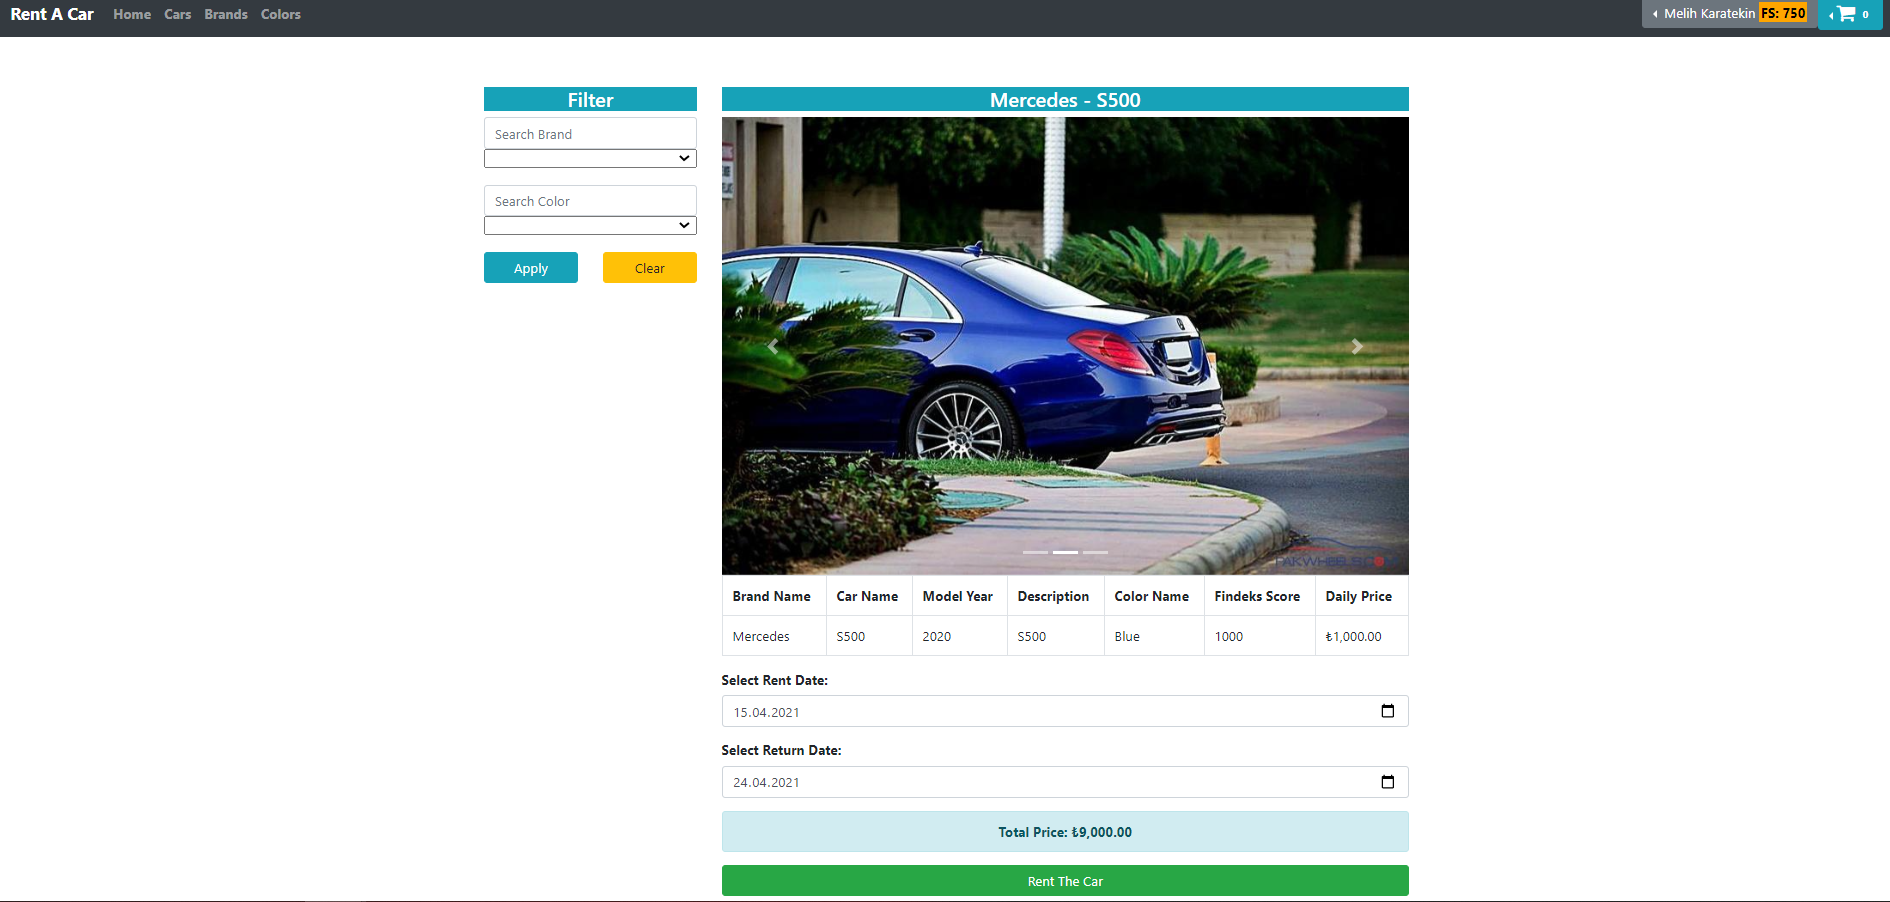
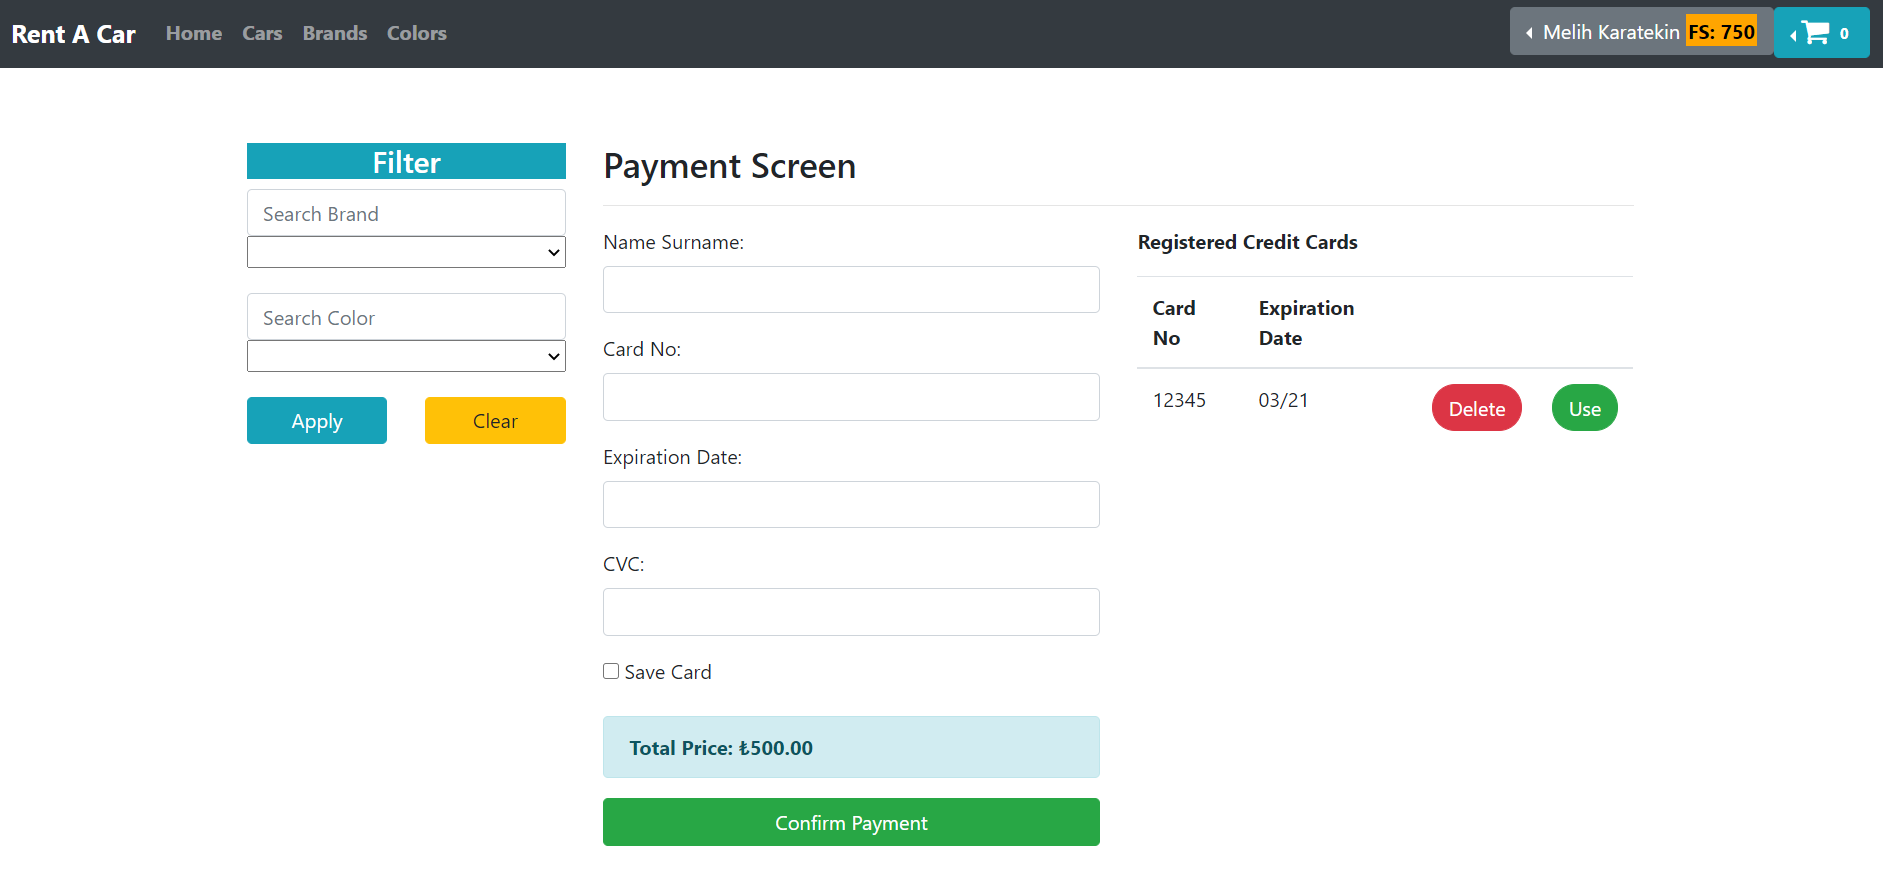
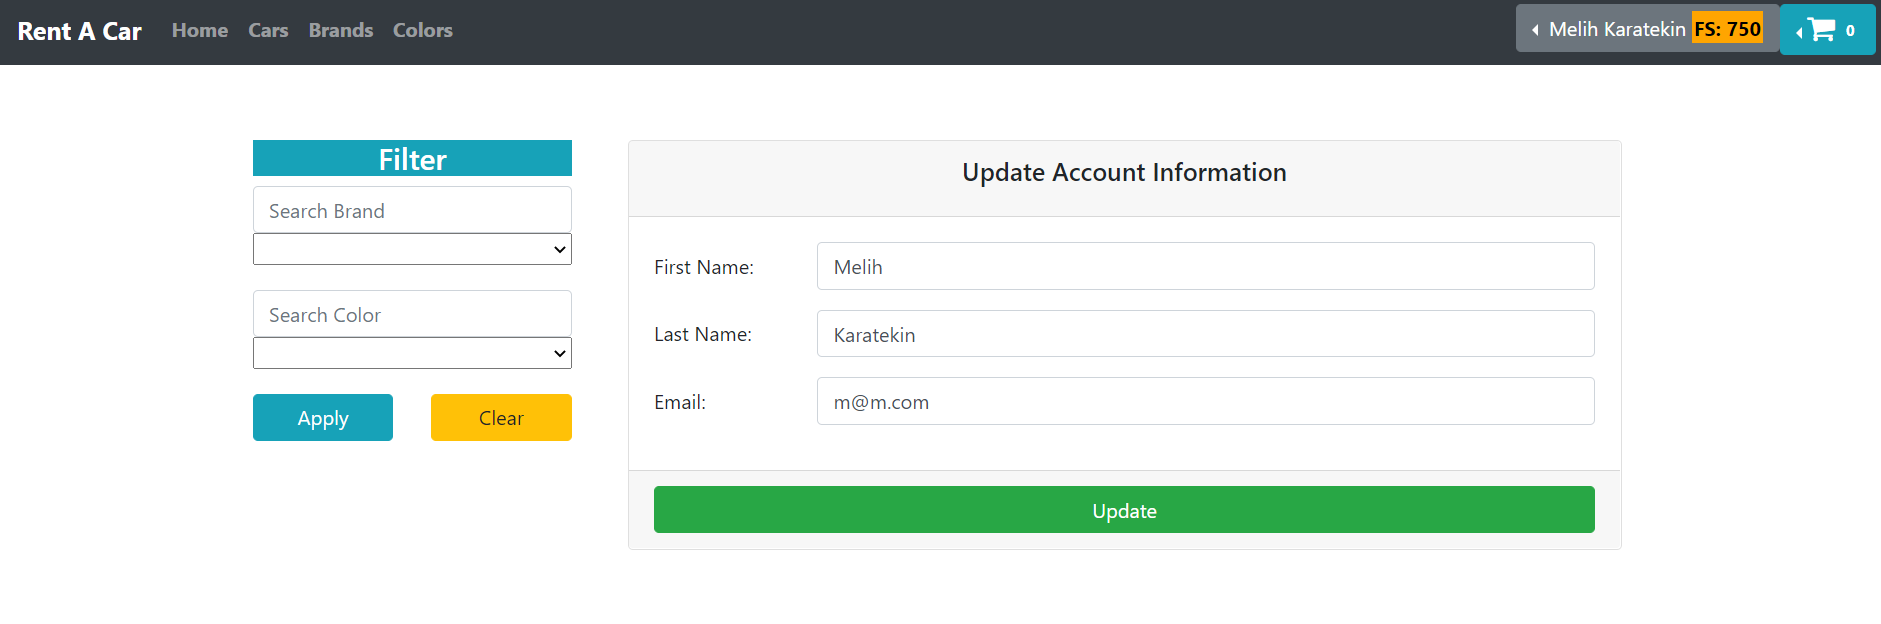
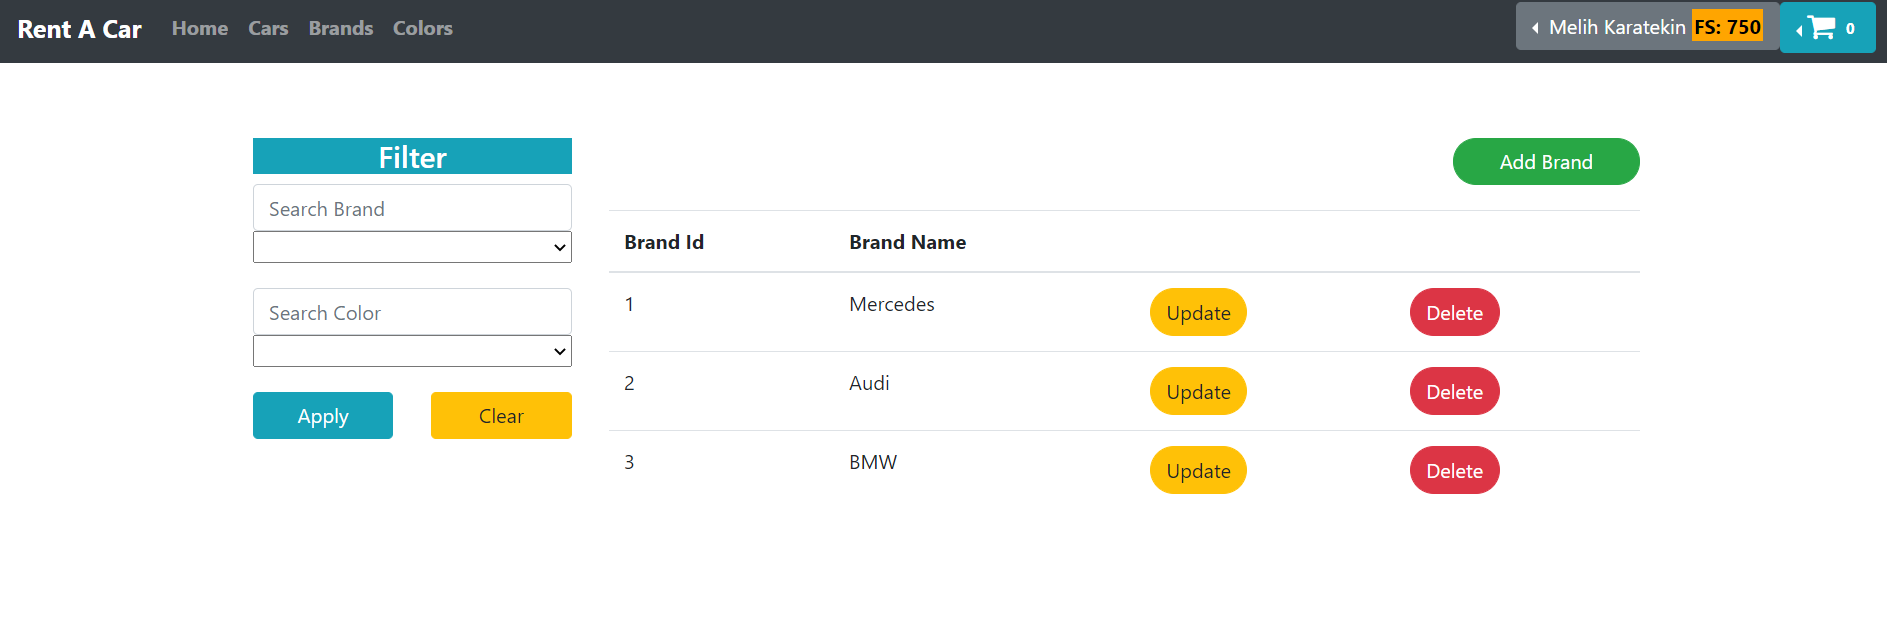
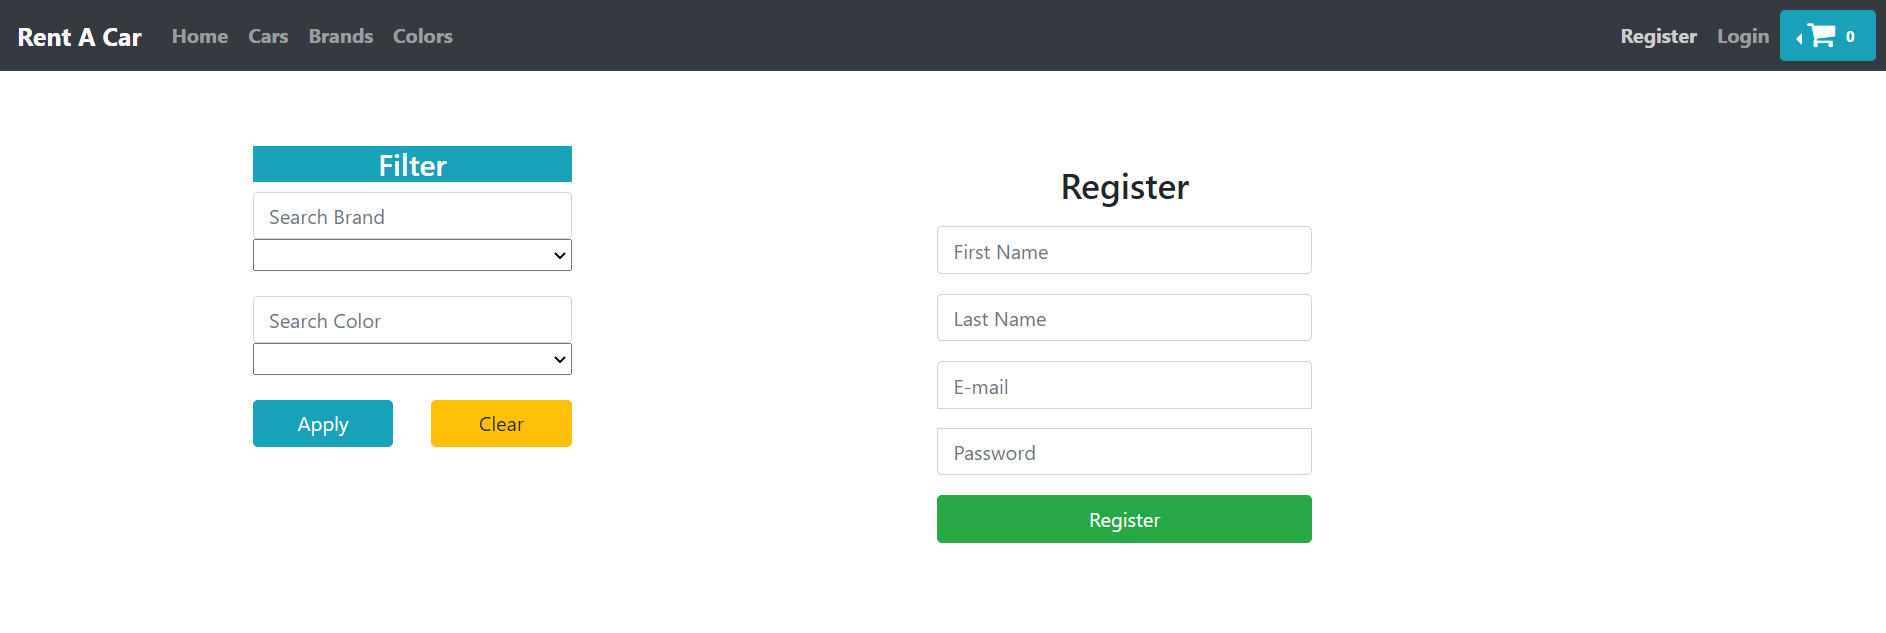
📌 Some images from the project:


Thank you for taking your time to read. You can contact me from my accounts below.