
After this lesson, you will be able to:
- Create an API that will serve contents from a database to an Angular app.
- Create an angular application that will use an API to send and receive information form a Mongo Database.
- Fork this repo
- Clone your fork into your
~/code/labsfolder.
Upon completion, run the following commands:
$ git add .
$ git commit -m"done"
$ git push origin master
Navigate to your repo and create a Pull Request -from your master branch to the original repository master branch.
In the Pull Request name, add your campus, name, and last name separated by a dash "-".
In this lesson you have to deliver two different projects: the server API and the client. You can add the client folder in the server folder to keep both in the same repo.
We all have secrets, but sometimes we would like to tell this secrets to a reliable source that will keep them between us. We are going to build an application that will allow us to store our biggest secret.
In the repo you have forked, we provide you an starter code. This code has the main structure for the API and the Client app you are going to build.
We have already generated and added all the packages you will need to start working in your API. The folder structure is the following:
starter-code/
├── authentication-app
│   └── src
│       └── app
│       │   ├── app.component.css
│       │   ├── app.component.html
│       │   ├── app.component.ts
│       │   └── app.module.ts
│       └── auth-login
│       │       ├── auth-login.component.css
│       │       ├── auth-login.component.html
│       │       └── auth-login.component.ts
│       └── signup-login
│       │       ├── auth-signup.component.css
│       │       ├── auth-signup.component.html
│       │       └── auth-signup.component.ts
│       └── my-private-page
│       │       ├── my-private-page.component.css
│       │       ├── my-private-page.component.html
│       │       └── my-private-page.component.ts
│       └── session-service.ts
├── .gitignore
├── app.js
├── bin
│   └── www
├── configs
│   └── passport.js
├── models
│   └── user.js
├── package.json
├── public
└── routes
As you can see, the project has an authentication-app folder where you will find all the necessary files to create your angular app. It already has all the components and service created. On the other hand, the main folder has the structure to create the API that will use the Angular app.
The first thing we have to create is the API. Remember to install all the packages before start coding.
The User model will have the following fields:
username, string. We will use it to login.password, string. Encrypted withbcrypt, we will use it with the username to authenticate the user.name, string. It will store the user full name.secret, string. In this field, we will store our biggest secret.
Remember to add the timestamps createdAt and updatedAt to the model, to store the values.
You have to add the code into the models/user.js file to generate your model.
Tasks
Create the model in the model/user.js file, with the following fields:
usernamepasswordnamesecretcreatedAtupdatedAt
The following step is to configure Passport.js to use the Local Strategy to authenticate users. You can find the functions you have to complete in the config/passport.js file. Remember we will use this service from our Client app.
Tasks
Add the necessary code to configure Passport.js, by completing the following functions:
passport.use()passport.serializeUser()passport.deserializeUser()
To finish up with our API, we have to create the different routes we will call from the client. You can find the routes in the routes/authController.js. We have already generated the main structure of your routes, you just have to create the code.
The controller contains the following methods:
POST /signup, that will receive the user information to signup in our application. Once we have stored the information in the database, we have to automatically login the user with thereq.loginmethod.POST /login, that will receive the username and the password, and start a session if the data is correct. If the data is incorrect, it has to throw an exception.POST /logout, that will finish the user session.
:::info You are creating an API. Remember to return not just the data, but also the Status Code that corresponds to the action that the user has done.
You can check out the different status codes you can return in the Status Cats API website. :::
Tasks
Generate the necessary code to implement your API in the routes/authController.js file:
POST /signup.POST /login.POST /logout.
Once we have done all the API, we can start coding the client. Remember that you will have to generate the necessary files with $ ng build --prod and add all the generated files in the authentication-app/build folder to the /public folder of the server.
The first thing we will do is the service that we will use to call our API methods. You have to change the file in authentication-app/src/app/session.service.ts file. We will need to store the current user in a variable inside the service.
We will have to create different methods to call they homonymous in the API. We need to create the following methods:
signup(), that will receive as a parameter the user data that will be stored in the database. If the information is correct, we will assign the user session to theuservariable we have to define.login(), that will receive the username and password to check out if the credentials are correct and he can start a session. Once the session starts, we have to store the current user in theuservariable.isLogged()will return if there is a user logged in or not. We will use theuservariable in the session to do that.logout()will finish the session, and remove the current user information from the variable in the service.handleError()will receive an error as a parameter and return an Observable with the message of the error.
Once we have done all this, we will have all the service correctly implemented.
Tasks
Create the necessary code to create a service that we will call the methods we have defined in the API and that we will use in the app. We have to:
- Create a
uservariable to store the current user information. - Generate the code of the following functions described above:
handleError()signup()login()isLogged()logout()
The following step in our process is to generate the routes that we will use to show the different components. We will have three different routes:
/signup/login/private
The components are already in the project, so you just have to add the routes into the authentication-app/src/app/app.module.ts file that will render the correct component depending on the route.
Tasks
Change the authentication-app/src/app/app.module.ts file to add the routes, by doing the following:
- Add the
RouterModuleandRoutesmodules form@anguler/router. - Create a
Routesarray, with the following routes:signup, that will renderAuthSignupComponent.login, that will renderAuthLoginComponent.private, that will renderMyPrivatePageComponent.
- Add the array to the
importssection in the file.
The app.component will be super simple. It will have two links (login and signup) if the user is not logged in, and a button (logout) if the user is logged in. You should use an ngIf directive to do that. You also have to style the page.
Tasks
Change the app.component.html and app.component.ts files to do the following:
- If a user is not logged in, show two different links that will render different components:
login, that will renderAuthLoginComponent.signup, that will renderAuthSignupComponent.
- If a user is logged in, show a button to
logout.
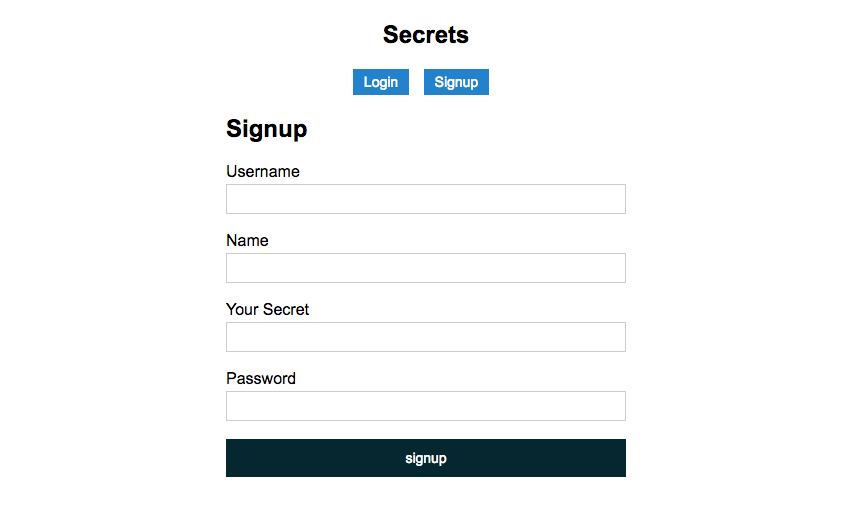
Once the user is in the /signup page, we have to show him a form that will allow to create a new account in the database. We have defined our model with four different fields: username, password, name, and secret.
We are saving our secret, so we don't want people to see what it is about while signing up. Use a password input field in the form.
When we click on the Signup button, we have to use the service we did in the Iteration 4 to store the user information in the database.
Tasks
Create the necessary changes in the code to allow users to signup in our application:
auth-signup.component.htmlfile, create the form with the following fields:username, type text.password, type password.Full name, type text.secret, type password.
auth-signup.component.tsfile, add the following:formInfoobject, to store all the information of the form.error, to store the error it could be generated during the signup process.signup()method to handle the request.
- Once the user has signed up, we start the session automatically, so we have to redirect the user to the
/privatepage.
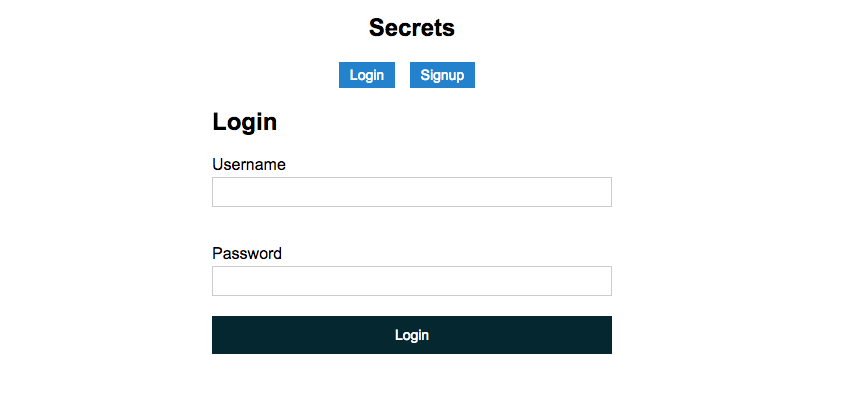
The login component has to have all the necessary fields to start a new session, so we have to create a form with username and password.
Again, when we click on the Login button, we have to use the service we did in the Iteration 4 to recover the data form the database and check out if the login succed or not.
Tasks
auth-login.component.htmlfile, create the form with the following fields:username, type text.password, type password.
auth-login.component.tsfile, add the following:formInfoobject, to store all the information of the form.error, to store the error it could be generated during the signup process.login()method to handle the request.
- Once the user has logged in, we have to redirect him to the
/privatepage.
To finish up this exercise, we have to load the user information and show it in the page. We will basically show the user's secret. We will use the user information we have in the Session service we created before.
The user have to be logged in to access this page. If he is not logged in, we have to redirect him to the login page.

Tasks
my-private-page.component.htmlfile, show the user's secret with an interpolation.my-private-page.component.tsfile, subscribe the component to theSessionservice to be able to load the user secret.- If the user is not logged in, redirect him to the login page when he tries to access to this page.
/Happy coding!