So far we've primarily presented Git as a version control system. Not only is Git a good version control system, it is also a marvelous tool for collaboration and team development. In fact, it was originally designed by Linus Torvalds for coordinating development for the Linux kernel. A primary mechanism through which Git collaboration can effectively be organized is the concept of branches.
Two golden practices in collaborating with git are:
- Keep the
masterbranch functional at all times - Keep lines of work ( branches ) separate from each other
Let's explore git branches and we'll come back to review why these golden practices are so helpful.
You will be able to:
- Explain branches and their purpose in git
- Create a new branch
- Switch between branches
- Use
git mergeto merge different branches - Identify and fix merge conflicts when merging branches
A git branch is a means to separate a new set of commits or edits from another branch. Typically we create a new branch off of master. If all developers we collaborate with honor golden practice 1, we can trust that master will be a safe starting point.
When we branch, we're creating a separate parallel universe. We can experiment there without any adverse effects to the master branch. It's a contained sandbox where mistakes can be made or ideas can incubate.
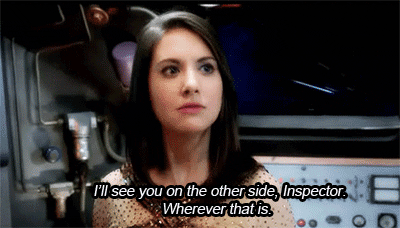
It's an idea that a lot of fiction has presented in the last 50 years.
| Parallel Universe | Source |
|---|---|
| Mirror Dimension | Dr. Strange (2016) |
| Darkest Timeline | "Community" / "Inspector Spacetime" |
| The entire premise of.. | "Dr. Who" |
| Mirror, Mirror (Evil Kirk / Spock) | Star Trek |
| Plot Against America | Philip Roth |
| The entire plot of... | "Primer" (2004) |
If you understand multiple-timeline fiction, you get the idea of branches.
By working in branches, collaborators can work without messing with the main timeline, known as master. OK, so how can we actually leverage this reality-shattering idea?
Let's suppose a master branch with two commits:

Best practices suggest that any new set of changes related to fixing a bug, creating a feature, or even messing around with experimental code in a "sandbox", should be started on a new branch.
In order to start a new branch, type:
$ git branch <new-branch-name>
This creates a new branch. If you wish to see a list of all branches associated with a git repo, you can type:
$ git branch -a
In case of a branch relating to writing a new feature, you could name the branch add-preprocessing-and-normalization. Thus: git branch add-preprocessing-and-normalization creates a new branch named add-preprocessing-and-normalization. This will take the entire commit history of the branch you're on (usually master) and make it the same history as on the add-preprocessing-and-normalization branch.
At this moment master and add-preprocessing-and-normalization are the same branches / realities etc.
In order to start making changes on your new branch, you need to "check it out." After checking a branch out, your commits will be added to that branch's history. You move between branches with:
$ git checkout <branch-name>
Protip: You can create and checkout a new branch in one command using:
git checkout -b <new-branch-name>. This will both create the branchnew-branch-nameand move into it by checking it out.
If you are currently on add-preprocessing-and-normalization, you can move back to master
with git checkout master. You can also type git checkout - in order to move
back to the previous branch.
When you add commits to a branch, you can see the history of the commits by typing:
$ git log --graph
The git log command displays the history of commits
for the branch you're on. The --graph "flag" tells git to make it pretty,
like a timeline. You can use "Space" to page down the history of commits. Use
q to exit.
Let's suppose we added two new commits to our new branch. We could visualize it as:

To make sure that you don't lose work, you should make sure all your changes
are committed before you switch branches. If you're doing work in
add-preprocessing-and-normalization that updates model.py, because master also has
a model.py file, master could overwrite your changes. Make sure all your
changes are committed before you switch branches.
Advanced:
githas a powerful feature calledstashwhich can be used when you're ready to hold changes-in-progress. When you're very comfortable withgit, look into it!
As you add more commits on the new branch you're changing only the add-preprocessing-and-normalization reality. The master branch will not be changed.
You can confirm this by first checking out master using git checkout master, then use git log --graph again, and you can see that the master branch only has the code up to the moment you "branched" into the add-preprocessing-and-normalization timeline, er, branch.
The code from add-preprocessing-and-normalization is safely tucked away in that branch, waiting patiently in isolation from the rest of your code in master until the feature is considered complete. Let's talk about merging these commits into master.
Now that you have some additions to the code that you'd like to combine back with the master, the goal is to bring the commits that occurred on the add-preprocessing-and-normalization branch into the master branch. By merging the branch, master will have all of the commits from the add-preprocessing-and-normalization branch as though those events occurred on the master branch.
When merging a branch with git merge, it's important to be currently working on your target branch, the branch that you want to move the content to of the new branch.
The first step for our add-preprocessing-and-normalization merge is to checkout master because that is where you want the commits to end up. You can then use git merge <branch-to-merge> -m "message" like shown here:
$ git checkout master
$ git merge add-preprocessing-and-normalization -m "merge in the feature"
Now the branches have been merged. If you type git log --graph, you'll see the commits from the add-preprocessing-and-normalization branch on your master branch.
Here's another way to visualize it:

In this graphic, you might note that a commit happened to master between
the two commits that made up our feature branch. The amazing thing is git
reconciles the master timeline, the additional commit, and the commits in
this feature branch. It re-weaves multiple realities together. That is
seriously cool.
When you're done with a branch that's been merged you can delete it with:
$ git branch -d <branch-to-delete>
Occasionally, when merging two branches, you might run into a message similar to this:
Auto-merging <filename>
CONFLICT (content): Merge conflict in <filename>
Automatic merge failed; fix conflicts and then commit the result.
What happened here? Well, you made changes to the same file (<filename> in this case) on both the base and the feature branches, and now Git doesn't know which set of changes to retain. In order to resolve this, you need to manually fix the relevant file. To do this, first open the relevant file. After opening the file, you will see conflict markers -- <<<<<<< HEAD, =======, and >>>>>>> branch-name. These markers indicate which portions of the file have conflicting changes. The markers and the conflicting changes are represented like this:
...
...
everthing is fine here
<<<<<<< HEAD
...
...
this is the portion from the destination branch
=======
...
...
this is the portion from the source branch
>>>>>>> branch-name
All the lines between <<<<<<< HEAD and ======= are the conflicting lines from the base branch and all lines between ======= and >>>>>>> branch-name are the conflicting lines from the <branch-name> branch. Here you can discard the set of conflicting lines of your choice and then delete the conflict markers (<<<<<<< HEAD, =======, and >>>>>>> branch-name). After you do this, add and commit your changes so you can merge the branches without any issues.
Note: If there are multiple conflicts in the same file, each conflict is surrounded by conflict markers and it is your resposibility to resolve each conflict individually and remove all the conflict markers before you attempt to merge again.
When you are collaborating with several people on a project, it is important that you are always up to date with the changes others are making to the project. Not only will this ensure that you are always working with the latest version of the project, but it will also help reduce merge conflicts!
Thus your local branches can merge in changes from remote repository branches just like they can do for local branches! To update a list of available branches at a remote we use: git fetch <remote-name>. Note this only updates the list of branches from remote repositories and not the local branches themselves. If you want to update the local branches, you have to merge. To give you a preview of what merging a remote branch workflow looks like:
$ git fetch origin
$ git checkout add-preprocessing-and-normalization
$ git merge origin/laurens-preprocessing
And now our local add-preprocessing-and-normalization has Lauren's ideas woven into it.
Alternatively, as a shorthand, you can fetch and then automatically merge the same-named branch from the remote using git pull <remote-name> <branch-name-to-merge-in>.
As developers we try to make sure that everyone has a clean place to start from: be that for writing a new feature or fixing a bug. Branching lets us keep master working at all times. If an emergency bug comes up, we know we have a
solid foundation to build from. Feature branches also help us look at git log and see what the intention of a feature was.
Git is a complex tool, and these tools are just scratching the surface for collaborating with people. These workflows are just being introduced to you -- and it may be challenging for the time being. You'll have lots of time to practice them and get used to what each command does. Don't try to cram it all in at once; instead just start to get an understanding of what is at your disposal.

Image courtesy of xkcd.
Do not do as stick man suggests!


