This project enables the building of LED Magic Panels for Astromech (R2-D2) droids. For more information on building your own droid, visit Astromech.net
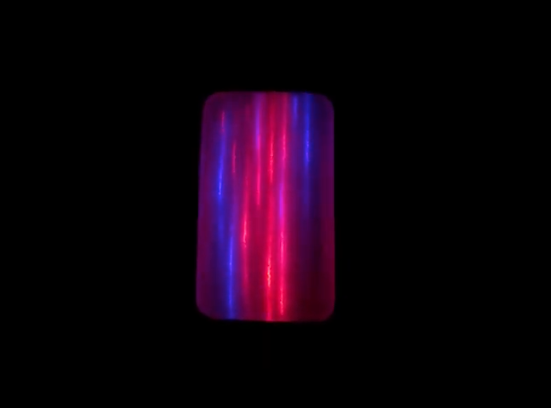
This version cycles through 8 predefined color pallets at 30 second intervals. The brightness pulses. The colors, intervals, sequences, speed, and density are all configurable. AMP requires 5v.
The default color sequence is:
- Red, <Off>
- Red with hints of Blue
- Blue, <Off>
- Red with hints of White
- White, <Off>
- Blue with hints of White
- Blue, <Off>
- Rainbow, <Off>
The build is pretty straightforward but if you are looking for a prebuilt, preprogrammed unit, send me a message in the Astromech forums. I can also be found on Instagram.
Click each of the images below to view a video on Youtube of the animation.
Rainbow Animation

Red and Blue Animations
Horizontal & Vertical Lenses Compared

To build the Astromech Magic Panel (AMP) you will need the following hardware:
- 1 x Adafruit QT Py (SAMD21)
- 2 x Adafruit DotStar 8x8 Grid or SparkFun LuMini LED Matrix - 8x8 The Adafruit Matrix is more densely packed but the Sparkfun Matrix is easier to solder
- 8 x M2, 6mm screws (Adafruit) or 8 x M3, 6mm screws (Sparkfun)
- 8 x F/F jumper wires (Adafruit) or 4 x F/F jumper wires (Sparkfun)
- USB Type-C Cable supporting both Data and Power
- Soldering Iron and Solder
- The Arduino IDE
- The ability to print the included mounting brackets
Here are the components prior to assembly
Sparkfun LuMini

Adafruit Dotstar

Note: You will also need a semi-transparent Magic Panel. If 3D printing this panel I recommend printing the panel vertically using a clear PETG filament. I used 6 perimeters/shells with 10% gyroid infill. Fewer perimeters and less infill will result in poorer LED diffusion. I highly recommend using Michael Baddeley's excellent 3D printable models.
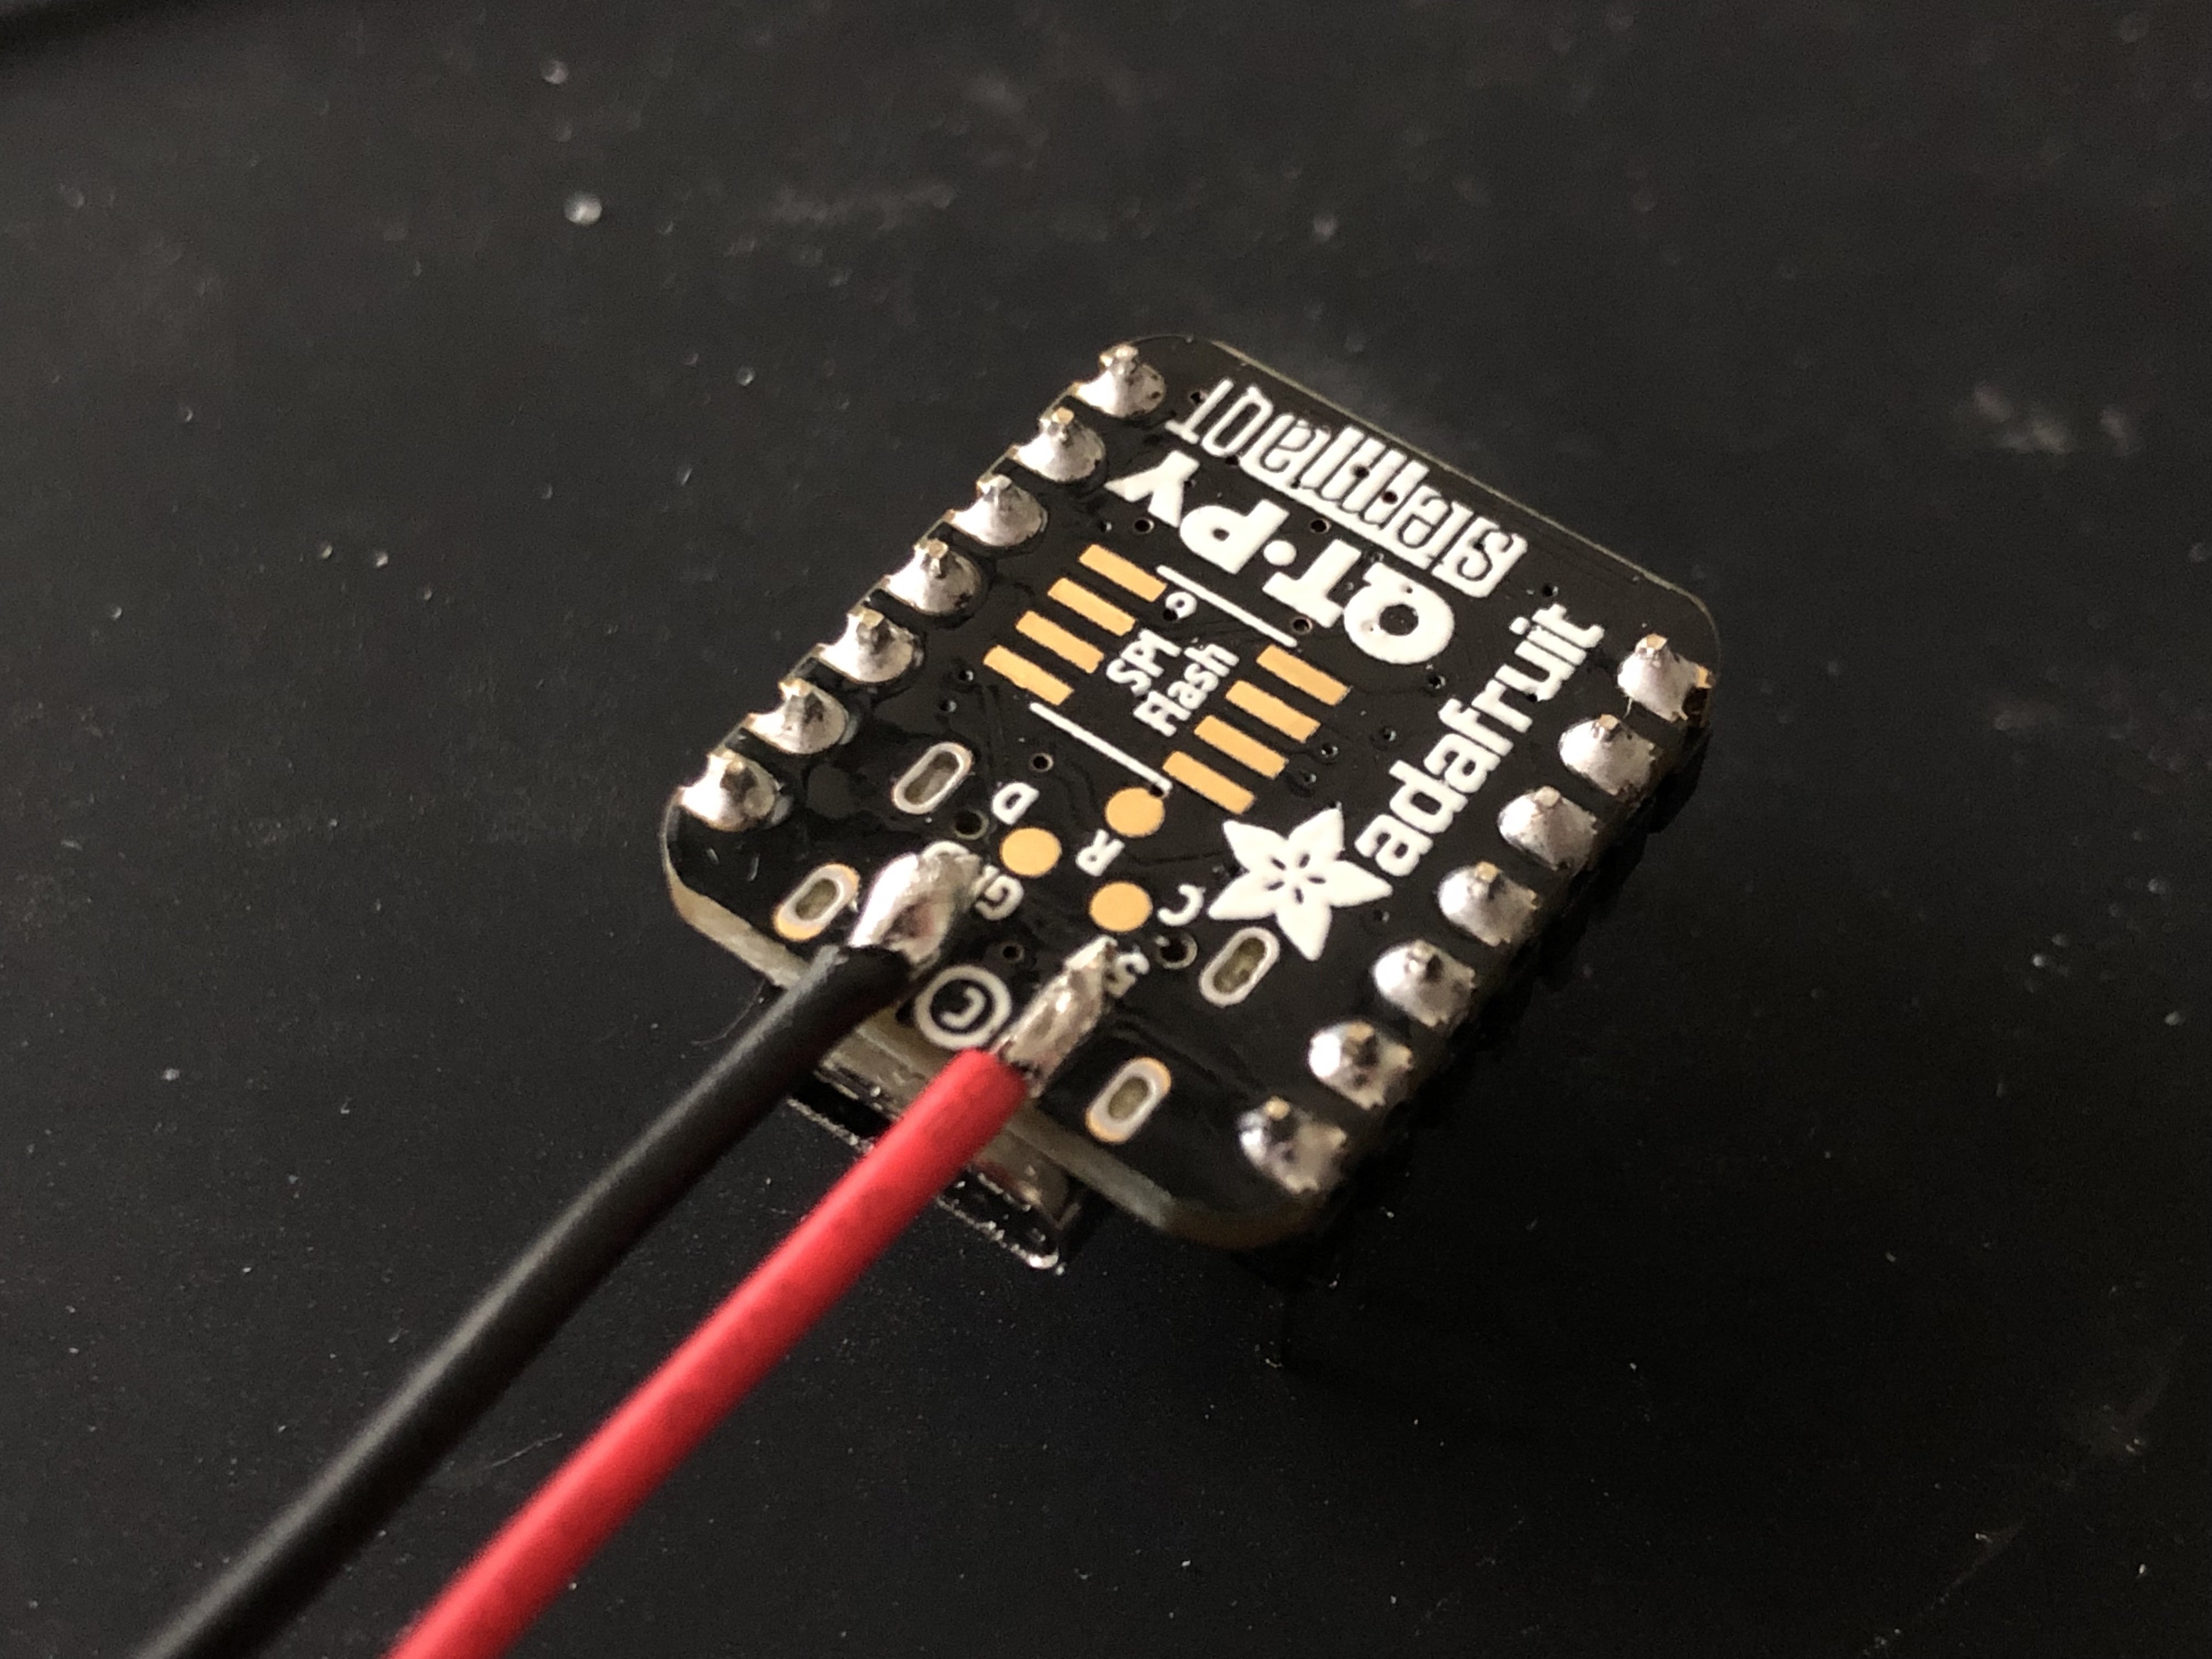
First, solder the straight header pins to the Adafruit QT Py facing up.

Next, solder two wires to the power pads on the opposite side of the QT Py.
Sparkfun Instructions
Next, solder the 5V, CO-CI, DO-DI, and GND pads together on a flat surface. Also place a bit of solder on the remaining 5V, CI, DI, and GND pads on the top board.

Next, spread the pins of the right angle headers apart slightly and solder them to the 5V, CI, DI, and GND pads on the top board.

Adafruit Instructions
Next, solder the capacitors supplied with the matrices to the boards. Be sure to solder the + and - capacitor leads to the corresponding pads on the board. Once soldered trim the leads. Also place a bit of solder on the CIN, DIN, GND, and +5V pads. Do the same for the +5V, GND, DOUT, and COUT pads on one of the boards.

Next, solder the right angle headers to the pads prepared in the step above. Note that with the Adafruit board the right angle headers do not need to be spread apart.

Using a USB C cable, a computer, and the Arduino IDE, connect the QT Py microcontroller and upload the AstromechMagicPanel.ino sketch found in the src directory.
3D print the QT Py and Base mounting brackets found in the models folder. Only print the base model corresponding to the LED matrix you are using.
Print the Magic Panel vertically (standing on the shorter side) using clear PETG filament. I used 6 perimeters/shells with 10% gyroid infill. Fewer perimeters and less infill will result in poorer LED diffusion. I recommend using "Panel 7" model from Michael Baddeley's project. The light is diffused perpendicular to the print layer direction.
Next, use CA glue to attach the QT Py bracket to the base.

Next, screw the LED panels into the bracket.

Then connect the QT Py to the LED panels using the female jumper wires. If using the Sparkfun Lumini, connect CI to pin 0 and DI to pin 1. If using Adafruit Dotstar, connect CIN to pin 0 and DIN to pin 1. Don't forget to connect the 5V and GND pins as well.
Assembled Sparkfun LuMini AMP

Assembled Adafruit Dotstar AMP

Once assembled, AMP can be installed into the dome directly over the semi-transparent Magic Panel and connected to a 5v power supply.
For additional assistance please contact Michael Whitley (umlungu) on the Astromech.net forums.

