This application is part of a step by step guide of how to implement a Power Bi Embedded application into a .Net Core App using Razor Pages. This will also detail how the Power Bi Infrastructure works.
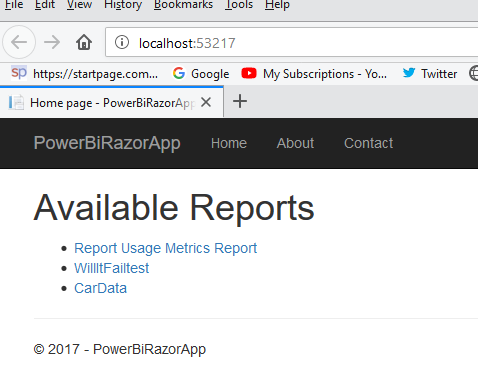
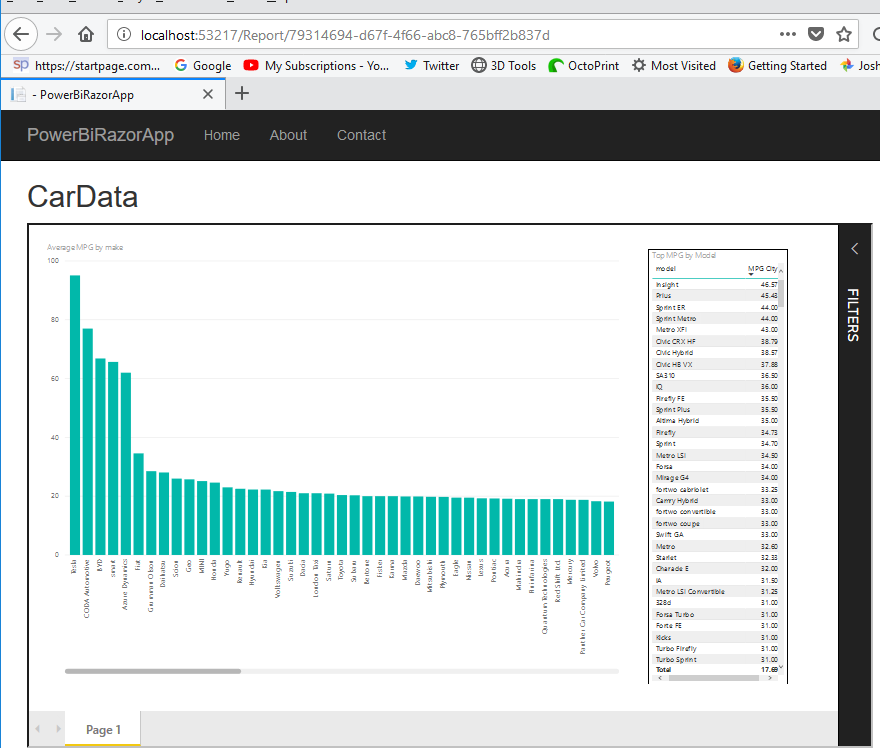
This Web app creates a index page listing links of Power BI reports based on your Power BI workspace. Clicking on the link will lead you to a page where the report is being embedded.
- Mobile view
- QNA
- Dashboards
- Power Bi Pro Account
- Power BI Registered Azure Application
- Power BI Azure resource (optional in development, required in production)
How a Power BI report is emedded and rendered is that the server sends a Power Bi configuration settings (tokens, urls, ect) for the report guid specified by the user. The user uses these configuration settings and renders the Power BI report client side through JavaScript by calling powerbi.embed(htmlContainer, reportConfigSettings)
This produces an iFrame which connects to Microsoft and their Power BI Service directly, providing interactive reports and visuals. (Any interactions inside the iFrame are handled by Microsoft and not our servers)
This is unusual for web apps because it has 3 clients instead of the usual 2.
- Client Side (user of site)
- Server Side (standard .Net MVC server side rendering)
- Power BI Client (Microsoft's Power Bi service called by its APIs)
This is the workflow of responsibility on how a Report ID sent by the client turns into the embedded iframe.
participant iFrame
Client -> Report Server: Sends Report ID
Report Server -> Power Bi Server: Sends Report ID \n and Master Power BI \n Credentials
Power Bi Server -> Report Server: Sends report embed token
Report Server -> Client: Sends report config \n (with embed token)
Client -> iFrame :Embeds Power BI \n Report with config
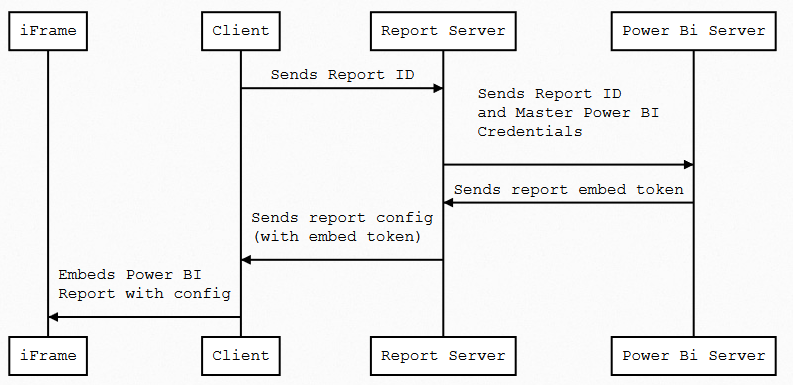
It's important to note that any interaction between the iFrame and the Client such as any interactive sorting functions or filtering functions of the report has nothing to do with the Report server. That is between Microsoft's Power BI service and The Client
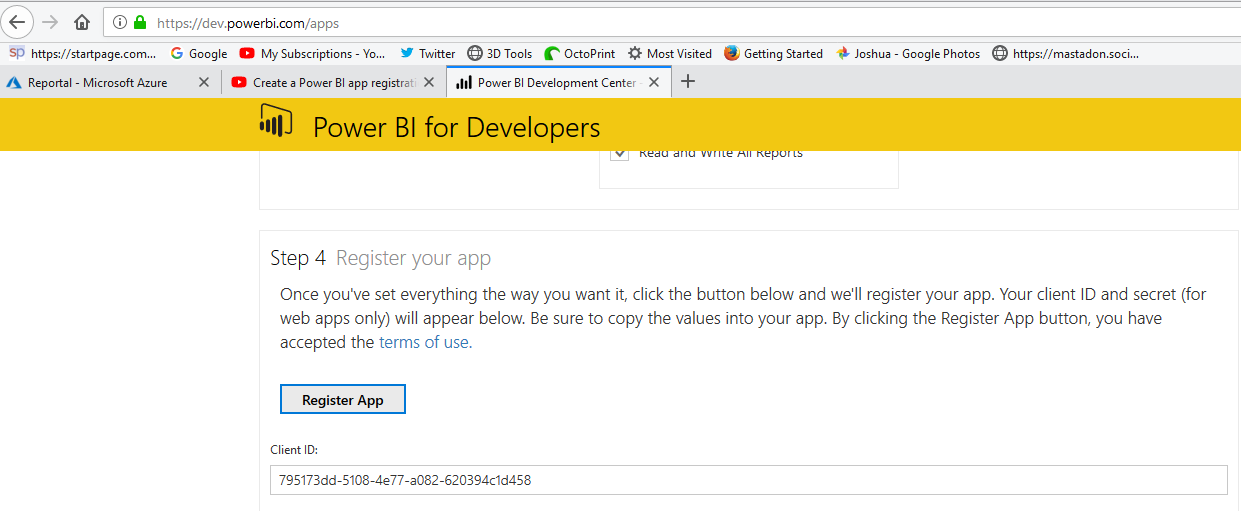
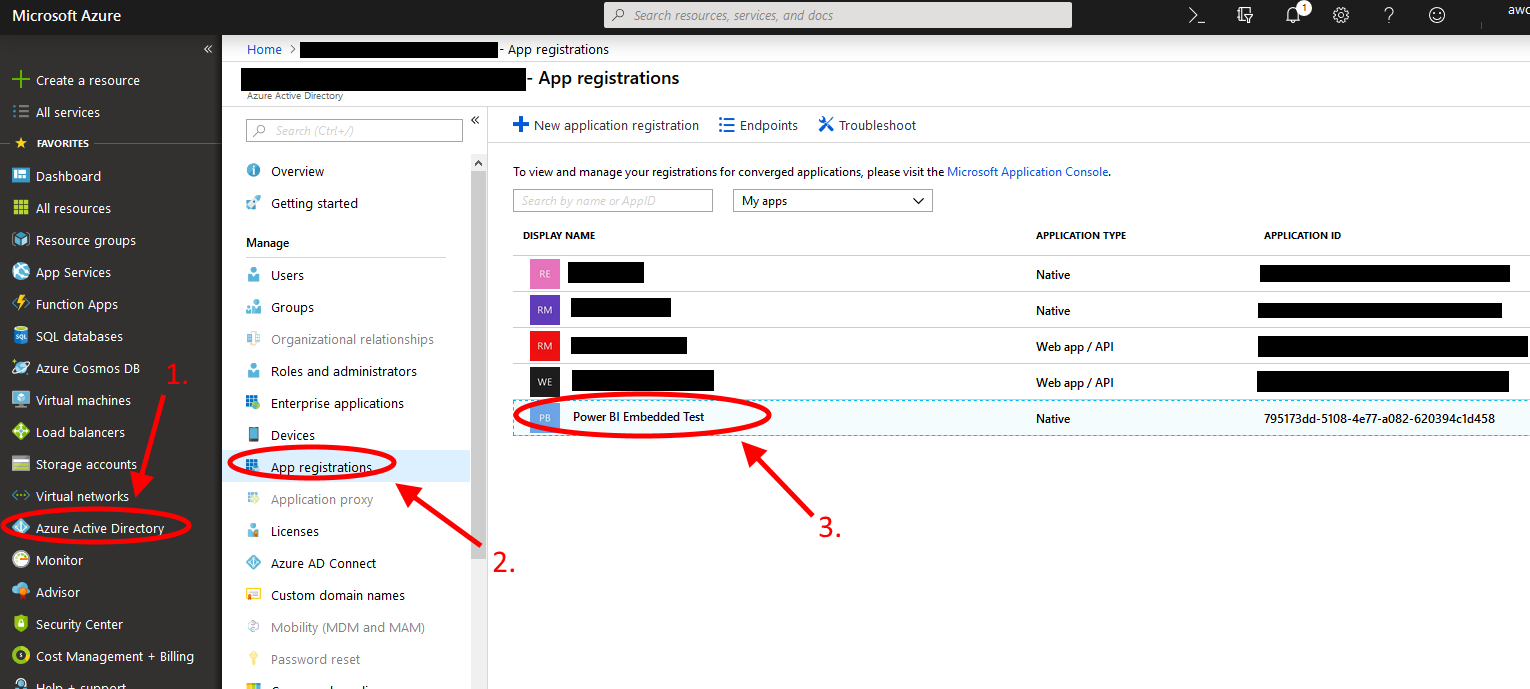
Go to https://dev.powerbi.com/apps and register a Power Bi Application to Azure AD, the list of permissions you need are the following.
- Read All Datasets
- Read All Groups
- Read All Dashboards
- Read All Reports
Access the appsettings.json file and fill in the following information

To get the" TenantId", go to the azure portal for you or your organization (https://portal.azure.com) and find it under "Azure Active Directory" => "Properties" =>"Directory ID" the guid under there should be the "TenantId"

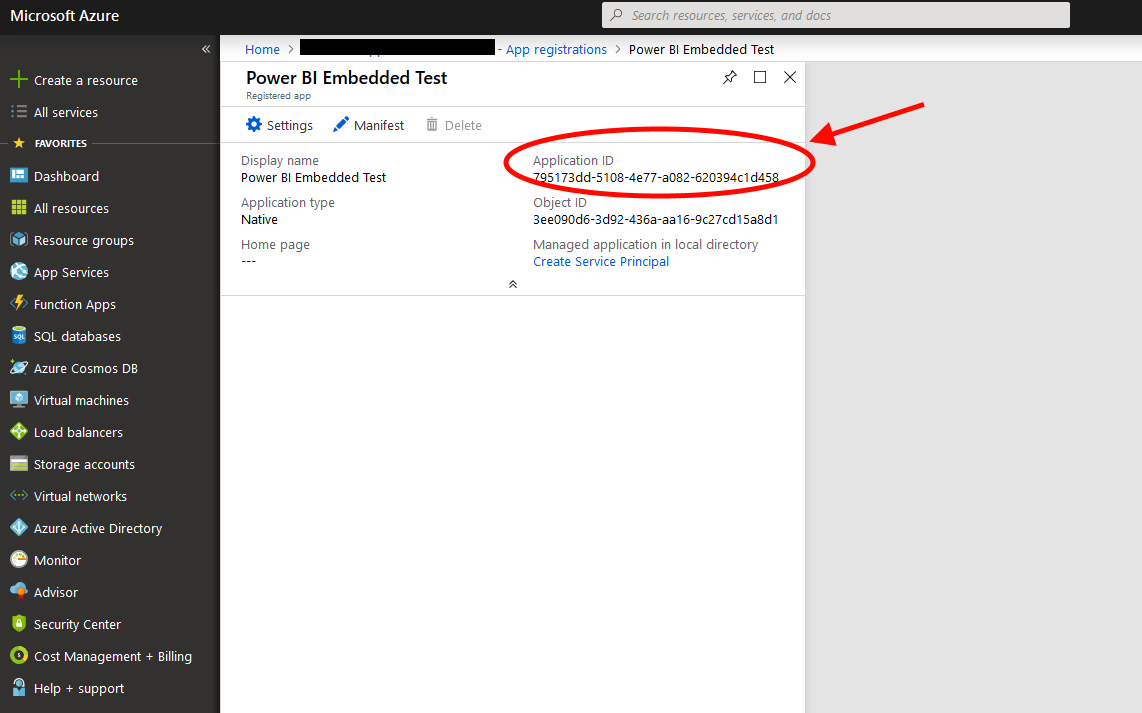
The "ClientId" should have been provided to you under the Power BI App registration tool in Step 1.
If you want to find it under the Azure portal, navigate to "Azure Active Directory" => "App Registrations" => "(NAME OF YOUR APP)" => "Application ID"
The "MasterUser" should be any Microsoft account you have that has a Power Bi Pro license. Enter your username and password inside the "MasterUser," and "MasterKey." Be sure to NEVER commit this information to a public repository.
The "GroupId" is the "workspace" where your Power BI reports you wish to embed reside. They can be found going to https://app.powerbi.com/ => "(YOUR WORKSPACE NAME)" and should be Guid after the route "Group" in the URL.
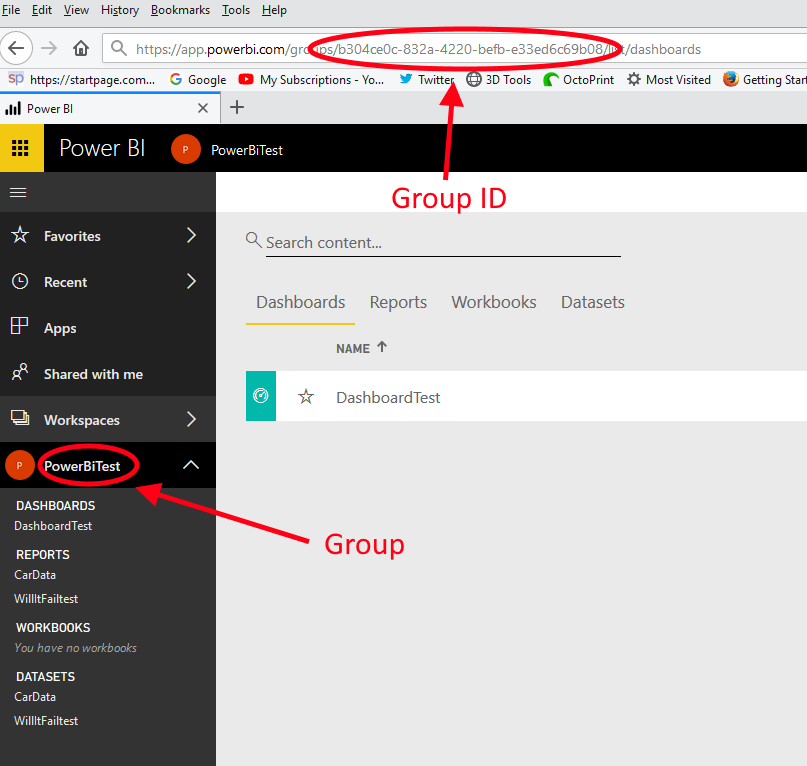
Be sure that the MasterUser that you used above is an owner of that group/workspace, otherwise the MasterUser will not have permissions to embed the reports.

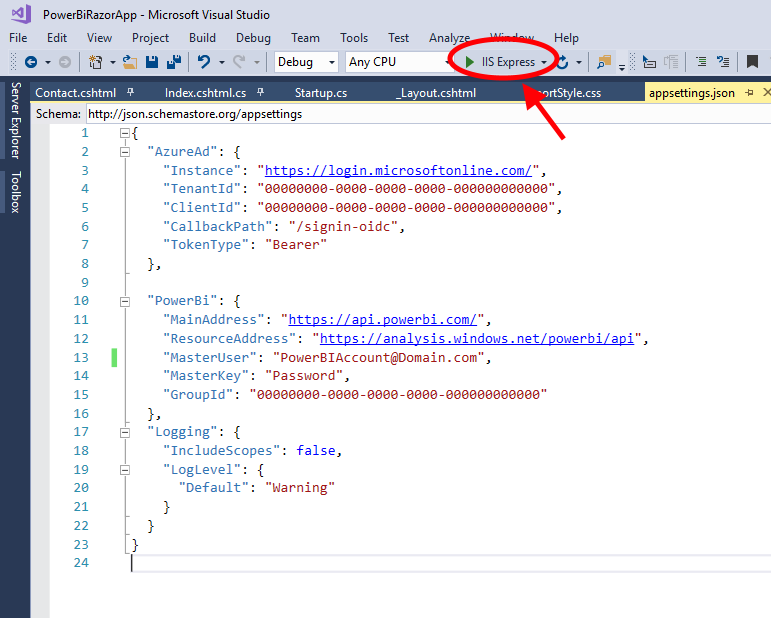
After finishing Step 2. You should be able to launch the application through IIS Express in Visual Studio
The Power BI application will work without paying or providing dedicated capacity, however note that you are using the development capacity of Power BI embedded from Microsoft is not guaranteed for timely performance, and against the license agreement when used in production.
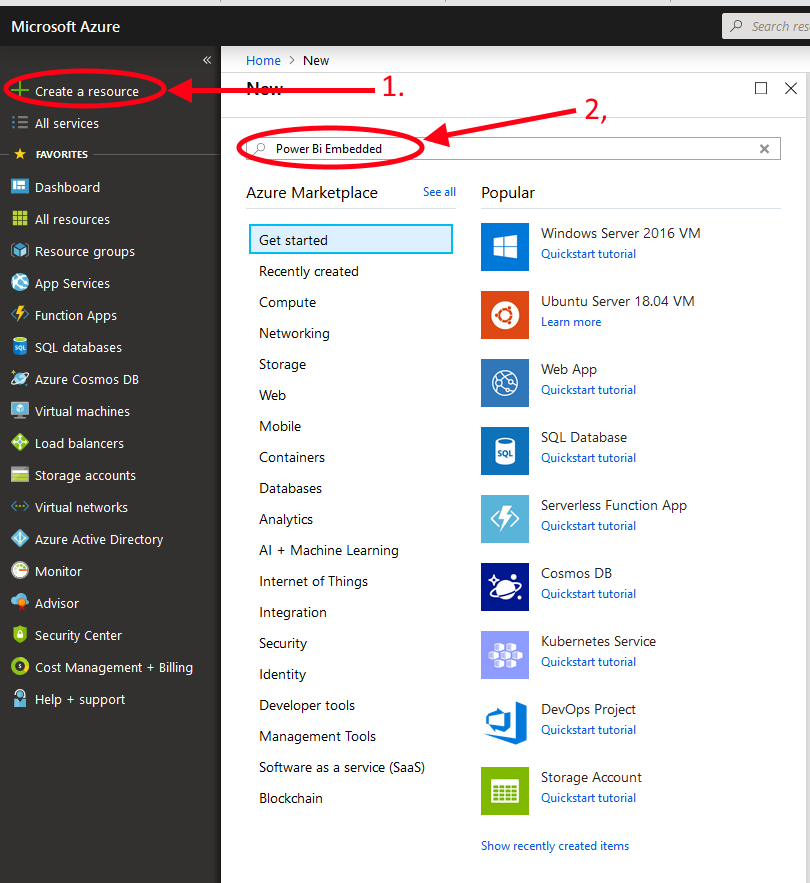
To enable dedicated capacity, purchase a Power BI resource from the Azure Portal (https://portal.azure.com)
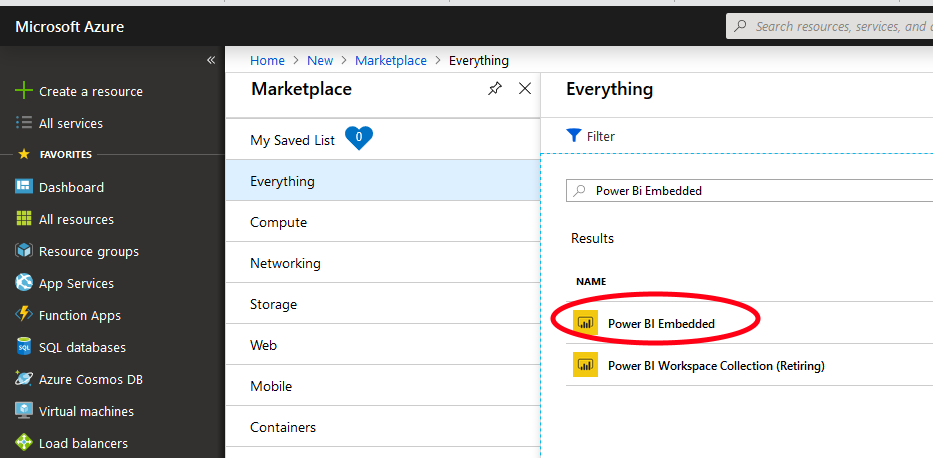
Create a resource and search for "Power Bi Embedded"
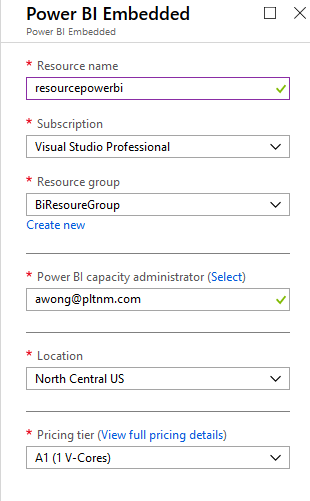
Purchase your resource with the appropriate subscription and pricing tier for your situation.
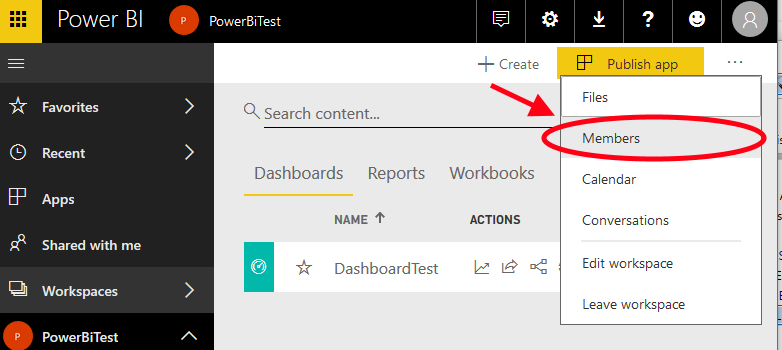
Go to https://app.powerbi.com/ and edit your Power BI workspace under "Edit workspace" Go under "Advanced" and enable "Dedicated capacity" (May take a while) and choose the resource you purchased above.

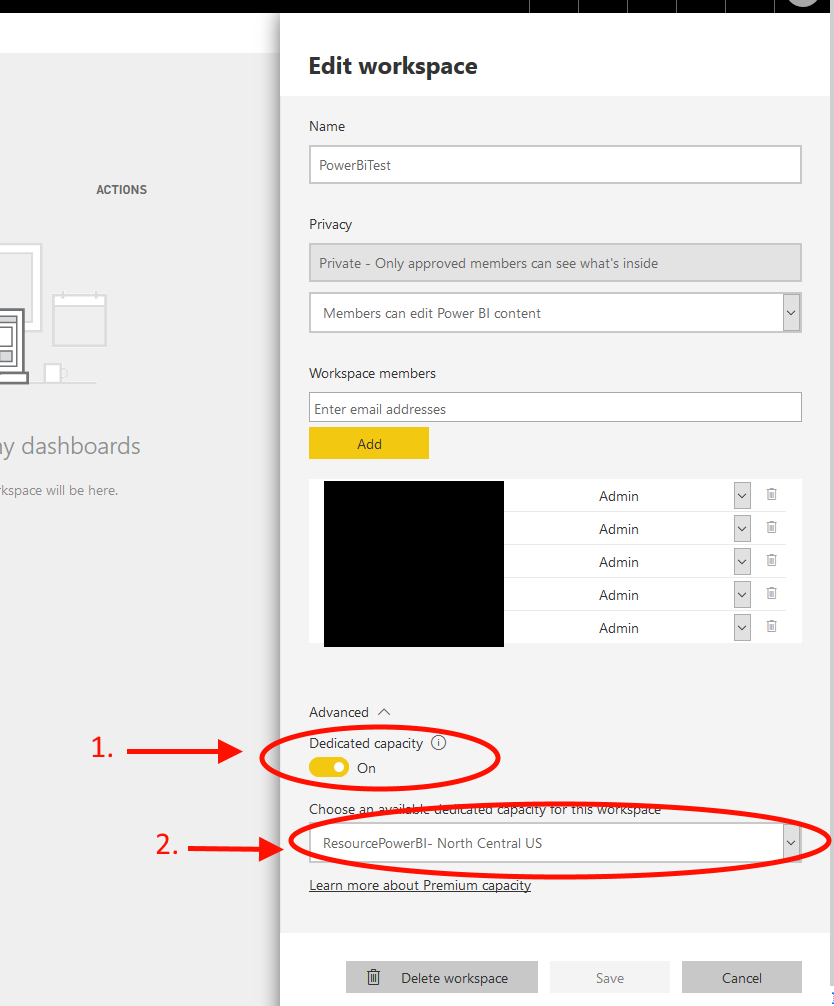
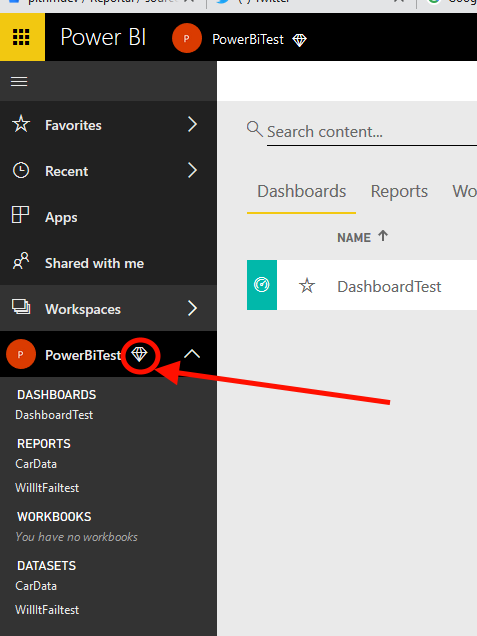
After saving, you should see a diamond on your workspace, the reports from that workspace should now use purchased "dedicated capacity" rather than "development capacity."
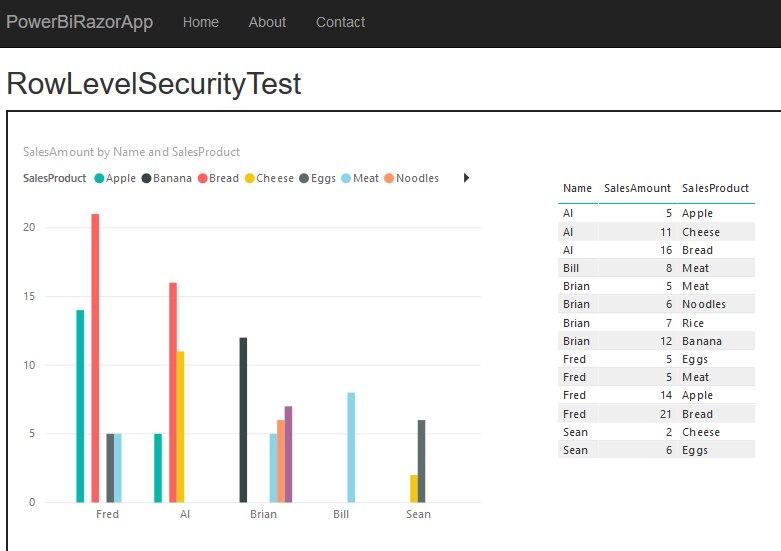
Row level security is a feature of Power BI that allows different users based on security roles and their identifiers (guids, usernames, ID's ect) to be restricted on the information that they can view for the same report. For example a supervisor may see data on their employees, but employees should only see data on themselves.
Report without Row Level Security (RLS)
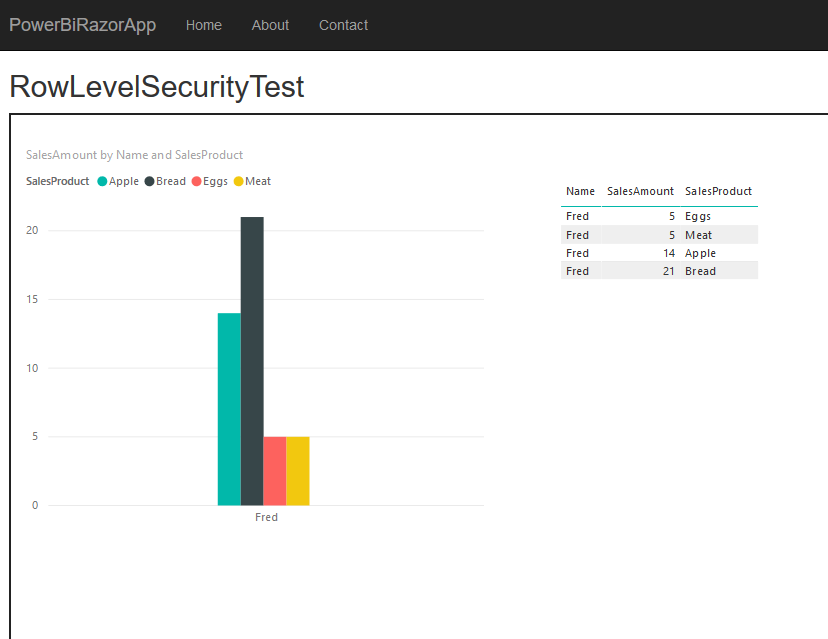
Report With Row Level Security as "Fred"
To do this, you must go to power BI and under "Modeling"=>"Manage Roles"
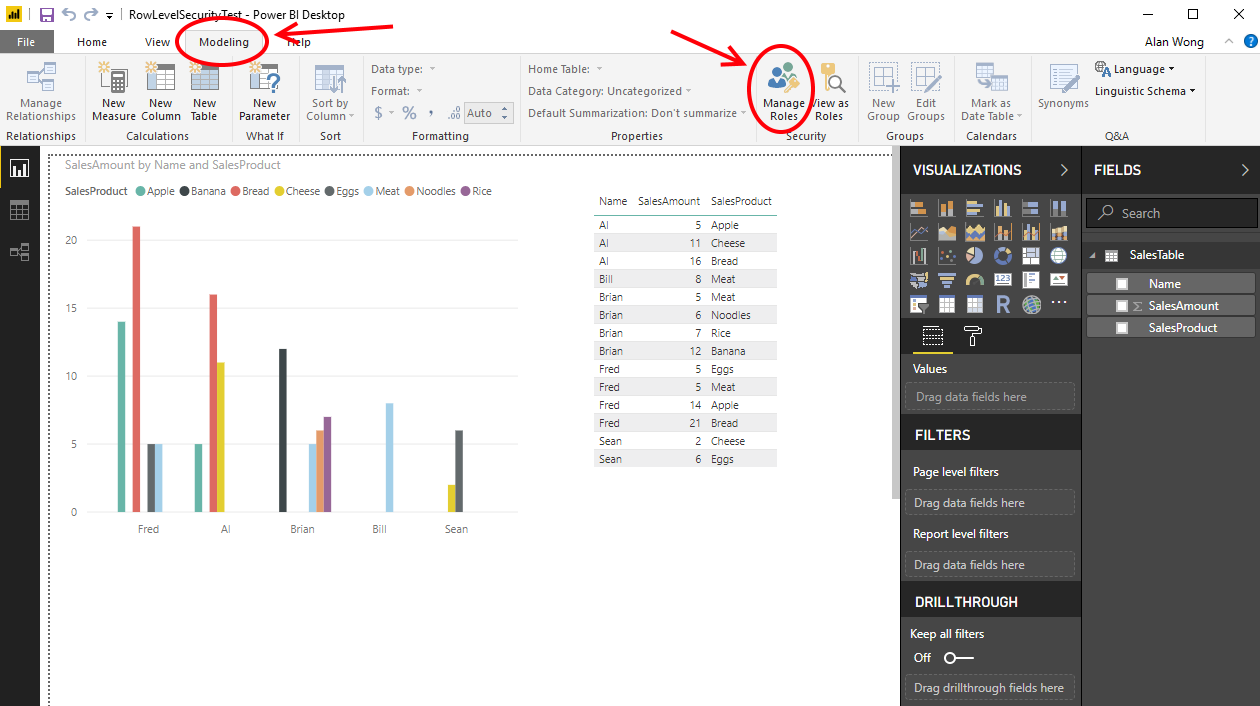
In here you can create role(s)
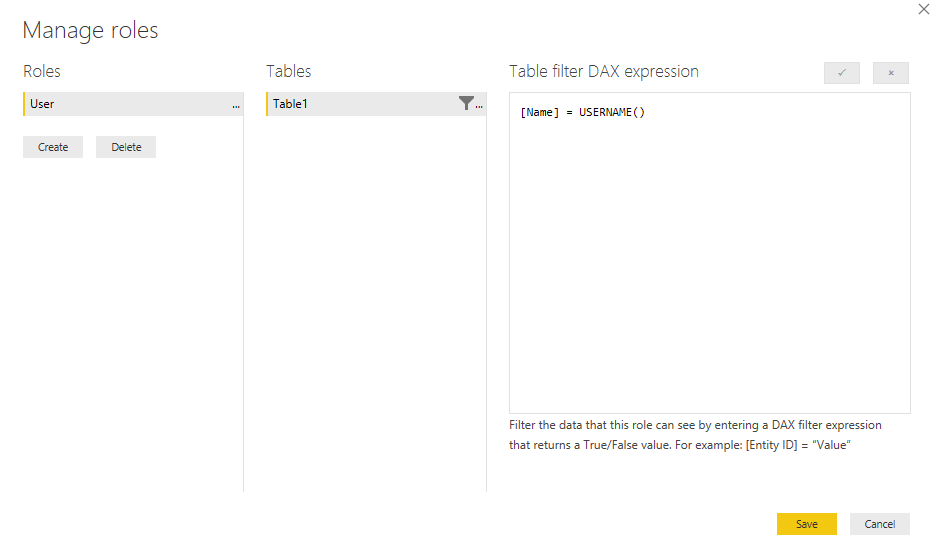
Based on that you fill in a Power BI DAX expression where it is evaluated per row of a selected table. in the case of Power BI embedded, you should use 'USERNAME()' as one of the fields, as that be the name identifier someone uses on the website.
Once the report is published to Power BI with the row level security configured you should open the report in the project and fill in the requesite role and name that you want to specify.
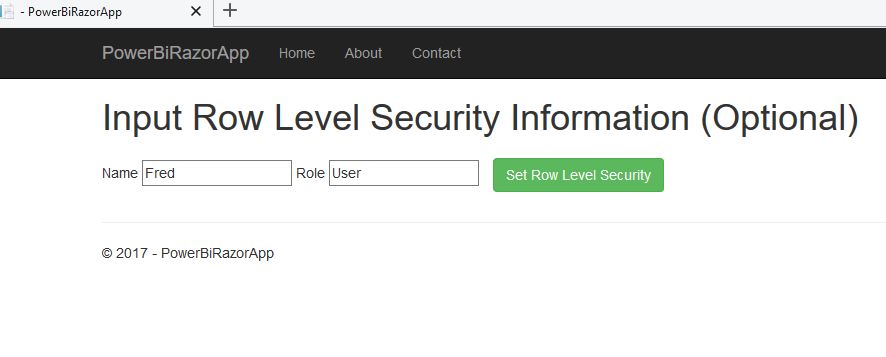
(NOTE: Power BI embedded supports multiple roles, however this demo only supports 1 role)
In this case a person with the "Role" of "User" and the Name of "Fred" should only show results where [Name] = "Fred" is true in the DAX expression.
