This week's assignment will be broken into two parts:
Follow the Zero to Python guide on the course website for instructions on how to setup Python locally and launch the Jupyter notebook.
Please see the list of recommended readings for tutorials and background reading to get familiar with Python, conda, and the Jupyter notebook.
Problems? Post your question to Piazza!
Part #2 of the assignment will be submitted as a Jupyter notebook (a .ipynb file) on Github — there is already a starter notebook in this repository.
You will submit your assignment through Github. For each assignment, I will provide a GitHub link that can be used to create a new repository. Each student will have their own private repository on GitHub where the assignment can be submitted. Only the student and instructors will have access to the private repository.
The invitation link for this week is:
https://classroom.github.com/a/5z9RCS2v
If you do not have a GitHub account yet, you should be prompted to make an account. After clicking on this link, GitHub will create a new private repo with permissions such that only you and the instructors can view the commits.
There are two options for working on assignments. You can work:
- Locally on your computer
- In the cloud using Github Codespaces
Note: Working locally on your computer is the recommended solution, however, if you are unable to get your local environment setuop for this assignment, you can use Github Codespaces, instead. Working on Binder for homework assignments is NOT recommended because you cannot save and return to your Binder session.
If you've successfully followed the guide in the previous step, you should have
installed Python and launched Jupyter by running jupyter notebook. This should
have launched the Jupyter
dashboard.
Now you can launch the assignment notebook
and get started on the homework!
The notebook will execute code from the current working directory (the folder that the notebook was launched from). This folder is usually your home folder on your laptop. If you are using relative file paths to load the data, the path should be relative to this working directory. From within the Jupyter notebook, you can find out the current working directory by running the following command in a cell:
pwdIf you've downloaded the assignment-1 repository to your computer, it usually makes sense to launch the Jupyter notebook from this folder instead of the default folder. You can change the start-up folder by first navigating to your assignment folder in the command line: see instructions here.
Once you have your created your private repository (by clicking on the Github Classroom link above), you have the option to launch a cloud-based development environment using Github Codespaces. This provides a fully featured Python environment running on Github's servers, with our course's Python dependencies pre-installed.
Codespaces uses the VS Code editor to interact with the files in the repository. For those new to VS Code, check out the documentation.
VS codes provides a different interface for Jupyter notebooks than the standard Jupyter dashboard. The interface is similar, but they've made some improvements (like seeing all defined variables!). For more info, see the documentation.
Creating a codespace
To create the codespace, click the <> Code button and select the Codespaces tab.

This will launch a window that creates the codespace and builds the development environment.
Crucially, if you exit a codespace, it continues to run, and you will see the spaces listed when clicking on the <> Code button in the future. This will allow you to work on assignments in the codespace, save your work, and return to it.
Committing your work
When working in a codespace, you can automatically sync your new files/changes back to your repository on Github. To do so, follow these instructions:
- Click on the "Source Control" tab in the Activity Bar on the left side:
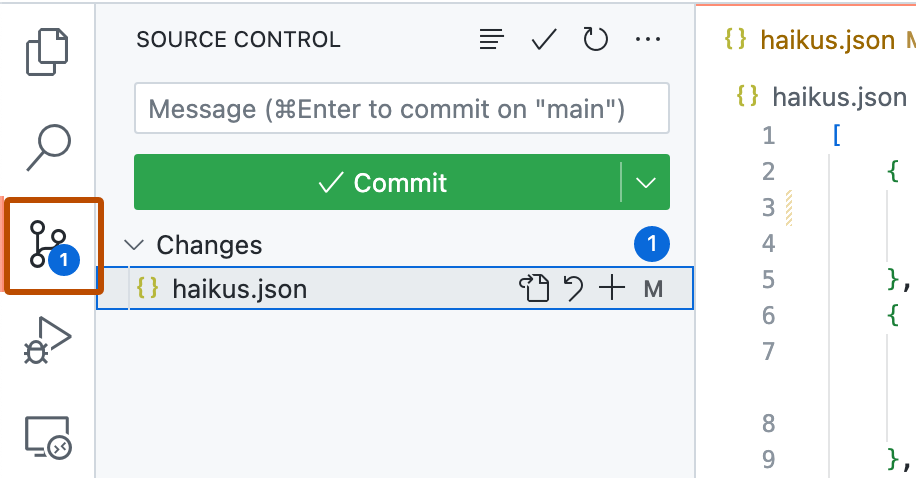
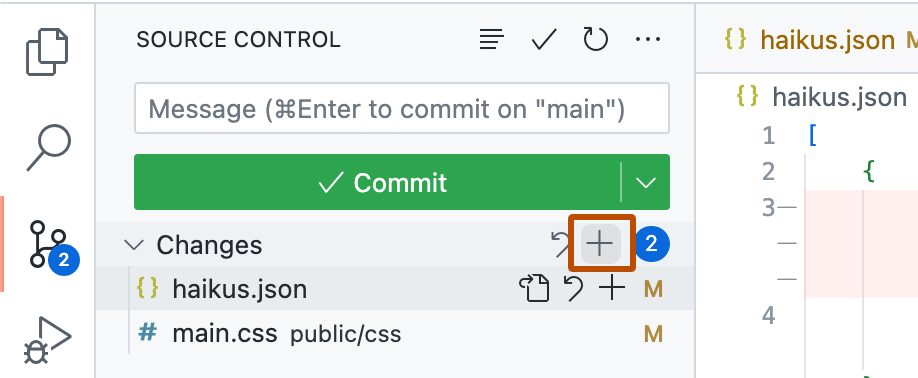
- To stage your changes, click + next to the file you've changed, or next to Changes if you've changed multiple files and you want to stage them all.
- Type a commit message describing the change you've made.
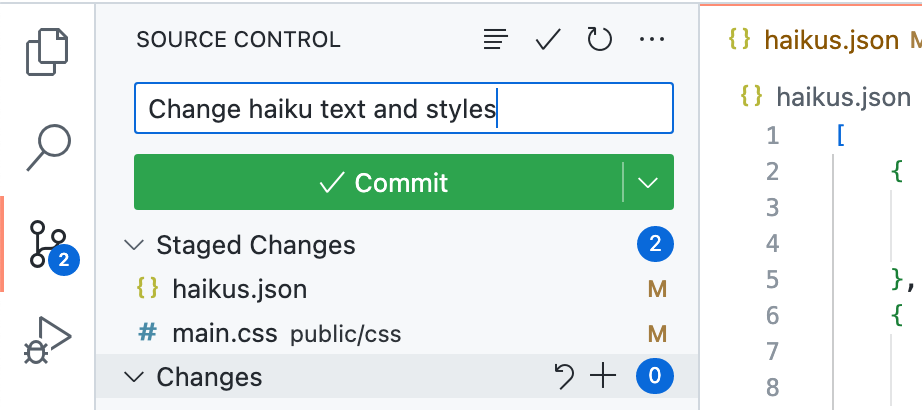
- To commit your staged changes, click the check mark at the top the source control side bar.
- Finally, you can push your committed changes back to Github to keep everything in sync by hitting the "Sync Changes" button.
Use a Jupyter notebook to find the Philadelphia ZIP code with the largest average annual ZHVI value, for each year in the data set. The Zillow data is available for download in this repository: data/Zip_zhvi_uc_sfrcondo_tier_0.33_0.67_sm_sa_month.csv.
The Jupyter notebook should use pandas to load the data and analyze it. The following steps should be followed:
- Load the ZHVI data for each ZIP code, selecting only Philadelphia ZIP codes.
- Calculate the annual average ZHVI for each ZIP code in Philadelphia and each year.
- Identify the ZIP code with the maximum value for each year.
The final result should be a dataframe with a row for each year and the corresponding ZIP code that has the maximum ZHVI value in that year.
Your assignment should be added to this GitHub repository before the deadline. You can add files to the repository through the web (github.com) interface or using the command line locally on your machine.
Important: Files should be committed to the newly created private repository (after following the above link) and not to your forked version of the assignment-1 repository.
Your Jupyter notebook should be submitted to your private repository by the deadline, 7pm on 9/19.
Below are some references if you need help: