Giter VIP home page Giter VIP logo

espgeiger's Introduction

Build Issues Stars

ESPGeiger

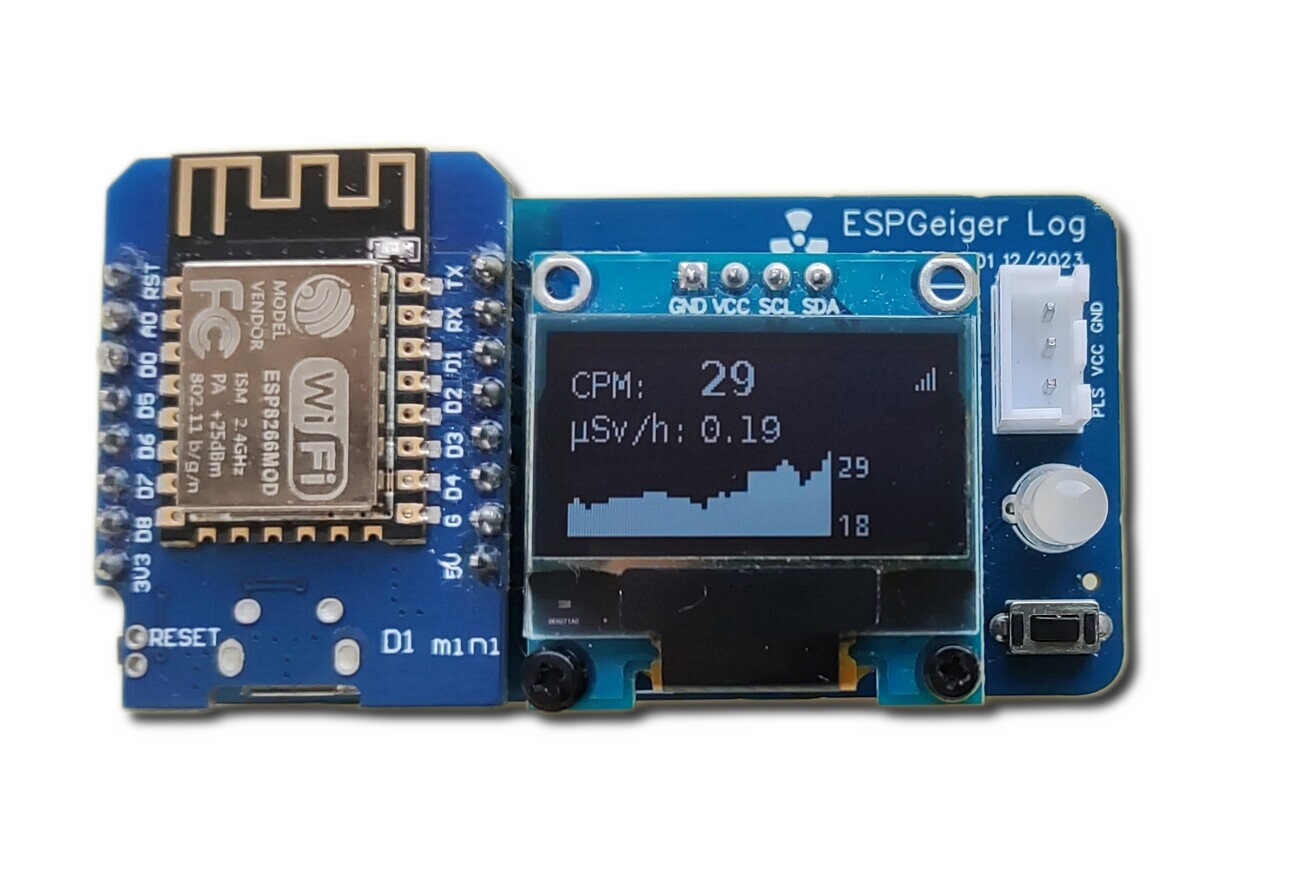
ESPGeiger is an open-source project that makes it easy to create your own IOT connected Geiger counter, to monitor radiation levels in your environment. It can collect, calculate, and report radiation levels from a range of Geiger counters with pulse and serial outputs. ESPGeiger supports the GC10/GC10next and MightyOhm counters, with additional support possible. The firmware is written to be installed onto the common esp8266 and esp32 boards.

  • 😃 Easy to install and configure - contribute to monitoring!
  • ✅ Compatible with all generic Geiger counters with Pulse output and a range of serial based - GC10, GC10next, MightyOhm
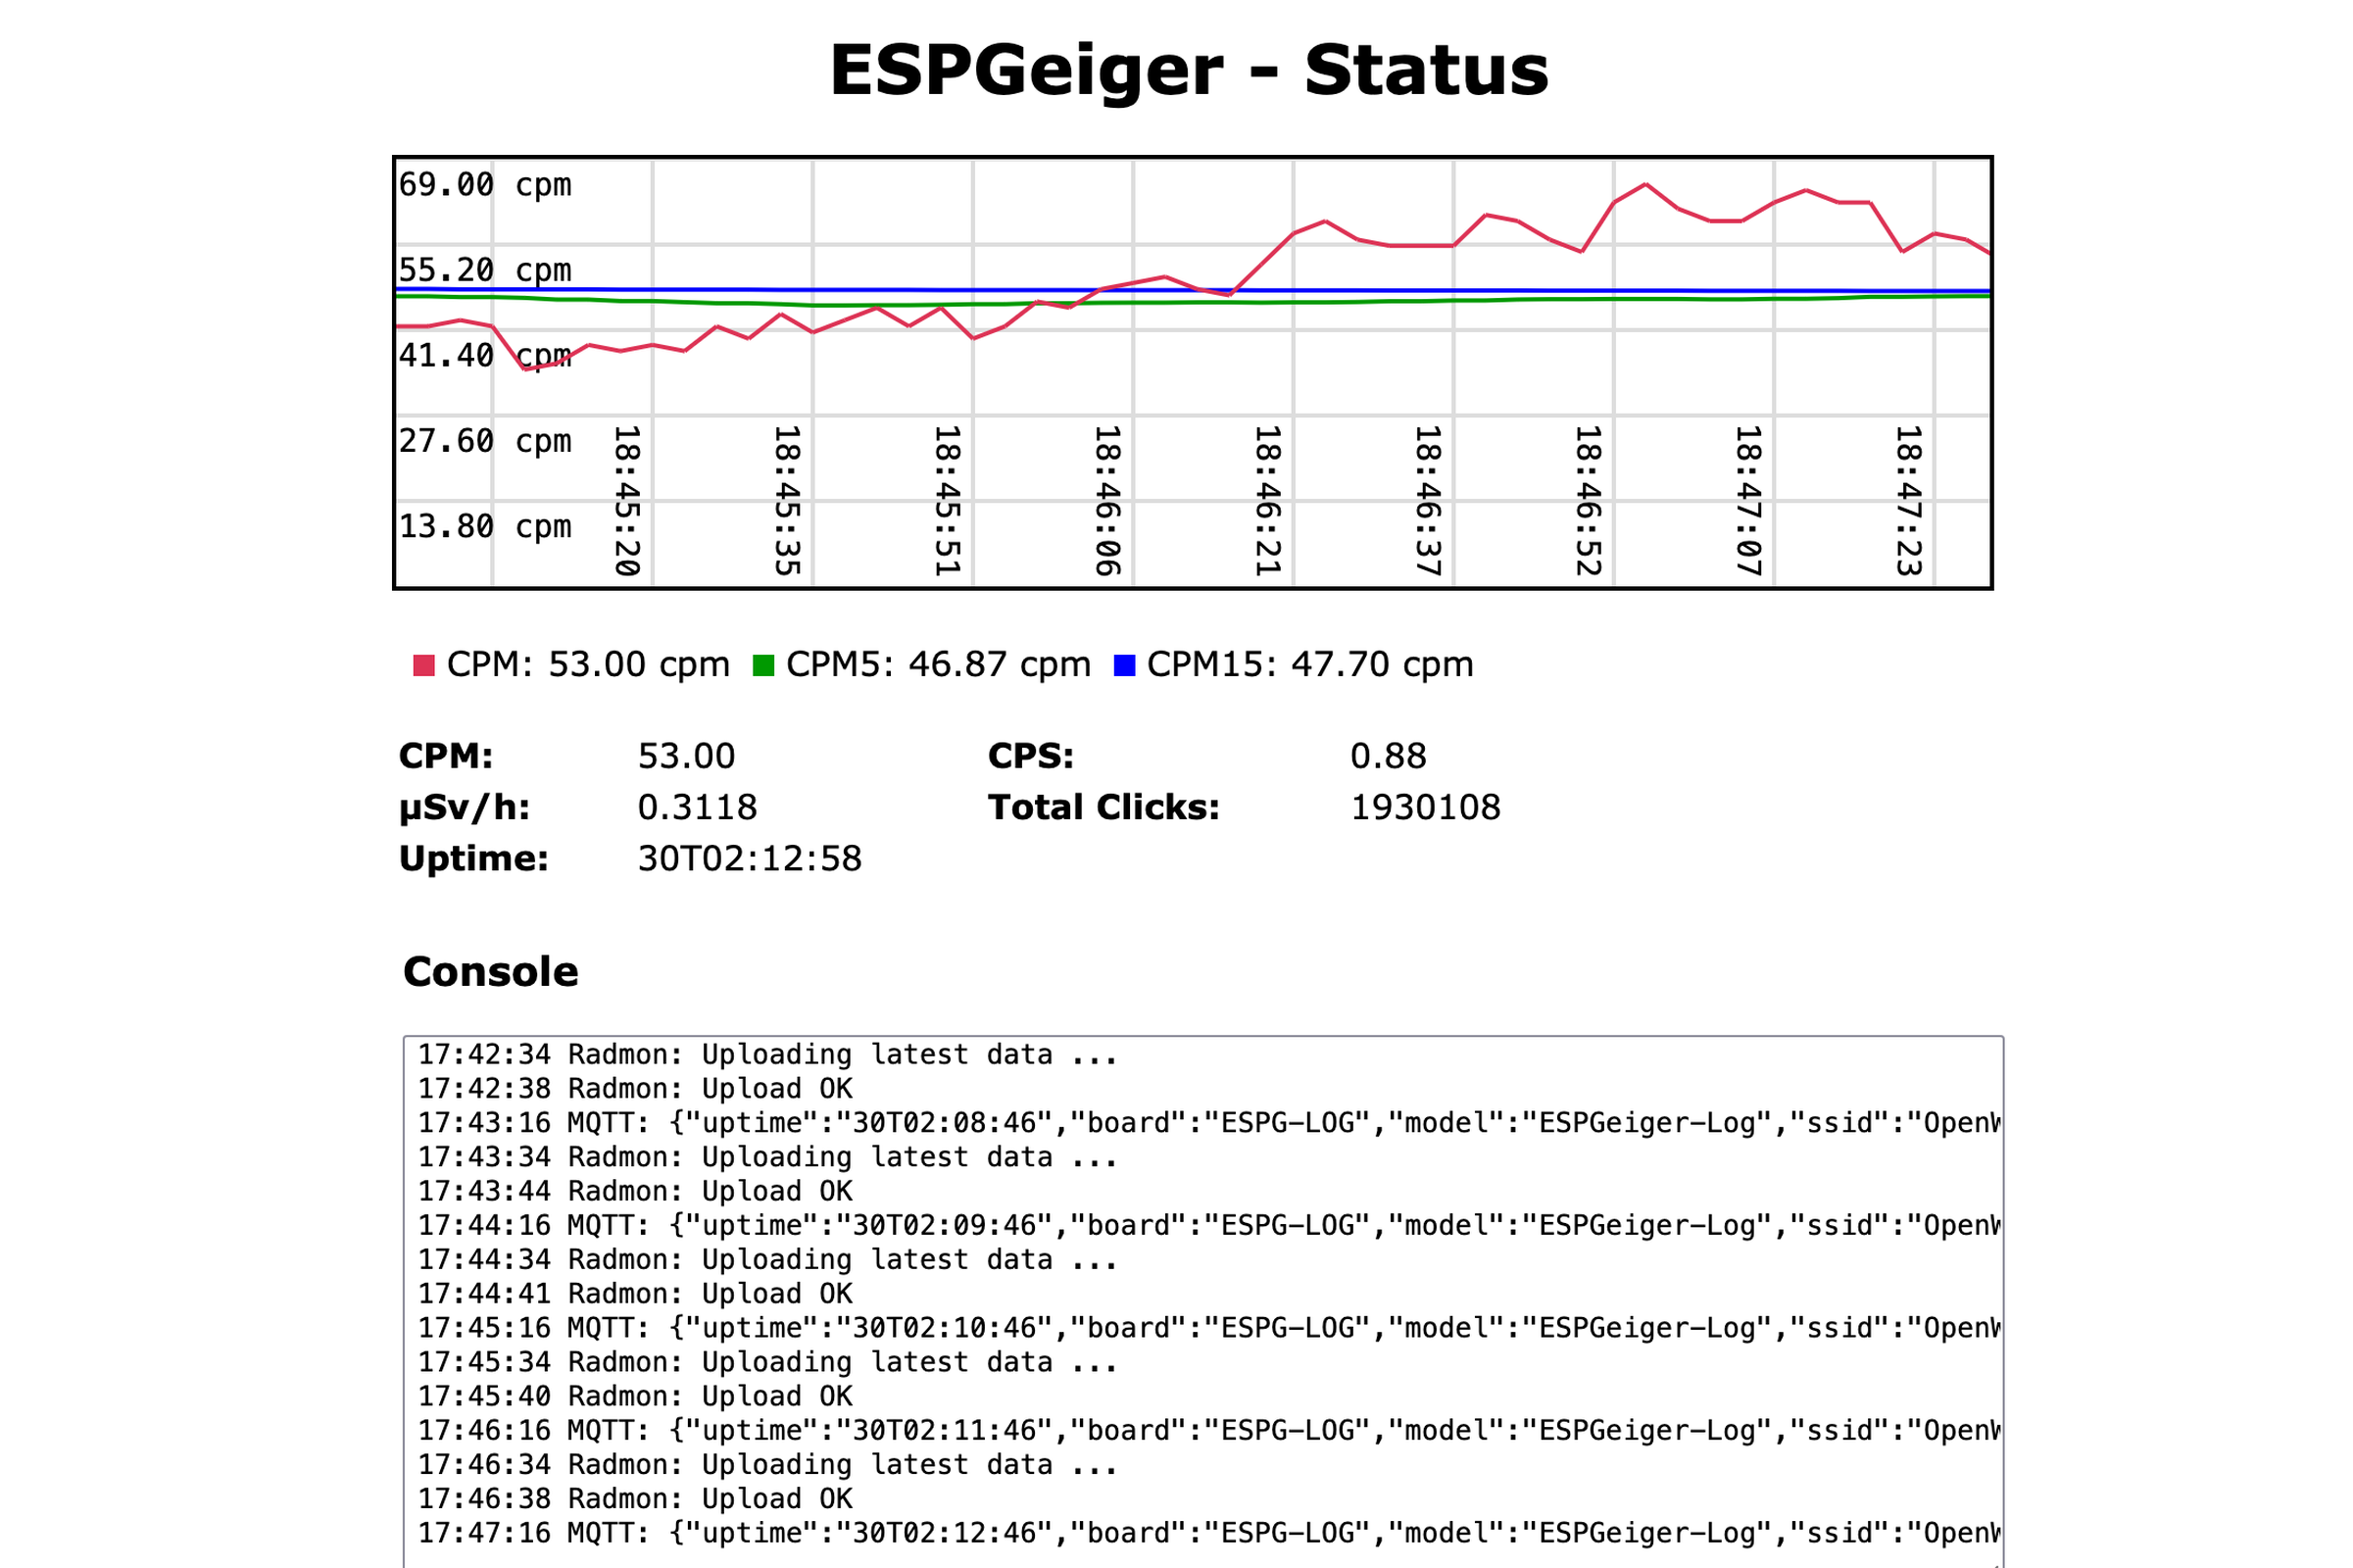
  • 📈 Built in webserver with graphing
  • 🖥️ SSD1306 Display support
  • 🔴 Live CPM and μSv/h readings
  • 🔢 Smoothed and averaged values over 1, 5 and 15 minutes
  • 🎛️ Configurable filtering/debounce and noise control
  • 📟 Accurate counting via interrupt and non-blocking functions (accuracy tested up to 100k CPM), with optional hardware counter (ESP32 only - PCNT)
  • ⏲️ No dead time due to waiting for 3rd party services
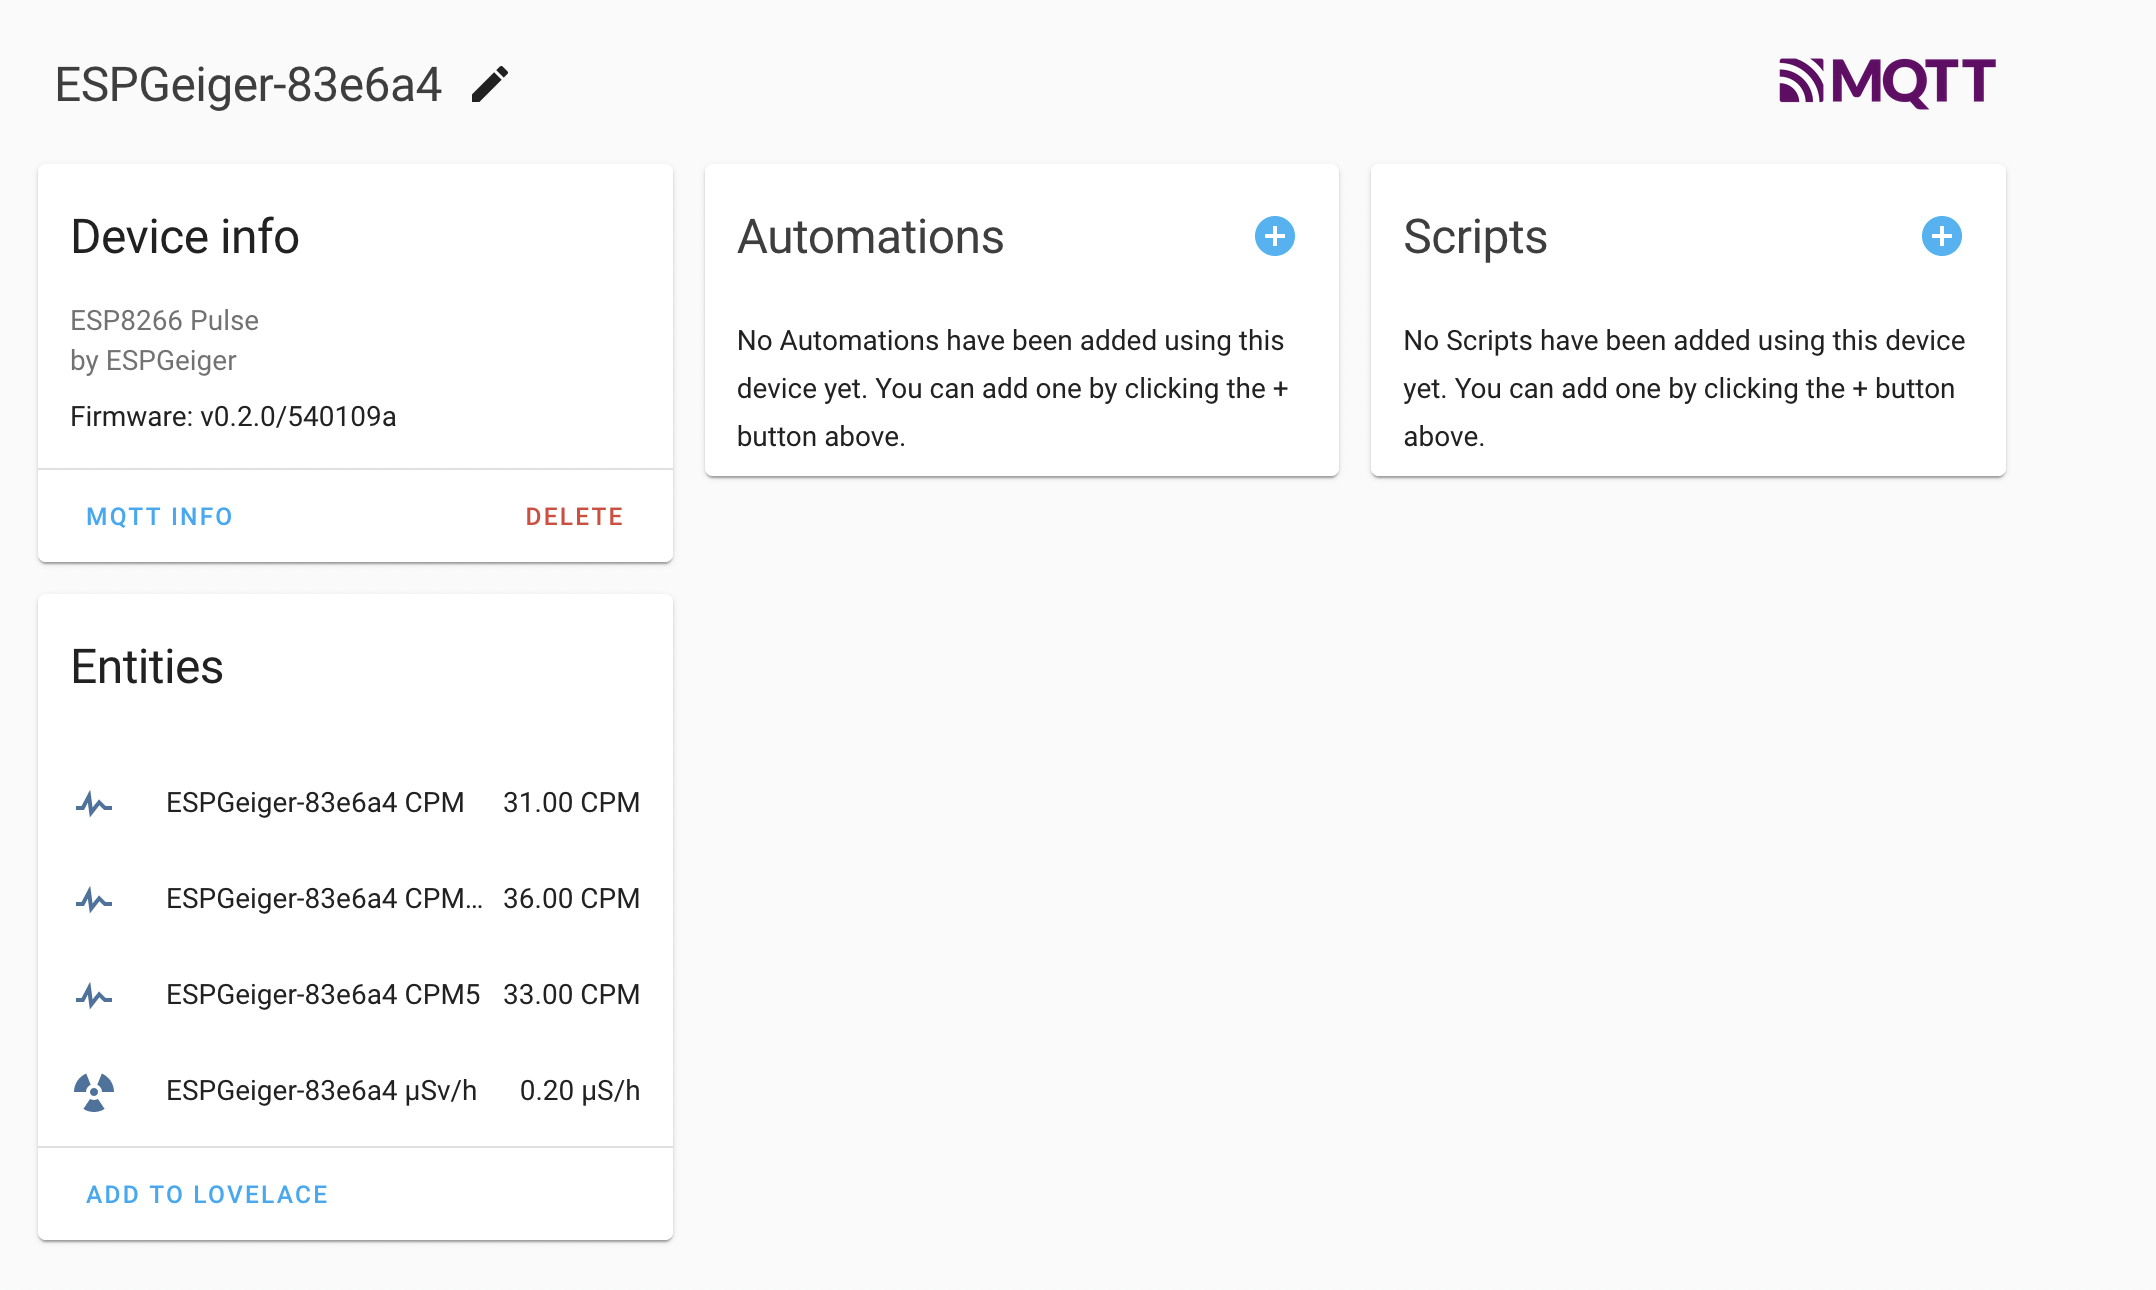
  • 🌐 Upload and share statistics to services online and locally via MQTT and Home Assistant automatic discovery
  • 💾 Save your data locally to a Fat16/32 SDCard over SPI
  • 💡 Colourful and intuitive feedback using a WS2812X NeoPixel
  • 🚧 Test builds for emulating pulse and serial based counters

Documentation

Please visit (https://docs.espgeiger.com/) for the latest documentation.

Note: Documentation is currently being populated

1. Installation

Web Installer

On your Chrome or Edge browser, visit our web installer here: https://install.espgeiger.com/

Pre-built image

Select an image - the images are in the format <esp_device>_<geiger_device>

There are builds for both ESP32 and ESP8266 boards, both with builds for:

  • Generic Pulse Counters (pulse)
  • GC10 (gc10)
  • GC10next (gc10next)
  • MightyOhm (mightyohm)

For example, if you have an esp8266 and a generic pulse counter, use esp8266_pulse-firmware.v0.1.2.bin - an ESP32 with a GC10 - esp32_gc10-firmware.v0.1.2.bin

All build files have an OLED option if you are using a SSD1306 OLED display.

There are additional builds with special features:

  • espgeigerhw - build for the ESPGeiger HW geiger counter
  • minpulse - this is a build without any 3rd party output other than web config
  • no_pcnt - disables PCNT (hardware) counting for ESP32 devices
  • cajoe_iotgm - build for the CaJoe IOT GM with ESP32 on board

Use a tool such as esptool.py or Tasmotizer to flash the firmware to your ESP device.

Building your own image

The project should build automatically with Platformio - it can be built with the Arduino IDE but will require you to satify the requirements by installing the libraries.

The environments.ini file defines some pre-built environments and examples of how the build can be configured. You can pick a combination of target board (esp32/esp8266) and geiger type (pulse/serial/GC10 etc)

  1. Open the PlatformIO IDE and open the ESPGeiger project.
  2. Edit the platformio.ini file to change default_envs to match the environment you want to build.
  3. Click on the Build button in the PlatformIO IDE.
  4. The PlatformIO IDE will build the project.
  5. Once the project is built, you can upload it to your microcontroller.
  6. To upload the project to your microcontroller, click on the Upload button in the PlatformIO IDE.
  7. The PlatformIO IDE will upload the project to your microcontroller.

2. Connect Hardware

Pulse counter

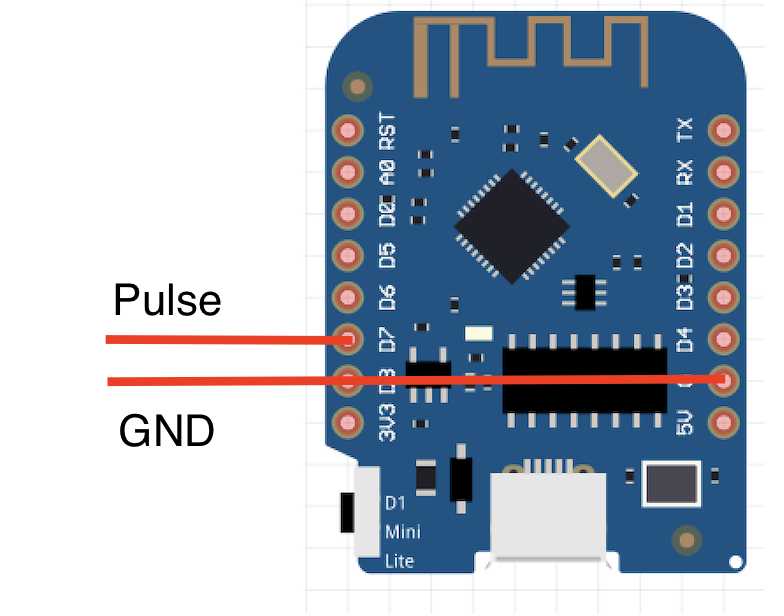
By default GEIGER_RXPIN is set to GPIO13. This is the pin you need to connect the Geiger pulse output to. Don't forget to connect ground as well!

Serial counter

By default GEIGER_RXPIN is set to GPIO13. This is the pin on the ESP you need to connect the Geiger counter serial TX pin to. Don't forget to have a common ground, as well!

The GEIGER_TXPIN is not currently in use for communication to the Geiger Counter.

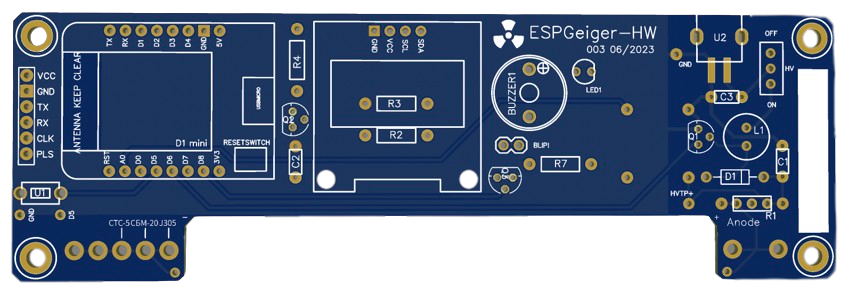
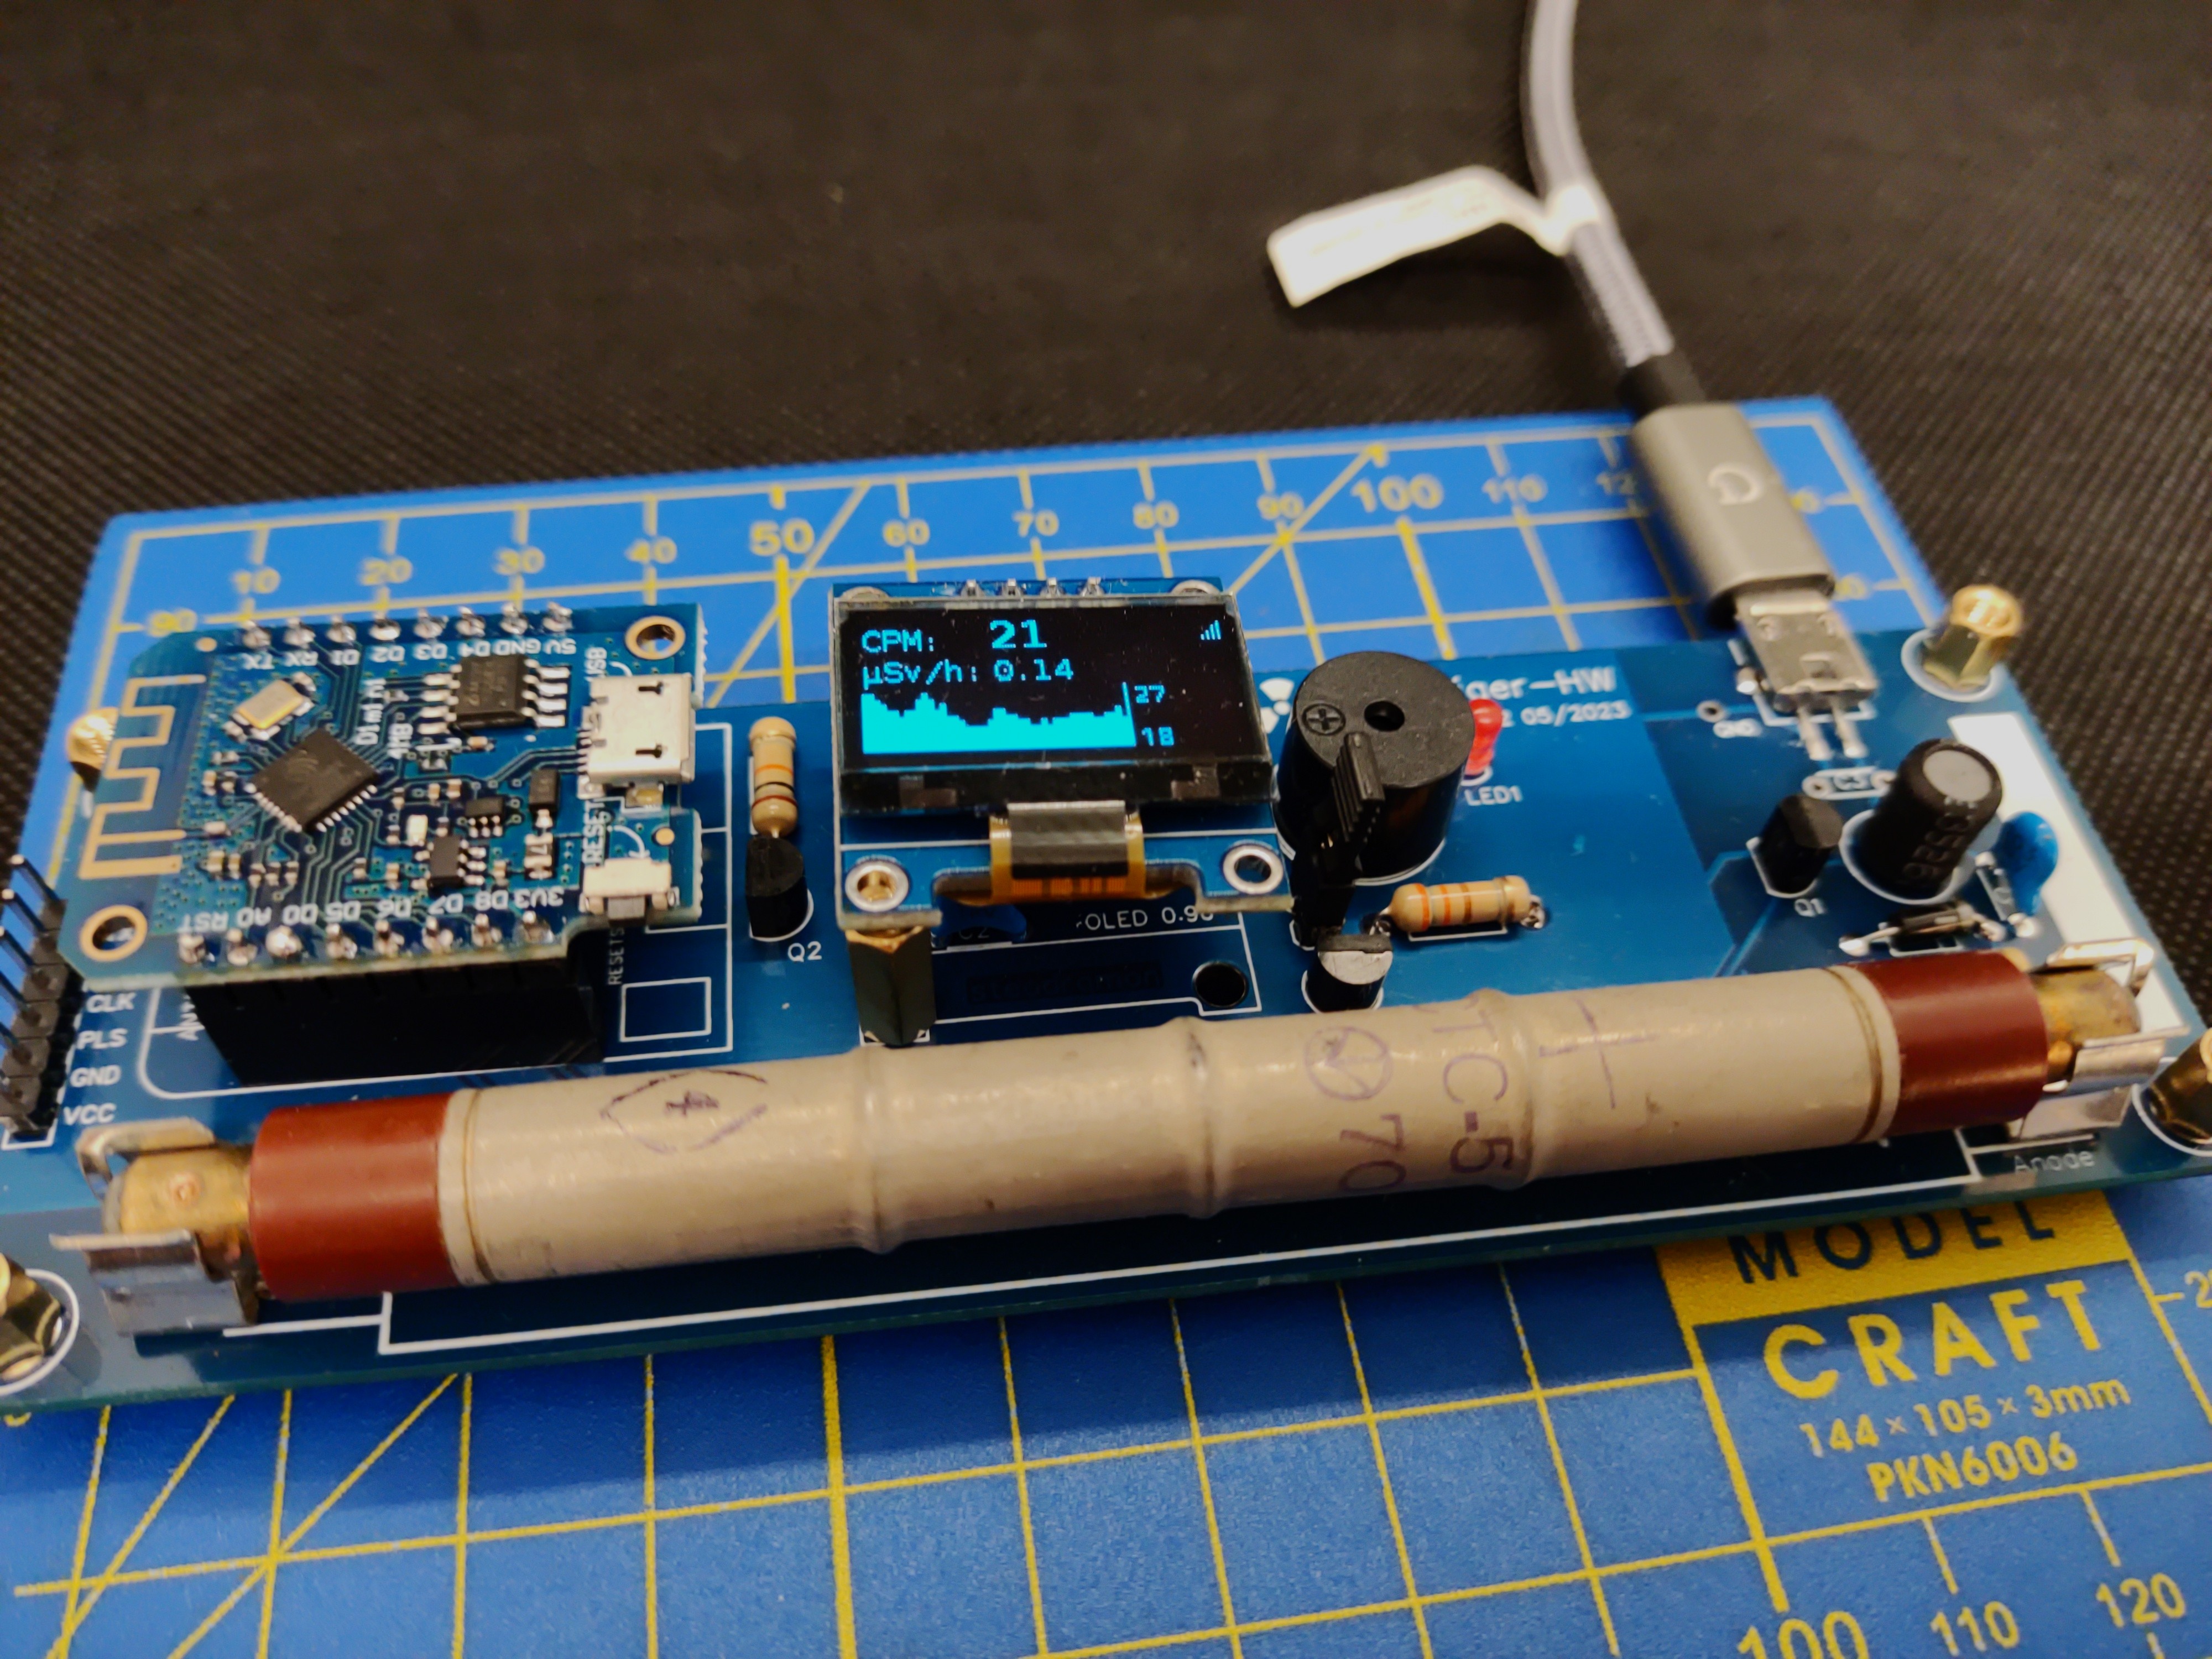
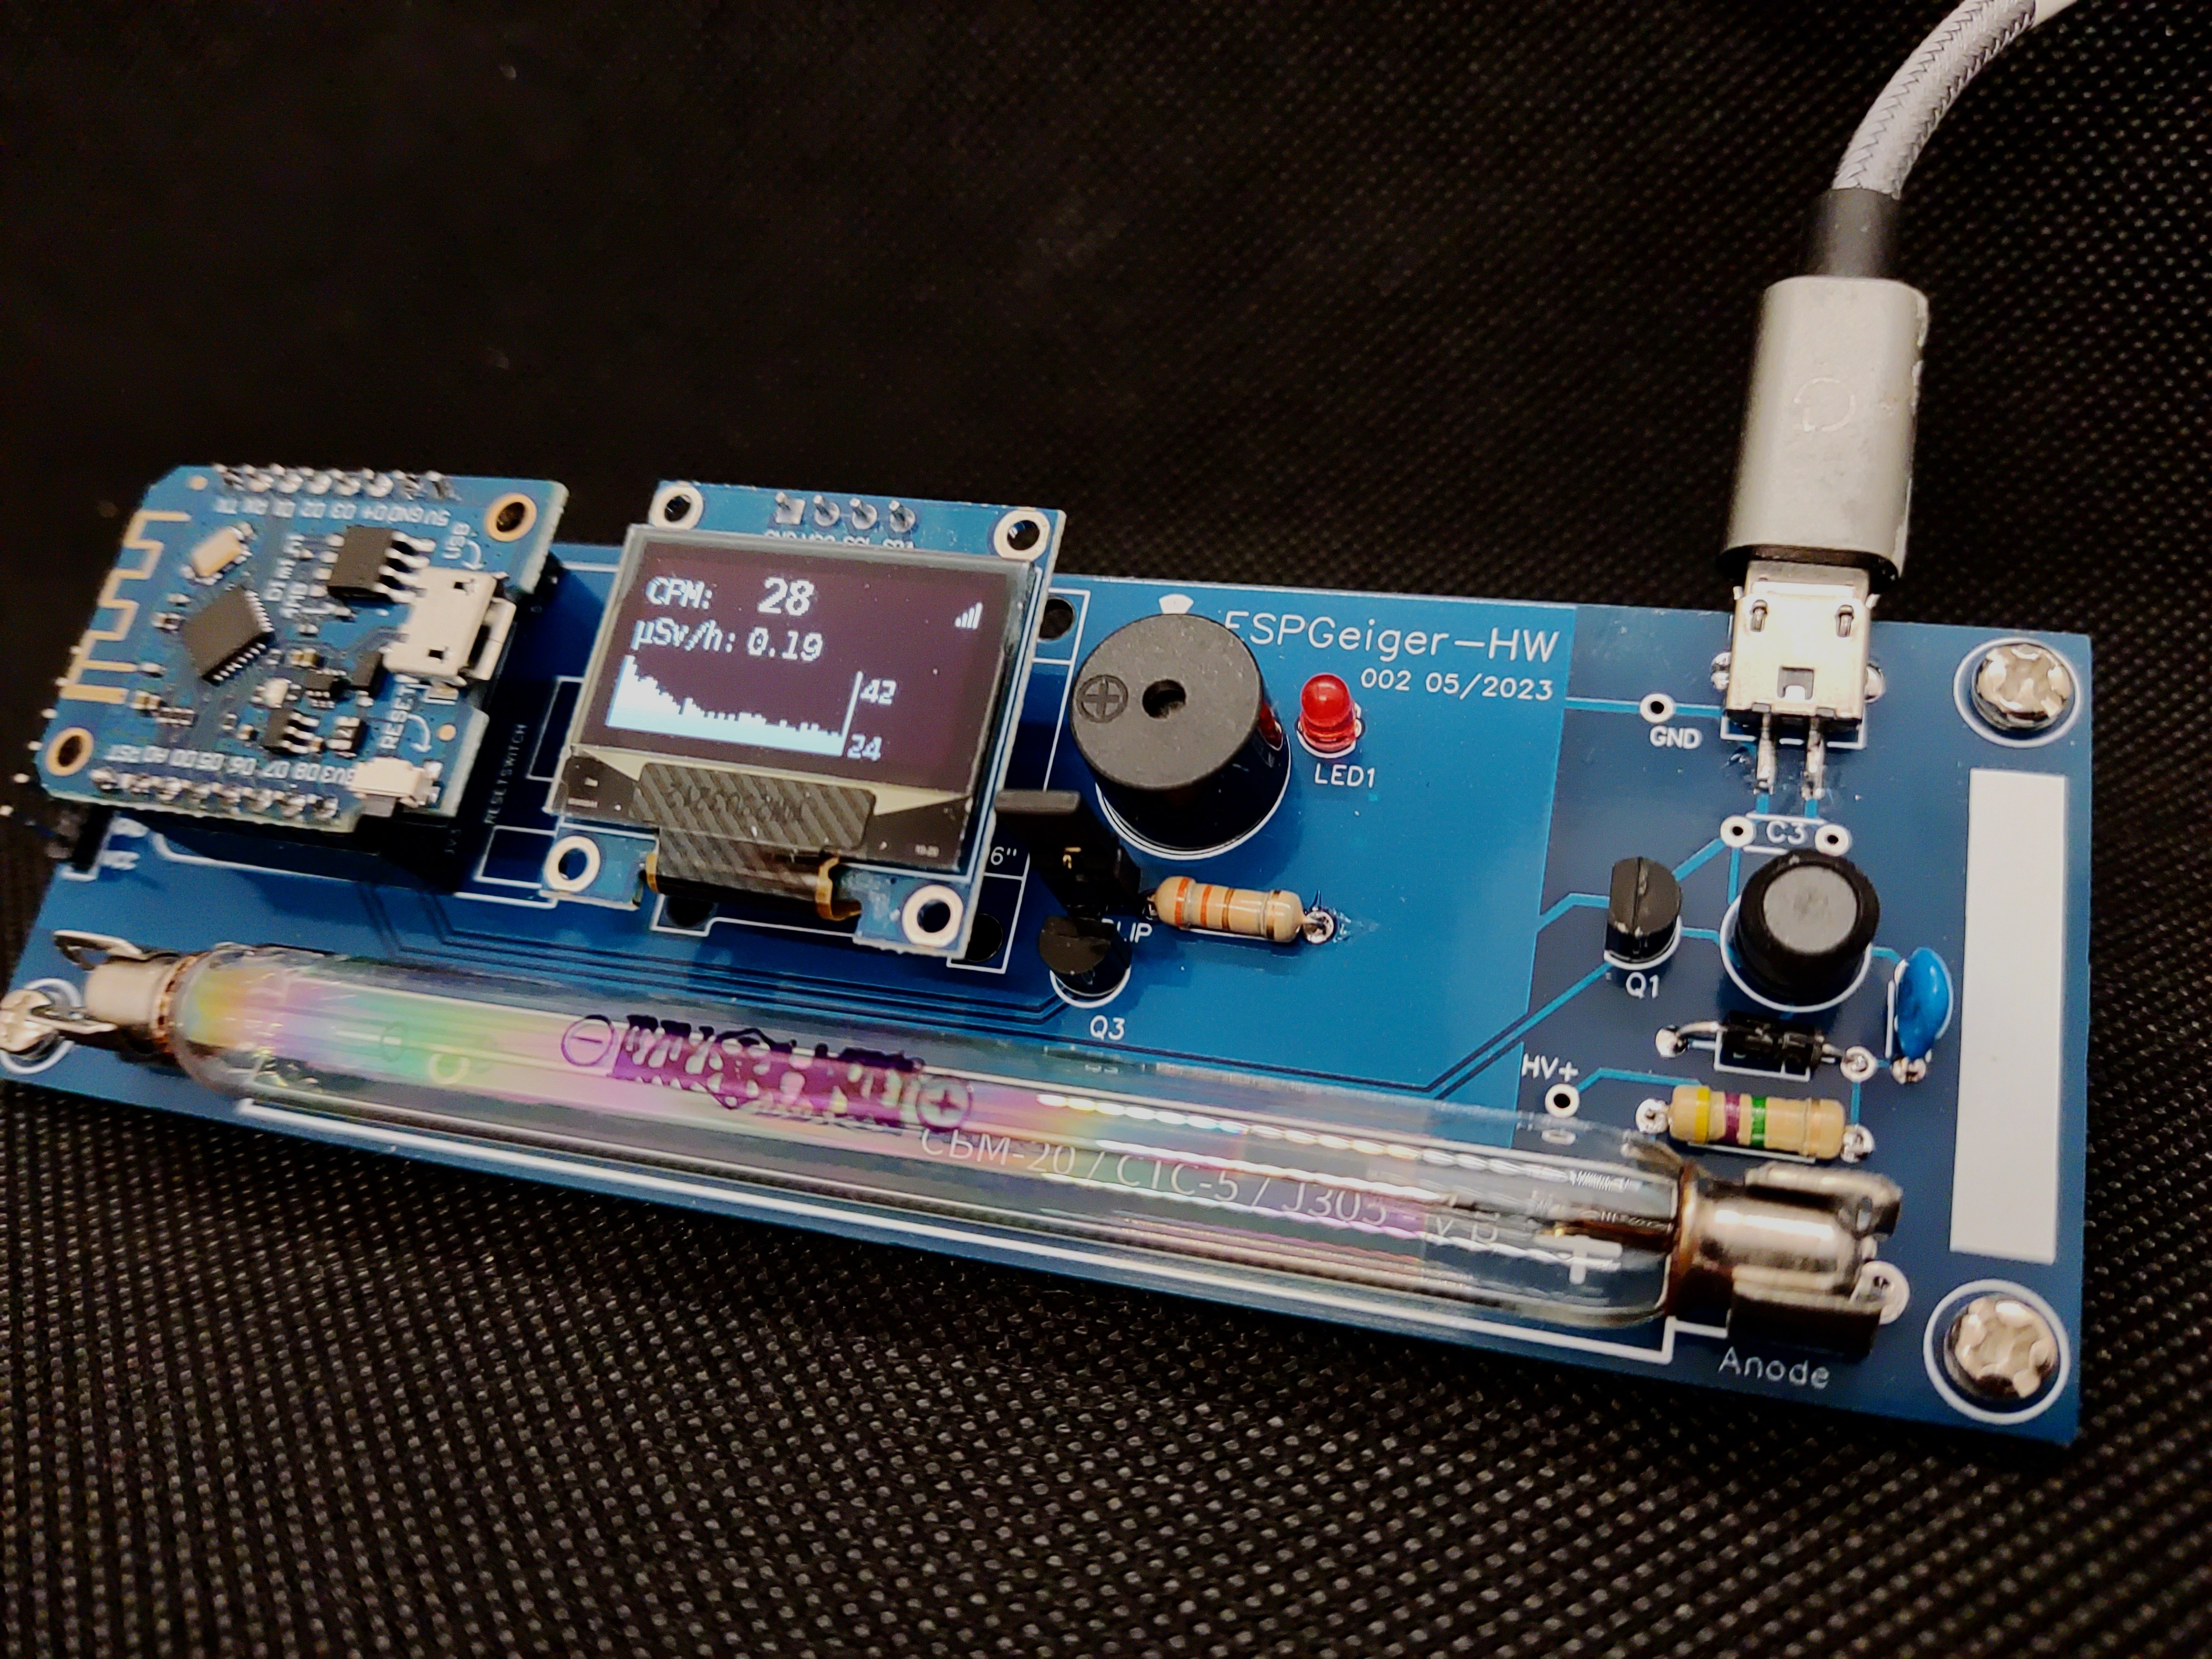
ESPGeiger-HW

Currently ESPGeiger-HW is in development testing, watch this space!

Test/Emulation mode counter

Note: Publishing to public sites is disabled whilst ESPGeiger is in test mode.

By default GEIGER_RXPIN is set to GPIO13. By default GEIGER_TXPIN is set to GPIO12.

In either Test Pulse or Test Serial modes you can connect GEIGER_RXPIN and GEIGER_TXPIN together with a jumper wire, to emulate a Geiger counter from ESPGeiger itself.

3. Setup and Config

  1. Once installed, connect to the built-in Wifi on the ESP to set up your access point. The SSID will look like ESPGeiger-<alpha-num>
  2. When you connect a window show pop up asking for Wifi Configuration, if not browse to http://192.168.4.1/
  3. Select the SSID and insert the password for the network you'd like to connect to.
  4. Once connected to the network you can browse to the ESPGeiger IP address directly or enter http://<name of the device>.local into your browser, for example http://ESPGeiger-83e6a4.local
  5. You can now configure MQTT etc from the Setup page and view the current status from Status

4. Upgrading

Upgrading can be done through the web interface. Please be careful to select the right firmware for your build.

Note: ESP32 users please download the firmware version - merged firmwares are for fresh installs.

Compatible Counters

Annoucing ESPGeiger-HW

Pulse Counters

The project is compatible with Generic Pulse-based geiger counters and the GC10next serial based counters.

Simply connect the pulse output to GPIO13

Serial Compatibility

Currently the serial integration is untested against some units until I can gain access to a device.

Other Serial based should in theory be supportable with small changes to the codebase.

If you own or can offer a device below for testing and support, please get in touch!

  • GC10 (original)
  • MightyOhm
  • GMC-320
  • GGreg20

Outputs

  • MQTT
  • Home Assistant (Autodiscovery)
  • ThingSpeak
  • Radmon.org
  • gmcmap.com

MQTT Output

Automatically output every minute:

ESPGeiger-129e0c/tele/lwt Online
ESPGeiger-129e0c/tele/status {"uptime":"2T01:45:10","board":"ESP32","model":"GC10next","free_mem":191552,"ssid":"Wifi","ip":"192.168.1.123","rssi":-24}
ESPGeiger-129e0c/stat/CPM 26.00
ESPGeiger-129e0c/stat/uSv 0.10
ESPGeiger-129e0c/stat/CPM5 25.00
ESPGeiger-129e0c/stat/CPM15 25.00
...
ESPGeiger-129e0c/tele/lwt Offline

Home Assistant MQTT Autodiscovery

https://www.home-assistant.io/integrations/mqtt/#mqtt-discovery

Planned:

  • ESPGeiger API

Contributions

Contributions are welcomed, please feel free to raise a Pull Request for this. I am a new Arduino/C coder, so please feel free to suggest improvements to the code here to make it better for everyone!

Thanks 🙏

Thanks for supporting libraries goes to:

And inspiration:

espgeiger's People

Contributors

steadramon avatar

Stargazers

 avatar  avatar  avatar  avatar  avatar  avatar  avatar  avatar  avatar  avatar  avatar  avatar  avatar  avatar  avatar  avatar  avatar  avatar  avatar  avatar  avatar  avatar  avatar  avatar

Watchers

 avatar  avatar  avatar  avatar

espgeiger's Issues

Cajoe image not working

Just got a cajoe esp32-gc board and the image v0.6.1 is not working in PCNT. However NO_PCNT is working.

Since I never used espgeiger before I don't know if it worked in releases before 0.6.1

GPIO defined as INPUT stays high

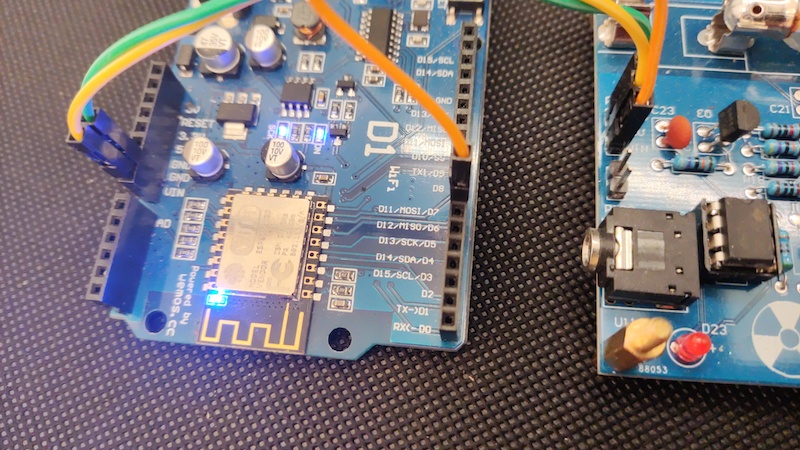
I am trying to setup CAJOE IOT-GM-v1.1 counter.
Pulses from counter are connected to the ESP32 GPIO26.

My setup:
platformio.ini: default_envs = esp32oled_pulse
counter.h: #define GEIGER_RXPIN 26

After the start, the GPIO stays HIGH (3.3V). Because of that ESP can not detect pulses from detector.

Schematic here

Photos of device
Screenshot from 2023-06-21 00-59-11
Screenshot from 2023-06-21 00-57-19

How can I configure the code so GPIO defined as INPUT stays LOW?

Disable all output except Serial

What's the best way to disable all output other than Serial? I see a SERIALOUT flag but nothing for disabling MQTT, Thingspeak, etc.

Just a few requests and remarks.

First nice job!
It would be nice to have the possible switch between 24h and am/pm in the graph.
My Access Point SSID is not readable in menu Info,
It would be nice if switch/display of summertime/wintertime is automated.
It would also be nice if current date/time is included in ESPGeiger-XXXXXX/tele/status
Have you seen the dial presentation of https://github.com/mkgeiger/geiger-counter-iot it would be nice if that could be included.

Problem with the OLED display

Hello!

First of all I want to say congrats on the amazing work you've done on this project. It is really complete and has awesome features. That is way I really want to use it to power my geiger counter.

The issue I'm experiencing is the display not clearing.
photo_2024-06-16_11-58-56

I am compiling my own version due to different pins used for the I2C interface. I've tested the screen with the Adafruit_SSD1306 and the screen is working as expected.

Would you have any idea what might be the issue and how to resolve it?

Feature request - configurable interval for logging to services

It would be very handy to be able to configure the logging interval for external services such as MQTT and radmon.org, and possibly the others.

I would like the ability to send data to MQTT every 10 seconds and some radmon.org users/stations submit readings at intervals other than 1 minute. The minimum submission interval for radmon.org is 30 seconds as any submissions sooner than 30 seconds are dropped by radmon core.

I'm not sure about the other services (HA, Thingspeak and GMC) as I have no working knowledge of them, and a configurable interval may or may not be useful to them.

I also understand that if just one submission timer is used in ESPGeiger then implementing this would be quite a job.

Cheers

(Simomax @ radmon.org)

OLED display not working

hi, I've just installed ESPGeiger on my ESP8266 connected to a J305B tube.
I can't get the OLED display to work.
It worked perfectly with my old sketch, using the address 0x3c (it seems to me that you're using this very same address in your config file).
do you have any suggestion?
my sketch uses this command to initialize the display:
display.begin(SSD1306_SWITCHCAPVCC, 0x3c)
thank you.

Loss of connection to MQTT broker causes lockups and reboots

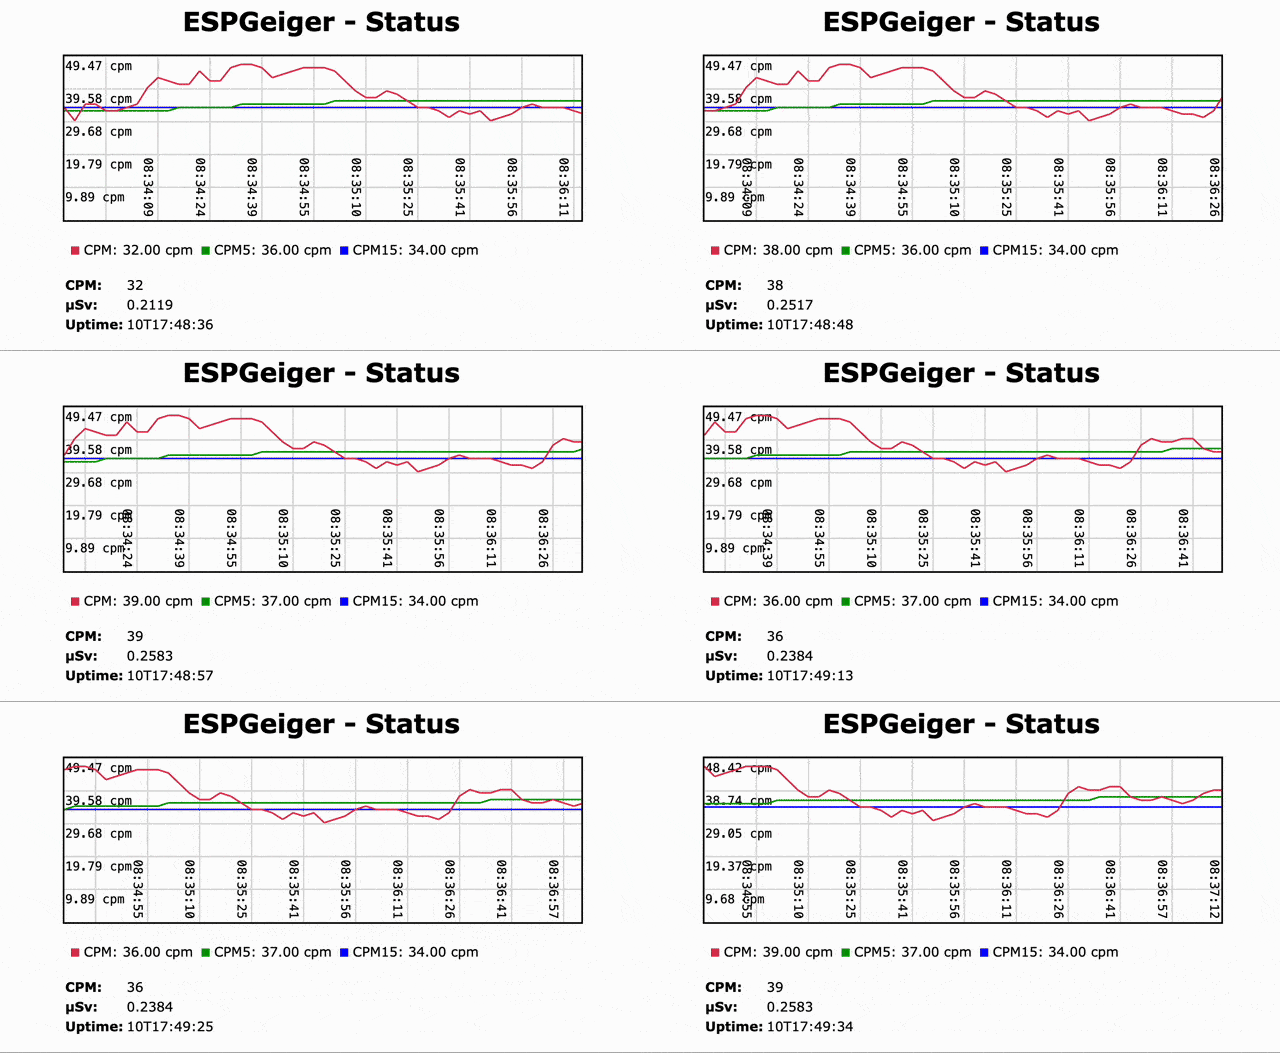
When the ESP8266 looses connection to the MQTT broker it causes the MCU to lockup/lag and then reboot after what appears to be an arbitrary length of time. With this the status web page goes very slow (see timestamps on the chart of the attached image.) Similar can be seen with the OLED and red LED on the ESPGeiger HW. Every so often the OLED will update and the red LED will light for a longer time than the regular count blink. The log window on the status web page seems unaffected.

This affects v0.5.3 and v0.5.4. Attached is a log text file copied from the status page log window and a screen grab of the status web page. v0.5.3 was in use at first, then updated to v0.5.4.

Hardware/software:
ESPGeiger HW (v0.5.3/064bca6 & v0.5.4/3066e12
Mosquitto MQTT Broker, running on Windows 10 Pro

Steps to reproduce:

  1. Setup/configure an MQTT broker (Mosquitto in my case)
  2. Configure ESPGeiger to use the MQTT server
  3. Observe normal operation
  4. Break the connection to the MQTT broker (in my case I stopped the Mosqitto service on Windows)
  5. Observe the ESPGeiger slow down/lockup and after some time (around 10-15 minutes in my tests) the unit will reboot

If the MQTT broker connection is restored normal operation resumes, however if the connection is not restored the MCU will reboot. The first reboot occurred around 17 minutes after the connection was lost. After restoring the connection normal operation resumed. I then updated to v0.5.4. Observed normal operation and then broke the MQTT connection again. The reboot occurred after 13 minutes and then again 12 minutes later. This can be seen in the log file attached.

Please let me know if you would like any further information or testing.

Thanks.

ESPGeiger-4e4aee.txt
ESPGeiger-4e4aee - MQTT issue

Home-Assistant Autodiscovery stops randomly (Unpredictable)

Ello there!

I've been using ESPGeiger on a cheap BR-6 Geiger-Counter for the past week,
But i've noticed an issue with the home-assistant MQTT Stuff

I have it send its data over to my HASS, which works fine, sometimes for multiple days, sometimes only for a few hours
it then just, stops (in HASS) and doesnt report anything, it even goes into "Unavailable"

the notable thing is that when i connect directly to the MQTT server, over the same network, i can see the ESP reporting its data just fine, without any issues

To get it back up and running, without rebooting the ESP, i go to the settings page, and simply press "SAVE"
This triggers a new "Auto-discovery" cycle, and fixes the connection again

I'm unsure how to debug this further, so i hope this helps out alot

Tiny things i tried

Stable 5v Input to the ESPBoard (Using its own 3.3v regulator)
Stable 3.3v Input
Different networks (Never know!)
Different usernames (ofc shouldnt matter, but still worth a try)
Reflashing ESP from clear

Recommend Projects

  • React photo React

    A declarative, efficient, and flexible JavaScript library for building user interfaces.

  • Vue.js photo Vue.js

    🖖 Vue.js is a progressive, incrementally-adoptable JavaScript framework for building UI on the web.

  • Typescript photo Typescript

    TypeScript is a superset of JavaScript that compiles to clean JavaScript output.

  • TensorFlow photo TensorFlow

    An Open Source Machine Learning Framework for Everyone

  • Django photo Django

    The Web framework for perfectionists with deadlines.

  • D3 photo D3

    Bring data to life with SVG, Canvas and HTML. 📊📈🎉

Recommend Topics

  • javascript

    JavaScript (JS) is a lightweight interpreted programming language with first-class functions.

  • web

    Some thing interesting about web. New door for the world.

  • server

    A server is a program made to process requests and deliver data to clients.

  • Machine learning

    Machine learning is a way of modeling and interpreting data that allows a piece of software to respond intelligently.

  • Game

    Some thing interesting about game, make everyone happy.

Recommend Org

  • Facebook photo Facebook

    We are working to build community through open source technology. NB: members must have two-factor auth.

  • Microsoft photo Microsoft

    Open source projects and samples from Microsoft.

  • Google photo Google

    Google ❤️ Open Source for everyone.

  • D3 photo D3

    Data-Driven Documents codes.