- PHP
- MySQL
In this guide, you will learn how to install XAMPP stack and start with the PHP development on the Windows platform.
XAMPP is an all-in-one stack that includes PHP, Apache HTTP server, and MariaDB database. It stands for Cross-Platform (X), Apache, MariaDB, PHP, and Perl. The main advantage is a simple and fast installation of the popular software for PHP development.
Usually, you won't see it in the production online environments directly because its main purpose is the PHP development and using it locally on your workstation.
In case of issues, see the Troubleshooting section at the bottom of this guide.
Download and install XAMPP from the official website.
Head over to the download section
and choose the Windows installer .exe for the PHP 7.2 version. Currently,
only 32-bit versions are available. This won't be an issue at this step even if
you have a 64-bit operating system.
After the download completes, run the installer:
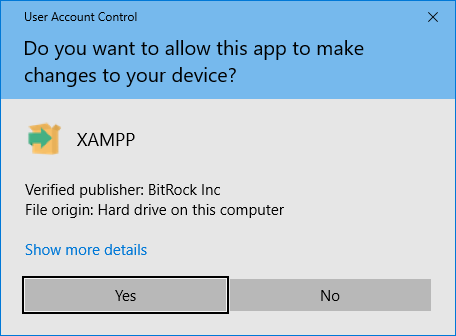
The installer will ask you to confirm changes on your workstation:
Click Yes.
The following warning is notifying you about the UAC (User Account Control):
Important! Because an activated User Account Control (UAC) on your system
some functions of XAMPP are possibly restricted. With UAC please avoid to
install XAMPP to C:\Program Files (x86) (missing write permissions). Or
deactivate UAC with msconfig after this setup.
This means that in case your current Windows system has UAC enabled, you won't
be able to install XAMPP to the C:\Program Files (x86) location. You will be
able to install XAMPP elsewhere. For example, in C:\xampp folder, which is what
you want actually and this guide suggests further on.
To learn how to disable UAC, follow the procedure in the troubleshooting section at the bottom of this guide.
For security purposes avoid disabling the UAC as suggested in the warning and click OK.
The Installer's Welcome wizard screen appears:
Click Next.
The Components screen appears. Here you can choose only particular components that you might need.
A quick components description:
-
Apache
This is the main web server that provides something visible at the URL
http://localhost. -
MySQL
This is the main database that will hold your data. This component is actually a MariaDB (a fork project of the MySQL), however for the simplicity of understanding things, here is called MySQL. Majority of the functionality and how to access it with PHP is the same as the MySQL.
-
Filezilla FTP Server
An additional component to help you upload files remotely. It won't be used on your local machine,
-
Mercury Mail Server
Server for sending emails. It won't be used in the local development environment.
-
Tomcat
This is Apache Tomcat web server for running Java code.
-
PHP
This is the main component that you want. PHP language software itself. Prebuilt, compiled, packaged, and ready for usage.
-
Perl
An additional programming language you might want to check out.
-
phpMyAdmin
Control panel with accessible via
http://localhost/phpmyadminfor managing the database. -
Webalizer
A separate web-based log analyzer for statistics and analysis. This won't be used on your local machine.
-
Fake Sendmail
This is a mailing simulation component that might be useful for sending emails on your development machine but not actually delivering them to the real address.
This guide will choose all components since they don't change the installation size or other things much. Click Next.
The installation location screen appears. In this guide, the C:\xampp. You can
choose to install it wherever you need, except the C:\Program Files (x86) as
warned above because of the UAC:
Enter the folder location and click Next.
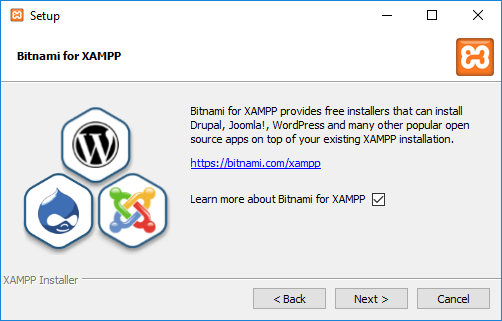
The following screen is an information about additional Bitnami for XAMPP add-ons, which install additional software such as CMS, eCommerce, CRM and similar software with few button clicks.
Click Next.
Now you are ready to install the XAMPP stack and all its components.
Click Next.
The installation procedure is now in progress.
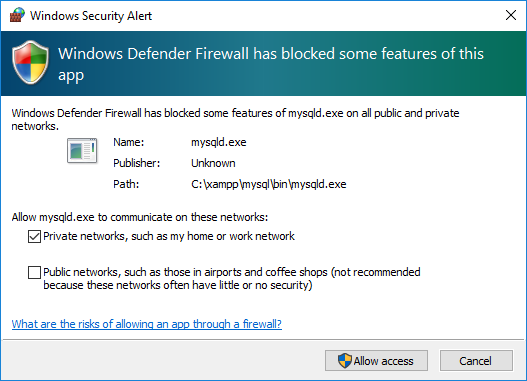
You will also get a notification to configure the firewall rules how the Apache web server is allowed to communicate on your network. In this guide, the Private networks, such as my home or work network option is chosen.
Click Allow.
XAMPP installation is now completed.
Select to start the XAMPP control panel and click Finish.
XAMPP can be used in more languages. This guide will choose the English language.
Click Save.
The XAMPP control panel has been launched:
Let's start Apache web server and the database. Click start buttons for Apache and MySQL. You will get a firewall notification for the database service similar to the one for Apache web server:
Click Allow for your private network.
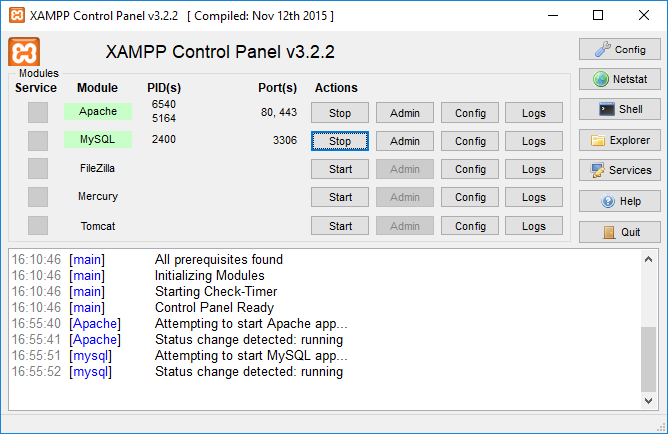
The control panel now indicates that Apache and MySQL services are up and running:
By visiting http://localhost in your browser, you should see an XAMPP welcome
screen, similar to this one:
For managing the database, you can use the provided phpMyAdmin control panel,
which is available at http://localhost/phpmyadmin:
You are almost done. Few post-installation steps need to be done to have a better development experience and additional tools at your disposal.
You will use command line a lot with modern PHP development and in order to
Windows recognize the PHP command, you need to add the PHP installation directory
to your Path environment variable.
When you type php in the command prompt, you will most likely get the
following error in the beginning:
'php' is not recognized as an internal or external command,
operable program or batch file.
Click Windows Start and type environment variables keywords in the search.
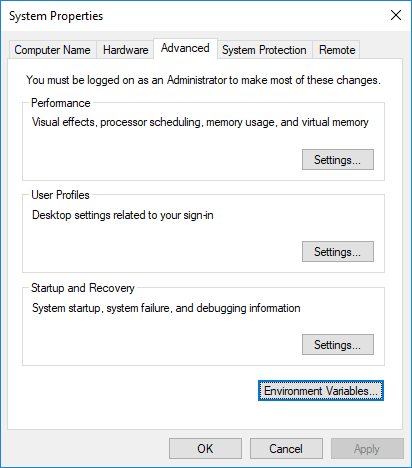
Click the result Edit the system environment variables. The System Properties
window opens:
Click the Environment variables:
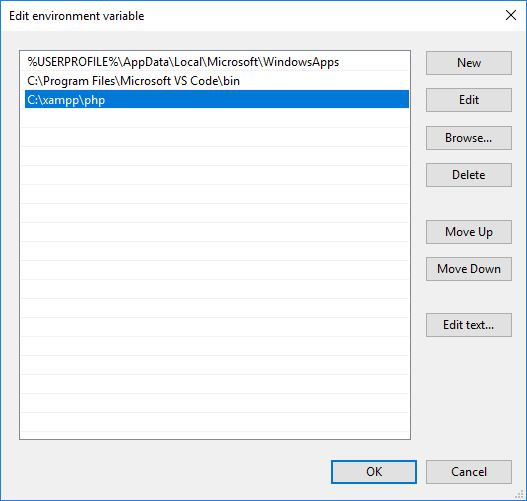
And add the PHP installation directory to the Path variable. In the case of
this guide, this is C:\xampp\php:
Restart command line prompt, and the php command should now work:
This is actually not recommended for security purposes, however, in some cases, you will want to disable the UAC.
-
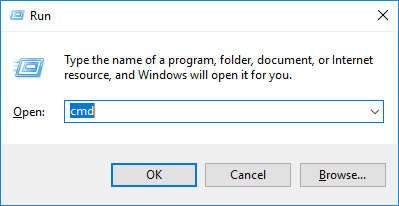
The first thing you need to do is checking if the current user has administrator privileges. Start command line prompt:
win-key + Rand typecmd: -
Type
lusrmgr.msc: -
And check if your current user is in the
Administratorsgroup: -
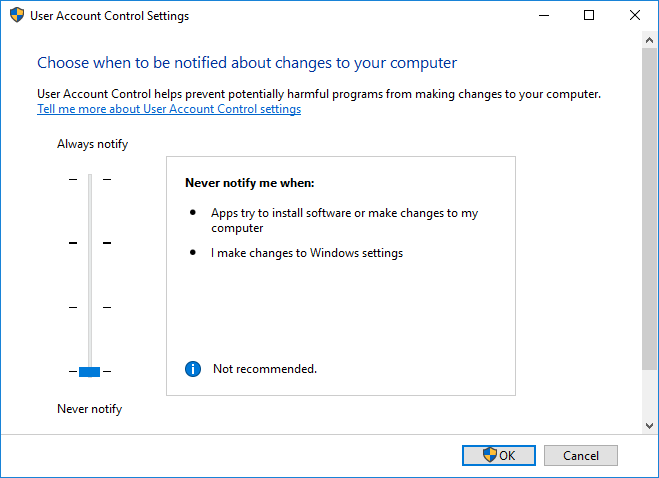
Once the account has administrator privileges, you can disable the UAC from the Control Panel. Open Control Panel and type UAC in the upper right search box. Click the Change User Account Control settings. Drag the slider to Never notify:
-
This disables the UAC. Click OK and reboot the computer.
By the end of the XAMPP installation, you might get an error window notifying you that Apache HTTP Server has stopped working and you have only option to click the Close program... button.
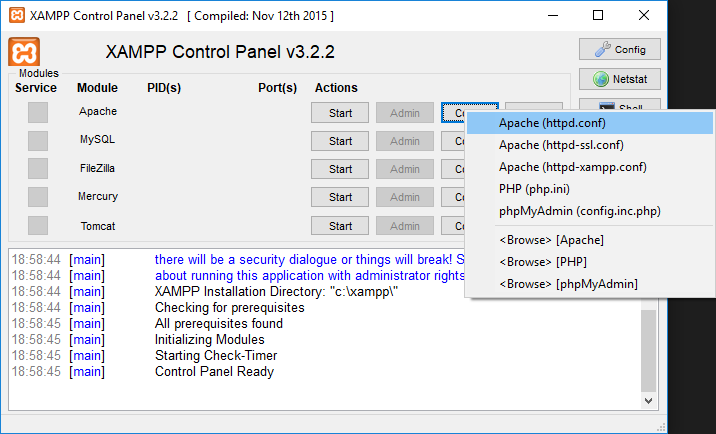
Open XAMPP Control Panel and select httpd.conf Apache configuration file:
And add the following code at the bottom of the file:
<IfModule mpm_winnt_module>
    ThreadStackSize 8388608
</IfModule>
The default Apache stack size on Windows is 1MB which sometimes causes crashes.
A very common issue many users have is the blocked port 80 because the Skype is using it and Apache cannot use it afterward.
To change the port in Skype:
- Open Skype
Tools->Options- Select the
Advancedoption from the left column - Select
Connection - Deselect the option that says,
Use port 80 and 443 as alternatives for incoming connections - Click Save
- Exit and then restart Skype
Now Skype and Apache can run at the same time on your workstation.
- Now move project folder to location xampp/htdocs
- Start XAMPP and go to phpmyadmin and create a database named "general"
- Now go to import
- Go to Assets folder and import the general.sql file
- Open localhost/general or your-ip/general to start software
- login by admin/admin go initial setup like school data, user data and book data
- Hence, General Book System is ready to use


