Giter VIP home page Giter VIP logo

andfun-kotlin-dessert-pusher's Introduction

Activity Lifecycle - DessertPusher

This is the toy app for lesson 4 of the Android App Development in Kotlin course on Udacity.

DessertPusher

DessertPusher is a game about making desserts. Press the button, make a dessert, earn the big bucks.

This app is for exploring the Activity Lifecycle callback methods and the Lifecycle object.

Screenshots

Screenshot1 Screenshot1 Screenshot1

How to use this repository

  • Fork this repository to your Github account.
  • Open Android Studio 3.2.x+ in your local machine.
  • We recommend you to use the Version Control System(VCS) in your Android Studio 3.2.x+ IDE to clone the repository directly in your IDE.
  • You may have to use the File > Settings > Version Control (VCS) menu option to set up Git settings.
  • Refer to this IntelliJ document for details.
  • Working with VCS will make it easy for you to push your updates or switch between branches to your remote repository in Github.

Repo Details

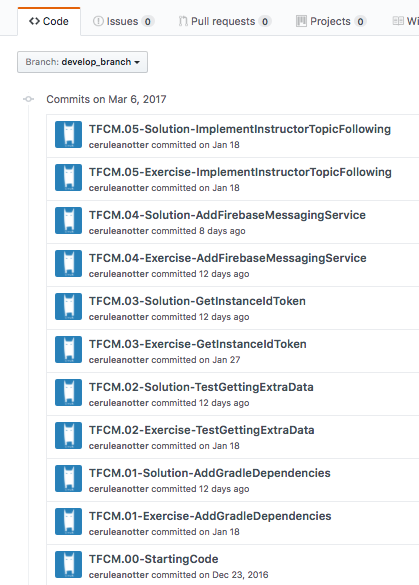
Each code repository in this class has a chain of commits that looks like this:

listofcommits

These commits show every step you'll take to create the app. Each commit contains instructions for completing the that step.

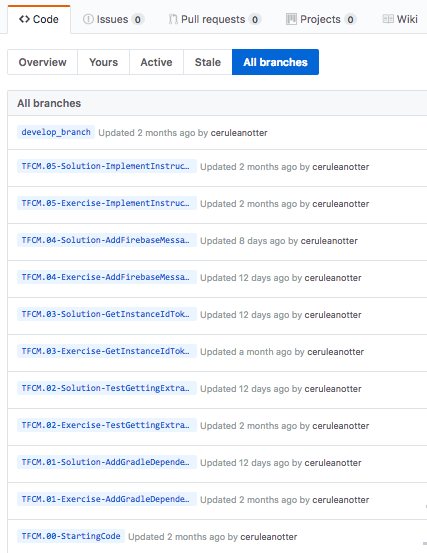
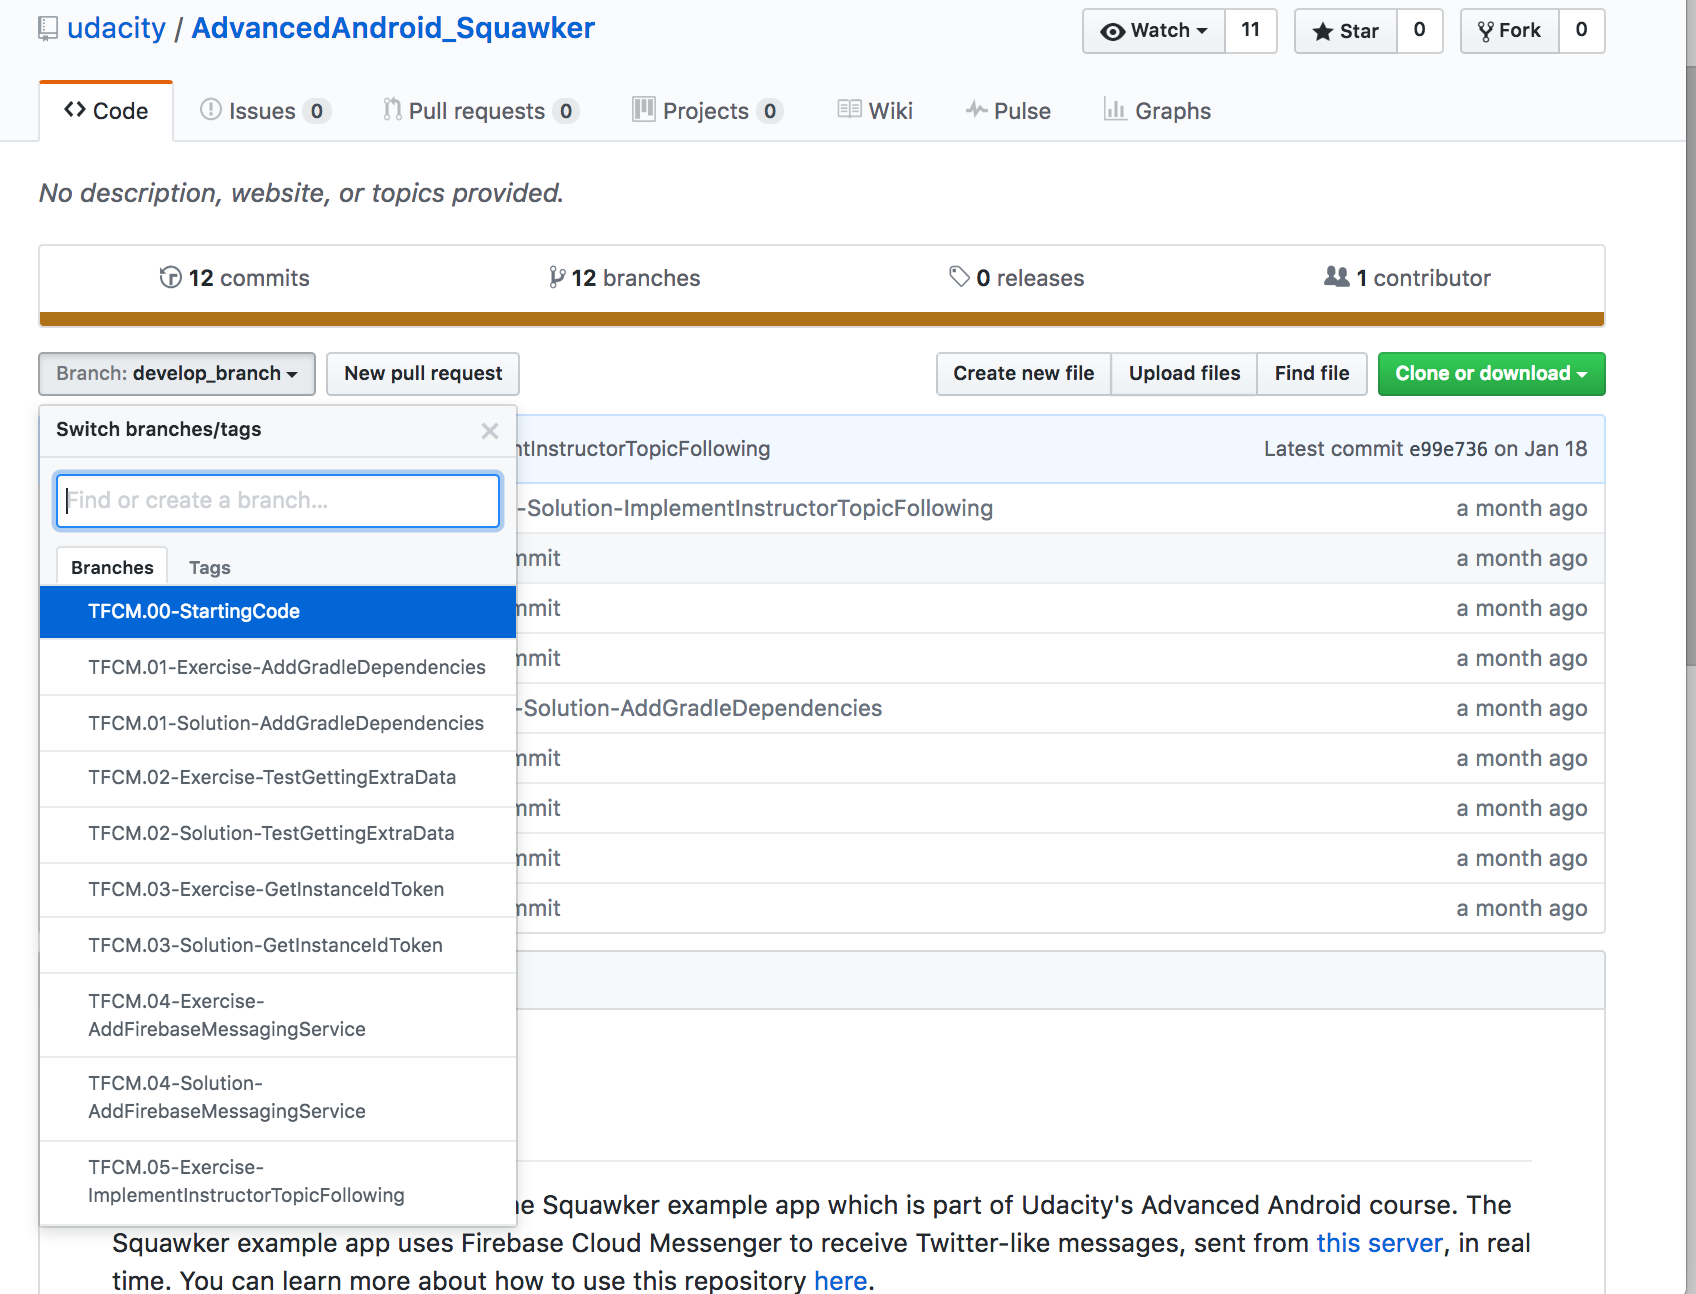
Each commit also has a branch associated with it of the same name as the commit message, seen below:

branches Access all branches from this tab

listofbranches

branchesdropdown

The branches are also accessible from the drop-down in the "Code" tab

Working with the Course Code

Here are the basic steps for working with and completing exercises in the repo.

The basic steps are:

  1. Clone the repo
  2. Checkout the branch corresponding to the step you want to attempt
  3. Find and complete the TODOs
  4. Optionally commit your code changes
  5. Compare your code with the solution
  6. Repeat steps 2-5 until you've gone trough all the steps to complete the toy app

Step 1: Clone the repo

As you go through the course, you'll be instructed to clone the different exercise repositories, so you don't need to set these up now. You can clone a repository from github in a folder of your choice with the command:

git clone https://github.com/udacity/REPOSITORY_NAME.git

Step 2: Checkout the step branch

As you go through different steps in the code, you'll be told which step you're on, as well as a link to the corresponding branch.

You'll want to check out the branch associated with that step. The command to check out a branch would be:

git checkout BRANCH_NAME

Step 3: Find and complete the TODOs

Once you've checked out the branch, you'll have the code in the exact state you need. You'll even have TODOs, which are special comments that tell you all the steps you need to complete the exercise. You can easily navigate to all the TODOs using Android Studio's TODO tool. To open the TODO tool, click the button at the bottom of the screen that says TODO. This will display a list of all comments with TODO in the project.

We've numbered the TODO steps so you can do them in order: todos

Step 4: Commit your code changes

After You've completed the TODOs, you can optionally commit your changes. This will allow you to see the code you wrote whenever you return to the branch. The following git code will add and save all your changes.

git add .
git commit -m "Your commit message"

Step 5: Compare with the solution

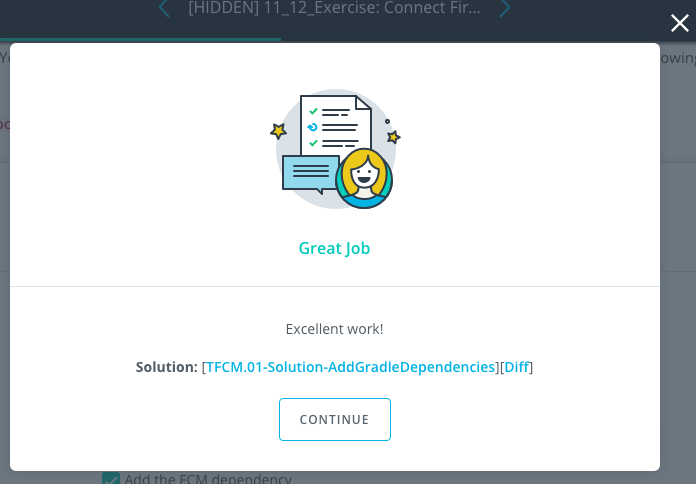
Most exercises will have a list of steps for you to check off in the classroom. Once you've checked these off, you'll see a pop up window with a link to the solution code. Note the Diff link:

solutionwindow

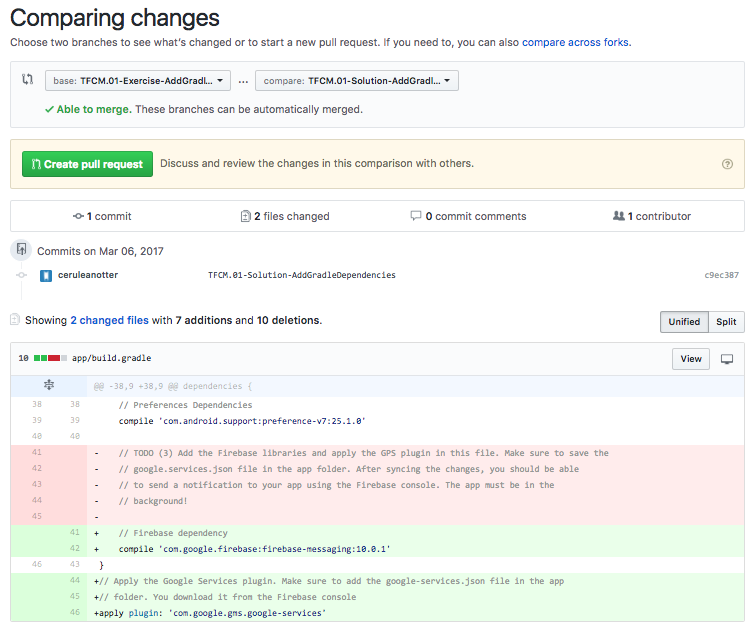
The Diff link will take you to a Github diff as seen below: diff

All of the code that was added in the solution is in green, and the removed code (which will usually be the TODO comments) is in red.

You can also compare your code locally with the branch of the following step.

Report Issues

Notice any issues with a repository? Please file a github issue in this repository.

andfun-kotlin-dessert-pusher's People

Contributors

ceruleanotter avatar sudkul avatar

Stargazers

 avatar  avatar  avatar  avatar  avatar  avatar  avatar  avatar  avatar  avatar  avatar  avatar  avatar  avatar  avatar  avatar  avatar  avatar  avatar  avatar  avatar  avatar  avatar  avatar  avatar  avatar  avatar  avatar  avatar  avatar  avatar  avatar  avatar  avatar  avatar  avatar  avatar  avatar  avatar  avatar  avatar  avatar  avatar  avatar  avatar  avatar  avatar  avatar  avatar  avatar  avatar  avatar  avatar  avatar  avatar  avatar  avatar  avatar  avatar  avatar  avatar  avatar  avatar  avatar  avatar  avatar  avatar  avatar

Watchers

 avatar  avatar  avatar  avatar  avatar  avatar  avatar  avatar  avatar  avatar  avatar  avatar  avatar  avatar  avatar  avatar  avatar  avatar  avatar

andfun-kotlin-dessert-pusher's Issues

Issues building the app with Android Studio Hedgehog

Hey folks, I just started with this lesson and I had a lot of issues getting the app build. I initially checked out the starter-code and went down a rabbit hole trying it to get the build and eventually gave up.

A coworker helped me and got the master branch to run, but I had to tweak both the compileSdkVersion and targetSdkVersion to version 34, up from 31

Android Studio info:

Android Studio Hedgehog | 2023.1.1 Patch 1
Build #AI-231.9392.1.2311.11255304, built on December 26, 2023
Runtime version: 17.0.7+0-17.0.7b1000.6-10550314 aarch64
VM: OpenJDK 64-Bit Server VM by JetBrains s.r.o.
macOS 14.1.2
GC: G1 Young Generation, G1 Old Generation
Memory: 3072M
Cores: 10
Metal Rendering is ON
Registry:
    external.system.auto.import.disabled=true
    ide.text.editor.with.preview.show.floating.toolbar=false

Non-Bundled Plugins:
    com.github.copilot (1.4.4.3955)
    google-java-format (1.17.0.0)
    idea.plugin.protoeditor (231.9225.5)

I was using JDK 17, the one bundled with Android Studio.

However the starter-code branch fails, from the get go, with this error:

Unsupported Java. 
Your build is currently configured to use Java 17.0.7 and Gradle 6.1.1.

Possible solution:
 - Upgrade Gradle wrapper to 7.2 version and re-import the project

Diffing between master and this branch helps, but without some Git-foo and my colleague's help it would have been a nightmare to get this to run.

savedInstanceState always remains null after restart

savedInstanceState will always remain null after the app is killed. It is not passed on to the bundle.

public void onCreate(Bundle savedInstanceState) 
{
    super.onCreate(savedInstanceState);
    if (savedInstanceState != null) { ... }
}

This bug exists since 5 years and Google has decided not to fix this anymore in 2020:

https://issuetracker.google.com/issues/37020082

As also discussed here on StackOverflow: https://stackoverflow.com/questions/6554317/savedinstancestate-is-always-null

I'm learning Android right now and find that quite a strange decision from Google. I hope there are other ways to persist the data and retrieve it at app start.

kill vs force-stop

kill didn't work for me, only force-stop. What is the difference and why did kill not work?
adb shell am force-stop com.example.android.dessertpusher

Recommend Projects

  • React photo React

    A declarative, efficient, and flexible JavaScript library for building user interfaces.

  • Vue.js photo Vue.js

    ๐Ÿ–– Vue.js is a progressive, incrementally-adoptable JavaScript framework for building UI on the web.

  • Typescript photo Typescript

    TypeScript is a superset of JavaScript that compiles to clean JavaScript output.

  • TensorFlow photo TensorFlow

    An Open Source Machine Learning Framework for Everyone

  • Django photo Django

    The Web framework for perfectionists with deadlines.

  • D3 photo D3

    Bring data to life with SVG, Canvas and HTML. ๐Ÿ“Š๐Ÿ“ˆ๐ŸŽ‰

Recommend Topics

  • javascript

    JavaScript (JS) is a lightweight interpreted programming language with first-class functions.

  • web

    Some thing interesting about web. New door for the world.

  • server

    A server is a program made to process requests and deliver data to clients.

  • Machine learning

    Machine learning is a way of modeling and interpreting data that allows a piece of software to respond intelligently.

  • Game

    Some thing interesting about game, make everyone happy.

Recommend Org

  • Facebook photo Facebook

    We are working to build community through open source technology. NB: members must have two-factor auth.

  • Microsoft photo Microsoft

    Open source projects and samples from Microsoft.

  • Google photo Google

    Google โค๏ธ Open Source for everyone.

  • D3 photo D3

    Data-Driven Documents codes.