Giter VIP home page Giter VIP logo

m5stack / core2-for-aws-iot-kit Goto Github PK

View Code? Open in Web Editor NEW
127.0 127.0 67.0 68.34 MB

Accompanying code for use with AWS IoT Kit content. Works with PlatformIO and ESP-IDF v4.2.

Home Page: https://m5stack.com/collections/m5-core/products/m5stack-core2-esp32-iot-development-kit-for-aws-iot-edukit

License: MIT License

CMake 0.19% Makefile 0.18% HTML 0.09% CSS 0.01% C 97.92% Shell 0.02% C++ 0.11% Python 1.47% Jupyter Notebook 0.01% Batchfile 0.01%
aws aws-iot-edukit edukit esp-idf iot m5stack-core2 platformio

core2-for-aws-iot-kit's Introduction

M5Stack Library

Arduino Lint Clang Format

English | 中文 | 日本語

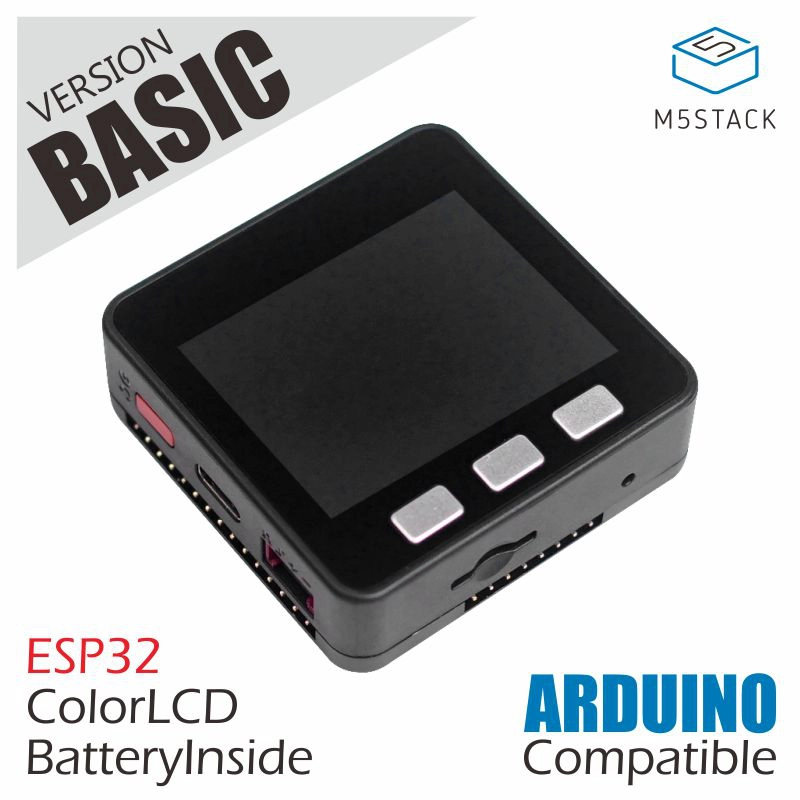
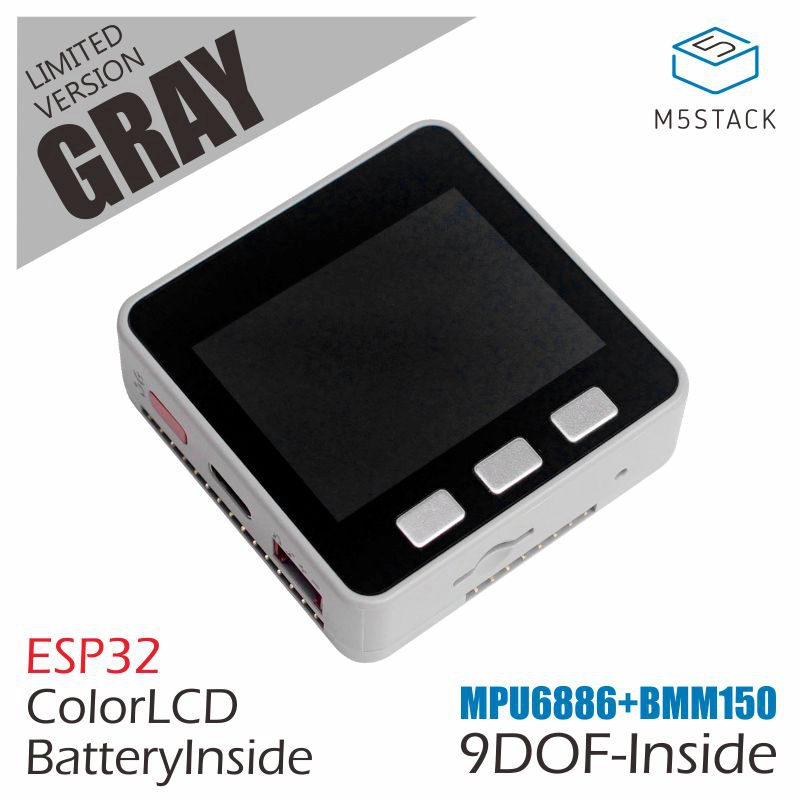
The M5Stack library provides access to the built-in hardware of the M5Stack Core (including Basic and Gray) controllers.

Recommendation

This library is not recommended for new projects, nor for projects using M5Stack products other than Basic and Gray. See M5Unified and M5GFX for libraries that are more up-to-date and with support for many newer M5Stack products.

Usage

This library's functionality is available through the M5Stack class, referenced as M5, including:

  • LCD display via M5.Lcd, a customized version of the TFT_eSPI LCD library, adapted for Basic and Gray. The display resolution is 320x240 supporting 262K colors. Several fonts, graphics primitives, QR code rendering, and PNG/BMP/JPEG support are included.
  • Power control, including device shutoff and battery level detection via M5.Power and the IP5306 power management chip
  • Hardware buttons via M5.BtnA, M5.BtnB, M5.BtnC
  • Speaker, via M5.Speaker, supporting tones, volume control, and basic wave audio playback using ESP32's DAC function
  • Accelerometer, via M5.Imu, M5.Mpu6886, or M5.Sh200Q (accelerometer type depends on version of Basic/Gray)

To use the M5Stack library, #include "M5Stack.h" must appear at the top of your sketch.

The most productive way to become acquainted with the class is through the numerous included examples. Additional documentation within this library:

Additional optional include files:

  • M5Faces.h for access to M5Stack Faces accessories (EOL)
  • LoRaWan.h

basicgray

Comparison of M5Stack controllers

M-BUS

More Information

UIFlow Quick Start: Click Here

MicroPython API: Click Here

Arduino IDE Development: Click Here

Gray PinMap: Click Here

Basic PinMap: v1.0 (EOL) v2.6 (EOL) v2.7**

USER CASES

core2-for-aws-iot-kit's People

Contributors

forairaaaaa avatar imliubo avatar n6wxd avatar rashedtalukder avatar takeru avatar tinyu-zhao avatar

Stargazers

 avatar  avatar  avatar  avatar  avatar  avatar  avatar  avatar  avatar  avatar  avatar  avatar  avatar  avatar  avatar  avatar  avatar  avatar  avatar  avatar  avatar  avatar  avatar  avatar  avatar  avatar  avatar  avatar  avatar  avatar  avatar  avatar  avatar  avatar  avatar  avatar  avatar  avatar  avatar  avatar  avatar  avatar  avatar  avatar  avatar  avatar  avatar  avatar  avatar  avatar  avatar  avatar  avatar  avatar  avatar  avatar  avatar  avatar  avatar  avatar  avatar  avatar  avatar  avatar  avatar  avatar  avatar  avatar  avatar  avatar  avatar  avatar  avatar  avatar  avatar  avatar  avatar  avatar  avatar  avatar  avatar  avatar  avatar  avatar  avatar  avatar  avatar  avatar  avatar  avatar  avatar  avatar  avatar  avatar  avatar  avatar  avatar  avatar  avatar  avatar

Watchers

 avatar  avatar  avatar  avatar  avatar  avatar  avatar  avatar  avatar  avatar  avatar  avatar  avatar  avatar  avatar  avatar  avatar  avatar

core2-for-aws-iot-kit's Issues

Certificate Issue?

Anyone else have an issue connecting to IoT Core? I'm getting the following error:
I (3756) aws_iot: Attempting to use device certificate from ATECC608
E (7706) aws_iot: failed! mbedtls_ssl_handshake returned -0x4c80
E (7706) Blinky: Error(-4) connecting to xxxxxxxxxxxxxxxxx-ats.iot.us-west-2.amazonaws.com:8883

The certificate generation step using registration_helper.py finished without issue. And I have confirmed the endpoint.

USB Connection Name Different on Mac/BigSur

When I connected the device to my Mac via USB cable the port name does show up for "ls -l /dev/cu.S*" command:
image

Here is the list with the device disconnected:
image

And here is the list with the device connected:
image

So "ls -l /dev/cu.usb*" would be a better command to get the port for a Mac running BigSur:
image

instructions for finding serial number are wrong

https://edukit.workshop.aws/en/blinky-hello-world/device-provisioning.html

"For optional fleet management, you’ll need to replace the common name value with the device’s serial number. You can retrieve the device’s serial number by going to the Core2-for-AWS-IoT-EduKit-Factory-Firmware folder and entering the command idf.py build flash monitor -p <<DEVICE_PORT>>. Replace «DEVICE_PORT» with the system port your device is logically mounted on."

idf.py not found. Also, it's a nit, but the device is not logically mounted - better to say "Replace «DEVICE_PORT» with the serial port device your Core2 is connected to"

Smart Thermostat - Device program constantly rebooting after publishing through AWS (and lights not working)

Hello,

I went through this exercise multiple times and a couple of unexpected errors kept occurring.

In step c) Data Sync, there is a bug during the validation step. Once a shadow message is published, the M5Core 2 device starts rebooting the program and attempting reconnection (connection with AWS is stable before publishing the message).

If the validation is skipped without publishing, the device and monitoring keep working correctly. Then, a similar error occurs building the cloud application, once AWS IoT starts publishing messages to the device. The device keeps rebooting after sending only one set of data, so the intervals become around 15 seconds (this is what it takes the device to reset and reconnect).

Rebooting...
ets Jul 29 2019 12:21:46

rst:0xc (SW_CPU_RESET),boot:0x17 (SPI_FAST_FLASH_BOOT)
configsip: 0, SPIWP:0xee
clk_drv:0x00,q_drv:0x00,d_drv:0x00,cs0_drv:0x00,hd_drv:0x00,wp_drv:0x00
mode:DIO, clock div:1
load:0x3fff0030,len:4
load:0x3fff0034,len:7636
load:0x40078000,len:13904
load:0x40080400,len:5296
entry 0x40080710
␛[0;32mI (29) boot: ESP-IDF 3.40200.210118 2nd stage bootloader␛[0m
␛[0;32mI (29) boot: compile time 12:32:35␛[0m
␛[0;32mI (29) boot: chip revision: 3␛[0m
␛[0;32mI (33) boot_comm: chip revision: 3, min. bootloader chip revision: 0␛[0m
␛[0;32mI (40) qio_mode: Enabling default flash chip QIO␛[0m
␛[0;32mI (45) boot.esp32: SPI Speed      : 80MHz␛[0m
␛[0;32mI (50) boot.esp32: SPI Mode       : QIO␛[0m
␛[0;32mI (54) boot.esp32: SPI Flash Size : 16MB␛[0m
␛[0;32mI (59) boot: Enabling RNG early entropy source...␛[0m
␛[0;32mI (64) boot: Partition Table:␛[0m
␛[0;32mI (68) boot: ## Label            Usage          Type ST Offset   Length␛[0m
␛[0;32mI (75) boot:  0 nvs              WiFi data        01 02 00009000 00006000␛[0m
␛[0;32mI (83) boot:  1 phy_init         RF data          01 01 0000f000 00001000␛[0m
␛[0;32mI (90) boot:  2 factory          factory app      00 00 00010000 003f7a00␛[0m
␛[0;32mI (97) boot:  3 ota_0            OTA app          00 10 00410000 00010000␛[0m
␛[0;32mI (105) boot:  4 ota_1            OTA app          00 11 00420000 00640000␛[0m
␛[0;32mI (113) boot:  5 spiffs           Unknown data     01 82 00a60000 004c4c00␛[0m
␛[0;32mI (120) boot: End of partition table␛[0m
␛[0;32mI (124) boot_comm: chip revision: 3, min. application chip revision: 0␛[0m
␛[0;32mI (132) esp_image: segment 0: paddr=0x00010020 vaddr=0x3f400020 size=0x24fb8 (151480) map␛[0m
␛[0;32mI (185) esp_image: segment 1: paddr=0x00034fe0 vaddr=0x3ffbdb60 size=0x03ee0 ( 16096) load␛[0m
␛[0;32mI (191) esp_image: segment 2: paddr=0x00038ec8 vaddr=0x40080000 size=0x00404 (  1028) load␛[0m
␛[0;32mI (192) esp_image: segment 3: paddr=0x000392d4 vaddr=0x40080404 size=0x06d44 ( 27972) load␛[0m
␛[0;32mI (211) esp_image: segment 4: paddr=0x00040020 vaddr=0x400d0020 size=0xc594c (809292) map␛[0m
␛[0;32mI (449) esp_image: segment 5: paddr=0x00105974 vaddr=0x40087148 size=0x0c488 ( 50312) load␛[0m
␛[0;32mI (478) boot: Loaded app from partition at offset 0x10000␛[0m
␛[0;32mI (478) boot: Disabling RNG early entropy source...␛[0m
␛[0;32mI (479) psram: This chip is ESP32-D0WD␛[0m
␛[0;32mI (483) spiram: Found 64MBit SPI RAM device␛[0m
␛[0;32mI (488) spiram: SPI RAM mode: flash 80m sram 80m␛[0m
␛[0;32mI (493) spiram: PSRAM initialized, cache is in low/high (2-core) mode.␛[0m
␛[0;32mI (500) cpu_start: Pro cpu up.␛[0m
␛[0;32mI (504) cpu_start: Application information:␛[0m
␛[0;32mI (509) cpu_start: Project name:     AWS_IoT_EduKit-Smart-Thermostat␛[0m
␛[0;32mI (516) cpu_start: App version:      b281edf␛[0m
␛[0;32mI (521) cpu_start: Compile time:     Apr  7 2021 12:27:33␛[0m
␛[0;32mI (527) cpu_start: ELF file SHA256:  6fe07958e952a94a...␛[0m
␛[0;32mI (533) cpu_start: ESP-IDF:          3.40200.210118␛[0m
␛[0;32mI (538) cpu_start: Starting app cpu, entry point is 0x40082c30␛[0m
␛[0;32mI (530) cpu_start: App cpu up.␛[0m
␛[0;32mI (1042) spiram: SPI SRAM memory test OK␛[0m
␛[0;32mI (1042) heap_init: Initializing. RAM available for dynamic allocation:␛[0m
␛[0;32mI (1043) heap_init: At 3FFAE6E0 len 0000F480 (61 KiB): DRAM␛[0m
␛[0;32mI (1049) heap_init: At 3FFCD920 len 000126E0 (73 KiB): DRAM␛[0m
␛[0;32mI (1055) heap_init: At 3FFE0440 len 00003AE0 (14 KiB): D/IRAM␛[0m
␛[0;32mI (1061) heap_init: At 3FFE4350 len 0001BCB0 (111 KiB): D/IRAM␛[0m
␛[0;32mI (1068) heap_init: At 400935D0 len 0000CA30 (50 KiB): IRAM␛[0m
␛[0;32mI (1074) cpu_start: Pro cpu start user code␛[0m
␛[0;32mI (1079) spiram: Adding pool of 4082K of external SPI memory to heap allocator␛[0m
␛[0;32mI (1099) spi_flash: detected chip: generic␛[0m
␛[0;32mI (1100) spi_flash: flash io: qio␛[0m
␛[0;32mI (1100) cpu_start: Starting scheduler on PRO CPU.␛[0m
␛[0;32mI (0) cpu_start: Starting scheduler on APP CPU.␛[0m
␛[0;32mI (1108) spiram: Reserving pool of 32K of internal memory for DMA/internal allocations␛[0m
␛[0;32mI (2558) gpio: GPIO[39]| InputEn: 1| OutputEn: 0| OpenDrain: 0| Pullup: 1| Pulldown: 1| Intr:3 ␛[0m
␛[0;32mI (2758) ILI9341: Initialization.␛[0m
␛[0;32mI (2958) ILI9341: Display orientation: LANDSCAPE␛[0m
␛[0;32mI (2958) ILI9341: 0x36 command value: 0x08␛[0m
I (2988) wifi:wifi driver task: 3ffd3d28, prio:23, stack:6656, core=0
␛[0;32mI (2988) system_api: Base MAC address is not set␛[0m
␛[0;32mI (2988) system_api: read default base MAC address from EFUSE␛[0m
I (3018) wifi:wifi firmware version: 1865b55
I (3018) wifi:wifi certification version: v7.0
I (3018) wifi:config NVS flash: enabled
I (3018) wifi:config nano formating: disabled
I (3018) wifi:Init data frame dynamic rx buffer num: 32
I (3028) wifi:Init management frame dynamic rx buffer num: 32
I (3028) wifi:Init management short buffer num: 32
I (3038) wifi:Init static tx buffer num: 16
I (3038) wifi:Init tx cache buffer num: 32
I (3048) wifi:Init static rx buffer size: 1600
I (3048) wifi:Init static rx buffer num: 16
I (3048) wifi:Init dynamic rx buffer num: 32
␛[0;32mI (3058) wifi_init: rx ba win: 16␛[0m
␛[0;32mI (3058) wifi_init: tcpip mbox: 32␛[0m
␛[0;32mI (3068) wifi_init: udp mbox: 6␛[0m
␛[0;32mI (3068) wifi_init: tcp mbox: 6␛[0m
␛[0;32mI (3068) wifi_init: tcp tx win: 5744␛[0m
␛[0;32mI (3078) wifi_init: tcp rx win: 5744␛[0m
␛[0;32mI (3078) wifi_init: tcp mss: 1440␛[0m
␛[0;32mI (3088) wifi_init: WiFi/LWIP prefer SPIRAM␛[0m
␛[0;32mI (3088) Smart_Spaces: Setting Wi-Fi configuration to SSID: Belong4A2633-ALT␛[0m
␛[0;32mI (3178) phy: phy_version: 4500, 0cd6843, Sep 17 2020, 15:37:07, 0, 0␛[0m
I (3178) wifi:mode : sta (b8:f0:09:c6:15:d8)
␛[0;32mI (3188) atecc608: Seeding the random number generator...␛[0m
␛[0;32mI (3188) atecc608: ok␛[0m
␛[0;32mI (3228) atecc608: Initializing ATECC608 secure element␛[0m
␛[0;32mI (3228) atecc608: ok␛[0m
␛[0;32mI (3228) atecc608: Checking data zone lock status...␛[0m
␛[0;32mI (3268) atecc608: ok: locked␛[0m
␛[0;32mI (3268) atecc608: Get the device info (type)...␛[0m
␛[0;32mI (3308) atecc608: ok: 60 02␛[0m
␛[0;32mI (3308) Smart_Spaces: AWS IoT SDK Version 3.0.1-␛[0m
I (4388) wifi:new:<10,0>, old:<1,0>, ap:<255,255>, sta:<10,0>, prof:1
I (4858) wifi:state: init -> auth (b0)
I (4868) wifi:state: auth -> assoc (0)
I (4878) wifi:state: assoc -> run (10)
I (4888) wifi:connected with Belong4A2633-ALT, aid = 1, channel 10, BW20, bssid = 18:90:d8:5c:bc:ac
I (4888) wifi:security: WPA2-PSK, phy: bgn, rssi: -42
I (4898) wifi:pm start, type: 1

I (4928) wifi:AP's beacon interval = 102400 us, DTIM period = 1
␛[0;32mI (6978) Smart_Spaces: Device IP address:255.255.255.0␛[0m
␛[0;32mI (6978) Smart_Spaces: Shadow Init␛[0m
␛[0;32mI (6978) Smart_Spaces: Shadow Connect␛[0m
␛[0;32mI (6978) esp_netif_handlers: sta ip: 10.0.0.22, mask: 255.255.255.0, gw: 10.0.0.138␛[0m
␛[0;32mI (7198) aws_iot: Attempting to use device certificate from ATECC608␛[0m
␛[0;32mI (13738) I2S: DMA Malloc info, datalen=blocksize=512, dma_buf_count=2␛[0m
␛[0;32mI (13738) I2S: PLL_D2: Req RATE: 44100, real rate: 90909.000, BITS: 16, CLKM: 11, BCK: 5, MCLK: 11.338, SCLK: 2909088.000000, diva: 64, divb: 21␛[0m
␛[0;32mI (13748) I2S: PLL_D2: Req RATE: 44100, real rate: 90909.000, BITS: 16, CLKM: 11, BCK: 5, MCLK: 11.338, SCLK: 2909088.000000, diva: 64, divb: 21␛[0m
␛[0;32mI (14158) Smart_Spaces: =======================================================================================␛[0m
␛[0;32mI (14158) Smart_Spaces: On Device: roomOccupancy false␛[0m
␛[0;32mI (14158) Smart_Spaces: On Device: hvacStatus STANDBY␛[0m
␛[0;32mI (14168) Smart_Spaces: On Device: temperature 23.557526␛[0m
␛[0;32mI (14168) Smart_Spaces: On Device: sound 75␛[0m
␛[0;32mI (14178) Smart_Spaces: Update Shadow: {"state":{"reported":{"temperature":23.557526,"sound":75,"roomOccupancy":false,"hvacStatus":"STANDBY"}}, "clientToken":"<<HIDDEN>>"}␛[0m
␛[0;32mI (16798) Smart_Spaces: *****************************************************************************************␛[0m
␛[0;32mI (16798) Smart_Spaces: Stack remaining for task 'aws_iot_task' is 2012 bytes␛[0m
␛[0;32mI (17818) Smart_Spaces: Update accepted␛[0m
␛[0;32mI (17838) Smart_Spaces: Delta - roomOccupancy state changed to 1␛[0m
␛[0;32mI (17998) Smart_Spaces: =======================================================================================␛[0m
␛[0;32mI (17998) Smart_Spaces: On Device: roomOccupancy true␛[0m
␛[0;32mI (17998) Smart_Spaces: On Device: hvacStatus STANDBY␛[0m
␛[0;32mI (18008) Smart_Spaces: On Device: temperature 24.928398␛[0m
␛[0;32mI (18008) Smart_Spaces: On Device: sound 9␛[0m
␛[0;32mI (18018) Smart_Spaces: Update Shadow: {"state":{"reported":{"temperature":24.928398,"sound":9,"roomOccupancy":true,"hvacStatus":"STANDBY"}}, "clientToken":"<<HIDDEN>"}␛[0m
␛[0;32mI (18058) Smart_Spaces: *****************************************************************************************␛[0m
␛[0;32mI (18058) Smart_Spaces: Stack remaining for task 'aws_iot_task' is 2012 bytes␛[0m
␛[0;32mI (19078) Smart_Spaces: Update accepted␛[0m
␛[0;32mI (19098) Smart_Spaces: Delta - roomOccupancy state changed to 0␛[0m
␛[0;32mI (19148) Smart_Spaces: Delta - roomOccupancy state changed to 0␛[0m
␛[0;32mI (19148) Smart_Spaces: Delta - hvacStatus state changed to COOLING␛[0m
␛[0;32mI (19148) Smart_Spaces: setting side LEDs to blue␛[0m
Guru Meditation Error: Core  1 panic'ed (StoreProhibited). Exception was unhandled.

Core  1 register dump:
PC      : 0x400f09d5  PS      : 0x00060d30  A0      : 0x800d7634  A1      : 0x3ffe2760
A2      : 0x3ffc3cc8  A3      : 0x00000000  A4      : 0x0000ff00  A5      : 0x00000000
A6      : 0x00000001  A7      : 0x00000001  A8      : 0x800f09d5  A9      : 0x3ffe2740  
A10     : 0x00000000  A11     : 0x0000ff00  A12     : 0x3ffe2760  A13     : 0x0000000c
A14     : 0x00ff0000  A15     : 0xff000000  SAR     : 0x00000004  EXCCAUSE: 0x0000001d
EXCVADDR: 0x00000000  LBEG    : 0x400014fd  LEND    : 0x4000150d  LCOUNT  : 0xfffffffc

Backtrace:0x400f09d2:0x3ffe2760 0x400d7631:0x3ffe2780 0x400d2510:0x3ffe27a0 0x400d4ef6:0x3ffe27c0 0x400d6615:0x3ffe2800 0x400d685e:0x3ffe2830 0x400d69ca:0x3ffe2890 0x400d72e8:0x3ffe28b0 0x400d73ec:0x3ffe28e0 0x400d45df:0x3ffe2900 0x400d2792:0x3ffe2920 0x4008bcb5:0x3ffe36b0


ELF file SHA256: 6fe07958e952a94a

Rebooting...
ets Jul 29 2019 12:21:46

Also, the device lights are not being triggered when the states are changed to COOLING or HEATING (they remain off).

I hope this information is useful.

Cheers,
David

Error installing windows Curses

This happens during the "Build" step of Getting Started, on a Windows 10 machine:

Installing windows-curses package
Processing c:\users\sean\.platformio\packages\framework-espidf\tools\kconfig_new\esp-windows-curses
ERROR: Could not install packages due to an EnvironmentError: [Errno 2] No such file or directory: 'C:\\Users\\sean\\.platformio\\packages\\framework-espidf\\tools\\kconfig_new\\esp-windows-curses'

AWS CLI VERSION

This is my first time posting an issue in github. My apologies if the format isn't correct. The instructions for the Blinky Hello World example walks you through installing AWS CLI Version 2, but I realized that the requirements.txt file found in the "Core2-for-AWS-IoT-EduKit/Blinky-Hello-World/utilities/AWS_IoT_registration_helper" folder actually has it installing AWS CLI version "awscli>=1.18.202" is this correct?

Actually I was really confused as the instructions for this have changed in the past week. It had you installing the miniconda and creating an environment and using Jupyter notebook to edit and run a file "TNGTLS_aws_connect", but it appears that whole process was replaced by this registration helper.py file.

One other issue I noticed was that If you download the Core2-for-aws-iot-edukit and extract it from github, you get messages saying that some of the filestrings are too long for the windows/dos environment and can't be installed.
Thanks

Docs need to be a lot more clear on the QR Codes

The unit ships with a QR code on screen that takes you to https://edukit.workshop.aws/en/ - but then following the instructions you build and then need to scan the barcode that is on your computer screen to claim the device.

This should be a LOT more clear in the instructions up front to make it simpler for customers to understand. If you scan the barcode that ships on the device with Rainmaker you just get an error.

Documentation Addition (AWS IoT EduKit > Smart Thermostat > Data acquisition)

I just noticed that the Unix steps are included but not the steps for Windows.

Data Acquisition...
...Code sample...
...2.Change directory to the Smart-Thermostat project:
cd Core2ForAWS-AWS-IoT-EduKit/Smart-Thermostat
3. Copy your sdkconfig file from the Blinky-Hello-World demo to simplify setting your Wi-Fi and AWS endpoint:
cp ../Blinky-Hello-World/sdkconfig .

May want to include a note for Windows users that a different process is required. Instead they should be in the Blinky-Hello-World folder and use copy sdkconfig ..\Smart-Thermostat to copy sdkconfig and then go to the Smart-Thermostat folder.

Necessary permissions are unclear at Blinky and/or subsequent story

AWS IoT EduKit > Blinky Hello World > Prerequisites

In "AWS CLI Configuration" section, the authority required to carry out the description "you will need to give necessary permissions to your IAM user." is not specified. I would like you to present a simple but compact authority set instead of a huge comprehensive authority.

aws_iot: failed! could not load cert from ATECC608

Hi there,

Having some weird issue's and hope you can help ... sometimes my Core2 is registering and I am getting the tutorials completed, but I keep getting this type of error BELOW. Honestly this worked a couple of days ago, I moved onto the next tutorial and had issues so started again, I also seem to have issues erasing the flash, I am running from a Oracle VM running Ubuntu, wondered if this may cause me problems? the only other thing I can think is my WiFi has problems for some reason.

BTW the certificate is in the IoT core, is active, the client is registered and has a policy, tried clearing these two

␛[0;32mI (4735) Blinky: Connecting to AWS IoT Core...␛[0m
␛[0;31mE (4785) aws_iot: failed! could not load cert from ATECC608, tng_get_device_cert_def returned e1␛[0m
␛[0;31mE (4785) aws_iot: failed! mbedtls_x509_crt_parse returned -0xffffff1f while parsing device cert␛[0m
␛[0;31mE (4795) Blinky: Error(-20) connecting to xxx-ats.iot.eu-west-1.amazonaws.com:8883␛[0m
␛[0;32mI (5925) aws_iot: Attempting to use device certificate from ATECC608␛[0m

Unclear how to find the device serial number

Docs say "All are optional, but for fleet management it is recommended to fill the common name with the device serial. You can retrieve the device serial by monitoring the serial port while running the Core2-for-AWS-IoT-EduKit-Factory-Firmware application on your M5Stack Core2 for AWS IoT EduKit reference hardware."

These docs need to be a lot more clear and proscriptive. Closest thing I could find is this

psram: This chip is ESP32-D0WD␛[0m

Docs should CLEARLY call out how to find the serial number. Better, a tool to extract that would be nice

The guiTask sometimes stops.

Hello World - Blinking the LEDs fails

I have my device successfully connecting to AWS IoT:

I (10500) aws_iot: Attempting to use device certificate from ATECC608
I (16800) Blinky: Successfully connected to AWS IoT Core!
I (16800) Blinky: Subscribing...
I (17040) Blinky: Subscribed to topic: 012333b76cac4c3701/#
I (17040) Blinky: 
I (17040) Blinky: **************************************
I (17040) Blinky: Client Id - 012333b76cac4c3701
I (17050) Blinky: **************************************

I subscribed to the # topic per the instructions, but when I publish nothing happens on the device:

blink

AWS IoT EduKit > Blinky Hello World > Device Provisioning - OpenSSL is missing

I have started the example on a new VM with Windows 10 and it looks like OpenSSL needs to be installed first before running the example:

C:\IoT\Core2-for-AWS-IoT-EduKit\Blinky-Hello-World\components\esp-cryptoauthlib\esp_cryptoauth_utility\sample_certs>openssl req -new -x509 -key output_files/signerkey.pem -out output_files/signercert.crt -days 365
Can't open C:\Program Files\Common Files\ssl/openssl.cnf for reading, No such file or directory
3568:error:02001003:system library:fopen:No such process:crypto\bio\bss_file.c:69:fopen('C:\Program Files\Common Files\ssl/openssl.cnf','r')
3568:error:2006D080:BIO routines:BIO_new_file:no such file:crypto\bio\bss_file.c:76:

Intro to Alexa fot IoT

Hello,

I'm trying to run the example for Alexa, but I'm stuck in the Amazon authentication phase.
Here the detail:

  1. Flash the certificates stage: all seems to go fine (I got the certificates by email, I modified the CSV file, I generated the mfg.bin file and I loaded the certificate into my Core2)
  2. Flash the firmware stage: all seems to go fine. The Core2 boots, side leds blinks red, the display shows "ALEXA APP" and the slider to set the screen brightness.
  3. Smartphone Espressif "ESP Alexa" App stage: I downloaded the Alexa App for iPhone (iOS ver 14.3). Running the app, I tap on "Add New Device" button and the pone found my Core2 as "ESP-Alexa-A7FC". Tapping on it, the app show the "Proof of Possession" code (abcd1234), tapping on "Done" button the app show an "amazon alexa" message and ask for signing in with Amazon.
  4. When I tap on that button (sign in with Amazon) in the serial log I see these messages:
I (732594) [avs_config]: Received request for device details
I (732594) [avs_config]: code_verifier - abcd1234, code_challenge - 6c7nGrky_ehjM40Ivk3p3-OeoEm9r7NCzmWexUULaa4
I (732594) [avs_config]: version: 1, DSN: b8f009c4a7fc, ProductID: Core2ForAWS

My phone shows this:
IMG_E5804

The italian message says something like that: We apologies. An error has occurred while we are trying to manage your request.

At this point I can't do anything else.

If I skip the Amazon sign in phase, I can set the WiFi credentials but without an account, the Core2 can't login with Amazon: the Core 2 side leds are blue pulsing cyan. This is the serial log output

W (1702644) wifi:Error! Should use default active scan time parameter for WiFi scan when Bluetooth is enabled!!!!!!

I (1725394) [app_prov]: Received Wi-Fi credentials:
        SSID: mySSID
        Password: myPASSWORD
I (1727844) wifi:new:<6,0>, old:<1,0>, ap:<255,255>, sta:<6,0>, prof:1
I (1728544) wifi:state: init -> auth (b0)
I (1728554) wifi:state: auth -> assoc (0)
I (1728554) wifi:state: assoc -> run (10)
I (1728594) wifi:connected with mySSID, aid = 19, channel 6, BW20, bssid = 00:1c:82:05:2c:58
I (1728604) wifi:security: WPA2-PSK, phy: bgn, rssi: -34
I (1728604) wifi:pm start, type: 1

I (1728714) wifi:AP's beacon interval = 102400 us, DTIM period = 1
[app_wifi]: Connected with IP Address: 192.168.1.65
I (1729454) esp_netif_handlers: sta ip: 192.168.1.65, mask: 255.255.255.0, gw: 192.168.1.1
I (1729454) wifi_prov_mgr: STA Got IP
I (1729454) [app_prov]: Provisioning successful
I (1732724) wifi_prov_mgr: Provisioning stopped
I (1732724) [app_prov]: Provisioning stopped
I (1732724) wifi_prov_scheme_ble: BTDM memory released
I (1732734) [va_nvs_utils]: No value set for: friendlyname
I (1732734) [va_nvs_utils]: No value set for: udn
I (1732744) SSDP: Network Interface List (1):
[alexa]: Waiting for time to be updated
I (1732744) SSDP: 1. wifi  : 192.168.1.65
I (1732764) LSSDP: create SSDP socket 58
[alexa]: Done getting current time: 1610793030
I (1734064) [tls_certification]: Done setting global CA store
I (1734064) [va_nvs_utils]: No value set for: clientId
I (1734064) [va_nvs_utils]: No value set for: refreshToken
I (1734074) [alexa]: Checking for companion app based authentication...

[alexa]: Waiting for authentication tokens.
[alexa]: Waiting for authentication tokens.
[alexa]: Waiting for authentication tokens.
[alexa]: Waiting for authentication tokens.
[alexa]: Waiting for authentication tokens.
[alexa]: Waiting for authentication tokens.
[alexa]: Waiting for authentication tokens.
[alexa]: Waiting for authentication tokens.
[alexa]: Waiting for authentication tokens.

The last message is repeated.

Any clues?

Thanks,

Stefano

registration_helper.py is missing esptool and pyserial

Ran this inside the miniconda environment as documented here. This was after running pip3 install -r requirements.txt which worked fine.

https://edukit.workshop.aws/en/blinky-hello-world/device-provisioning.html

python registration_helper.py -p COM3
Pyserial is not installed for C:\Users\sean\miniconda3\envs\edukit\python.exe. Check the README for installation instructions.
Traceback (most recent call last):
  File "C:\Users\sean\git_repos\Core2-for-AWS-IoT-EduKit\Blinky-Hello-World\utilities\AWS_IoT_registration_helper\registration_helper.py", line 42, in <module>
    import esptool
ModuleNotFoundError: No module named 'esptool'

During handling of the above exception, another exception occurred:

Traceback (most recent call last):
  File "C:\Users\sean\git_repos\Core2-for-AWS-IoT-EduKit\Blinky-Hello-World\utilities\AWS_IoT_registration_helper\registration_helper.py", line 49, in <module>
    import esptool
  File "C:\Users\sean\Desktop\esp-idf-2\components\esptool_py\esptool\esptool.py", line 38, in <module>
    import serial
ModuleNotFoundError: No module named 'serial'

Lots of missing dependencies

Following the instructions to build the device firmware, it seems there are a ton of missing libraries. For example:

src\app_driver.c:11:24: fatal error: iot_button.h: No such file or directory

src\fan.h:26:29: fatal error: esp_rmaker_core.h: No such file or directory

AWS IoT EduKit > Blinky Hello World > Device Provisioning - esptool is missing

After I´ve installed OpenSLL and copied openssl.cnf to ...\commen files\ssl the step "openssl req -new -x509 -key output_files/signerkey.pem -out output_files/signercert.crt -days 365" was possible and I have entered the certificate values.

But step "python secure_cert_mfg.py --flash sample_bins/secure_cert_mfg_esp32.bin --signer-cert output_files/signercert.crt --signer-cert-private-key output_files/signerkey.pem -p <<DEVICE_PORT>>" with DEVICE_PORT = COM3 failed (see at the end "ModuleNotFoundError: No module named 'esptool"):

(edukit) C:\IoT\Core2-for-AWS-IoT-EduKit\Blinky-Hello-World\components\esp-cryptoauthlib\esp_cryptoauth_utility>python secure_cert_mfg.py --flash sample_bins/secure_cert_mfg_esp32.bin --signer-cert output_files/signercert.crt --signer-cert-private-key output_files/signerkey.pem -p COM3
Traceback (most recent call last):
File "secure_cert_mfg.py", line 17, in
import helper_scripts as hs
File "C:\IoT\Core2-for-AWS-IoT-EduKit\Blinky-Hello-World\components\esp-cryptoauthlib\esp_cryptoauth_utility\helper_scripts_init_.py", line 2, in
from .serial import load_app_stub, cmd_interpreter, esp_cmd_check_ok
File "C:\IoT\Core2-for-AWS-IoT-EduKit\Blinky-Hello-World\components\esp-cryptoauthlib\esp_cryptoauth_utility\helper_scripts\serial.py", line 22, in
import esptool
ModuleNotFoundError: No module named 'esptool'

Windows installation requires pip

pip should be bundled in the installer script that installs python.

Here is the fix, after I did this the ESP-IDF tools completed installing.

download https://bootstrap.pypa.io/get-pip.py
C:\Python39\python.exe .\get-pip.py

and if the ESP-IDF tools is upstream, maybe just add a note in the docs for Windows users to install pip manually.

queue.c:1148 (xQueueGiveFromISR)- assert failed

Hi, I recently received the hardware device and tried https://edukit.workshop.aws/. The "Getting Started" example worked fine, but the "Blinky Hello World" example does not work.

After running idf.py flash monitor the devices is stuck and fails with:

Rebooting...
ets Jul 29 2019 12:21:46

rst:0xc (SW_CPU_RESET),boot:0x17 (SPI_FAST_FLASH_BOOT)
configsip: 0, SPIWP:0xee
clk_drv:0x00,q_drv:0x00,d_drv:0x00,cs0_drv:0x00,hd_drv:0x00,wp_drv:0x00
mode:DIO, clock div:1
load:0x3fff0030,len:4
load:0x3fff0034,len:7364
load:0x40078000,len:14980
ho 0 tail 12 room 4
load:0x40080400,len:4388
0x40080400: _init at ??:?

entry 0x40080694
I (31) boot: ESP-IDF v4.3-dev-2136-gb0150615d 2nd stage bootloader
I (31) boot: compile time 22:57:31
I (31) boot: chip revision: 3
I (35) qio_mode: Enabling default flash chip QIO
I (41) boot.esp32: SPI Speed      : 80MHz
I (45) boot.esp32: SPI Mode       : QIO
I (50) boot.esp32: SPI Flash Size : 16MB
I (54) boot: Enabling RNG early entropy source...
I (60) boot: Partition Table:
I (63) boot: ## Label            Usage          Type ST Offset   Length
I (71) boot:  0 nvs              WiFi data        01 02 00009000 00006000
I (78) boot:  1 phy_init         RF data          01 01 0000f000 00001000
I (86) boot:  2 factory          factory app      00 00 00010000 003f7a00
I (93) boot:  3 ota_0            OTA app          00 10 00410000 00010000
I (101) boot:  4 ota_1            OTA app          00 11 00420000 00640000
I (108) boot:  5 spiffs           Unknown data     01 82 00a60000 004c4c00
I (116) boot: End of partition table
I (120) esp_image: segment 0: paddr=00010020 vaddr=3f400020 size=22fe8h (143336) map
I (171) esp_image: segment 1: paddr=00033010 vaddr=3ffbdb60 size=04b64h ( 19300) load
I (177) esp_image: segment 2: paddr=00037b7c vaddr=40080000 size=00404h (  1028) load
I (178) esp_image: segment 3: paddr=00037f88 vaddr=40080404 size=08090h ( 32912) load
I (197) esp_image: segment 4: paddr=00040020 vaddr=400d0020 size=ba59ch (763292) map
I (422) esp_image: segment 5: paddr=000fa5c4 vaddr=40088494 size=0c6c4h ( 50884) load
I (452) boot: Loaded app from partition at offset 0x10000
I (452) boot: Disabling RNG early entropy source...
I (463) psram: This chip is ESP32-D0WD
I (464) spiram: Found 64MBit SPI RAM device
I (464) spiram: SPI RAM mode: flash 80m sram 80m
I (469) spiram: PSRAM initialized, cache is in low/high (2-core) mode.
I (476) cpu_start: Pro cpu up.
I (480) cpu_start: Starting app cpu, entry point is 0x40081550
0x40081550: call_start_cpu1 at /Users/sbstjn/Applications/esp-idf/components/esp_system/port/cpu_start.c:133

I (471) cpu_start: App cpu up.
I (980) spiram: SPI SRAM memory test OK
I (988) cpu_start: Pro cpu start user code
I (988) cpu_start: cpu freq: 240000000
I (988) cpu_start: Application information:
I (991) cpu_start: Project name:     AWS_IoT_EduKit-Blinky-Hello-Wor
I (998) cpu_start: App version:      162805a
I (1003) cpu_start: Compile time:     Jan  1 2021 22:58:10
I (1009) cpu_start: ELF file SHA256:  6ce88d6ebc1a0f76...
I (1015) cpu_start: ESP-IDF:          v4.3-dev-2136-gb0150615d
I (1021) heap_init: Initializing. RAM available for dynamic allocation:
I (1029) heap_init: At 3FFAE6E0 len 0000F480 (61 KiB): DRAM
I (1035) heap_init: At 3FFCC448 len 00013BB8 (78 KiB): DRAM
I (1041) heap_init: At 3FFE0440 len 00003AE0 (14 KiB): D/IRAM
I (1048) heap_init: At 3FFE4350 len 0001BCB0 (111 KiB): D/IRAM
I (1054) heap_init: At 40094B58 len 0000B4A8 (45 KiB): IRAM
I (1060) spiram: Adding pool of 4084K of external SPI memory to heap allocator
I (1069) spi_flash: detected chip: generic
I (1073) spi_flash: flash io: qio
I (1078) cpu_start: Starting scheduler on PRO CPU.
I (0) cpu_start: Starting scheduler on APP CPU.
I (1088) spiram: Reserving pool of 32K of internal memory for DMA/internal allocations
I (1118) gpio: GPIO[39]| InputEn: 1| OutputEn: 0| OpenDrain: 0| Pullup: 1| Pulldown: 1| Intr:3
I (1328) ILI9341: Initialization.
I (1528) ILI9341: Display orientation: LANDSCAPE
I (1528) ILI9341: 0x36 command value: 0x08
I (1568) wifi:wifi driver task: 3ffd3720, prio:23, stack:6656, core=0
I (1568) system_api: Base MAC address is not set
I (1568) syst/Users/sbstjn/Applications/esp-idf/components/freertos/queue.c:1148 (xQueueGiveFromISR)- assert failed!

abort() was called at PC 0x4009039a on core 0
0x4009039a: xQueueGiveFromISR at /Users/sbstjn/Applications/esp-idf/components/freertos/queue.c:1148 (discriminator 3)


Backtrace:0x4008c547:0x3ffbe920 0x4008cd4d:0x3ffbe940 0x40093422:0x3ffbe960 0x4009039a:0x3ffbe9d0 0x40085f82:0x3ffbe9f0 0x4008a1bf:0x3ffbea20 0x4008a319:0x3ffbea40 0x40084669:0x3ffbea70 0x400d3ec9:0x3ffd30f0 0x400d4bd9:0x3ffd3110 0x400d3631:0x3ffd3130 0x4000bd83:0x3ffd3150 0x4000117d:0x3ffd3170 0x400592fe:0x3ffd3190 0x4005937a:0x3ffd31b0 0x40058bbf:0x3ffd31d0 0x4017a48b:0x3ffd3200 0x4017fa6f:0x3ffd3230 0x4017fbf1:0x3ffd3540 0x4018a5b1:0x3ffd3570 0x400932b5:0x3ffd35a0 0x400d9fc3:0x3ffd35f0 0x4014c48f:0x3ffd3620 0x4014998e:0x3ffd3640 0x401636b6:0x3ffd3660 0x4008f869:0x3ffd3690
0x4008c547: panic_abort at /Users/sbstjn/Applications/esp-idf/components/esp_system/panic.c:367

0x4008cd4d: esp_system_abort at /Users/sbstjn/Applications/esp-idf/components/esp_system/system_api.c:108

0x40093422: abort at /Users/sbstjn/Applications/esp-idf/components/newlib/abort.c:46

0x4009039a: xQueueGiveFromISR at /Users/sbstjn/Applications/esp-idf/components/freertos/queue.c:1148 (discriminator 3)

0x40085f82: spi_ready at /Users/sbstjn/Workspace/src/github.com/sbstjn/Core2-for-AWS-IoT-EduKit/Blinky-Hello-World/components/core2forAWS/tft/disp_spi.c:176

0x4008a1bf: spi_post_trans at /Users/sbstjn/Applications/esp-idf/components/driver/spi_master.c:581 (discriminator 1)

0x4008a319: spi_intr at /Users/sbstjn/Applications/esp-idf/components/driver/spi_master.c:614

0x40084669: _xt_lowint1 at /Users/sbstjn/Applications/esp-idf/components/freertos/port/xtensa/xtensa_vectors.S:1105

0x400d3ec9: uart_tx_char at /Users/sbstjn/Applications/esp-idf/components/vfs/vfs_uart.c:159

0x400d4bd9: uart_write at /Users/sbstjn/Applications/esp-idf/components/vfs/vfs_uart.c:217

0x400d3631: esp_vfs_write at /Users/sbstjn/Applications/esp-idf/components/vfs/vfs.c:423 (discriminator 4)

0x4017a48b: __sprint_r at /builds/idf/crosstool-NG/.build/HOST-x86_64-apple-darwin12/xtensa-esp32-elf/src/newlib/newlib/libc/stdio/vfprintf.c:433
 (inlined by) __sprint_r at /builds/idf/crosstool-NG/.build/HOST-x86_64-apple-darwin12/xtensa-esp32-elf/src/newlib/newlib/libc/stdio/vfprintf.c:403

0x4017fa6f: _vfprintf_r at /builds/idf/crosstool-NG/.build/HOST-x86_64-apple-darwin12/xtensa-esp32-elf/src/newlib/newlib/libc/stdio/vfprintf.c:1781 (discriminator 1)

0x4017fbf1: vprintf at /builds/idf/crosstool-NG/.build/HOST-x86_64-apple-darwin12/xtensa-esp32-elf/src/newlib/newlib/libc/stdio/vprintf.c:34 (discriminator 5)

0x4018a5b1: esp_log_writev at /Users/sbstjn/Applications/esp-idf/components/log/log.c:189

0x400932b5: esp_log_write at /Users/sbstjn/Applications/esp-idf/components/log/log.c:199

0x400d9fc3: esp_read_mac at /Users/sbstjn/Applications/esp-idf/components/esp_common/src/mac_addr.c:148 (discriminator 13)

0x4014c48f: wifi_init_process at ??:?

0x4014998e: ieee80211_ioctl_process at ??:?

0x401636b6: ppTask at ??:?

0x4008f869: vPortTaskWrapper at /Users/sbstjn/Applications/esp-idf/components/freertos/port/xtensa/port.c:168


ELF file SHA256: 6ce88d6ebc1a0f76

Rebooting...

Getting started, need to release com port before erasing

Hi

I think there's a step missing in the Getting Started, after upload and monitor the com port remains in use by the monitoring loop, so I get Permission Denied when trying to erase flash. I need to terminate the loop with CTRL-C, then I can do the erase - but it doesn't reset the device, I need to powercycle it before getting the empty state.

And maybe you could add the explanation that a black screen with a ticking sound doesn't mean you've broken anything but simply that there was nothing to boot from which is expected at this point

Struggling with Python Versions on Mac - What Version to Run AWS

I've been struggling to get the correct Python settings in order to run the registration help python script. This shows what I'm currently experiencing:
image

Should I switch to a container with Linux, or a VM with Windows? Know what version I should be installing/running in order to get the 'aws' CLI working as well as the other scripts? Could the instructions be modified to show the steps without the automation for people who are not able to get the automated scripts working?

Docs unclear to get started

https://edukit.workshop.aws/en/ is where the barcode sends you, but it is NOT clear that the first thing you need to do is flash the device. The instructions there say:

"Once you receive the hardware kit, access the getting started tutorial and follow the steps to install the Espressif Rainmaker Mobile App on your phone. The Espressif Rainmaker Mobile App will allow you to control the AWS IoT EduKit reference hardware and connect to AWS IoT. Next, you can select from a list of free projects available on AWS IoT EduKit’s website. Start with building a basic connected home application and progress over time to running a machine learning model with Amazon SageMaker Autopilot or building a Voice Assisted Smart Home application with Alexa Voice Service Integration for AWS IoT (AFI)."

In reality, you need to follow the directions here: https://edukit.workshop.aws/en/getting-started/prerequisites.html and flash the unit first. The Rainmaker app cannot be used until that step is done. The firmware in the unit just displays the barcode (according to M5Stack support).

Serial port monitor blocks the registration_helper.py script

This may be obvious, but if you have the serial port monitor running (for example, if you followed the first part of the tutorial and left it running), the serial port will be blocked, preventing you from running the script to register your device. You might want to mention this in the docs.

Could not build getting started on Ubuntu ARM64 Raspberry Pi

I tried to run getting started on Raspberry Pi Ubuntu 20.10 Desktop ARM64

uname -a
Linux user-desktop 5.8.0-1015-raspi #18-Ubuntu SMP PREEMPT Fri Feb 5 06:09:58 UTC 2021 aarch64 aarch64 aarch64 GNU/Linux

I got an error when run build process as bellow.

Processing core2foraws (platform: https://github.com/platformio/platform-espressif32.git; framework: espidf; board: esp32dev)
-------------------------------------------------------------------------------------------------------------------------
Tool Manager: Installing platformio/toolchain-xtensa32 @ ~2.80400.0
Error: Could not find the package with 'platformio/toolchain-xtensa32 @ ~2.80400.0' requirements for your system 'linux_aarch64'
The terminal process "pio 'run', '--environment', 'core2foraws'" terminated with exit code: 1.

Terminal will be reused by tasks, press any key to close it.

It seems that the toolchain can not be available for ARM64.
Does someone knows any workaround?

Issue installing Silicon Labs USB to UART bridge driver

Not a bug per se, but thought this would be helpful to other people.

I was getting an error when trying to install the driver:

Result: err:(null) errResult:Can't open CFBundle for /Library/Extensions/SiLabsUSBDriver.kext. Can't create /Library/Extensions/SiLabsUSBDriver.kext.

I followed the guidance here and was able to install the new driver successfully.

Basically, I needed to install the legacy drivers first. That prompted me to allow the install of the drivers from the Silicon Labs Inc developer, which was blocked by my system.
After allowing the developer, the legacy install completed and then the install of the updated drivers completed with no errors.

syntax error in registration_helper.py

Script output:

C:\Users\sean\git_repos\Core2-for-AWS-IoT-EduKit\Blinky-Hello-World\utilities\AWS_IoT_registration_helper>python registration_helper.py -p COM6
Traceback (most recent call last):
  File "C:\Users\sean\git_repos\Core2-for-AWS-IoT-EduKit\Blinky-Hello-World\utilities\AWS_IoT_registration_helper\registration_helper.py", line 53, in <module>
    import helper_scripts as esp_hs
  File "C:\Users\sean\git_repos\Core2-for-AWS-IoT-EduKit\Blinky-Hello-World\components\esp-cryptoauthlib\esp_cryptoauth_utility\helper_scripts\__init__.py", line 4, in <module>
    from .manifest import generate_manifest_file
  File "C:\Users\sean\git_repos\Core2-for-AWS-IoT-EduKit\Blinky-Hello-World\components\esp-cryptoauthlib\esp_cryptoauth_utility\helper_scripts\manifest.py", line 47, in <module>
    from jose import utils
  File "C:\Users\sean\.espressif\python_env\idf4.2_py3.9_env\lib\site-packages\jose.py", line 546
    print decrypt(deserialize_compact(jwt), {'k':key},
          ^
SyntaxError: invalid syntax

Factory reset

How do I factory reset the unit ?
I gave the wrong password during setup and now I am told to factory reset.
I (84610) wifi:state: init -> auth (b0)
I (84610) wifi:state: auth -> assoc (0)
I (84620) wifi:state: assoc -> run (10)
I (87640) wifi:state: run -> init (2a0)
I (87640) wifi:new:<7,0>, old:<7,2>, ap:<255,255>, sta:<7,2>, prof:1
I (87640) wifi:new:<7,0>, old:<7,0>, ap:<255,255>, sta:<7,2>, prof:1
␛[0;32mI (87640) app_wifi: Disconnected. Connecting to the AP again...␛[0m
␛[0;32mI (89700) app_wifi: Disconnected. Connecting to the AP again...␛[0m
I (89820) wifi:new:<7,2>, old:<7,0>, ap:<255,255>, sta:<7,2>, prof:1
I (89830) wifi:state: init -> auth (b0)
I (90830) wifi:state: auth -> init (200)
I (90830) wifi:new:<7,0>, old:<7,2>, ap:<255,255>, sta:<7,2>, prof:1
␛[0;32mI (90830) app_wifi: Disconnected. Connecting to the AP again...␛[0m
␛[0;32mI (92890) app_wifi: Disconnected. Connecting to the AP again...␛[0m
I (93010) wifi:new:<7,2>, old:<7,0>, ap:<255,255>, sta:<7,2>, prof:1

Finding the serial port on MacOS Big Sur

On Big Sur the device address was not as indicated in the docs. I needed to use the Pio CLI tool

pio devices list

to find the correct device. In my case:

% pio device list
/dev/cu.Bluetooth-Incoming-Port
-------------------------------
Hardware ID: n/a
Description: n/a

/dev/cu.usbserial-0202E71A
--------------------------
Hardware ID: USB VID:PID=10C4:EA60 SER=0202E71A LOCATION=20-3
Description: CP2104 USB to UART Bridge Controller - CP2104 USB to UART Bridge Controller

Upload and Monitor via Pio

I am getting the following error (username blanked with xxxxxx) when running Upload and Monitor.

File "c:\users\xxxxxxxx.platformio\penv\lib\site-packages\serial\serialwin32.py", line 64, in open
raise SerialException("could not open port {!r}: {!r}".format(self.portstr, ctypes.WinError()))
serial.serialutil.SerialException: could not open port '/dev/cu.SLAB_USBtoUART': FileNotFoundError(2, 'The system cannot find the path specified.', None, 3)

I am on Windows 10 and the Kit COM port is COM9. How do I commit the port to the configuration - it does not seem to save correctly.
Thanks.

Partly worked on raspbian on Raspberry Pi4

In a few days before I tried to run the tutorial on Ubuntu ARM64 Raspberry Pi but did not work.

#45

So I changed my trial to on Raspbian and it's partly worked fine. I just want to share the logs.

Raspberry Pi 4 8GB

uname -a
Linux raspberrypi 5.4.83-v7l+ #1379 SMP Mon Dec 14 13:11:54 GMT 2020 armv7l GNU/Linux

Getting Started was not worked as it is so I changed platformio.ini as bellow.

- platform = [email protected]
+ platform = [email protected]

I get working successfully to build and flash & monitor after changed it.

In Blinky Hello, AWS CLI installation has been the defferent way which is explained the guide of page because the guide do not explain to install to ARM32.

https://docs.aws.amazon.com/cli/latest/userguide/install-cliv2-linux.html

git clone https://github.com/aws/aws-cli.git
cd aws-cli && git checkout v2
pip install -r requirements.txt
pip install .
aws --version
aws-cli/2.1.28 Python/3.7.10 Linux/5.4.83-v7l+ source/armv7l.raspbian.10 prompt/off

After setuped, I got to finish the tutorial fine.
However It spent many time for build the firmware around 3 minites due to Raspberry Pi's resourse.

I finished 2 tutorial like above but Smart Thermostat could not be finish. I got to build the firmware successfully but I have gotten cpu panic after flash it.

Guru Meditation Error: Core  1 panic'ed (StoreProhibited). Exception was unhandled.

Core  1 register dump:
PC      : 0x40185258  PS      : 0x00060b30  A0      : 0x800f27dc  A1      : 0x3ffc8e80  
0x40185258: lv_color_fill at /home/pi/Core2-for-AWS-IoT-EduKit/Smart-Thermostat/build/../components/core2forAWS/tft/lvgl/lvgl/src/lv_misc/lv_color.c:54

A2      : 0x00000000  A3      : 0x00007eef  A4      : 0x00000140  A5      : 0x00000000  
A6      : 0x00000000  A7      : 0x000000ff  A8      : 0x7eef7eef  A9      : 0x00000010  
A10     : 0x00000000  A11     : 0x00000281  A12     : 0x00000000  A13     : 0x3ffc9180  
A14     : 0x3ffb4d18  A15     : 0x00000001  SAR     : 0x00000000  EXCCAUSE: 0x0000001d  
EXCVADDR: 0x00000000  LBEG    : 0x00000000  LEND    : 0x00000000  LCOUNT  : 0x00000000  

Backtrace:0x40185255:0x3ffc8e80 0x400f27d9:0x3ffc8ea0 0x400f32ca:0x3ffc8f40 0x400e111a:0x3ffc8fa0 0x400e17e5:0x3ffc9060 0x400d9bd7:0x3ffc9080 0x400da8e6:0x3ffc9110 0x400da995:0x3ffc9160 0x400daca4:0x3ffc9180 0x400dae29:0x3ffc9210 0x400daf12:0x3ffc9240 0x400daf74:0x3ffc9260 0x400e58ed:0x3ffc9290 0x400e59d8:0x3ffc92b0 0x400d6145:0x3ffc92d0 0x4008a4c9:0x3ffc92f0
0x40185255: lv_color_fill at /home/pi/Core2-for-AWS-IoT-EduKit/Smart-Thermostat/build/../components/core2forAWS/tft/lvgl/lvgl/src/lv_misc/lv_color.c:53

0x400f27d9: fill_normal at /home/pi/Core2-for-AWS-IoT-EduKit/Smart-Thermostat/build/../components/core2forAWS/tft/lvgl/lvgl/src/lv_draw/lv_draw_blend.c:364 (discriminator 3)

0x400f32ca: _lv_blend_fill at /home/pi/Core2-for-AWS-IoT-EduKit/Smart-Thermostat/build/../components/core2forAWS/tft/lvgl/lvgl/src/lv_draw/lv_draw_blend.c:179

0x400e111a: draw_bg at /home/pi/Core2-for-AWS-IoT-EduKit/Smart-Thermostat/build/../components/core2forAWS/tft/lvgl/lvgl/src/lv_draw/lv_draw_rect.c:231

0x400e17e5: lv_draw_rect at /home/pi/Core2-for-AWS-IoT-EduKit/Smart-Thermostat/build/../components/core2forAWS/tft/lvgl/lvgl/src/lv_draw/lv_draw_rect.c:110

0x400d9bd7: lv_obj_design at /home/pi/Core2-for-AWS-IoT-EduKit/Smart-Thermostat/build/../components/core2forAWS/tft/lvgl/lvgl/src/lv_core/lv_obj.c:3904

0x400da8e6: lv_refr_obj at /home/pi/Core2-for-AWS-IoT-EduKit/Smart-Thermostat/build/../components/core2forAWS/tft/lvgl/lvgl/src/lv_core/lv_refr.c:699 (discriminator 1)

0x400da995: lv_refr_obj_and_children at /home/pi/Core2-for-AWS-IoT-EduKit/Smart-Thermostat/build/../components/core2forAWS/tft/lvgl/lvgl/src/lv_core/lv_refr.c:641

0x400daca4: lv_refr_area_part at /home/pi/Core2-for-AWS-IoT-EduKit/Smart-Thermostat/build/../components/core2forAWS/tft/lvgl/lvgl/src/lv_core/lv_refr.c:572

0x400dae29: lv_refr_area at /home/pi/Core2-for-AWS-IoT-EduKit/Smart-Thermostat/build/../components/core2forAWS/tft/lvgl/lvgl/src/lv_core/lv_refr.c:482 (discriminator 2)

0x400daf12: lv_refr_areas at /home/pi/Core2-for-AWS-IoT-EduKit/Smart-Thermostat/build/../components/core2forAWS/tft/lvgl/lvgl/src/lv_core/lv_refr.c:404

0x400daf74: _lv_disp_refr_task at /home/pi/Core2-for-AWS-IoT-EduKit/Smart-Thermostat/build/../components/core2forAWS/tft/lvgl/lvgl/src/lv_core/lv_refr.c:203

0x400e58ed: lv_task_exec at /home/pi/Core2-for-AWS-IoT-EduKit/Smart-Thermostat/build/../components/core2forAWS/tft/lvgl/lvgl/src/lv_misc/lv_task.c:409 (discriminator 1)

0x400e59d8: lv_task_handler at /home/pi/Core2-for-AWS-IoT-EduKit/Smart-Thermostat/build/../components/core2forAWS/tft/lvgl/lvgl/src/lv_misc/lv_task.c:142

0x400d6145: guiTask at /home/pi/Core2-for-AWS-IoT-EduKit/Smart-Thermostat/build/../components/core2forAWS/core2forAWS.c:319

0x4008a4c9: vPortTaskWrapper at /home/pi/esp/esp-idf/components/freertos/xtensa/port.c:143


ELF file SHA256: b5d26c7b8e109c7a

Rebooting...
ets Jul 29 2019 12:21:46

rst:0xc (SW_CPU_RESET),boot:0x17 (SPI_FAST_FLASH_BOOT)
configsip: 0, SPIWP:0xee
clk_drv:0x00,q_drv:0x00,d_drv:0x00,cs0_drv:0x00,hd_drv:0x00,wp_drv:0x00
mode:DIO, clock div:2
load:0x3fff0030,len:4
load:0x3fff0034,len:7064
load:0x40078000,len:13212
load:0x40080400,len:4568
0x40080400: _init at ??:?

I guess that is a tft library error but I could not understand to it.

This is just sharing because I have understood this tutorial is not support to Raspberry Pi. However let me know if you can advice to me. Thanks you.

Creating cert cannot just leave all values blank

"A window will open asking for additional information to include into the certificate. For purposes of this tutorial, we will leave all fields blank."

  • it's not a window, it's in the terminal
  • something needs to be there - otherwise it errors out

147dda0c29e5:esp_cryptoauth_utility gherlein$ openssl req -new -x509 -key output_files/signerkey.pem -out output_files/signercert.crt -days 365
You are about to be asked to enter information that will be incorporated
into your certificate request.
What you are about to enter is what is called a Distinguished Name or a DN.
There are quite a few fields but you can leave some blank
For some fields there will be a default value,
If you enter '.', the field will be left blank.

Country Name (2 letter code) []:
State or Province Name (full name) []:
Locality Name (eg, city) []:
Organization Name (eg, company) []:
Organizational Unit Name (eg, section) []:
Common Name (eg, fully qualified host name) []:
Email Address []:
error, no objects specified in config file
problems making Certificate Request

AWS IoT EduKit > Blinky Hello World > Device Provisioning - ModuleNotFoundError: No module named 'pyasn1_modules'

  • OS : macOS Catalina
  • conda : version 4.9.2

When I run python registration_helper.py -p <<DEVICE_PORT>>, it occured an python module exception.

(edukit) takipone@latte AWS_IoT_registration_helper % python registration_helper.py -p /dev/cu.SLAB_USBtoUART
Traceback (most recent call last):
  File "registration_helper.py", line 26, in <module>
    from pyasn1_modules import pem
ModuleNotFoundError: No module named 'pyasn1_modules'

I run pip3 in order to resolved the exception.

pip3 install -r requirements.txt

Would you add this command line to the tutorial's instruction?

registration_helper.py fails with connection timed out/CMD prompt timed out

Connection times out during registration_helper.py. Output is:
_...

Completed checking/installing package dependencies

Generating ECDSA 256-bit prime field key...
Generating self-signed x.509 certificate...
Successfully created x.509 certificate with expiration in 365 days...
Connecting....
Changing baud rate to 921600
Changed.
RAM boot...
Downloading 31364 bytes at 3ffb0000... done!
Downloading 456 bytes at 3ffb8f28... done!
Downloading 1028 bytes at 40080000... done!
Downloading 107384 bytes at 40080404... done!
Downloading 4 bytes at 4009a77c... done!
All segments done, executing at 40081bf0
Wait for init
connection timed out
CMD prompt timed out.__

Added some print() statements to serial.py wait_for_init() function to print out the lines its receiving to see what's going on. Here's the output.

_-----------------------------------------
Completed checking/installing package dependencies

Generating ECDSA 256-bit prime field key...
Generating self-signed x.509 certificate...
Successfully created x.509 certificate with expiration in 365 days...
Connecting....
Changing baud rate to 921600
Changed.
RAM boot...
Downloading 31364 bytes at 3ffb0000... done!
Downloading 456 bytes at 3ffb8f28... done!
Downloading 1028 bytes at 40080000... done!
Downloading 107384 bytes at 40080404... done!
Downloading 4 bytes at 4009a77c... done!
All segments done, executing at 40081bf0
Wait for init
waiting for line... and line reads: b'start: Single core mode\x1b[0m\r\n'
waiting for line... and line reads: b'\x1b[0;32mI (13477) heap_init: Initializing. RAM available for dynamic allocation:\x1b[0m\r\n'
waiting for line... and line reads: b'\x1b[0;32mI (13479) heap_init: At 3FFAE6E0 len 00001920 (6 KiB): DRAM\x1b[0m\r\n'
waiting for line... and line reads: b'\x1b[0;32mI (13482) heap_init: At 3FFB90F0 len 00026F10 (155 KiB): DRAM\x1b[0m\r\n'
waiting for line... and line reads: b'\x1b[0;32mI (13484) heap_init: At 3FFE0440 len 0001FBC0 (126 KiB): D/IRAM\x1b[0m\r\n'
waiting for line... and line reads: b'\x1b[0;32mI (13487) heap_init: At 40078000 len 00008000 (32 KiB): IRAM\x1b[0m\r\n'
waiting for line... and line reads: b'\x1b[0;32mI (13489) heap_init: At 4009A780 len 00005880 (22 KiB): IRAM\x1b[0m\r\n'
waiting for line... and line reads: b'\x1b[0;32mI (13492) cpu_start: Pro cpu start user code\x1b[0m\r\n'
waiting for line... and line reads: b'\x1b[0;33mW (13494) clk: RTC domain not initialised by bootloader\x1b[0m\r\n'
waiting for line... and line reads: b'\x80\x80\x00\x80\x80\x80\x80\x00\x00\x80\x80\x00\x80\x00\x00\x00\x00\x00\x80\x80\x80\x80\x80\x00\x00\x80\x00\x00\x00\x80\x00\x00\x80\x00\x80\x00\x00\x80\x00\x00\x80\x80\x80\x00\x80\x00\x80\x00\x00\x00\x80\x00\x80\x00\x80\x80\x00\x80\x80\x80\x80\x80\x00\x00\x80\x00\x80\x80\x80\x00\x80\x80\x00\x80\x00\x80\x80\x00\x80\x00\x00\x00\x00\x00\x80\x80\x80\x00\x80\x00\x80\x80\x80\x80\x00\x80\x80\x00\x80\x00\x80\x80\x80\x80\x00\x80\x00\x00\x80\x00\x00\x80\x00\x80\x00\x80\x80\x80\x00\x80\x80\x00\x80\x00\x80\x00\x00\x00\x80\x00\x80\x80\x80\x00\x80\x00\x80\x80\x80\x80\x00\x80\x00\x00\x80\x80\x00\x80\x80\x80\x00\x80\x80\x80\x00\x80\x80\x80\x80\x00\x00\x80\x80\x80\x80\x80\x80\x00\x00\x80\x00\x80\x80\x00\x80\x80\x80\x80\x00\x00\x80\x80\x00\x80\x00\x00\x00\x00\x00\x80\x80\x80\x80\x80\x00\x00\x80\x00\x00\x00\x80\x00\x00\x80\x00\x80\x00\x00\x80\x00\x00\x00\x80\x00\x80\x00\x80\x00\x00\x00\x80\x00\x80\x00\x80\x80\x00\x80\x80\x80\x80\x80\x00\x00\x80\x00\x80\x80\x80\x00\x80\x80\x00\x80\x00\x80\x80\x00\x80\x00\x00\x00\x00\x00\x80\x00\x80\x80\x80\x00\x80\x80\x00\x80\x00\x80\x80\x00\x00\x80\x00\x80\x80\x80\x80\x80\x00\x80\x00\x00\x00\x80\x00\x80\x80\x00\x80\x80\x80\x80\x80\x80\x80\x00\x80\x80\x80\x80\x00\x00\x80\x80\x80\x80\x80\x80\x00\x00\x80\x00\x80\x80\x00\x80\x80\x80\x80\x00\x00\x80\x80\x00\x80\x00\x00\x80\x00\x00\x80\x80\x80\x80\x80\x80\x80\x80\x00\x00\x00\x80\x00\x00\x80\x00\x80\x00\x00\x80\x00\x00\x00\x80\x00\x80\x00\x80\x00\x00\x00\x80\x00\x80\x00\x80\x80\x00\x80\x80\x80\x80\x80\x00\x00\x80\x00\x80\x80\x80\x00\x80\x80\x00\x80\x00\x80\x80\x00\x80\x00\x00\x00\x00\x00\x80\x80\x80\x00\x80\x00\x80\x80\x80\x80\x00\x80\x80\x00\x80\x00\x80\x80\x80\x80\x00\x80\x00\x00\x80\x00\x00\x80\x00\x80\x80\x00\x80\x80\x00\x80\x80\x80\x80\x00\x80\x00\x80\x00\x80\x00\x00\x00\x80\x00\x80\x00\x00\x00\x00\x00\x80\x00\x80\x80\x80\x80\x80\x00\x80\x00\x00\x00\x00\x80\x80\x80\x00\x80\x00\x00\x80\x80\x00\x80\x80\x80\x00\x80\x00\x00\x80\x00\x00\x00\x80\x80\x00\x80\x80\x80\x00\x80\x00\x80\x80\x00\x00\x00\x80\x80\x00\x80\x80\x80\x80\x00\x80\x00\x00\x80\x00\x80\x80\x00\x80\x80\x00\x80\x80\x80\x80\x00\x80\x00\x00\x80\x00\x80\x80\x00\x80\x80\x00\x00\x00\x80\x80\x00\x80\x80\x80\x80\x00\x80\x00\x00\x00\x00\x80\x80\x00\x80\x80\x00\x80\x80\x80\x00\x80\x00\x00\x80\x80\x00\x80\x00\x00\x80\x00\x80\x80\x80\x80\x80\x80\x80\x00\x80\x80\x00\x80\x80\x80\x00\x80\x00\x00\x00\x80\x80\x80\x80\x00\x80\x80\x00\x80\x00\x00\x80\x80\x80\x00\x80\x00\x00\x80\x00\x80\x00\x00\x00\x00\x00\x00\x00\x80\x00\x00\x00\x80\x80\x80\x80\x80\x00\x80\x00\x00\x80\x00\x00\x00\x80\x80\x80\x80\x80\x80\x00\x80\x80\x00\x80\x80\x00\x80\x80\x80\x00\x80\x00\x00\x00\x80\x80\x00\x80\x80\x80\x80\x00\x80\x00\x00\x80\x00\x80\x80\x00\x80\x80\x00\x80\x80\x80\x80\x00\x80\x00\x00\x80\x00\x80\x80\x00\x80\x80\x00\x00\x00\x80\x80\x00\x80\x80\x80\x80\x00\x80\x00\x00\x00\x00\x80\x80\x00\x80\x80\x00\x80\x80\x80\x00\x80\x00\x00\x80\x80\x00\x80\x00\x00\x80\x00\x80\x80\x80\x80\x80\x80\x80\x00\x80\x80\x00\x80\x80\x80\x00\x80\x00\x00\x00\x80\x80\x80\x80\x00\x80\x80\x00\x80\x00\x00\x80\x80\x80\x00\x80\x00\x00\x80\x00\x80\x00\x80\x80\x00\x80\x80\x80\x80\x00\x00\x80\x80\x80\x80\x80\x80\x00\x00\x80\x00\x80\x80\x00\x80\x80\x80\x80\x00\x00\x80\x80\x00\x80\x00\x00\x00\x00\x00\x80\x80\x80\x80\x80\x00\x00\x80\x00\x00\x00\x80\x00\x00\x80\x00\x00\x80\x00\x00\x00\x00\x80\x00\x80\x00\x80\x00\x00\x00\x80\x00\x80\x00\x80\x80\x80\x80\x80\x80\x80\x80\x80\x00\x80\x00\x80\x80\x80\x00\x80\x00\x00\x80\x00\x80\x80\x00\x80\x00\x00\x00\x80\x00\x80\x80\x00\x80\x80\x80\x00\x80\x00\x00\x80\x00\x80\x80\x80\x00\x80\x80\x00\x80\x80\x80\x00\x80\x00\x00\x80\x00\x80\x80\x00\x80\x00\x80\x80\x80\x80\x00\x80\x00\x00\x80\x80\x80\x80\x80\x00\x80\x80\x80\x80\x00\x80\x00\x00\x80\x00\x00\x80\x80\x80\x00\x80\x80\x00\x00\x00\x80\x80\x00\x00\x80\x80\x80\x00\x80\x00\x00\x80\x00\x80\x00\x80\x80\x80\x80\x80\x80\x80\x00\x80\x00\x80\x80\x00\x80\x80\x80\x80\x00\x00\x80\x80\x80\x80\x80\x80\x00\x00\x80\x00\x80\x80\x00\x80\x80\x80\x80\x00\x00\x80\x80\x00\x80\x00\x00\x00\x00\x00\x80\x80\x80\x80\x80\x00\x00\x80\x00\x00\x00\x80\x00\x00\x80\x00\x00\x80\x00\x80\x00\x00\x00\x00\x00\x80\x00\x80\x00\x00\x00\x80\x80\x80\x80\x80\x00\x80\x00\x00\x80\x00\x80\x80\x00\x80\x00\x00\x00\x80\x00\x80\x80\x80\x80\x80\x80\x80\x00\x80\x80\x80\x80\x80\x80\x80\x00\x80\x00\x00\x00\x00\x80\x00\x00\x80\x80\x80\x00\x80\x80\x80\x00\x80\x00\x00\x80\x00\x80\x00\x80\x80\x00\x80\x80\x00\x80\x80\x80\x00\x80\x80\x00\x80\x00\x80\x00\x00\x00\x80\x00\x00\x00\x00\x00\x80\x80\x00\x80\x80\x80\x80\x00\x00\x80\x80\x80\x80\x80\x80\x00\x00\x80\x00\x80\x00\x00\x80\x00\x80\x80\x80\x00\x80\x80\x00\x80\x80\x80\x00\x80\x80\x80\x00\x80\x00\x80\x80\x80\x00\x80\x80\x80\x00\x80\x80\x00\x80\x80\x00\x80\x80\x80\x00\x80\x00\x00\x80\x00\x80\x80\x80\x80\x80\x80\x80\x80\x80\x80\x80\x80\x80\x00\x80\x00\x80\x80\x00\x00\x80\x00\x00\x00\x80\x80\x80\x00\x80\x80\x00\xab\xe9 >>\n'
waiting for line... and line reads: b'>>\n'
waiting for line... and line reads: b''
connection timed out
CMD prompt timed out._

This output looks suspicious: clk: RTC domain not initialised by bootloader
Wondering if something is wrong with my hardware?
Thanks!
Sam

Documentation Typo on Mac Serial Port

I clicked "bug report" and it led me to here, so I hope this is the right place to report this type of thing.

In the docs here it says For macOS, the device is typically on /dev/cu.SLABUSBtoUART

Noticed the port is missing a _. The sentence should read For macOS, the device is typically on /dev/cu.SLAB_USBtoUART

ESP Alexa iOS app crashing on iPhone11 Pro Max

ESP Alexa iOS app crashing on iPhone11 Pro Max (fresh install):

  1. ALEXA App is running on M5 waiting for app registration (I can see screen brightness slider on screen and red light is flashing on the side)
  2. ESP Alexa App is up and running on IPhone
  3. I press button "Add New Device" on iPhone
    4)My M5 is listed in devices via Bluetooth as "ESP-Alexa-7700"
  4. Selected device in list
  5. Amazon Alexa screen appear with dailog "Proof of possession" and "abcd1234" in text field, press button "done"
  6. ESP Alexa app disappear from iPhone screen...

Any idea what to do?

Blinky-Hello-World: Device provisioning fails with Python x509 module exception

During manifest generation as part of the device provisioning process in the Blinky-Hello-World tutorial, the following command:

python secure_cert_mfg.py --flash sample_bins/secure_cert_mfg_esp32.bin --signer-cert output_files/signercert.crt --signer-cert-private-key output_files/signerkey.pem -p <<DEVICE_PORT>>

, errors out as follows:

Validate Device Certificate:
OK

<device-cert-id>
reading slot 0 public key
>>

reading slot 1 public key
>>

reading slot 2 public key
>>

reading slot 3 public key
>>


reading slot 4 public key
>>

Traceback (most recent call last):
  File "/Users/<user>/projects/esp/Core2-for-AWS-IoT-EduKit/Blinky-Hello-World/components/esp-cryptoauthlib/esp_cryptoauth_utility/secure_cert_mfg.py", line 192, in <module>
    main()
  File "/Users/<user>/projects/esp/Core2-for-AWS-IoT-EduKit/Blinky-Hello-World/components/esp-cryptoauthlib/esp_cryptoauth_utility/secure_cert_mfg.py", line 97, in main
    hs.manifest.generate_manifest_file(esp, args, init_mfg)
  File "/Users/<user>/projects/esp/Core2-for-AWS-IoT-EduKit/Blinky-Hello-World/components/esp-cryptoauthlib/esp_cryptoauth_utility/helper_scripts/manifest.py", line 295, in generate_manifest_file
    log_key_id = jws_b64encode(log_cert.extensions.get_extension_for_class(x509.SubjectKeyIdentifier).value.digest)
  File "/Users/<user>/.espressif/python_env/idf4.2_py3.9_env/lib/python3.9/site-packages/cryptography/x509/extensions.py", line 135, in get_extension_for_class
    raise ExtensionNotFound(
cryptography.x509.extensions.ExtensionNotFound: No <class 'cryptography.x509.extensions.SubjectKeyIdentifier'> extension was found

This is on MacOS Catalina, running inside a Python 3.7.9 virtualenv, having followed all of the prerequisite steps.

Can't install hidapi on MacOS Catalina

I cannot install the requirements for the AWS_IoT_Registration_helper on MacOS Catalina.

/usr/bin/xcodebuild -version 
Xcode 12.3
Build version 12C33

sw_vers 
ProductName:	Mac OS X
ProductVersion:	10.15.7
BuildVersion:	19H114
   command: /Users/narnoldi/.pyenv/versions/3.8.1/bin/python -u -c 'import sys, setuptools, tokenize; sys.argv[0] = '"'"'/private/tmp/pip-install-pc_4srqk/hidapi/setup.py'"'"'; __file__='"'"'/private/tmp/pip-install-pc_4srqk/hidapi/setup.py'"'"';f=getattr(tokenize, '"'"'open'"'"', open)(__file__);code=f.read().replace('"'"'\r\n'"'"', '"'"'\n'"'"');f.close();exec(compile(code, __file__, '"'"'exec'"'"'))' bdist_wheel -d /private/tmp/pip-wheel-3l5sdfn5
       cwd: /private/tmp/pip-install-pc_4srqk/hidapi/
  Complete output (2185 lines):
  running bdist_wheel
  running build
  running build_ext
  skipping 'hid.c' Cython extension (up-to-date)
  building 'hid' extension
  creating build
  creating build/temp.macosx-10.14-x86_64-3.8
  creating build/temp.macosx-10.14-x86_64-3.8/hidapi
  creating build/temp.macosx-10.14-x86_64-3.8/hidapi/mac
  clang -Wno-unused-result -Wsign-compare -Wunreachable-code -DNDEBUG -g -fwrapv -O3 -Wall -I/Library/Developer/CommandLineTools/SDKs/MacOSX10.14.sdk/usr/include -I/Library/Developer/CommandLineTools/SDKs/MacOSX10.14.sdk/usr/include -isysroot /Library/Developer/CommandLineTools/SDKs/MacOSX.sdk -framework IOKit -framework CoreFoundation -framework AppKit -Ihidapi/hidapi -I/Users/narnoldi/.pyenv/versions/3.8.1/include/python3.8 -c hid.c -o build/temp.macosx-10.14-x86_64-3.8/hid.o
  clang: warning: -framework IOKit: 'linker' input unused [-Wunused-command-line-argument]
  clang: warning: -framework CoreFoundation: 'linker' input unused [-Wunused-command-line-argument]
  clang: warning: -framework AppKit: 'linker' input unused [-Wunused-command-line-argument]
  In file included from hid.c:14:
  In file included from /Users/narnoldi/.pyenv/versions/3.8.1/include/python3.8/Python.h:25:
  In file included from /Library/Developer/CommandLineTools/SDKs/MacOSX10.14.sdk/usr/include/stdio.h:64:
  /Library/Developer/CommandLineTools/SDKs/MacOSX10.14.sdk/usr/include/_stdio.h:93:16: warning: pointer is missing a nullability type specifier (_Nonnull, _Nullable, or _Null_unspecified) [-Wnullability-completeness]
          unsigned char   *_base;
                          ^
  /Library/Developer/CommandLineTools/SDKs/MacOSX10.14.sdk/usr/include/_stdio.h:93:16: note: insert '_Nullable' if the pointer may be null
          unsigned char   *_base;
                          ^
                            _Nullable
  /Library/Developer/CommandLineTools/SDKs/MacOSX10.14.sdk/usr/include/_stdio.h:93:16: note: insert '_Nonnull' if the pointer should never be null
          unsigned char   *_base;
                          ^
                            _Nonnull
  /Library/Developer/CommandLineTools/SDKs/MacOSX10.14.sdk/usr/include/_stdio.h:138:32: warning: pointer is missing a nullability type specifier (_Nonnull, _Nullable, or _Null_unspecified) [-Wnullability-completeness]
          int     (* _Nullable _read) (void *, char *, int);
                                            ^
  /Library/Developer/CommandLineTools/SDKs/MacOSX10.14.sdk/usr/include/_stdio.h:138:32: note: insert '_Nullable' if the pointer may be null
          int     (* _Nullable _read) (void *, char *, int);
                                            ^
                                             _Nullable
  /Library/Developer/CommandLineTools/SDKs/MacOSX10.14.sdk/usr/include/_stdio.h:138:32: note: insert '_Nonnull' if the pointer should never be null
          int     (* _Nullable _read) (void *, char *, int);
                                            ^
                                             _Nonnull
  /Library/Developer/CommandLineTools/SDKs/MacOSX10.14.sdk/usr/include/_stdio.h:138:40: warning: pointer is missing a nullability type specifier (_Nonnull, _Nullable, or _Null_unspecified) [-Wnullability-completeness]
          int     (* _Nullable _read) (void *, char *, int);
                                                    ^
  /Library/Developer/CommandLineTools/SDKs/MacOSX10.14.sdk/usr/include/_stdio.h:138:40: note: insert '_Nullable' if the pointer may be null
          int     (* _Nullable _read) (void *, char *, int);
                                                    ^

(truncated)

Recommend Projects

  • React photo React

    A declarative, efficient, and flexible JavaScript library for building user interfaces.

  • Vue.js photo Vue.js

    🖖 Vue.js is a progressive, incrementally-adoptable JavaScript framework for building UI on the web.

  • Typescript photo Typescript

    TypeScript is a superset of JavaScript that compiles to clean JavaScript output.

  • TensorFlow photo TensorFlow

    An Open Source Machine Learning Framework for Everyone

  • Django photo Django

    The Web framework for perfectionists with deadlines.

  • D3 photo D3

    Bring data to life with SVG, Canvas and HTML. 📊📈🎉

Recommend Topics

  • javascript

    JavaScript (JS) is a lightweight interpreted programming language with first-class functions.

  • web

    Some thing interesting about web. New door for the world.

  • server

    A server is a program made to process requests and deliver data to clients.

  • Machine learning

    Machine learning is a way of modeling and interpreting data that allows a piece of software to respond intelligently.

  • Game

    Some thing interesting about game, make everyone happy.

Recommend Org

  • Facebook photo Facebook

    We are working to build community through open source technology. NB: members must have two-factor auth.

  • Microsoft photo Microsoft

    Open source projects and samples from Microsoft.

  • Google photo Google

    Google ❤️ Open Source for everyone.

  • D3 photo D3

    Data-Driven Documents codes.