Giter VIP home page Giter VIP logo

imageprocessing's Introduction

Build Status

MicaSense RedEdge and Altum Image Processing Tutorials

This repository includes tutorials and examples for processing MicaSense RedEdge and Altum images into usable information using the python programming language. RedEdge images captured with firmware 2.1.0 (released June 2017) or newer are required. Altum images captured with all firmware versions are supported. Dual-camera (10-band) capture are also included. As of 2023, RedEdge-P and Altum-PT are also supported in the "v2" notebooks. Previous notebooks have been updated to refer to newer images in this repository.

The intended audience is researchers and developers with some software development experience that want to do their own image processing. While a number of commercial tools fully support processing MicaSense data into reflectance maps, there are a number of reasons to process your own data, including controlling the entire radiometric workflow (for academic or publication reasons), pre-processing images to be used in a non-radiometric photogrammetry suite, or processing single sets of 5 images without building a larger map.

What do I need to succeed?

A working knowledge of running Python software on your system and using the command line are both very helpful. We've worked hard to make these tutorials straightforward to run and understand, but the target audience is someone that's looking to learn more about how to process their own imagery and write software to perform more powerful analysis.

You can start today even if you don't have your own RedEdge or Altum. We provide example images, including full flight datasets.

For a user of RedEdge or Altum that wants a turnkey processing solution, this repository probably is not the best place to start. Instead consider one of the MicaSense processing partners who provide turnkey software for processing and analysis.

Tutorial Articles

Click here to view the tutorial articles. The set of example notebooks and their outputs can be viewed in your browser without downloading anything or running any code.

How do I get set up?

First you'll need to install git and git-lfs. Install both before running git clone or you may have issues with the example data files included.

Next, git clone this repository, as it has all the code and examples you'll need.

Once you have git installed and the repository cloned, you are ready to start with the first tutorial. Check out the setup tutorial which will walk through installing and checking the necessary tools to run the remaining tutorials.

MicaSense Library Usage

In addition to the tutorials, we've created library code that shows some common transformations, usages, and applications of RedEdge imagery. In general, these are intended for developers that are familiar with installing and managing python packages and third party software. The purpose of this code is readability and clarity to help others develop processing workflows, therefore performance may not be optimal.

While this code is similar to an installable python library (and supports the python setup.py install process) the main purpose of this library is one of documentation and education. For this reason, we expect most users to be looking at the source code for understanding or improvement, so they will run the notebooks from the directory that the library was git cloned it into.

Running this code

The code in these tutorials consists of two parts. First, the tutorials generally end in .ipynb and are the Jupyter notebooks that were used to create the web page tutorials linked above. You can run this code by opening a terminal/iTerm (linux/mac) or Anaconda Command Prompt (Windows), navigating to the folder you cloned the git repository into, and running

jupyter notebook .

That command should open a web browser window showing the set of files and folder in the repository. Click the ...Setup.ipynb notebook to get started.

Second, a set of helper utilities is available in the micasense folder that can be used both with these tutorials as well as separtely.

Note that some of the hyperlinks in the notebooks may give you a 404 Not Found error. This is because the links are setup to allow the list of files above to be accessed on the github.io site. When running the notebooks, use your jupyter "home" tab to open the different notebooks.

Contribution guidelines

Find a problem with the tutorial? Please look through the existing issues (open and closed) and if it's new, create an issue on github.

Want to correct an issue or expand library functionality? Fork the repository, make your fix, and submit a pull request on github.

Have a question? Please double-check that you're able to run the setup notebook successfully, and resolve any issues with that first. If you're pulling newer code, it may be necessary in some cases to delete and re-create your micasense conda environment to make sure you have all of the expected packages.

This code is a community effort and is not supported by MicaSense support. Please don't reach out to MicaSense support for issues with this codebase; instead, work through the above troubleshooting steps and then create an issue on github.

Tests

Tests for many library functions are included in the tests diretory. Install the pytest module through your package manager (e.g. pip install pytest) and then tests can be run from the main directory using the command:

pytest

Test execution can be relatively slow (2-3 minutes) as there is a lot of image processing occuring in some of the tests, and quite a bit of re-used IO. To speed up tests, install the pytest-xdist plugin using conda or pip and achieve a significant speed up by running tests in parallel.

pytest -n auto

Data used by the tests is included in the data folder.

For (Tutorial) Developers

To generate the HTML pages after updating the jupyter notebooks, run the following command in the repository directory:

jupyter nbconvert --to html --ExecutePreprocessor.timeout=None --output-dir docs --execute *.ipynb

License

The MIT License (MIT)

Copyright (c) 2017-2019 MicaSense, Inc.

Permission is hereby granted, free of charge, to any person obtaining a copy of this software and associated documentation files (the "Software"), to deal in the Software without restriction, including without limitation the rights to use, copy, modify, merge, publish, distribute, sublicense, and/or sell copies of the Software, and to permit persons to whom the Software is furnished to do so, subject to the following conditions:

The above copyright notice and this permission notice shall be included in all copies or substantial portions of the Software.

THE SOFTWARE IS PROVIDED "AS IS", WITHOUT WARRANTY OF ANY KIND, EXPRESS OR IMPLIED, INCLUDING BUT NOT LIMITED TO THE WARRANTIES OF MERCHANTABILITY, FITNESS FOR A PARTICULAR PURPOSE AND NONINFRINGEMENT. IN NO EVENT SHALL THE AUTHORS OR COPYRIGHT HOLDERS BE LIABLE FOR ANY CLAIM, DAMAGES OR OTHER LIABILITY, WHETHER IN AN ACTION OF CONTRACT, TORT OR OTHERWISE, ARISING FROM, OUT OF OR IN CONNECTION WITH THE SOFTWARE OR THE USE OR OTHER DEALINGS IN THE SOFTWARE.

imageprocessing's People

Contributors

and-viceversa avatar danielslouis avatar fdarvas avatar hrrmxj avatar lloyd5389 avatar loicdtx avatar poynting avatar rrowlands avatar sebc06 avatar taftj avatar

Stargazers

 avatar  avatar  avatar  avatar  avatar  avatar  avatar  avatar  avatar  avatar  avatar  avatar  avatar  avatar  avatar  avatar  avatar  avatar  avatar  avatar  avatar  avatar  avatar  avatar  avatar  avatar  avatar  avatar  avatar  avatar  avatar  avatar  avatar  avatar  avatar  avatar  avatar  avatar  avatar  avatar  avatar  avatar  avatar  avatar  avatar  avatar  avatar  avatar  avatar  avatar  avatar  avatar  avatar  avatar  avatar  avatar  avatar  avatar  avatar  avatar  avatar  avatar  avatar  avatar  avatar  avatar  avatar  avatar  avatar  avatar  avatar  avatar  avatar  avatar  avatar  avatar  avatar  avatar  avatar  avatar  avatar  avatar  avatar  avatar  avatar  avatar  avatar  avatar  avatar  avatar  avatar  avatar  avatar  avatar  avatar  avatar  avatar  avatar  avatar  avatar

Watchers

 avatar  avatar  avatar  avatar  avatar  avatar  avatar  avatar  avatar  avatar  avatar  avatar  avatar  avatar  avatar  avatar  avatar  avatar  avatar  avatar  avatar  avatar  avatar  avatar  avatar  avatar  avatar

imageprocessing's Issues

How can I modify the exif data of the images?

I did not calibrate the Magnetometer before the filght. Now I got a Non-uniform reflectance map probably due to the wrong DLS_pose data. Now I want to replace the camera Mag dls_pose data by my UAV IMU data. I can read the dls_pose by exiftool but I have no idea how to rewrite it. Who can help me ? Please!

OSError: [WinError 10038] An operation was attempted on something that is not a socket

When I run the Testing Installation,
Successfully imported all required libraries.
Successfully executed exiftool.

But when I run the Part 1 of the tutorial,

OSError Traceback (most recent call last)
in ()
4 exiftoolPath = 'C:/exiftool/exiftool.exe'
5 # get image metadata
----> 6 meta = metadata.Metadata(imageName, exiftoolPath=exiftoolPath)
7 cameraMake = meta.get_item('EXIF:Make')
8 cameraModel = meta.get_item('EXIF:Model')

~\Downloads\imageprocessing-master\imageprocessing-master\micasense\metadata.py in init(self, filename, exiftoolPath)
42 raise IOError("Input path is not a file")
43 with exiftool.ExifTool(self.exiftoolPath) as exift:
---> 44 self.exif = exift.get_metadata(filename)
45
46 def get_all(self):

C:\ProgramData\Anaconda3\lib\site-packages\exiftool.py in get_metadata(self, filename)
270 documentation of :py:meth:execute_json().
271 """
--> 272 return self.execute_json(filename)[0]
273
274 def get_tags_batch(self, tags, filenames):

C:\ProgramData\Anaconda3\lib\site-packages\exiftool.py in execute_json(self, *params)
254 """
255 params = map(fsencode, params)
--> 256 return json.loads(self.execute(b"-j", *params).decode("utf-8"))
257
258 def get_metadata_batch(self, filenames):

C:\ProgramData\Anaconda3\lib\site-packages\exiftool.py in execute(self, *params)
225 fd = self._process.stdout.fileno()
226 while not output[-32:].strip().endswith(sentinel):
--> 227 inputready,outputready,exceptready = select.select([fd],[],[])
228 for i in inputready:
229 if i == fd:

OSError: [WinError 10038] An operation was attempted on something that is not a socket.

Could anyone help me with this error? Thanks.

exiftool not working

I tried to install micasense on Windows and I followed all instructions at least 10 times, but I can not get exiftool to work.
I got the message all the time: "No module named 'exiftool'"

I installed exiftool.exe into a folder C:\exiftool\exiftool.exe, and I set the path to this folder.

The exception text in the is: 'exiftool' is not defined"

Bad alignment

Hi,
I'm trying to align images following the alignment tutorial but the product of the alignment was poor.
Anyone has any ideia how I can improve the aligment ?
I tried several values for max_iterations=1000 - from 100 to 100000 and I couldn't see any difference.
This is the result: http://i63.tinypic.com/2hqb7md.png

Image Processing Setup

I am currently trying to run the python script for testing to see if all of the modules import on a windows machine. I am using Spyder Python 3.6 to run the script. I am having trouble with the exiftool. I downloaded the exiftool.exe file and stored it in my anaconda3\lib\site-packages\exiftool\exiftool.exe and added a system path variable to that location. I have also tried storing it in this location as well C:\exiftool\exiftool.exe and added a system path to there. I was able to set up the MicaSense Environment in Anaconda Prompt and run the yml file. I also had to pip install modules pyzbar and mapboxgl. When I run the Setup Script I get the following output:

**"Successfully imported all required libraries.

Exiftool isn't working. Double check that you've followed the instructions above.
The execption text below may help to find the source of the problem:

module 'exiftool' has no attribute 'ExifTool'"**

Any idea on how to fix this?? I have been searching all over for a fix.

Update OpenCV to 4.0.x

Per #57 (comment) we should be able to update opencv to a version <4.1. Versions greater than 4.1 currently have a breaking API change that needs to be managed.

To verify this change, we need to create new environments and perform the update on Windows/Linux/Mac and run all of the unit tests and the provided notebooks on all 3 platforms.

Improve imageset loading time

Currently we load the images into an imageset from a list of images or a directory. In this process, the image data itself isn't loaded, but the metadata is read via exiftool. This process is very slow.

I've tried using one exiftool object and loading all images from that, which should improve the setup/teardown efficiency of exiftool, but this didn't impact the loading speed much. It's possible I implemented this incorrectly; it's worth exploring.

The suggested approach would be to use the exiftool -csv option to read the exif data from a set of images, then build those image objects from the data in the csv. The exiftool process to save metadata to a CSV is relatively quick, running in seconds instead of minutes on a set of a few thousand image files.

Image Processing Tutorial #1 does not deal with metadata in Pictures

Hi,

The last line in your code does not save images as TIFFS, nor preserves metadata.
The consequence is that uploading these images to Pix4D or Agisoft is useless, since all the metadata is lost and, therefore, no mosaic of the band can be created by the programs.

Please advise on using a specific library that preserves Metadata, or a method to copy and paste metadata in last images.

Correction of lens distortion not working

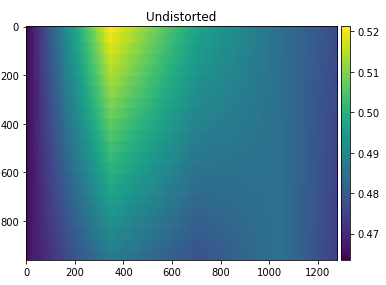
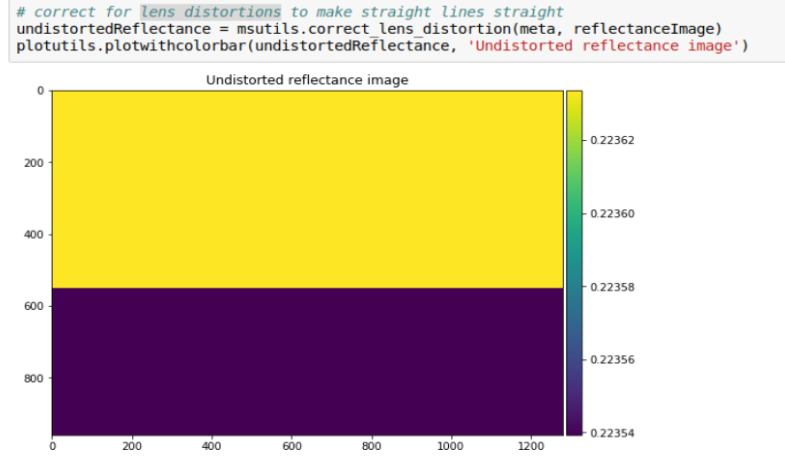
greetings to all, I am trying to work with the micasense libraries but I have a problem with tutorial 1 in the part of correct for lens distortions, when processing the image the result is a blurry photo. I have a micasense rededge m with software 4.2.2 and if I change photo I get an error very similar to the error of this post #3
The strange thing is that if I use the example photos provided by micasense (data folder) with version 2.1 the program works perfectly. Also, I found a new example photo but this was also done with the camera software 3.3.0 and also generates an error equal to the post #3.
I appreciate any help and also attach the photo with the problem after of correct for lens distortions. thank you all

asdsa

find_crop_bounds - Last 2 dimensions must be square

Hello,

In the altum branch of the lib I get this error following this command: A bug perhaps?

cropped_dimensions, edges = imageutils.find_crop_bounds(imAl, 
                                                           warp_matrices,
                                                           warp_mode=cv2.MOTION_HOMOGRAPHY)

Here is the error feed culminating in
numpy.linalg.LinAlgError: Last 2 dimensions of the array must be square


File "/home/ciaran/anaconda3/envs/micasense/lib/python3.6/site-packages/micasense/imageutils.py", line 302, in find_crop_bounds
  bounds = [get_inner_rect(s, a, d, c,warp_mode=warp_mode)[0] for s,a, d, c in zip(image_sizes,registration_transforms, lens_distortions, camera_matrices)]
File "/home/ciaran/anaconda3/envs/micasense/lib/python3.6/site-packages/micasense/imageutils.py", line 302, in <listcomp>
  bounds = [get_inner_rect(s, a, d, c,warp_mode=warp_mode)[0] for s,a, d, c in zip(image_sizes,registration_transforms, lens_distortions, camera_matrices)]
File "/home/ciaran/anaconda3/envs/micasense/lib/python3.6/site-packages/micasense/imageutils.py", line 321, in get_inner_rect
  left_map = map_points(left_edge, image_size, affine, distortion_coeffs, camera_matrix,warp_mode=warp_mode)
File "/home/ciaran/anaconda3/envs/micasense/lib/python3.6/site-packages/micasense/imageutils.py", line 391, in map_points
  new_pts =cv2.perspectiveTransform(new_pts,np.linalg.inv(warpMatrix).astype(np.float32))
File "/home/ciaran/anaconda3/envs/micasense/lib/python3.6/site-packages/numpy/linalg/linalg.py", line 546, in inv
  _assertNdSquareness(a)
File "/home/ciaran/anaconda3/envs/micasense/lib/python3.6/site-packages/numpy/linalg/linalg.py", line 213, in _assertNdSquareness
  raise LinAlgError('Last 2 dimensions of the array must be square')
numpy.linalg.LinAlgError: Last 2 dimensions of the array must be square

bad identification of the calibration panel

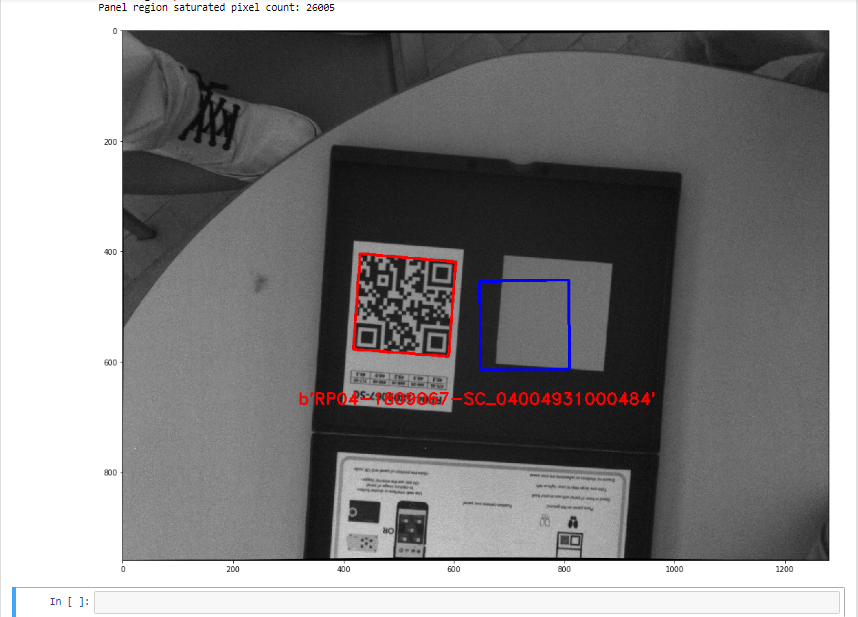
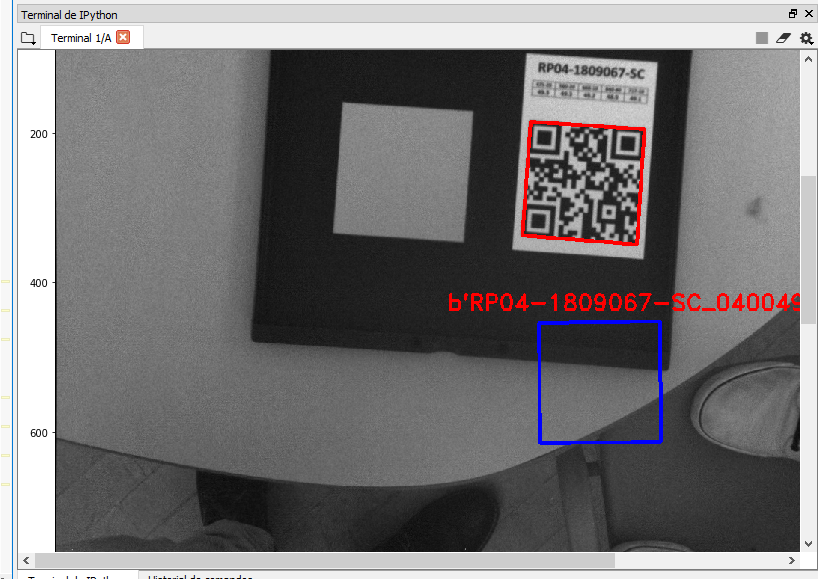
hello, I'm testing the code identification code qr calibration panel, this process does well because it identifies the serial number, the problem is that it marks the blue box in a different area. here I upload two captures with different images presenting the error. Thank you very much for the help

dawwd
aaa

A problem about calculating DLS_irradiance, a bug?

As the introduction in tutorial3.ipynb , in Cell 3,
# compute irradiance on the ground using the solar altitude angle
dls_irr = untilted_direct_irr * (percent_diffuse + np.sin(solar_elevation))
The DLS_irr was calculated by "sin" of solar_elevation.
However, in capture.py , line 162
# compute irradiance on the ground using the solar altitude angle
ground_irr = untiltied_direct_irr * (percent_diffuse + np.cos (self.solar_elevation))
The same var was calculated by "cos" of solar_elevation.

This is a bug and which one is correct? Anyone can help me?

Alignment is looping - any clue?

Hi,
I am processing the alignment of one Altum capture like described in the alignment tutorial (Windows machine).
In my processing, the opening works well as well as the irradiance and undistorted reflectance images.
There is always hangig up in a loop with the following instruction (Part [3]):
warp_matrices, alignment_pairs = imageutils.align_capture(capture, max_iterations=1)
-yes, even if I set the iterations only to one.

There were a lot of exiftool windows opening and closing one time. Usually this seems to be a hidden process. But it might be a hint...
Any glue why this might happen? (Everything is updated to the newest version.)

Best wishes,
Swawa

Refactor tests to share fixtures

Currently there are a lot of legacy file names/os.path/etc. in the tests. We should refactor this to share the fixtures between all of the tests.

DLS2 irradiance units

Hello, I try to process Altum images, when I study on this images I realize that altum's Spectral Irradiance value 104.20955143678957 which is used for irradiance correction. But in rededge spectral irradiance value like a 1.084824800491333. Nearly 100 times lower. Is there any problem when we calculate reflectance values of image set using dls+panel together.

Best

the "%" symbol usage in these scripts

Hi,
in some python scripts appear “%” as a first symbol in line. (my) Python can’t read that. I am familiar with the “%” symbol in order to apply a modulus operation that is placed between to variables/values.
What does it mean here? do I need a special package to use it?

Like on https://micasense.github.io/imageprocessing /MicaSense%20Image%20Processing%20Tutorial%201.html
paragraph
”Load a directory of images into an ImageSet”

Or on
https://micasense.github.io/imageprocessing/Images.html
paragraph
“images”

Best wishes

why we cant align pic with math?

Hello!
why we cant calculate the exact pixels count to cut images and just using numpy to join them? There was text about temperature and other factors, but is it really affect it so much?
I think we got all values, isnt it? i tried to use 100, 1000, 10000 iterations and got the same result. How can i improve alignment quality ?
100
1000
10000
p81130-025804

Error when testing installation

After going through the installation process, I tried running the test snippet in Jupyter and I get an error. The error occurs when it tries to run Mapboxgl. The installation seemed to go ok. I tried importing them one by one as well and got the same error when I ran the Mapboxgl. I tried doing a pip install for Mapboxgl and still get the error. I am very new to Micasense, multispectral imagery and Python, so forgive me if I am doing something dumb! I have searched online and in the Micasense Knowledgebase and have not found anything helpful. Thanks in advance!


ModuleNotFoundError Traceback (most recent call last)
in
6 import pyzbar.pyzbar as pyzbar
7 import matplotlib.pyplot as plt
----> 8 import mapboxgl
9
10 print()

~\Anaconda3\envs\micasense\lib\site-packages\mapboxgl_init_.py in
----> 1 from .viz import CircleViz, GraduatedCircleViz, HeatmapViz, ClusteredCircleViz, ImageViz, RasterTilesViz, ChoroplethViz, LinestringViz
2
3 version = "0.10.1"
4 all = ['CircleViz', 'GraduatedCircleViz', 'HeatmapViz', 'ClusteredCircleViz', 'ImageViz', 'RasterTilesViz', 'ChoroplethViz', 'LinestringViz']

~\Anaconda3\envs\micasense\lib\site-packages\mapboxgl\viz.py in
6
7 import numpy
----> 8 import requests
9
10 from mapboxgl.errors import TokenError

ModuleNotFoundError: No module named 'requests'

How to uninstall the whole micasense package?

Hi guys! There is a lot of information on how to install the environment but I can't find any information about removing. Can you give me a point in the right direction on how to remove the installed files?

Thanks a lot in advance!

export image with ndvi or ndre in .TIFF

hello, I would like to know how to export an NDVI image. the .tiff file for analysis in QGIS or PIX4D, because, in the alignment tutorial leaves only one image with all the bands together. Thanks

What is the difference between {XMP:DarkRowValue} and {EXIF:BlackLevel}?

Are these supposed to be the same? I don't understand why my {EXIF:BlackLevel} is always 4800 4800 4800 4800. From my understanding the black levels of the covered pixels should also vary from image to image. They are always the same. The {XMP:DarkRowValue} on the other hands shows different values in each image. So my guess would be that these are the correct values?

BTW: Thank you for the tutorial and code release on github. I always wanted to perform radiometric calibration myself in python, but didn't know how to approach it.

Correcting DLS readings for orientations

Dear,

In Tutorial 3 (DLS Sensor Basic Usage) under the part "Correcting DLS readings for orientations", there is written:
dls_irr = untilted_direct_irr * (percent_diffuse + np.cos (solar_elevation))

Is it possible in the last term, np.cos (solar_elevation) should be replaced by np.cos (np.pi/2 - solar_elevation)?

The solar_elevation is taken from PySolar (altitude) and this is referred to the horizontal plane while for the correction, I think an angle referred to zenith is supposed. Otherwise, the lower the sun is (i.e. lower altitude), the higher the computed irradiance on the ground will be.

Maybe I am missing something here. In both cases, it is meaningful for me to have this solved/explained.

Many thanks!

irradiance not defined

I followed the operation showed in Alignment.html,but error occurred.

warp_matrices, alignment_pairs = imageutils.align_capture(capture, max_iterations=10)
File "./micasense/imageutils.py", line 101, in align_capture
capture.images[ref_index].reflectance()).astype('float32')
File "/home/pengyaoyao/project/uav_registration/imageprocessing/micasense/image.py", line 135, in reflectance
raise RuntimeError("Provide a band-specific spectral irradiance to compute reflectance")
RuntimeError: Provide a band-specific spectral irradiance to compute reflectance

irradiance is defined by what? I haven't found.

Error in alignment of images in new example.

I was looking at the new updates to git and testing the tutorials with different images, I refer to the notebook Alignment-RigRelatives, where if you change the images detects the following error "Panels not detected in all images". It may be because the code expects to receive 6 bands, but in the case of the rededge it has 5. A strange thing that also happens is that if I try to find the panel with the example panel.py each image works well.
with this images
https://drive.google.com/drive/folders/18uh_zQo6hwKIocRQ9x0khYnBqrfycuyI?usp=sharing

pytest.py failed test

Hello!
Can you please solve this problem?
My command pytest.py . failed, all packages are installed
`/imageprocessing$ conda activate micasense
(micasense)
/imageprocessing$ pytest .
============================= test session starts ==============================
platform linux -- Python 3.6.7, pytest-4.0.1, py-1.7.0, pluggy-0.8.0
rootdir: /home/antigr/imageprocessing, inifile: pytest.ini
collected 79 items

tests/test_capture.py FFFFFFFFFFFFFFFF [ 20%]
tests/test_dls.py F....... [ 30%]
tests/test_image.py ........... [ 44%]
tests/test_imageset.py FFF [ 48%]
tests/test_metadata.py ............................... [ 87%]
tests/test_panel.py FFFFFFFFFF [100%]

=================================== FAILURES ===================================
_______________________________ test_from_images _______________________________

def test_from_images():
  imgs = [image.Image(fle) for fle in file_list()]

E _pytest.warning_types.RemovedInPytest4Warning: Fixture "file_list" called directly. Fixtures are not meant to be called directly, are created automatically when test functions request them as parameters. See https://docs.pytest.org/en/latest/fixture.html for more information.

tests/test_capture.py:47: RemovedInPytest4Warning
`

... and there was more and more same issues
i tried to reinstall all but it didnt help,
thank!

Applied in new dataset

I have your code on given sample data, and result the same as you--pixel from DN value to reflectance, and merged images have no ghosting.

Fine, and then I test code on Micasense Sample data[website], with some changes for sets of images, but results are totally not acceptable. As following image, merged rgb bands and nir/red/green bands.
img_0101_rgb
img_0101_cir

The panel_reflectance_by_band are set [0.67, 0.69, 0.68, 0.61, 0.67] , isn't this problem right?

What might cause this result, I don't understand. And whether those code could apply on other fights and images of micasense camera.
@poynting

imageutils multiprocessing

Hello,

I have encountered an error in

imageutils.align_capture

in line

multiprocessing.set_start_method('spawn')

where it returns a context already set error. I have solved this by adding force=True to set_start_method (see below) and the function runs fine now:

multiprocessing.set_start_method('spawn', force=True)

Ciaran

merged images generate ghosting

I used micasense images for mosaic through opendronemap , and opendronemap only received three-band '*.jpg' images. In order to get RGB mosaic images and NDVI mosaic images I had done operations, which is as follows:

  1. merged blue/green/red images into one
  2. calculated reflectance for red/nir/rededge band , and merged them ,then plus 255.0 for each pixel to show images in *.jpg
  3. stitching in opendronemap

but ghosts appeared in merged images, and I stop in step 2 to find how to solve the problem. merge results are as follows.
step 1 result:
img_0001_rgb
step 2 result:
img_0001_ref

anybody know how to solve the problem?

In addition, specific panel calibration aim at this specific images or specific aircraft or specific scene or others?
# Our panel calibration by band (from MicaSense for our specific panel) panelCalibration = { "Blue": 0.67, "Green": 0.69, "Red": 0.68, "Red edge": 0.67, "NIR": 0.61 }

Update readme.md to provide instructions for installing as a module

Let's update the documentation to capture that the library can be installed as a module. We should include an explanation of the pip install -e . or python setup.py develop syntax to capture that many developers may want to install in place so they can continue to update and develop the library code.

JSONDecodeError: Expecting value: line 1 column 1 (char 0)

Successfully imported all required libraries.

Successfully executed exiftool.

Successful for the above. But got an error for the below

from micasense.image import Image
imagePath = os.path.join('.','data','0000SET','000')
imageName = glob.glob(os.path.join(imagePath,'IMG_0000_1.tif'))[0]

img = Image(imageName)

JSONDecodeError                           Traceback (most recent call last)
<ipython-input-3-9c25cd451476> in <module>
      3 imageName = glob.glob(os.path.join(imagePath,'IMG_0000_1.tif'))[0]
      4 
----> 5 img = Image(imageName)

C:\Windows\System32\imageprocessing\micasense\image.py in __init__(self, image_path, exiftool_obj)
     67             raise IOError("Provided path is not a file: {}".format(image_path))
     68         self.path = image_path
---> 69         self.meta = metadata.Metadata(self.path, exiftool_obj=exiftool_obj)
     70 
     71         if self.meta.band_name() is None:

C:\Windows\System32\imageprocessing\micasense\metadata.py in __init__(self, filename, exiftoolPath, exiftool_obj)
     47             raise IOError("Input path is not a file")
     48         with exiftool.ExifTool(self.exiftoolPath) as exift:
---> 49             self.exif = exift.get_metadata(filename)
     50 
     51     def get_all(self):

~\Anaconda3\envs\micasense\lib\site-packages\exiftool.py in get_metadata(self, filename)
    266         documentation of :py:meth:`execute_json()`.
    267         """
--> 268         return self.execute_json(filename)[0]
    269 
    270     def get_tags_batch(self, tags, filenames):

~\Anaconda3\envs\micasense\lib\site-packages\exiftool.py in execute_json(self, *params)
    250         """
    251         params = map(fsencode, params)
--> 252         return json.loads(self.execute(b"-j", *params).decode("utf-8"))
    253 
    254     def get_metadata_batch(self, filenames):

~\Anaconda3\envs\micasense\lib\json\__init__.py in loads(s, encoding, cls, object_hook, parse_float, parse_int, parse_constant, object_pairs_hook, **kw)
    346             parse_int is None and parse_float is None and
    347             parse_constant is None and object_pairs_hook is None and not kw):
--> 348         return _default_decoder.decode(s)
    349     if cls is None:
    350         cls = JSONDecoder

~\Anaconda3\envs\micasense\lib\json\decoder.py in decode(self, s, _w)
    335 
    336         """
--> 337         obj, end = self.raw_decode(s, idx=_w(s, 0).end())
    338         end = _w(s, end).end()
    339         if end != len(s):

~\Anaconda3\envs\micasense\lib\json\decoder.py in raw_decode(self, s, idx)
    353             obj, end = self.scan_once(s, idx)
    354         except StopIteration as err:
--> 355             raise JSONDecodeError("Expecting value", s, err.value) from None
    356         return obj, end

JSONDecodeError: Expecting value: line 1 column 1 (char 0)

non-alignment of the rededge and NIR bands

I am testing the results of the multispectral image with combined bands in matlab, and at the moment of testing this I can see that the bands R,G,B if they are aligned (figure 2) on the other hand if we analyze the bands NIR and RedEdge we can see that they are not alienated (figure 1) from each other therefore, they have not been aligned (geometric correction).
In order to determine if they are aligned I use matlab with this command: imshowpair(NIR,rededge,'blend');
-Any idea why this happens? or is it normal?
-Doesn't it affect the analysis of the vegetative index?

Figura 1
figura 2

Colorbar covers Image

I have problems with the plotting tools like plotwithcolorbar. The colorbar always covers the image.
colorbar
Not really an expert in Python so I have no idea what the problem might be.
Anyone knows how to fix this?

About mathematical expression in Atlas

Thanks for the reference examples of NDVI and NDRE!
I also want to know the mathematical expression of ChlorophyllMap, Weeds2 and Weeds1 as displayed in the Atlas application.
Could you teach me?

Applying warp to rest of image set

More of a question than an issue.

Which variable is required to apply a 'good' alignment transform to another capture and indeed the remaining dataset?

Is it simply a case of using 'warp_matrices' from a good aligment to the next capture?

How much time is needed for aligning images that are provided in repository ?

How much time is needed for aligning images that are provided in repository ?
I am following step by step workflow to align images, but when it comes to

'Alinging images. Depending on settings this can take from a few seconds to many minutes'

there appears 4 same windows as from capture.plot_undistorted_reflectance(panel_irradiance). I tried waiting as long as I could, but nothing happened. Please, provide with appropriate solution.

P.S. Can't upload screenshot, it says something went really wrong, and we can't process that file,

Region of interest

hello, I would like to know if there is a way to select a particular region on a multispectral image to be able to determine an ndvi index quantity point on a multispectral image.

Correction of Altum identical to RedEdge?

Hi,
a question: I am working with Micasense Altum and wonder if the here offered image processing snippets also work for this camera type?
Also in terms of distortion and vignette correction, and the radiometric correction?

Do I have to take care of any differences between the two camera types?
Thanks!
balumbala

detected_panel_count is always 5

Running the following snippet on the altum branch I get 5, for a non panel capture

import os
import glob

from micasense.capture import Capture

img_path = os.path.join('.','data','0000SET','000')
img_filenames = glob.glob(os.path.join(img_path, 'IMG_0001_*.tif'))

cap = Capture.from_filelist(img_filenames)
print(cap.detect_panels())

Image align - Iteration

Hi I'm using the Micasense Lib in github to create a script able to process and get a stack tif file for every single file token from a Micasense Rededge. I used you sample code and sample data and added a simple iteration over the file names to process every file in folder. But i get this error:

"---------------------------------------------------------------------------
RemoteTraceback Traceback (most recent call last)
RemoteTraceback:
"""
Traceback (most recent call last):
File "C:\Anaconda3\envs\micasense_pnnl\lib\multiprocessing\pool.py", line 119, in worker
result = (True, func(*args, **kwds))
File "c:\micasense\imageprocessing-master\micasense\imageutils.py", line 85, in align
criteria)
cv2.error: OpenCV(3.4.1) C:\bld\opencv_1520732670222\work\opencv-3.4.1\modules\video\src\ecc.cpp:540: error: (-7) The algorithm stopped before its convergence. The correlation is going to be minimized. Images may be uncorrelated or non-overlapped in function cv::findTransformECC
"""
The above exception was the direct cause of the following exception:
error Traceback (most recent call last)
in ()
321 print("Alinging images. Depending on settings this can take from a few seconds to many minutes")
322 # Increase max_iterations to 1000+ for better results, but much longer runtimes
--> 323 warp_matrices, alignment_pairs = imageutils.align_capture(capture, max_iterations=1000)
324
325 print("Finished Aligning, warp matrices:")
c:\micasense\imageprocessing-master\micasense\imageutils.py in align_capture(capture, ref_index, warp_mode, max_iterations, epsilon_threshold)
115 #multiprocessing.set_start_method('spawn')
116 pool = multiprocessing.Pool(processes=multiprocessing.cpu_count())
--> 117 for i,mat in enumerate(pool.imap_unordered(align, alignment_pairs)):
118 warp_matrices[mat['match_index']] = mat['warp_matrix']
119 print("Finished aligning band {}".format(mat['match_index']))
C:\Anaconda3\envs\micasense_pnnl\lib\multiprocessing\pool.py in next(self, timeout)
733 if success:
734 return value
--> 735 raise value
736
737 next = next # XXX
error: OpenCV(3.4.1) C:\bld\opencv_1520732670222\work\opencv-3.4.1\modules\video\src\ecc.cpp:540: error: (-7) The algorithm stopped before its convergence. The correlation is going to be minimized. Images may be uncorrelated or non-overlapped in function cv::findTransformECC"

When i try to align the photos of the 5 bands, some o the sample images throw this error. Is it possible to be same problem with the sample data. Or a python error?
My code can do align over the iteration but after 8 or 9 files i get this error. When i test my code with a single image i get the same error with some files.
I already replaced all the sample data from the zip file, but still get the same error.
Thank you.

Exif Tags for radiometric calibration missing

Hi
I'd like to try out your workflow. Unfortunately my Exif tags do not include 'XMP:RadiometricCalibration' nor 'XMP:VignettingCenter' nor 'XMP:VignettingPolynomial'. Firmware is v1.5.30

Are those information available on every MicaSense camera or do I have to purchase them separately?

By the way I have data from a professional radiometric calibration in the lab (w/ Integrating sphere) for different sets of exposure times & illumination conditions. So i would be glad to transform our own data into a1, a2, a3 and V, x, y respectively if this is possible.

Any help is much appreciated

About error on camera firmware.

When I use micasense library to deal with the data captured by our RedEdge-M, but the following error occurred.

ValueError: Library requires images taken with camera firmware v2.1.0 or later. Upgrade your camera firmware to use this library.

Is there any method to solve this problem by using old version of the source ?
Or the only method is to update the camera firmware ?

Correction of lens distortion not working for RedEdge-M

I am using the whole camera calibration workflow, as shown in the tutorial, for a RedEdge camera with firmware v2.1.3, without any problems.

But when I apply the same workflow for images from the RedEdge-M camera (firmware v3.3.0), the lens distortion correction produces a very weird result (see below).

image

I figured, that there must be a problem in the EXIF tags that are used for the calibration. Indeed there is a interesting difference in the tag "Perspective Focal Length":
RedEdge-M: Perspective Focal Length: 5.4418739708109527
RedEdge: Perspective Focal Length : 1459.7272592972727

All other tags are in a similar value range (see below exif files)
rededge_exif.txt
rededge_m_exif.txt

Here is the RedEdge-M image I used, to reproduce this behavior:
https://goo.gl/pPKkRm

California orchard data

Which of the panel images in the large dataset in 'ImageSet Extended Examples notebook' are pre-flight calibration and post flight calibration?

They are all in the same folder(000) so it is not clear what the arrangement is.

Panel snippet identifies wrong area in image

I've finished running through the environment setup for the Micasense utilities. After successfully running the test calibration panel code that identifies the panel, I decided to try in on an image I've taken with the RedEdge-M. The code successfully runs and it correctly identifies the QR code on the panel, however it draws the blue box around the wrong portion of the panel (in the grass or elsewhere) as opposed to the calibrated surface it self. I've replicated this error on a number of different panel images from different dates. Below is an output of that code:

output_1_1

The only thing I've changed from the example panels code snippet are the imagePath and imageName variables:

imagePath = 'D:/Alaska_UAV_Flights_&_Specs/BRW_CALM/20180721/MicaSense/0025SET/000'
imageName = glob.glob(os.path.join(imagePath,'IMG_0004_4.tif'))[0]

Image alignment for multiple flight_captures is throwing an error "RuntimeError: context has already been set"

I have done all the panel calibration etc and got the dls_correction from panel and DLS. I've worked through the Alignment.ipynb and wanted to replicate it for multiple flight_captures and it's not working. I pieced together all the code from Alignment.ipynb and added some minor modifications. I'd really appreciate if someone could tell me where I'm wrong. It's going through the captures and plotting the reflectance images but fails when it comes to alignment. Code below.

for cap1 in flight_captures:

cap1.plot_undistorted_reflectance(cap1.dls_irradiance()*dls_correction[0])
print("Aligning images. Depending on settings this can take from a few seconds to many minutes")

# Increase max_iterations to 1000+ for better results, but much longer runtimes
warp_matrices, alignment_pairs = imageutils.align_capture(cap1, max_iterations=200)
print("Finished Aligning, warp matrices:")
for i,mat in enumerate(warp_matrices):
    print("Band {}:\n{}".format(i,mat))
    
dist_coeffs = []
cam_mats = []
# create lists of the distortion coefficients and camera matricies
for i,img in enumerate(cap1.images):
    dist_coeffs.append(img.cv2_distortion_coeff())
    cam_mats.append(img.cv2_camera_matrix())
# cropped_dimensions is of the form:
# (first column with overlapping pixels present in all images, 
#  first row with overlapping pixels present in all images, 
#  number of columns with overlapping pixels in all images, 
#  number of rows with overlapping pixels in all images   )
cropped_dimensions = imageutils.find_crop_bounds(cap1.images[0].size(), 
                                             warp_matrices, 
                                             dist_coeffs, 
                                             cam_mats)
im_aligned = imageutils.aligned_capture(warp_matrices, alignment_pairs, cropped_dimensions)

# Create a normalized stack for viewing
im_display = np.zeros((im_aligned.shape[0],im_aligned.shape[1],5), dtype=np.float32 )

rows, cols, bands = im_display.shape
driver = gdal.GetDriverByName('GTiff')
fileno = 'test'+ '_' +'aligned' + '_' +j+'.tif'
j+1
outputImagePath = os.path.join('.','data', 'test_output')
outputImageName = os.path.join(outputImagePath, fileno)
print(outputImageName)
outRaster = driver.Create(**outputImageName**, cols, rows, bands, gdal.GDT_Float32)

for i in range(0,bands):
    outband = outRaster.GetRasterBand(i+1)
    outband.WriteArray(im_aligned[:,:,i])
    outband.FlushCache()

outRaster = None   

Error below

RuntimeError Traceback (most recent call last)
in ()
4 print("Aligning images. Depending on settings this can take from a few seconds to many minutes")
5 # Increase max_iterations to 1000+ for better results, but much longer runtimes
----> 6 warp_matrices, alignment_pairs = imageutils.align_capture(cap1, max_iterations=200)
7 print("Finished Aligning, warp matrices:")
8 for i,mat in enumerate(warp_matrices):

C:\imageprocessing-master\micasense\imageutils.py in align_capture(capture, ref_index, warp_mode, max_iterations, epsilon_threshold)
112
113 #required to work across linux/mac/windows, see https://stackoverflow.com/questions/47852237
--> 114 multiprocessing.set_start_method('spawn')
115 pool = multiprocessing.Pool(processes=multiprocessing.cpu_count())
116 for i,mat in enumerate(pool.imap_unordered(align, alignment_pairs)):

~\AppData\Local\Continuum\anaconda3\envs\micasense\lib\multiprocessing\context.py in set_start_method(self, method, force)
240 def set_start_method(self, method, force=False):
241 if self._actual_context is not None and not force:
--> 242 raise RuntimeError('context has already been set')
243 if method is None and force:
244 self._actual_context = None

RuntimeError: context has already been set

Recommend Projects

  • React photo React

    A declarative, efficient, and flexible JavaScript library for building user interfaces.

  • Vue.js photo Vue.js

    🖖 Vue.js is a progressive, incrementally-adoptable JavaScript framework for building UI on the web.

  • Typescript photo Typescript

    TypeScript is a superset of JavaScript that compiles to clean JavaScript output.

  • TensorFlow photo TensorFlow

    An Open Source Machine Learning Framework for Everyone

  • Django photo Django

    The Web framework for perfectionists with deadlines.

  • D3 photo D3

    Bring data to life with SVG, Canvas and HTML. 📊📈🎉

Recommend Topics

  • javascript

    JavaScript (JS) is a lightweight interpreted programming language with first-class functions.

  • web

    Some thing interesting about web. New door for the world.

  • server

    A server is a program made to process requests and deliver data to clients.

  • Machine learning

    Machine learning is a way of modeling and interpreting data that allows a piece of software to respond intelligently.

  • Game

    Some thing interesting about game, make everyone happy.

Recommend Org

  • Facebook photo Facebook

    We are working to build community through open source technology. NB: members must have two-factor auth.

  • Microsoft photo Microsoft

    Open source projects and samples from Microsoft.

  • Google photo Google

    Google ❤️ Open Source for everyone.

  • D3 photo D3

    Data-Driven Documents codes.