Giter VIP home page Giter VIP logo

3dmppe_posenet_release's Introduction

PoseNet of "Camera Distance-aware Top-down Approach for 3D Multi-person Pose Estimation from a Single RGB Image"

Introduction

This repo is official PyTorch implementation of Camera Distance-aware Top-down Approach for 3D Multi-person Pose Estimation from a Single RGB Image (ICCV 2019). It contains PoseNet part.

What this repo provides:

Dependencies

This code is tested under Ubuntu 16.04, CUDA 9.0, cuDNN 7.1 environment with two NVIDIA 1080Ti GPUs.

Python 3.6.5 version with Anaconda 3 is used for development.

Quick demo

You can try quick demo at demo folder.

  • Download the pre-trained PoseNet in here.
  • Prepare input.jpg and pre-trained snapshot at demo folder.
  • Set bbox_list at here.
  • Set root_depth_list at here.
  • Run python demo.py --gpu 0 --test_epoch 24 if you want to run on gpu 0.
  • You can see output_pose_2d.jpg and new window that shows 3D pose.

Directory

Root

The ${POSE_ROOT} is described as below.

${POSE_ROOT}
|-- data
|-- demo
|-- common
|-- main
|-- tool
|-- vis
`-- output
  • data contains data loading codes and soft links to images and annotations directories.
  • demo contains demo codes.
  • common contains kernel codes for 3d multi-person pose estimation system.
  • main contains high-level codes for training or testing the network.
  • tool contains data pre-processing codes. You don't have to run this code. I provide pre-processed data below.
  • vis contains scripts for 3d visualization.
  • output contains log, trained models, visualized outputs, and test result.

Data

You need to follow directory structure of the data as below.

${POSE_ROOT}
|-- data
|   |-- Human36M
|   |   |-- bbox_root
|   |   |   |-- bbox_root_human36m_output.json
|   |   |-- images
|   |   |-- annotations
|   |-- MPII
|   |   |-- images
|   |   |-- annotations
|   |-- MSCOCO
|   |   |-- bbox_root
|   |   |   |-- bbox_root_coco_output.json
|   |   |-- images
|   |   |   |-- train2017
|   |   |   |-- val2017
|   |   |-- annotations
|   |-- MuCo
|   |   |-- data
|   |   |   |-- augmented_set
|   |   |   |-- unaugmented_set
|   |   |   |-- MuCo-3DHP.json
|   |-- MuPoTS
|   |   |-- bbox_root
|   |   |   |-- bbox_mupots_output.json
|   |   |-- data
|   |   |   |-- MultiPersonTestSet
|   |   |   |-- MuPoTS-3D.json

To download multiple files from Google drive without compressing them, try this. If you have a problem with 'Download limit' problem when tried to download dataset from google drive link, please try this trick.

* Go the shared folder, which contains files you want to copy to your drive  
* Select all the files you want to copy  
* In the upper right corner click on three vertical dots and select “make a copy”  
* Then, the file is copied to your personal google drive account. You can download it from your personal account.  

Output

You need to follow the directory structure of the output folder as below.

${POSE_ROOT}
|-- output
|-- |-- log
|-- |-- model_dump
|-- |-- result
`-- |-- vis
  • Creating output folder as soft link form is recommended instead of folder form because it would take large storage capacity.
  • log folder contains training log file.
  • model_dump folder contains saved checkpoints for each epoch.
  • result folder contains final estimation files generated in the testing stage.
  • vis folder contains visualized results.

3D visualization

  • Run $DB_NAME_img_name.py to get image file names in .txt format.
  • Place your test result files (preds_2d_kpt_$DB_NAME.mat, preds_3d_kpt_$DB_NAME.mat) in single or multi folder.
  • Run draw_3Dpose_$DB_NAME.m

Running 3DMPPE_POSENET

Start

  • In the main/config.py, you can change settings of the model including dataset to use, network backbone, and input size and so on.

Train

In the main folder, run

python train.py --gpu 0-1

to train the network on the GPU 0,1.

If you want to continue experiment, run

python train.py --gpu 0-1 --continue

--gpu 0,1 can be used instead of --gpu 0-1.

Test

Place trained model at the output/model_dump/.

In the main folder, run

python test.py --gpu 0-1 --test_epoch 20

to test the network on the GPU 0,1 with 20th epoch trained model. --gpu 0,1 can be used instead of --gpu 0-1.

Results

Here I report the performance of the PoseNet.

  • Download pre-trained models of the PoseNetNet in here
  • Bounding boxs (from DetectNet) and root joint coordintates (from RootNet) of Human3.6M, MSCOCO, and MuPoTS-3D dataset in here.

Human3.6M dataset using protocol 1

For the evaluation, you can run test.py or there are evaluation codes in Human36M.

Human3.6M dataset using protocol 2

For the evaluation, you can run test.py or there are evaluation codes in Human36M.

MuPoTS-3D dataset

For the evaluation, run test.py. After that, move data/MuPoTS/mpii_mupots_multiperson_eval.m in data/MuPoTS/data. Also, move the test result files (preds_2d_kpt_mupots.mat and preds_3d_kpt_mupots.mat) in data/MuPoTS/data. Then run mpii_mupots_multiperson_eval.m with your evaluation mode arguments.

MSCOCO dataset

We additionally provide estimated 3D human root coordinates in on the MSCOCO dataset. The coordinates are in 3D camera coordinate system, and focal lengths are set to 1500mm for both x and y axis. You can change focal length and corresponding distance using equation 2 or equation in supplementarial material of my paper.

Reference

@InProceedings{Moon_2019_ICCV_3DMPPE,
author = {Moon, Gyeongsik and Chang, Juyong and Lee, Kyoung Mu},
title = {Camera Distance-aware Top-down Approach for 3D Multi-person Pose Estimation from a Single RGB Image},
booktitle = {The IEEE Conference on International Conference on Computer Vision (ICCV)},
year = {2019}
}

3dmppe_posenet_release's People

Contributors

mks0601 avatar wangzheallen avatar

Stargazers

 avatar  avatar  avatar  avatar  avatar  avatar  avatar  avatar  avatar  avatar  avatar  avatar  avatar  avatar  avatar  avatar  avatar  avatar  avatar  avatar  avatar  avatar  avatar  avatar  avatar  avatar  avatar  avatar  avatar  avatar  avatar  avatar  avatar  avatar  avatar  avatar  avatar  avatar  avatar  avatar  avatar  avatar  avatar  avatar  avatar  avatar  avatar  avatar  avatar  avatar  avatar  avatar  avatar  avatar  avatar  avatar  avatar  avatar  avatar  avatar  avatar  avatar  avatar  avatar  avatar  avatar  avatar  avatar  avatar  avatar  avatar  avatar  avatar  avatar  avatar  avatar  avatar  avatar  avatar  avatar  avatar  avatar  avatar  avatar  avatar  avatar  avatar  avatar  avatar  avatar  avatar  avatar  avatar  avatar  avatar  avatar  avatar  avatar  avatar  avatar

Watchers

 avatar  avatar  avatar  avatar  avatar  avatar  avatar  avatar  avatar  avatar  avatar  avatar  avatar  avatar  avatar  avatar  avatar  avatar  avatar  avatar  avatar  avatar  avatar  avatar  avatar  avatar

3dmppe_posenet_release's Issues

MSCOCO dataset download link

Hello, can you provides the link for MSCOCO dataset?

Even if images and annotations are from coco2017,
I think the "bbox" link is still missing.

Thanks.

Training difference between PoseNet and Integral-Human-Pose

Hello! Thanks for your great work!
I use the bbox and root information you provided to test a model trained on Integral-Human-Pose project(https://github.com/JimmySuen/integral-human-pose), but I got pool performance(MPJPE 130mm using Protocol2).
If I change the bbox to gt bbox and use the root information you provided, I got 54mm.
I thought the reason would be the difference of bbox of Human3.6M during training, so I process the bbox as you did and train the model. But I still got pool performance(MPJPE 123mm using Protocol2).
Can you help me find out the reason why bbox influence so much? Can you explain the main difference between your PoseNet and the Integral-Human-Pose project?

Problem with Human36m Data

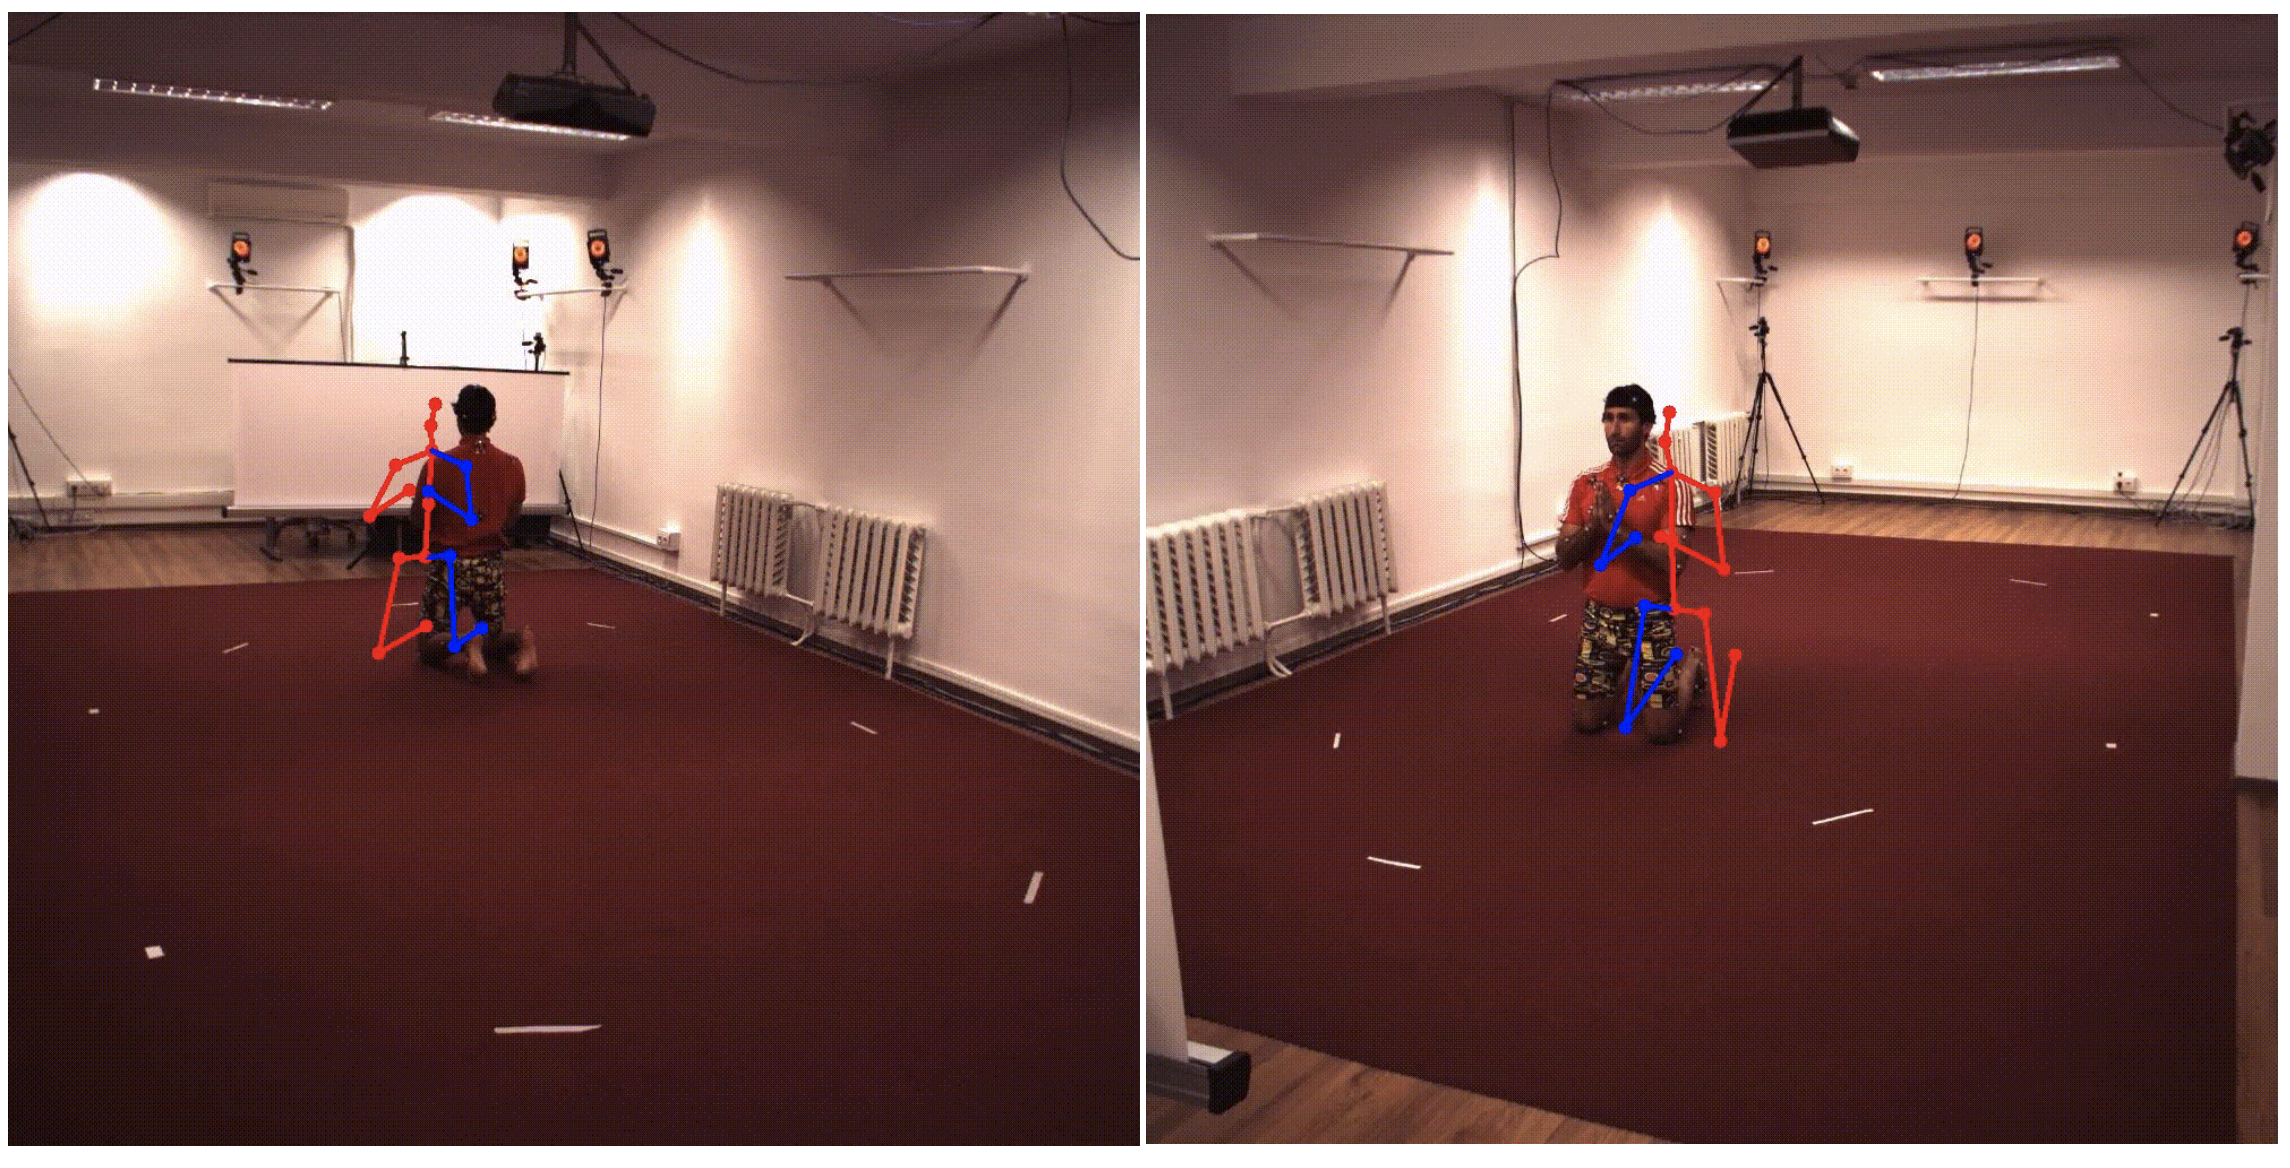
Hi, thank you for sharing the data. I observe a weird problem that the 2D pose was not matched to the person for some action. This is the visualization of subject9, action sittingDown, subact2.
image

Do you observe the same issue? Is this a problem with the original Human36M Dataset?

Question about dataset generation

Hi,

Sorry to brother you again. I have another question: How did you generate the processed MuCO-3DHP dataset? Did you use the official MATLAB code to generate these data? I tried their code, but the quality of generated data are worse than yours.

NameError

What is the reason for this situation “NameError: name 'mem_info' is not defined”

how to create my own data for test

I need to use this project to test on random video frames, but I don't know how to get data from random video, and now I can only do the visualized test for MuPoTs, could you help me

Some questions about the training data

Hello, thank you very much for your excellent work and code!
I would like to ask that have you retrained the LCR model and single-shot model with the same traing data of 3DMPPE-posenet, or you just use the reported results of these papers on MuPoTS for the comparison?
Besides, I'd like to ask that have you tried to train just on MuCo and test on MuPoTS, and what is the result? How much does the single person dataset(H3.6M) and 2D pose dataset(COCO, MPII) help the training?
Thanks again!

Human36m Protocol 2 error (MPJPE) >> tot: 74.17, which is much larger than 53.3 in the paper

Hi, i followed your instruction and retrained the posenet, but the result of human36m protocol 2 was not the same as the table 4 in the paper. here is my result:
>>> Using GPU: 0
01-08 04:44:22 Creating dataset...
Load data of H36M Protocol 2
creating index...
index created!
Get bounding box and root from groundtruth
01-08 04:44:38 Load checkpoint from /home/***/3DMPPE_POSENET_RELEASE/main/../output/model_dump/snapshot_24.pth.tar
01-08 04:44:38 Creating graph...
100% 272/272 [01:09<00:00, 2.02it/s]
Evaluation start...
Protocol 2 error (MPJPE) >> tot: 74.17
Directions: 67.14 Discussion: 79.61 Eating: 64.75 Greeting: 67.06 Phoning: 71.20 Posing: 65.54 Purchases: 71.40 Sitting: 92.58 SittingDown: 109.11 Smoking: 73.97 Photo: 80.40 Waiting: 72.86 Walking: 52.37 WalkDog: 73.72 WalkTogether: 57.12

can you help me? what shall i do if i wanna train the posenet and get a similar MPJPE (53.3)?
Thank you very much!

where is mpii_mupots_config?

hello~,where is mpii_mupots_config file?

mpii_mupots_config is code in mpii_mupots_multiperson_eval.m, maybe mpii_mupots_config is a .m file, when i run the mpii_mupots_multiperson_eval.m, it will be wrong.

thanks!

Where do I get the file "bbox_root_human36m_output.json"?

I'm trying to run the test code with the model pre-trained on H36M Protocol 1. The download links in the "Results" section of the README are different than the one bbox_root_human36m_output.json required by the code.

The files linked in the README is bbox_human36m_output.json. I tried re-naming it to bbox_root_human36m_output.json to see if it was just a naming error, however I get the following errors then:

  File "test.py", line 41, in main
    tester._make_batch_generator()
  File "/home/sehgal.n/3DMPPE_POSENET_RELEASE/main/../common/base.py", line 136, in _make_batch_generator
    testset = eval(cfg.testset)("test")
  File "/home/sehgal.n/3DMPPE_POSENET_RELEASE/main/../data/Human36M/Human36M.py", line 31, in __init__
    self.data = self.load_data()
  File "/home/sehgal.n/3DMPPE_POSENET_RELEASE/main/../data/Human36M/Human36M.py", line 86, in load_data
    bbox_root_result[str(annot[i]['image_id'])] = {'bbox': np.array(annot[i]['bbox']), 'root': np.array(annot[i]['root_cam'])}

Thanks!

Some questions about the process of 'joint_img[:, 2]'

Hi, when doing the data augment, you normalized the depth to -1~1 by diving bbox_3d_shape[0] as the "joint_img[i, 2] /= (cfg.bbox_3d_shape[0]/2.) # expect depth lies in -bbox_3d_shape[0]/2 ~ bbox_3d_shape[0]/2 -> -1.0 ~ 1.0", does it mean the depths in camera space are in the range of [-1000, 1000]? And why?

Then you did 'joint_img[:, 2] = joint_img[:, 2] * cfg.depth_dim', why did you do this?

MRPE and MPJPE

hello~
i run your code PoseNet and RootNet. this is the result of MRPE and MPJPE on h36m dataset.
image
image
image

why the result is lower than your paper? ...maybe i was wrong in some place?..
thanks.

Problem with the loss

As I see the coord in ResPoseNet (model.py) is something like this:
[['Head_Top-pred-Coord_X-sum over all people', ....],['Head_Top-pred-Coord_Y-sum over all people', ....],['Head_Top-pred-Coord_Z-sum over all people', ....]]

and target_coord is something like this:
[['Head_Top-real-Coord_X-sum over all people', ....],['Head_Top-real-Coord_Y-sum over all people', ....],['Head_Top-real-Coord_Z-sum over all people', ....]]

But if I'm correct you can't do:
coord-target_coord

This example shows the problem:
Person_1:
Head_Top-pred-Coord_X = 0.6
Head_Top-real-Coord_X = 0.5

Person_2:
Head_Top-pred-Coord_X = 0.5
Head_Top-real-Coord_X = 0.6

Sum-Head_Top-pred-CoordX = 1.1
Sum-Head_Top-real-CoordX = 1.1

Sum-Sum = 0
But MPJPE should be 0.1.

Do you understand what I mean?
PS: Sorry for my bad english.

Demo code for posenet

Hi,
Thanks for your amazing work.
I want to test posenet on a single image(already cropped by Detectron).Could you please share a demo script to visualization?

Is the order of data changed in MuPoTS when I select the "use_gt_bbox" mode?

Hello! I want to evaluate my modified PoseNet with 3DPCK in MuPoTS, it needs to be saved into .mat and evaluate in Matlab. When I select the "use_gt_bbox" mode, the results are very bad. If I evaluate the mpjpe directly, it seems to have a good result. Is there any changing, missing or Python-Matlab-mismatch with "use_gt_bbox" in MuPoTS data?

KeyError: 'bbox_root'

Hi, man.
I need your help.
When i test or train the model, i meet the KeyError as below:

(base) ➜ main git:(master) ✗ python test.py --gpu 0 --test_epoch 24

Using GPU: 0
12-02 09:40:59 Creating dataset...
creating index...
index created!
Get bounding box and root from ../data/Human36M/bbox_root/bbox_root_human36m_output.json
Traceback (most recent call last):
File "test.py", line 82, in
main()
File "test.py", line 41, in main
tester._make_batch_generator()
File "/home/user/3DMPPE_POSENET_RELEASE/main/../common/base.py", line 136, in _make_batch_generator
testset = eval(cfg.testset)("test")
File "/home/user/3DMPPE_POSENET_RELEASE/main/../data/Human36M/Human36M.py", line 31, in init
self.data = self.load_data()
File "/home/user/3DMPPE_POSENET_RELEASE/main/../data/Human36M/Human36M.py", line 86, in load_data
bbox_root_result[str(annot[i]['image_id'])] = {'bbox_root': np.array(annot[i]['bbox_root']), 'root': np.array(annot[i]['root_cam'])}
KeyError: 'bbox_root'
(base) ➜ main git:(master) ✗ pwd
/home/user/3DMPPE_POSENET_RELEASE/main
(base) ➜ main git:(master) ✗ python train.py --gpu 0
Using GPU: 0
12-02 09:48:19 Creating dataset...
creating index...
index created!
Get bounding box and root from groundtruth
Traceback (most recent call last):
File "train.py", line 112, in
main()
File "train.py", line 33, in main
trainer._make_batch_generator()
File "/home/user/3DMPPE_POSENET_RELEASE/main/../common/base.py", line 99, in _make_batch_generator
trainset_loader.append(DatasetLoader(eval(cfg.trainset[i])("train"), ref_joints_name, True, transforms.Compose([
File "/home/user/3DMPPE_POSENET_RELEASE/main/../data/Human36M/Human36M.py", line 31, in init
self.data = self.load_data()
File "/home/user/3DMPPE_POSENET_RELEASE/main/../data/Human36M/Human36M.py", line 121, in load_data
bbox = np.array(ann['bbox_root'])
KeyError: 'bbox_root'

After this, i checked the Json file, i found no key called 'bbox_root'
what shall i do next?
Thank you very much!

about the vis matlab code

could you told me how to run the matlab code:
this one is wrong: preds_2d_kpt = load('preds_2d_kpt_mupots.mat');
and 'MultiPersonTestSet\TS17_img_000000' is invalid

How to visualize the 3d skeleton?

Hi, thanks for your great work!
I have already got "bbox_root_pose_human36m_output.json" file by run "python test.py --gpu 0 --test_epoch 24". We could get positions(x,y,z) of body joints by parsing "bbox_root_human36m_output.json" and "bbox_root_pose_human36m_output.json". But how to show these infomation in a picture? I am not clear what the parameters (kpt_3d, kpt_3d_vis, kps_lines) under "./common/utils/vis.py" exactly mean.
def vis_3d_skeleton(kpt_3d, kpt_3d_vis, kps_lines, filename=None):

what's more, how to get test result files (preds_2d_kpt_$DB_NAME.mat, preds_3d_kpt_$DB_NAME.mat)? Looking forward to your reply.

Unexpected Keys in state_dict when running on CPU

i wrote a custom code which IMO is more or less the same with the original code to load the weights in the model and return the model with loaded weight, like so:

def modelLoader(modelpath,resnet_type,joint_num,gpu):
    model = get_pose_net(resnet_type,False,joint_num)
    ckpt = torch.load(modelpath)
    model.load_state_dict(ckpt['network'])
    model.eval()
    if gpu != "-1":
        device = torch.device(f"cuda:{gpu}")
        model.cuda(device=device)
    return model

I downloaded the pretrained models and tried loading the Human3.6M one in the Protocol1 folder, and met this error caused by basically every layer names having "module." preprended to them. For example, the loader expected "head.deconv_layers.7.running_var" but in the provided pretrained weight, i got "module.head.deconv_layers.7.running_var"

Is this intended?

For a quick hack, i basically just loop over the dict and remove the prepended module, but i just want to know if this is intended and i somehow misused something somewhere

Edit : This.. is basically what happens when you use pytorch on multi GPU settings. I have no idea the exact detail as i am not familiar with pytorch, but the module. prefix is caused by that.

This is an example script so you can easily filter remove the prefix, so you can easily load.

def convert(source,dest):
    statedict = torch.load(source)
    networkdict = statedict['network']
    res = []
    for k, v in tqdm(networkdict.items()):
        if k.split(".")[0] == 'module':
            k = k[7:]
        res.append((k,v))
    resdict = OrderedDict(res)

    torch.save(resdict,dest)

about the confidence score of keypoints

hi, it is really a great work!

But I have a question about the output. It is clearly the keypoints coordinates can be got from the volumetric heatmaps, but if I can got the confidence score about the keypoint? I try to got them by take the max value like the 2d heatmap, but it seems not convincing. Could you give me some advice?

No RootNet Part

Hi, the network seems not to contain RootNet part, sorry I did not find the network to predict \gamma and K for computing the camera-space root depth as described in the paper? Could give some advice?

A question about MUPOTS dataset

I download the annotation file about MUPOTS dataset from your link, the 2D coordination is in keypoints_img, and the corresponding x and y of 3D is the same as keypoints_img, the z comes from keypoints_cam-z. But I found the z is misplaced with real depth position in the corresponding image. Are there any extra steps to do?

About joint learning

I found the huge difference between "joint learning" and "disjoint learning". Do you have ever added some extra losses in "joint learning" except the losses of PoseNet and RootNet, such as global loss which back-project them into the camera coordination and compare with GT camera coordination. Thank you!

normalization

Hello,

Thanks for your great work!

I would like to ask why do you set the mean and std to a fixed number, and how did you get the numbers of:
pixel_mean = (0.485, 0.456, 0.406)
pixel_std = (0.229, 0.224, 0.225)
in cfg ?

Thanks a lot!

Some problem of Human36 dataset.......

Hello, first of all, thank you for your wonderful research, but I found that the download link for the Human36 dataset you provided is broken. Could you please provide a new download address code? thank you very much!!!!!!

how to show the 2D skeleton in the picture with the 3D skeleton

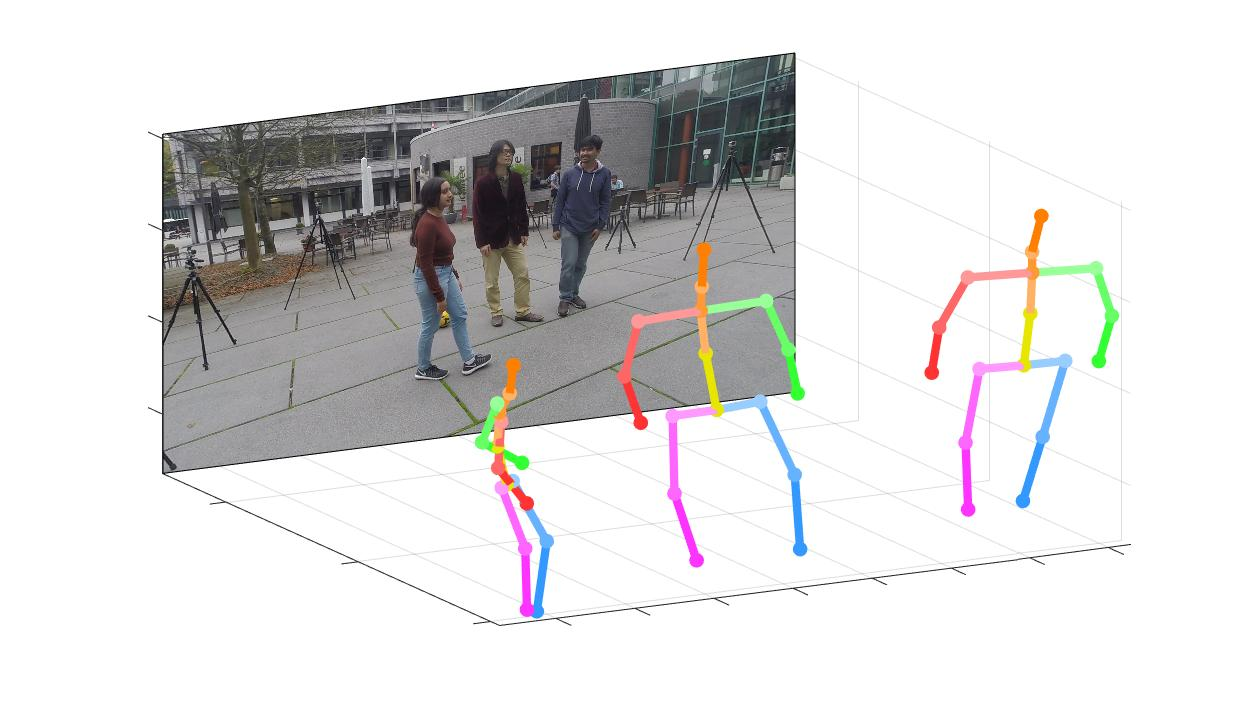
hello, I had done the 3d skeleton with the matlab code, but I also want to realize the same result on the github page gifs. How do I need to do to put the 2D and 3D in the same picture, now I can just see the 3D, and I also delete the "%" before
%img = draw_2Dskeleton(img_path,pred_2d_kpt,num_joint,skeleton,colorList_joint,colorList_skeleton);
img = imread(img_path);
f = draw_3Dskeleton(img,pred_3d_kpt,num_joint,skeleton,colorList_joint,colorList_skeleton);
but the picture is like this
image

Could you tell how to realize like this
image

bbox should be aspect ratio preserved-extended. It is done in RootNet.

rootNet) lulu@IoTLab-002:~/git-hub-packages/POSENET/main$ python test.py --gpu 0-4 --test_epoch 24

Using GPU: 0,1,2,3,4
11-03 05:13:40 Creating dataset...
creating index...
index created!
Get bounding box and root from ../data/Human36M/bbox_root/bbox_root_human36m_output.json
Traceback (most recent call last):
File "test.py", line 82, in
main()
File "test.py", line 41, in main
tester._make_batch_generator()
File "/home/lulu/git-hub-packages/POSENET/main/../common/base.py", line 136, in _make_batch_generator
testset = eval(cfg.testset)("test")
File "/home/lulu/git-hub-packages/POSENET/main/../data/Human36M/Human36M.py", line 31, in init
self.data = self.load_data()
File "/home/lulu/git-hub-packages/POSENET/main/../data/Human36M/Human36M.py", line 118, in load_data
bbox = bbox_root_result[str(image_id)]['bbox'] # bbox should be aspect ratio preserved-extended. It is done in RootNet.
KeyError: '1559752'

Camera parameters

I noticed that you have two repositories with seemingly similar implementation but one with visualisation code and the other without. However, in no-vis code the model takes camera parameters as input, could you explain why the difference?

Also, could you explain how important camera parameters are for accuracy of the model?

Thanks!

Transformation of 3D pose

Hi, thanks for sharing your great work!

I notice that the xR and yR of the output from PoseNet are in coordiante while ZR is in camera coordiante. Could you please give me some hints about how to transfrom (xR, yR, ZR) to the 3D pose in camera coordiante to achieve the evaluation? Are the intrinsic camera parameters required? Thanks!

How to get MultiPerson data?

Hi,
I just try to learn about AI and I really like this implementation because with it I can explain the power of AI better to other people. But I have just a very simple notebook and an Nvidia Jetson Nano for my experiments. I was able to build a modified script derived from test.py to read single images without dataset creation and I can attach a webcam to have a continous live feed which I can visualize live locally and even remote on the notebook (ok, since it's a Jetson Nano there is of course some lag and just a very low fps...). So since I can't do any training with this hardware I use your provided models to infere. But I have always only one person detected. Can you give me some advice how to get there? Will this only work with a MuPots trained model? I have tried all three provided samples. If you're interested in my examples just let me know, but they're really quick and dirty...

Experimental reuslts on Human3.6M

Hi Gyeongsik,

Good work.
In your paper, the network from "Integral human estimation regression (Sun)" is used as your PoseNet. However, the MPJPE achieved by your PoseNet is less than Sun (6.6mm). Why is this happening?

About running time reported in the paper

Greetings,
In supplementary material of the paper, Table 8 shows running time for each component. My question is specifically about inference time of RootNet and PoseNet. As RootNet and PoseNet work on bounding boxes, is frame same as that of bounding box in this context? I think the numbers reported are with respect to per bounding box and not per image as single image can contain multiple people.

I'm providing two examples to clarify it further.

  1. Consider an image with 1 person in it. So total time will be 0.141 s.
  2. Consider an image with 3 people in it. So, as per my understanding, DetectNet will take 0.12 s, RootNet will take 3 x 0.01 s = 0.03 s and PoseNet will take 3 x 0.011 = 0.033 s. So, total time for this image is 0.12+0.03+0.033 = 0.183 s
    -is this understanding correct?

Thanks for releasing the source.

Visualisation Code in MATLAB

The visualisation really should not be done with MATLAB. Very strange to have essentially all code in Python except visualisation (which could be done with matplotlib); is there a specific reason for this?

I really want to review this code as paper looks really cool, but I don't have access to MATLAB (not free software) so fundamentally can't demo it.

checkpoint size doesn't match with model.

Hi.

I want to test your model but it seems that there is difference between trained model and a model. Below is the error message I got. Could you tell me how I can fix this?

Thanks.

size mismatch for module.head.final_layer.weight: copying a param with shape torch.Size([1152, 256, 1, 1]) from checkpoint, the shape in current model is torch.Size([1088, 256, 1, 1]).
size mismatch for module.head.final_layer.bias: copying a param with shape torch.Size([1152]) from checkpoint, the shape in current model is torch.Size([1088]).

Recommend Projects

  • React photo React

    A declarative, efficient, and flexible JavaScript library for building user interfaces.

  • Vue.js photo Vue.js

    🖖 Vue.js is a progressive, incrementally-adoptable JavaScript framework for building UI on the web.

  • Typescript photo Typescript

    TypeScript is a superset of JavaScript that compiles to clean JavaScript output.

  • TensorFlow photo TensorFlow

    An Open Source Machine Learning Framework for Everyone

  • Django photo Django

    The Web framework for perfectionists with deadlines.

  • D3 photo D3

    Bring data to life with SVG, Canvas and HTML. 📊📈🎉

Recommend Topics

  • javascript

    JavaScript (JS) is a lightweight interpreted programming language with first-class functions.

  • web

    Some thing interesting about web. New door for the world.

  • server

    A server is a program made to process requests and deliver data to clients.

  • Machine learning

    Machine learning is a way of modeling and interpreting data that allows a piece of software to respond intelligently.

  • Game

    Some thing interesting about game, make everyone happy.

Recommend Org

  • Facebook photo Facebook

    We are working to build community through open source technology. NB: members must have two-factor auth.

  • Microsoft photo Microsoft

    Open source projects and samples from Microsoft.

  • Google photo Google

    Google ❤️ Open Source for everyone.

  • D3 photo D3

    Data-Driven Documents codes.